
This article explains how to reset the Local Security Policy settings to their defaults in Windows 11.
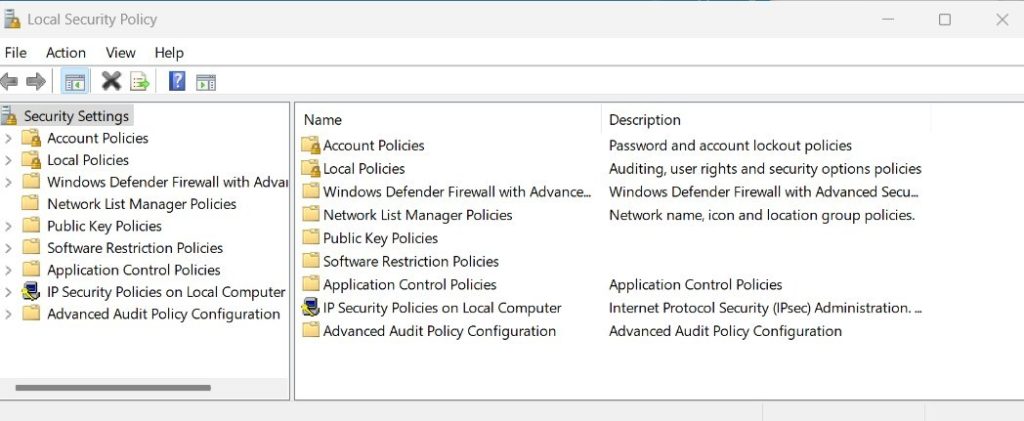
The Local Security Policy (secpol.msc) in Windows is a tool that allows system administrators to configure security policies on a local computer. These policies enforce system-wide rules and restrictions on user accounts and groups.
The Local Group Policy Editor (gpedit.msc) settings are an extension of the Local Security Policy that allows you to define security configurations as part of a Group Policy Object (GPO).
The Local Security Policy settings are only available in the Windows 10/11 Pro, Enterprise, and Education editions. However, all policies can be manually configured using Registry Editor in any Windows edition.
Learning how to reset the Local Security Policy settings to the defaults can be useful in situations where the settings have been modified and are causing issues on the computer. By resetting the settings to their default values, you can restore the security policies to their original state and potentially resolve any security-related issues that have arisen.
It is also a good practice to periodically review and reset the security policies to ensure the computer remains secure and protected from potential threats.
Reset the Local Security Policy settings
As mentioned, users can reset their device’s Local Security Policy settings to the defaults to resolve issues if setting changes are causing problems.
Here’s how to do it.
First, open the Windows Terminal app as administrator.
Then, use the PowerShell console to run the command below to reset the security policy settings.
secedit /configure /cfg $Env:WINDIRinfdefltbase.inf /db defltbase.sdb /verbose
Run the command below with the Command Prompt consoles to do the same.
secedit /configure /cfg %windir%infdefltbase.inf /db defltbase.sdb /verbose
Restart your computer to apply the changes.
That should do it!
Conclusion:
- Resetting the Local Security Policy settings to their defaults in Windows 11 can resolve issues caused by modified settings.
- It is essential to periodically review and reset the security policies to ensure the computer remains secure and protected from potential threats.
- The process involves using Windows Terminal as administrator and running specific commands in PowerShell or Command Prompt consoles.
- After completing the reset, restarting the computer applies the changes effectively.
Remember to use the comments form below if you find errors or need to add something.

Leave a Reply