
This article explains how to connect to a printer that is shared on a network on Windows 11.
Windows lets you share a local printer installed on a PC and make it accessible to other devices, even if it isn’t directly connected to the network.
This means you can print documents from any device connected to the network without a physical connection to the printer. With printer sharing, you can save money on buying multiple printers for each device, making printing more convenient and efficient for everyone in your network.
Once you share a printer over the network, other devices can connect to it and print. To do so, you will need to know the network path of a shared printer, including the IP address or computer name of the PC the shared printer is connected to and the printer’s share name.
A typical network path for a shared printer looks like this: MyHomePCCanon TS300 series.
Learning how to connect to a shared printer can be very useful if you want to print documents from different devices on the same network without physically connecting each device to the printer.
This can save you money on multiple printers and make printing more convenient and efficient for everyone in your network. Additionally, printer sharing is a common practice in many businesses and organizations, so knowing how to connect to a shared printer can be a valuable skill in the workplace.
Add a shared printer using the Settings app
One way to add a shared printer in Windows is to use the Windows Settings app.
Here’s how to do that.
First, open the Windows Settings app.
You can do that by clicking on the Start menu and selecting Settings. Or press the keyboard shortcut (Windows key + I) to launch the Settings app.
When the Setting app opens, click the Bluetooth & devices button on the left.

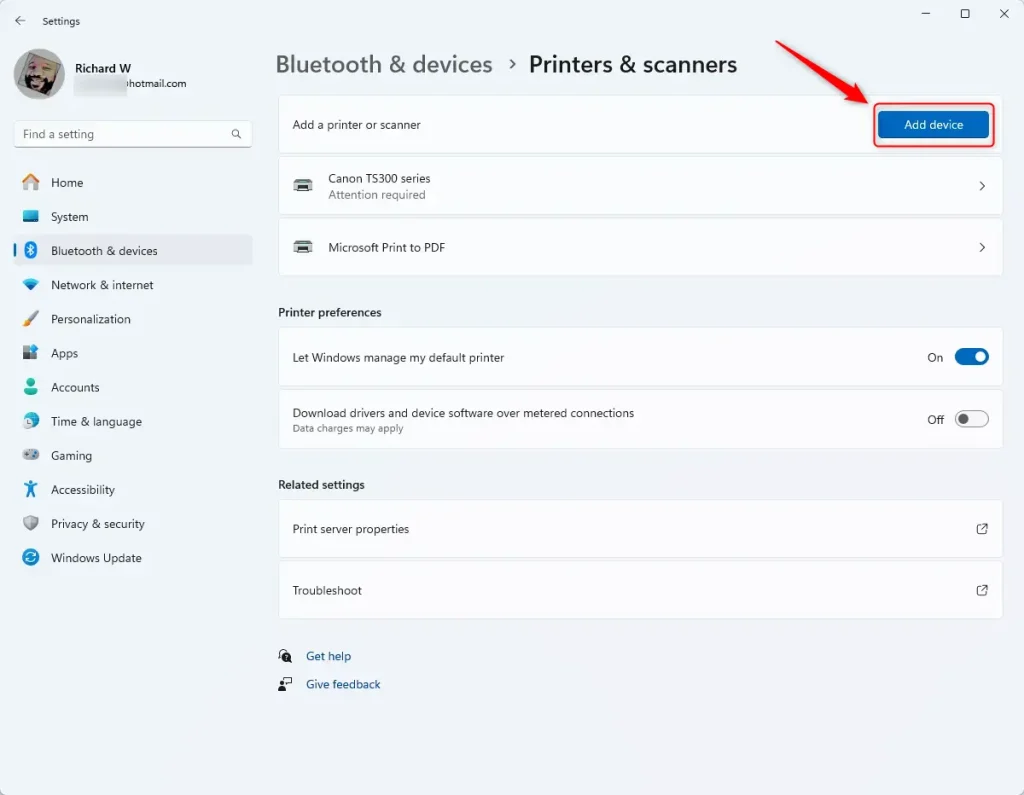
Select the Printers & scanners tile under ‘Bluetooth & devices ‘on the right to expand it.

Next, click the Add Device button on the Printers & scanners settings page.
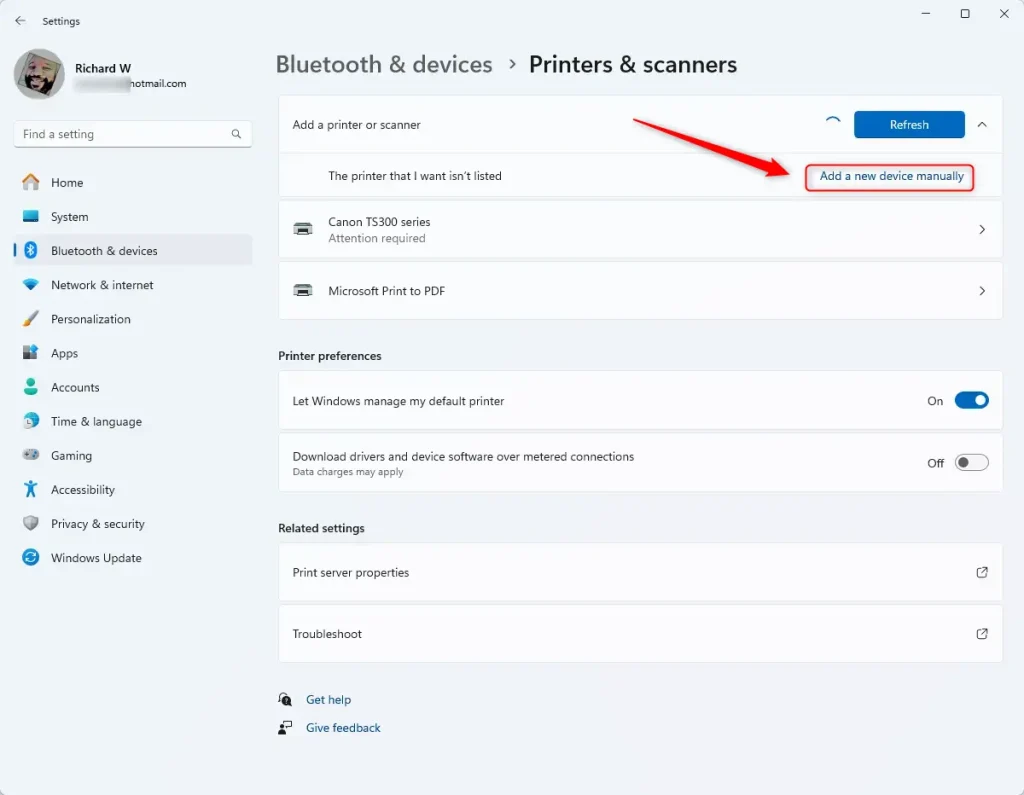
Then, click the “Add a new device manually” link when it appears.
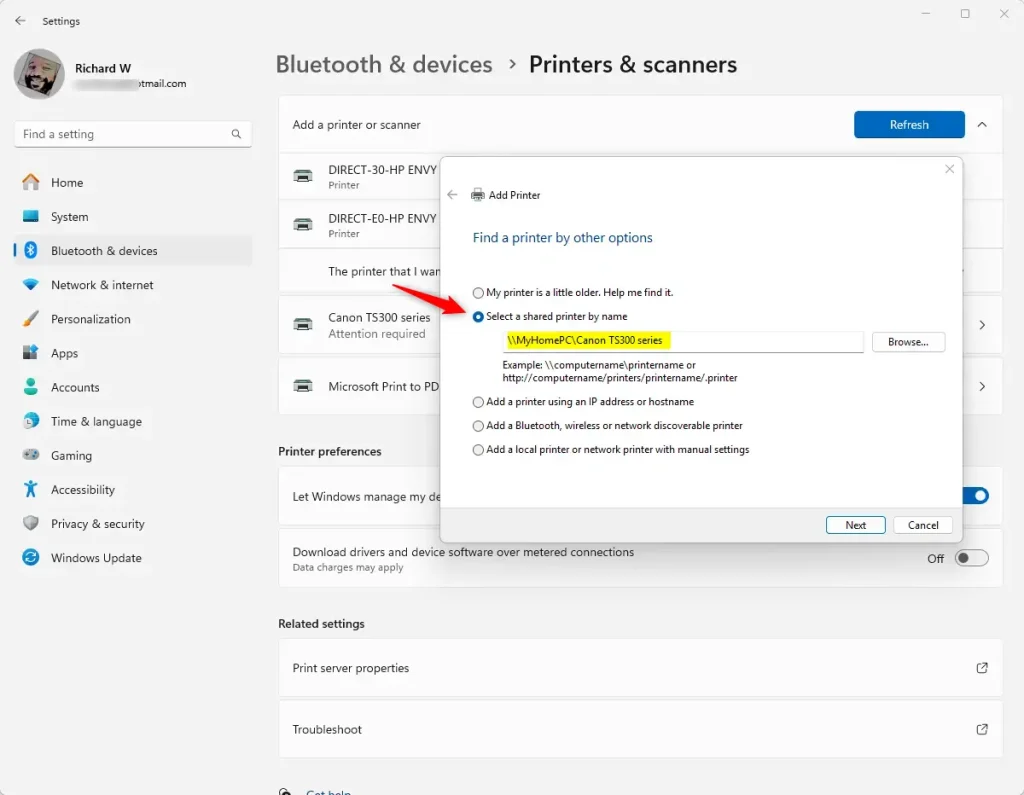
Next, select the option: Select a shared printer by name. Then, type in the network path of the printer.
You can use the IP address or computer name of the PC the shared printer is connected to.
Ex. MyHomePCCanon TS300 series
If you have trouble typing the network path to the printer, you can use the “Browse” button to browse and search for the printer on the network.
Click the Next button to add the printer to connect to the printer. If everything is added correctly, you should see a message that the printer is added and allow you to print a test page.
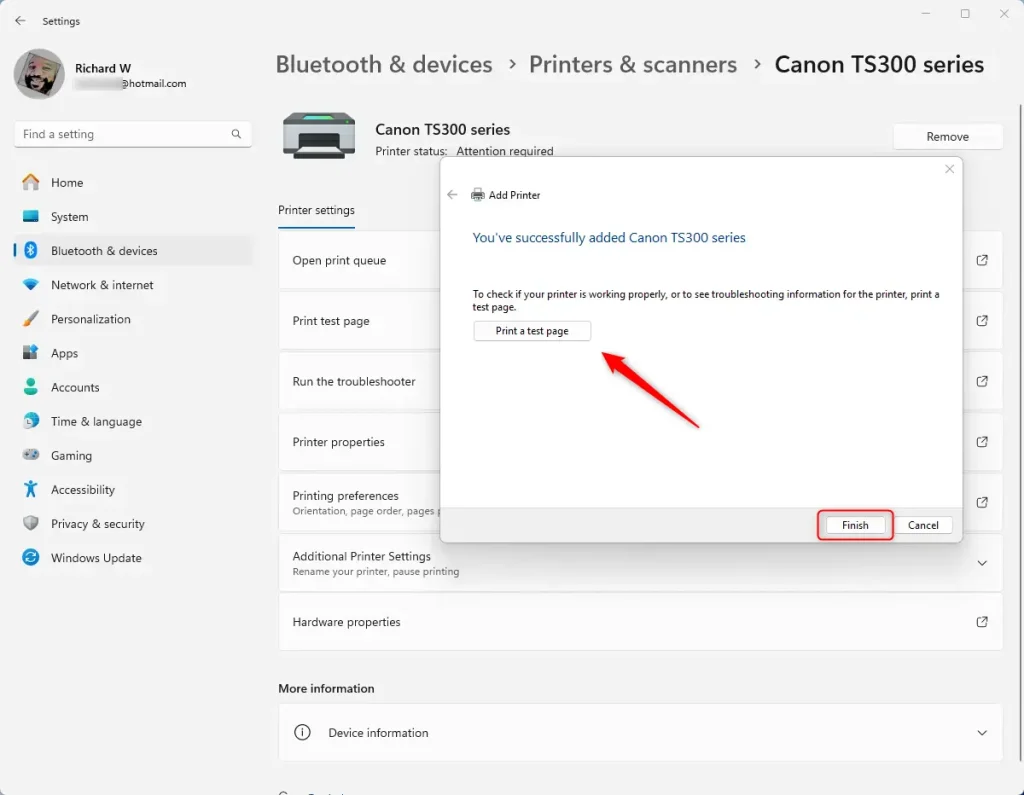
Close the Settings app when you’re done.
Add a shared printer from the Devices and Printers folder
Another way to add a shared printer in Windows is to use the Devices and Printers folder.
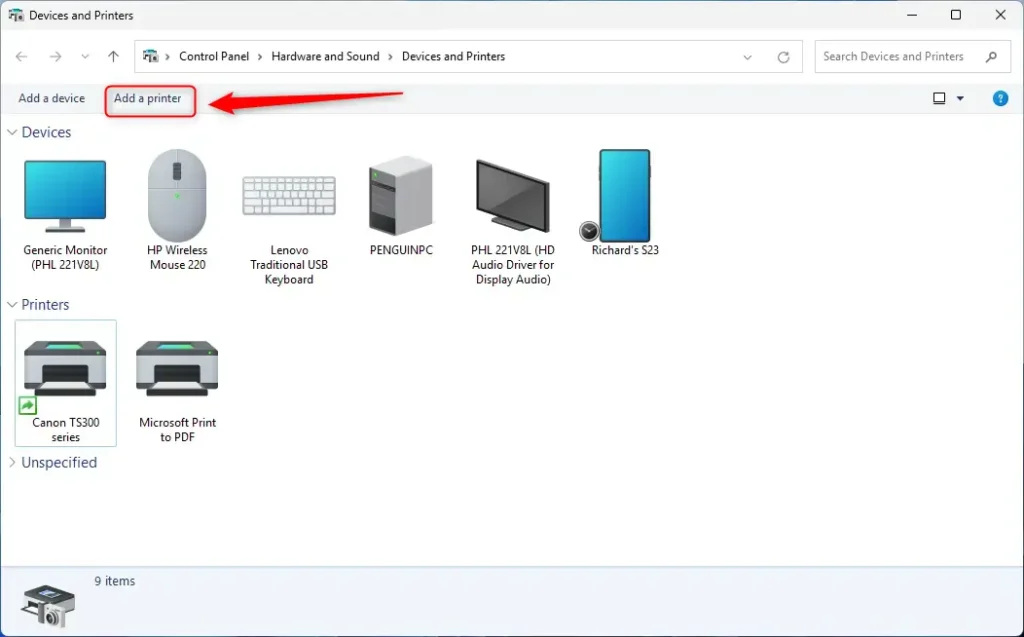
First, open the Devices and Printer folder.
Then, click the Add printer button to add a printer
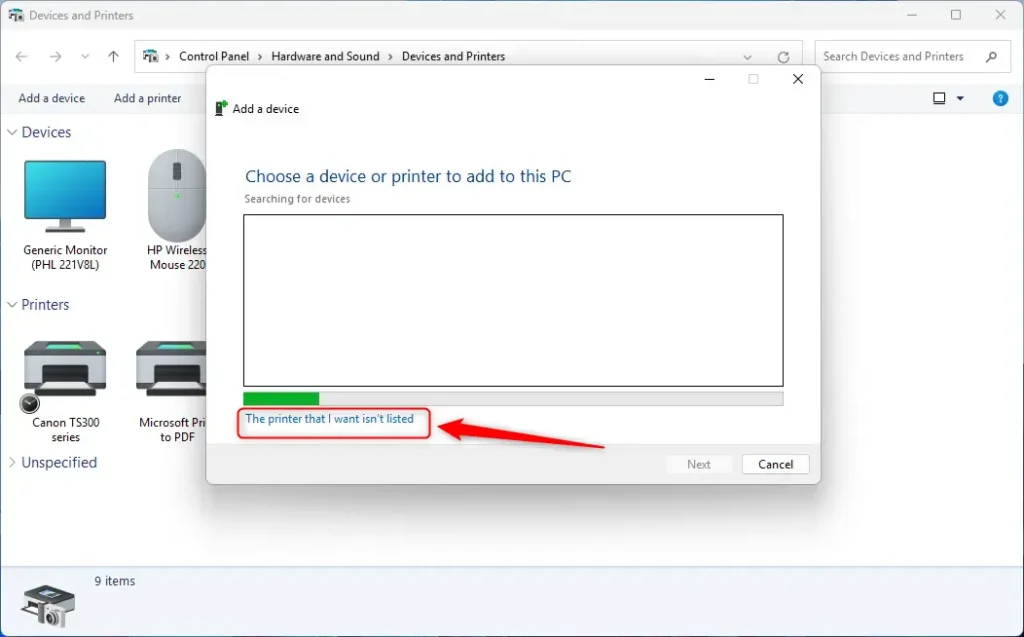
Next, click the “The printer that I want isn’t listed” link at the bottom when it appears.
Next, select the option: Select a shared printer by name. Then, type in the network path of the printer.
You can use the IP address or computer name of the PC the shared printer is connected to.
Ex. MyHomePCCanon TS300 series
If you have trouble typing the network path to the printer, you can use the “Browse” button to browse and search for the printer on the network.
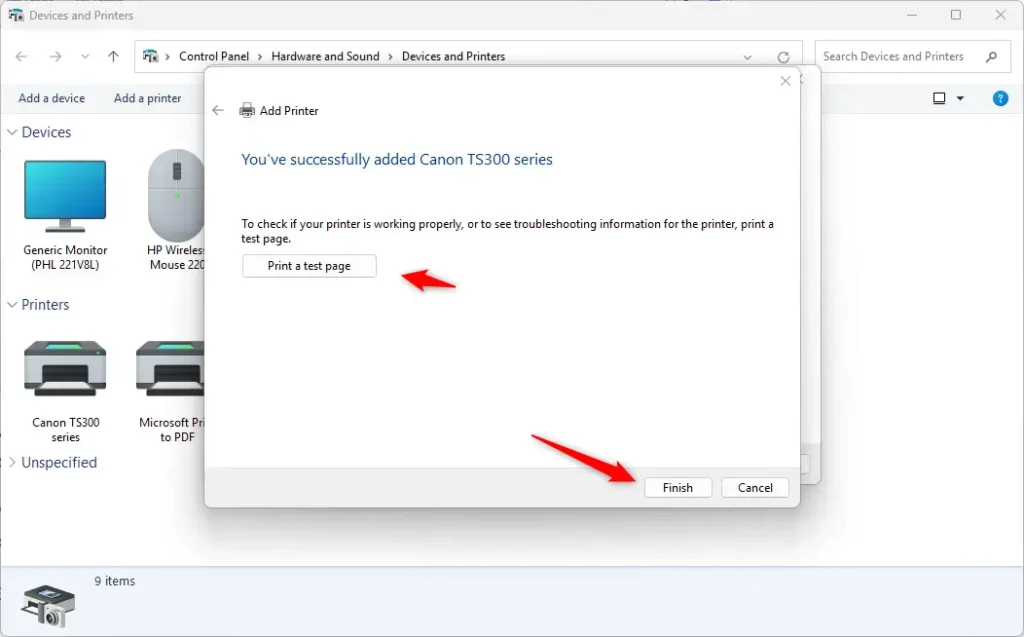
Click the Finish button when you’re done.
Add a shared printer using PowerShell
Yet another way to add a shared printer in Windows is to use the PowerShell console.
To do that, first, open the Windows Terminal as administrator and select the PowerShell tab.
Then, run the command format below to add a shared printer.
Add-Printer -ConnectionName "Computer NamePrinter Shared Name"
OR
Add-Printer -ConnectionName "IP AddressPrinter Shared Name"
Replace “Printer Shared Name” with the name of the shared printer you want to add.
Example:
Add-Printer -ConnectionName "MyHomePCCanon TS300 series"
OR
Add-Printer -ConnectionName "192.168.1.2Canon TS300 series"
That should do it!
Conclusion:
- Adding a shared printer in Windows 11 can facilitate convenient printing from various devices on the same network without needing physical connections to the printer.
- Printer sharing can help save costs by eliminating the necessity for multiple printers for each device, thus improving efficiency within the network.
- Windows provides multiple methods for adding a shared printer, including using the Settings app, Devices and Printers folder, and PowerShell console.
- The outlined methods offer flexibility. Users can easily connect to a shared printer by providing the required network path details, such as the computer name or IP address and the printer’s shared name.
- Enhance your printing experience and optimize network resources by leveraging the functionality of shared printers in Windows 11.


Leave a Reply