How to Install a wireless printer to Windows 11
Installing a wireless printer on Windows 11 connects it to your PC wirelessly, letting you print documents without cables.
Windows 11 usually detects printers automatically, but sometimes you need to add them manually through Settings.
This guide shows you how to add a wireless printer, even if Windows doesn’t find it right away.
Go to Settings > Bluetooth & devices > Printers & scanners, then click Add device and let Windows search for your printer. If it isn’t found, click “The printer that I want isn’t listed” and add it using its IP address.
Connecting Your Wireless Printer to Windows
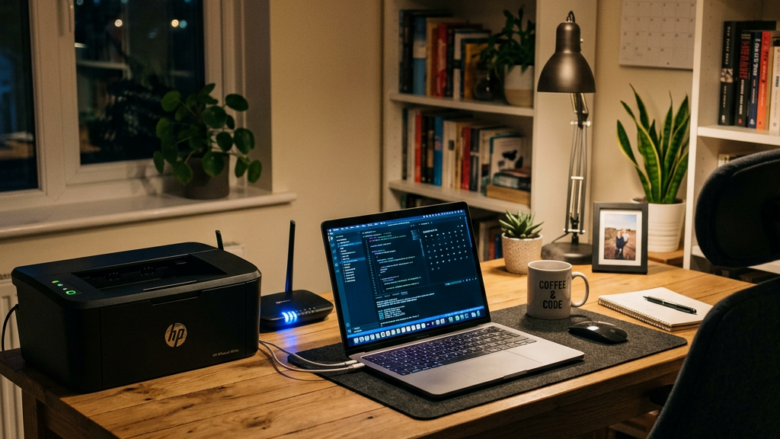
Wireless printers offer a lot of convenience, letting many devices connect without a tangle of cables. This is especially helpful in shared spaces. Here’s how to get your Windows computer to recognize your printer.
Step 1Turn on Your Printer and Connect It to Your Network
First, ensure your printer is powered on and ready to go. For wireless models, it needs to be on the same network as your computer. This might mean plugging an Ethernet cable into your router, or you could use the printer’s own screen to connect it to your Wi-Fi.
Step 2Open Printer Settings in Windows
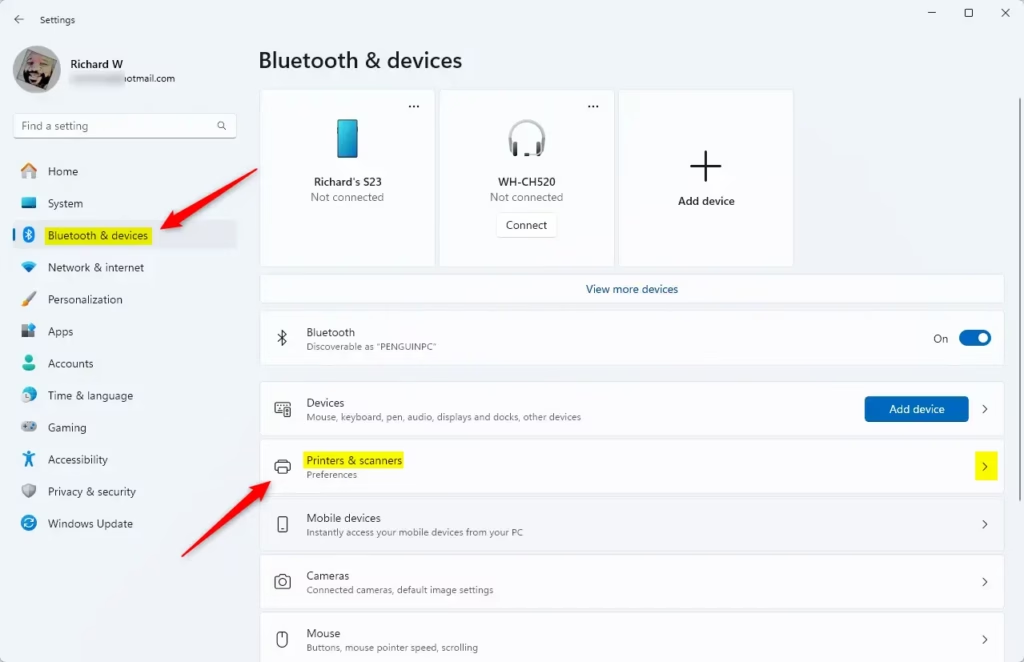
To add your wireless printer to Windows 11, first open the Settings app and go to the printer settings.
- Click the Start button. It’s usually in the bottom-left corner.
- Select the Settings cogwheel icon.
- In the Settings window, click Bluetooth & devices.
- From the menu on the left, select Printers & scanners.
Step 3Let Windows Search for Your Printer
Windows will now search your network for your wireless printer after you open the printer settings.
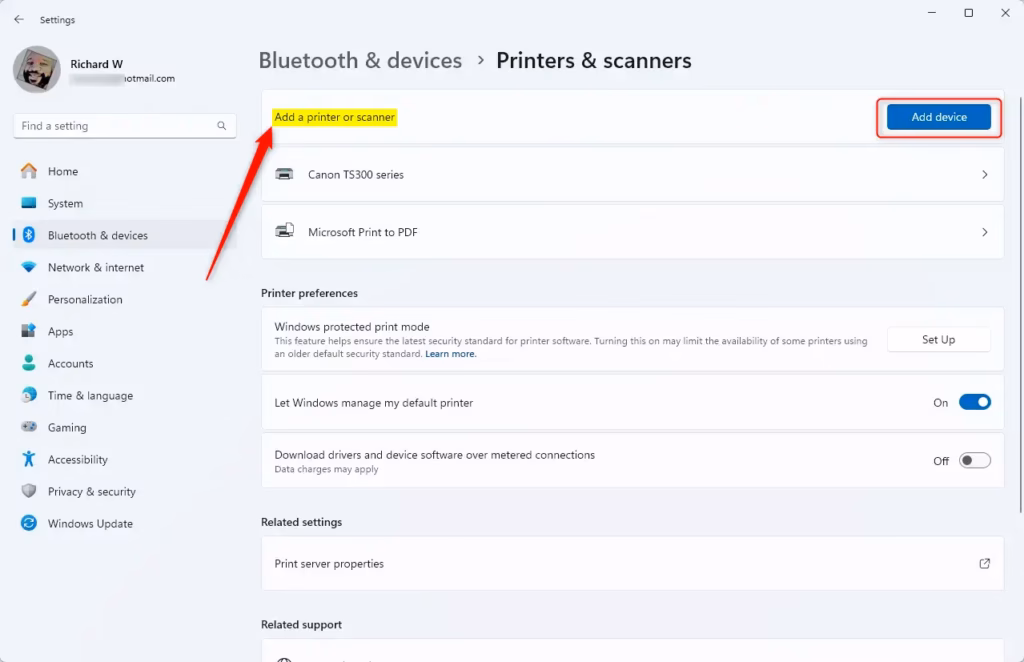
Windows will scan your network for printers. This process can take a minute or two, so a little patience goes a long way.
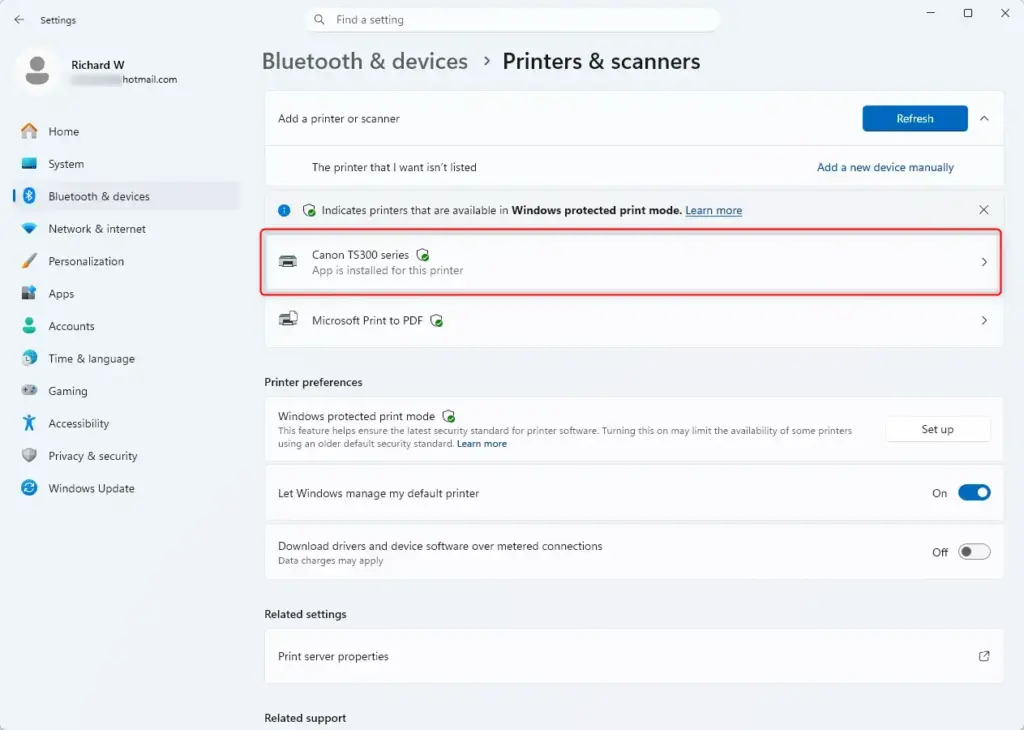
Step 4Select and Add Your Printer
Once Windows finds your wireless printer, select it from the list and click ‘Add device’ to install it.
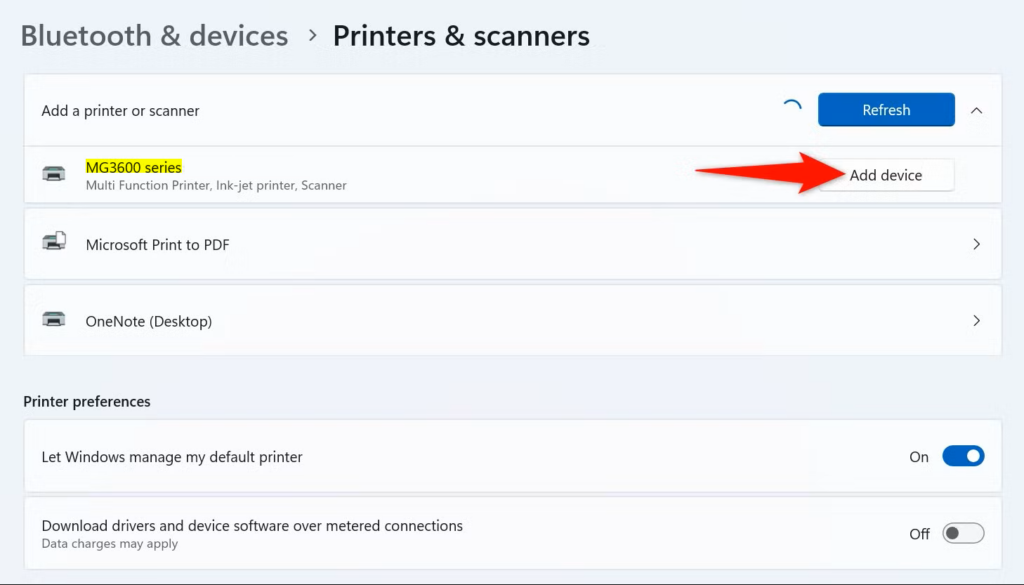
Windows will proceed to install the necessary software, known as drivers (these allow hardware to communicate with your computer). Often, this step is all that’s required! Windows includes built-in drivers for many printers, so you frequently won’t need to install anything additional.
Note: In some cases, Windows might add the printer immediately after you click “Add device.” Keep an eye on the screen for confirmation.
Step 5What if Your Printer Isn’t Found Automatically?
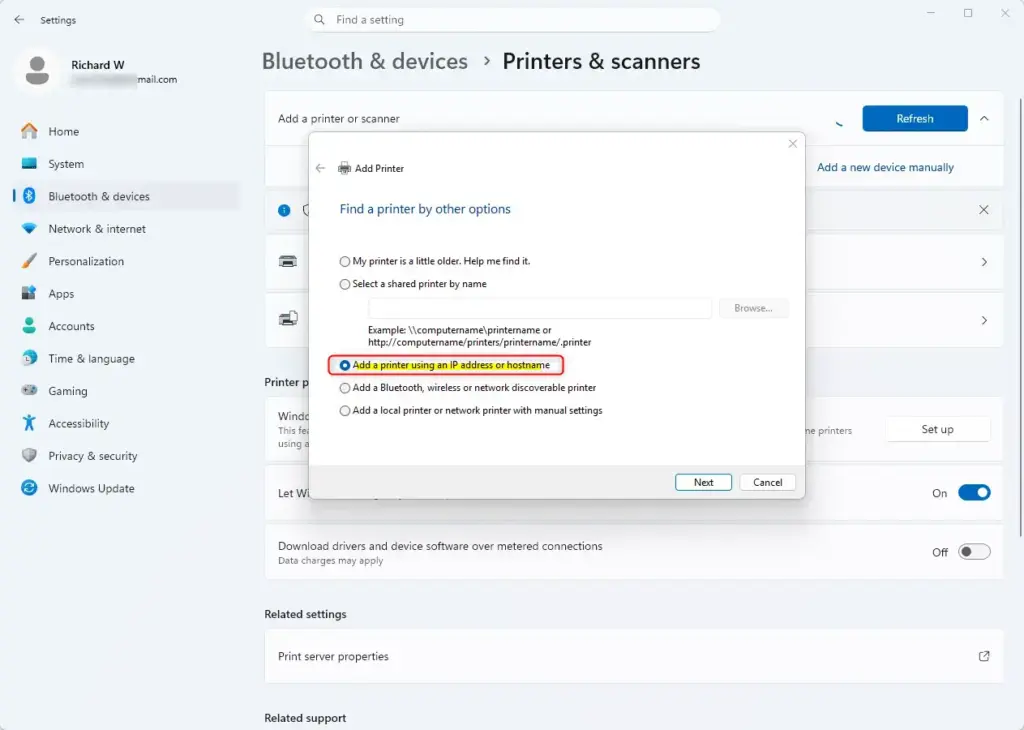
If Windows doesn’t find your wireless printer automatically, you can manually add it using its IP address through the ‘Add Printer’ window.
A new window, titled “Add Printer,” will open, offering more configuration options. For a wireless printer, select the option that reads ‘Add a printer using a TCP/IP address or hostname’.
Adding by IP Address:
- Select Add a printer using a TCP/IP address or hostname.
- Click Next.
- For “Device type,” choose TCP/IP Device.
- In the “Hostname or IP address” field, type your printer’s IP address. You can usually find this on your printer’s network settings menu or in your router’s list of connected devices.
Windows will attempt to locate the printer by using its IP address.
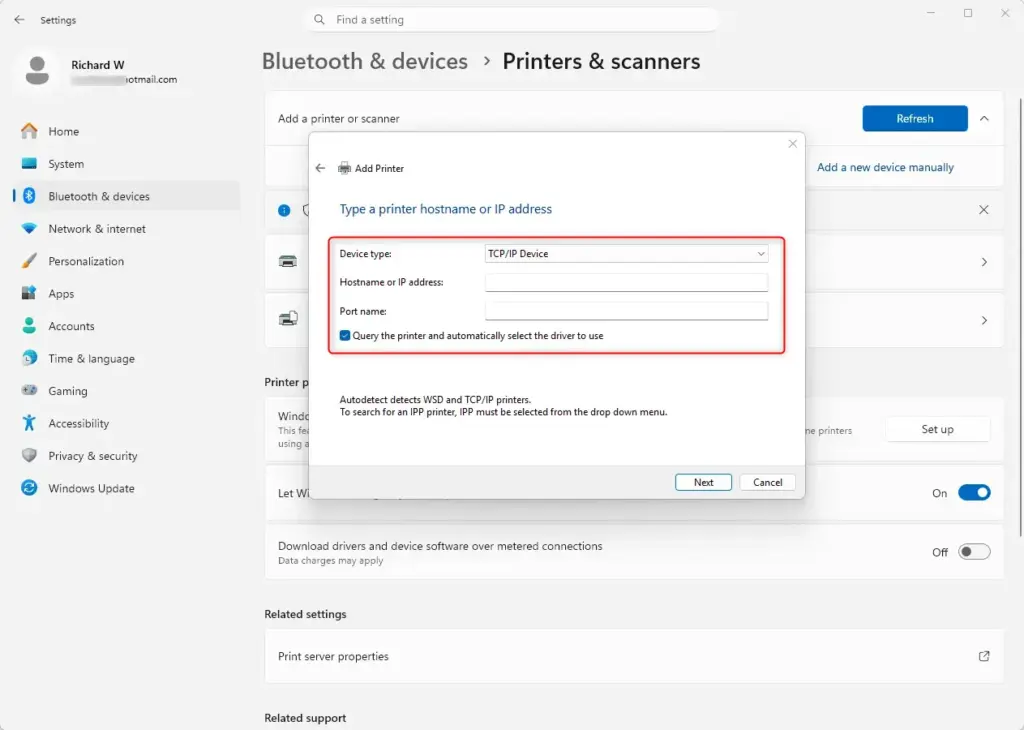
Click ‘Next’ and follow any subsequent on-screen instructions.
Step 6Install Drivers and Check for Updates
After Windows finds your printer, it usually installs the necessary drivers automatically, but you may need to check for updates or install them manually.
Keep in mind that Windows drivers can sometimes be quite basic. To access all features, such as scanning capabilities or duplex (two-sided) printing, you might need more advanced drivers. After adding the printer, return to the “Printers & scanners” settings. You may find an option like “Find drivers” or “Update drivers.”
A more reliable method for obtaining the latest drivers involves checking Windows Update.
- Go to Settings > Windows Update.
- Click Check for updates.
- If optional updates are found, especially for your printer, install them.
Alternatively, visiting your printer manufacturer’s website is a great option. Look for the support or downloads section, then find your specific printer model. Downloading the latest drivers from there is often the most effective way to unlock all your printer’s functionalities.
Step 7Test Your Printer
You’ve completed the setup steps, and Windows indicates the printer is ready. The best confirmation? Printing something! There are a couple of ways to go about this:
Summary
Connecting a wireless printer to Windows 11 involves turning it on, connecting it to Wi-Fi, and letting Windows find it via Settings, or adding it manually with its IP address if needed.
Was this guide helpful?

About the Author
Richard
Tech Writer, IT Professional
Richard, a writer for Geek Rewind, is a tech enthusiast who loves breaking down complex IT topics into simple, easy-to-understand ideas. With years of hands-on experience in system administration and enterprise IT operations, he’s developed a knack for offering practical tips and solutions. Richard aims to make technology more accessible and actionable. He's deeply committed to the Geek Rewind community, always ready to answer questions and engage in discussions.

No comments yet — be the first to share your thoughts!