
If you’re running out of space on your computer, Windows 11 has a helpful feature called Storage Sense that can clean up files you don’t need automatically. This includes things like temporary files and items in your Recycle Bin.
By default, Storage Sense is turned off. It works mainly on your main drive (usually the C: drive). Sometimes, Windows may turn it on automatically to help keep your storage tidy.
Here’s an easy guide to help you turn Storage Sense on or off yourself.
Turn Storage Sense On or Off Using Settings
- Open the Settings app:
- Click the Start button (the Windows icon) and then click Settings.
- Or press Windows key + I on your keyboard to open Settings quickly.

Windows 11 Settings button- In Settings, click on System on the left menu.
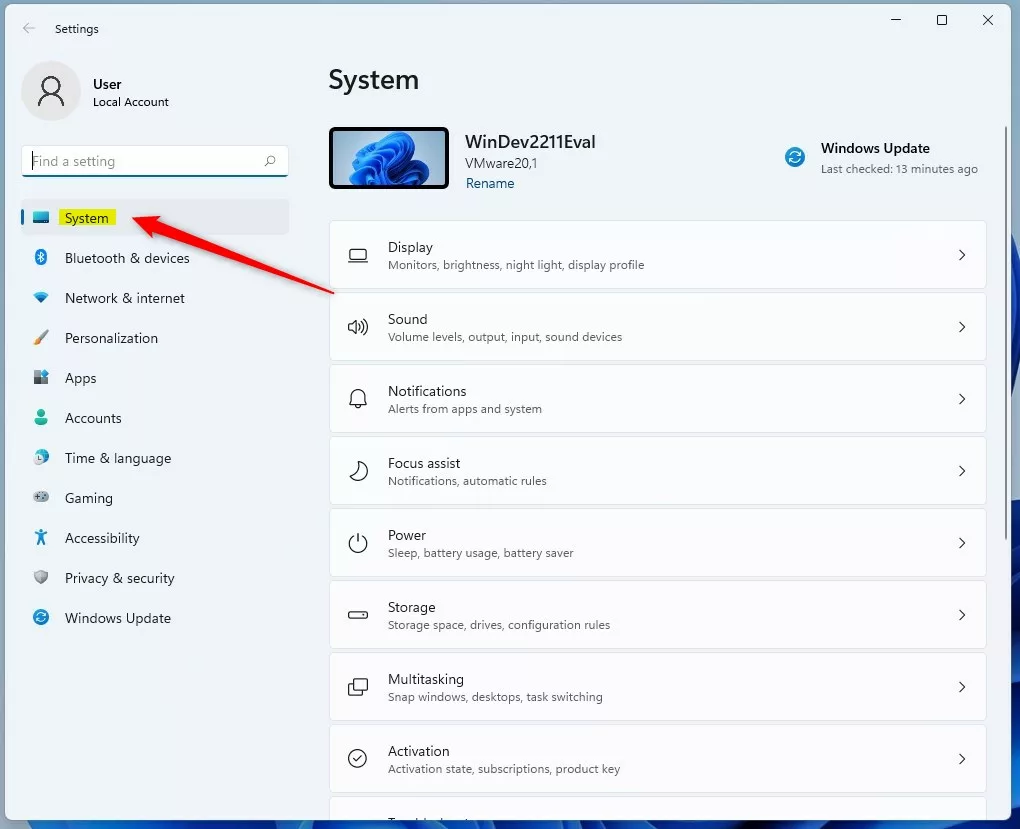
System button in Windows Settings app- On the right side, click on Storage.

Storage tile in Windows Settings- Now, click on the Storage Sense option.
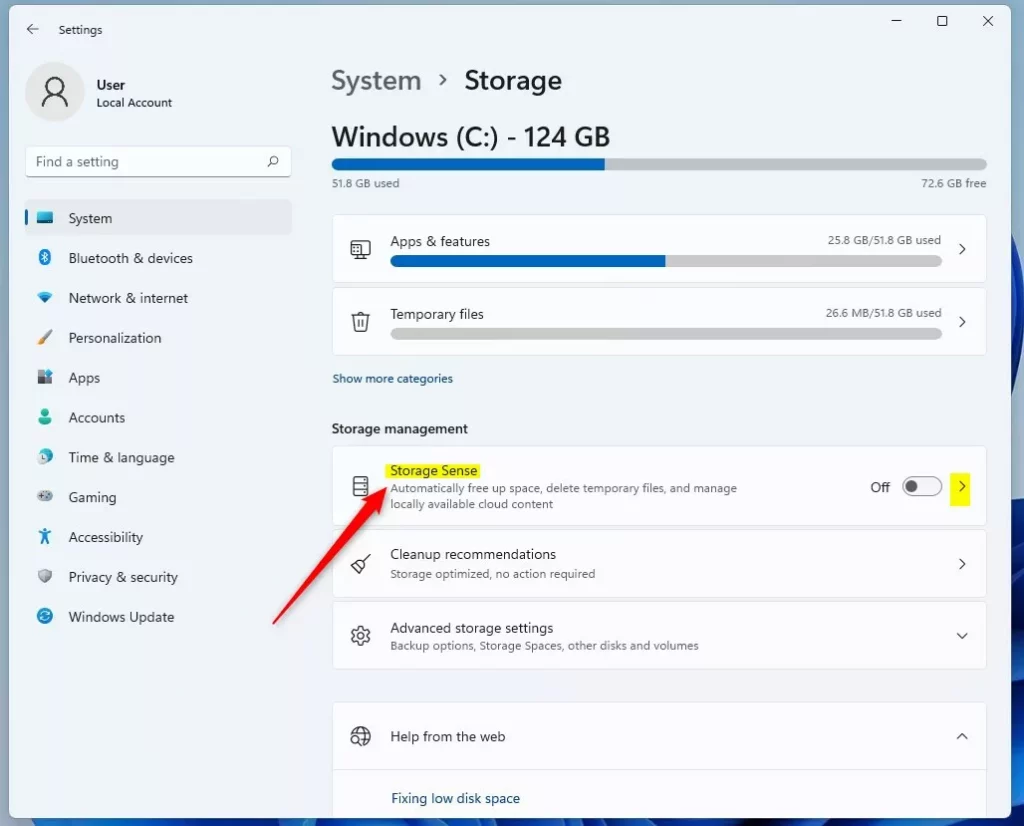
Storage Sense option in Windows 11 Settings- Toggle the switch to On to enable Storage Sense or to Off to disable it.

Toggle Storage Sense on or off
When Storage Sense is on, Windows will clean up files automatically when your disk space is low. By default, it won’t delete files in your Downloads folder or cloud storage unless you tell it to.
Turn Storage Sense On or Off Using Windows Registry
If you are comfortable with making advanced changes, you can also turn Storage Sense on or off using the Windows Registry. But be careful! Changing the Registry can cause problems if done incorrectly.
Follow these steps only if you feel confident:
- Open the Windows Registry Editor.
- Go to this folder path:
HKEY_CURRENT_USER\Software\Microsoft\Windows\CurrentVersion\StorageSense\Parameters\StoragePolicy
- If you don’t see the StoragePolicy folder, right-click on Parameters, select New → Key, and name it StoragePolicy.
- Inside StoragePolicy, right-click on the empty right side, choose New → DWORD (32-bit) Value, and name it 01.
- Double-click the new 01 value, and set the Value data to:
- 1 to enable Storage Sense
- 0 to disable Storage Sense
- Close the Registry Editor when done.
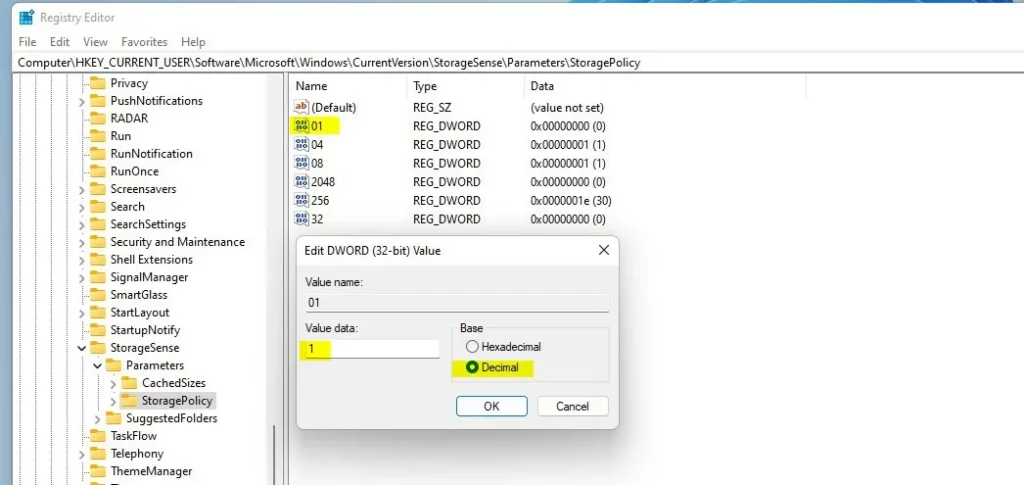
Enable or disable Storage Sense via Registry
Summary
- Storage Sense helps keep your computer clean by deleting unneeded files automatically.
- You can turn it on or off easily from the Windows Settings app.
- Advanced users can also control Storage Sense using the Windows Registry, but be careful when editing it.
- Using Storage Sense can make your computer run smoother by freeing up space without you having to do anything.
For more details, check out the official Microsoft info here:
Manage Drive Space with Storage Sense – Microsoft
Leave a Reply