Enable Do Not Disturb in Ubuntu: A Quick Guide
You enable Do Not Disturb in Ubuntu to silence distracting notifications and improve focus.
This built-in Ubuntu feature stops pop-up banners and sounds from interrupting your workflow. Notifications are still collected for you to review later in the notification center.
You can activate Do Not Disturb with just a few clicks in your system settings or via a keyboard shortcut. It’s ideal for when you’re working on a critical project or want an uninterrupted session.
Click the Clock in the top bar and toggle Do Not Disturb to On. Alternatively, go to Settings, then Notifications, and switch Do Not Disturb on. This silences all incoming notifications to help you focus.
How to enable or disable do not disturb in Ubuntu Linux
As mentioned above, Do Not Disturb will make it easy to silence notification banners to avoid getting distracted.
You can switch off notifications if you are working on something and do not want to be bothered.
Below is how to enable or disable this feature:
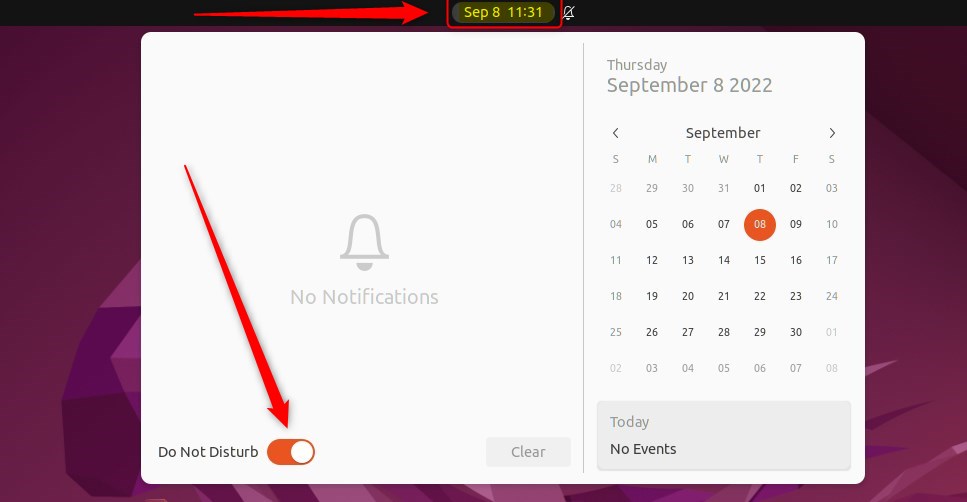
Users can quickly turn On or Off Do Not Disturb from the top bar by clicking on the Clock.
Click on the Clock and set On or Off Do Not Disturb as shown below.
Alternatively, you can use the Ubuntu Linux Settings app to control this feature.
Ubuntu Linux has a centralized location for the majority of its settings. From system configurations to creating new users and updating, all can be done from the System Settings panel.
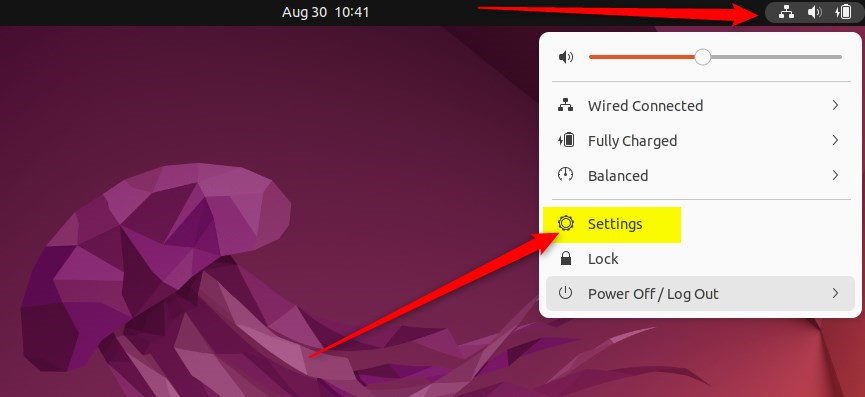
Alternatively, click on the System menu at the top-right corner of the top bar on your desktop.
On the System menu, select Settings, as highlighted below.
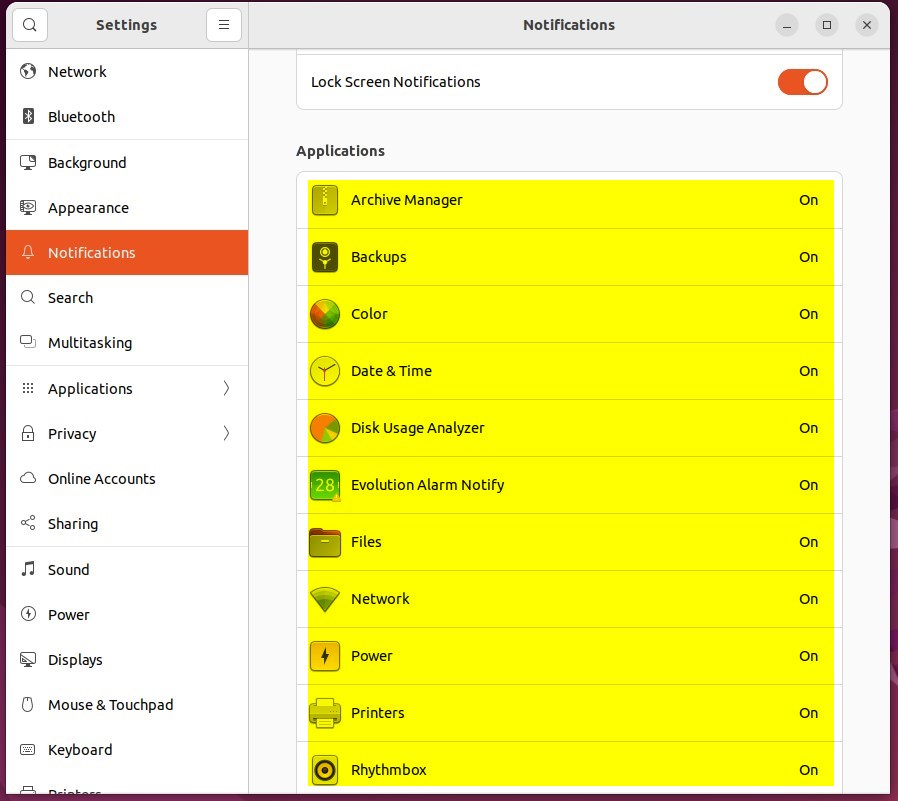
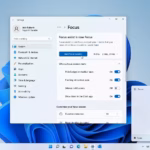
Click on the Notifications tile to open the panel in the Settings app.
In the System Settings -> Notifications panel, toggle the Do Not Disturb switch to On to enable and silence all notifications.

To disable and allow notifications again, switch the Do Not Disturb switch to Off.
When switched off, notifications will not appear as usual at the top of the screen.
You can also disable or re-enable notifications for individual applications from the Notifications panel.
That should do it! You can now close the Settings app.
Conclusion:
- Enabling Do Not Disturb in Ubuntu Linux helps users minimize distractions and stay focused on tasks.
- Users can quickly toggle the Do Not Disturb feature from the top bar or through the Ubuntu Linux Settings app.
- The Do Not Disturb feature silences notification banners to prevent distractions without entirely disabling notifications.
- Disabling Do Not Disturb restores normal notification behavior on the Ubuntu Linux desktop.
Frequently Asked Questions
How do I enable Do Not Disturb in Ubuntu?
Can I disable Do Not Disturb from the Settings app?
Will I still receive notifications when Do Not Disturb is enabled?
Is there a quick way to toggle Do Not Disturb on Ubuntu?
Can I customize notifications for individual applications in Ubuntu?
Was this guide helpful?

About the Author
Richard
Tech Writer, IT Professional
Richard, a writer for Geek Rewind, is a tech enthusiast who loves breaking down complex IT topics into simple, easy-to-understand ideas. With years of hands-on experience in system administration and enterprise IT operations, he’s developed a knack for offering practical tips and solutions. Richard aims to make technology more accessible and actionable. He's deeply committed to the Geek Rewind community, always ready to answer questions and engage in discussions.


No comments yet — be the first to share your thoughts!