How to Enable or Disable Advertising ID in Windows 11
Windows 11 assigns your computer a unique Windows 11 advertising ID. This ID acts like a digital tag. It lets apps and websites track your activity to show you ads tailored to your interests. If you want more privacy, you can turn this feature off.
Why do this?
You should do this to stop apps from building a profile on your habits. Turning it off prevents personalized tracking and reduces the amount of user activity tracking and data collection occurring on your device.
What happens when done?
Once disabled, your apps will no longer use your unique ID to track your activity. You will still see ads, but they will be generic. They will not be based on your personal browsing data or personalized content and suggestions.
Understanding Your Privacy
Many users worry about Windows 11 telemetry. While disabling the advertising ID stops targeted ads, it does not stop all ads in Windows 11. You may still see promotional content in the Start menu or other areas. To learn more about how your data is handled, check out our guide on Windows 11 privacy settings.
Disclaimer: Microsoft is currently updating Windows 11 settings. Depending on your Windows Update build version, you may find these options under the ‘General’ privacy menu or the newer ‘Recommendations & offers’ section.
Method 1: Using Windows Settings
This is the easiest way to change your settings.
- Open the Windows Settings app.
- Select Privacy & security on the left menu.
- Click the General tile (or Recommendations & offers in newer builds).
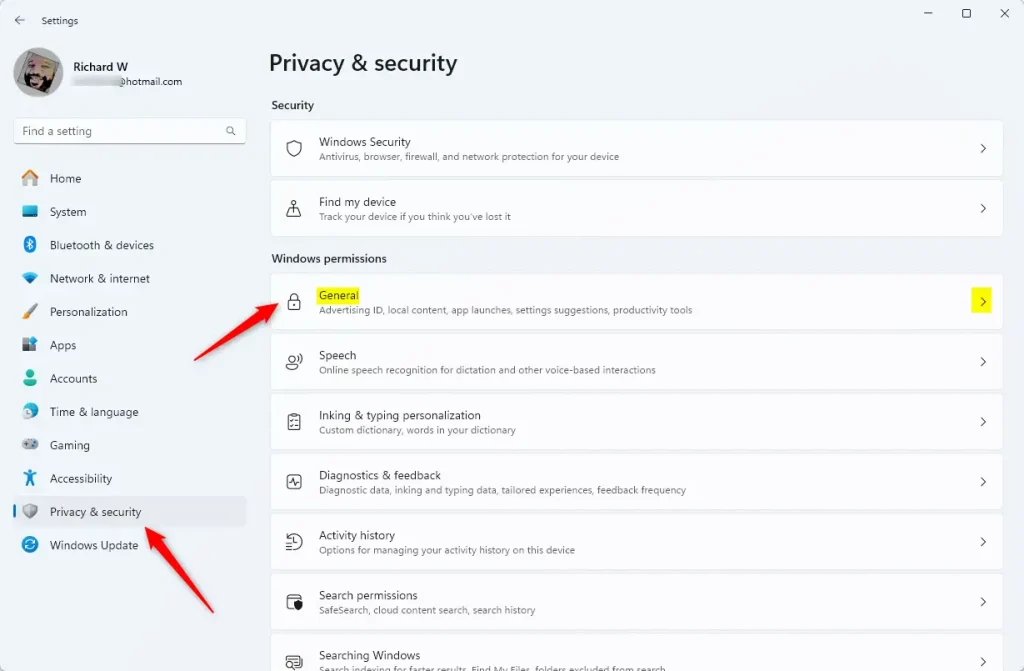
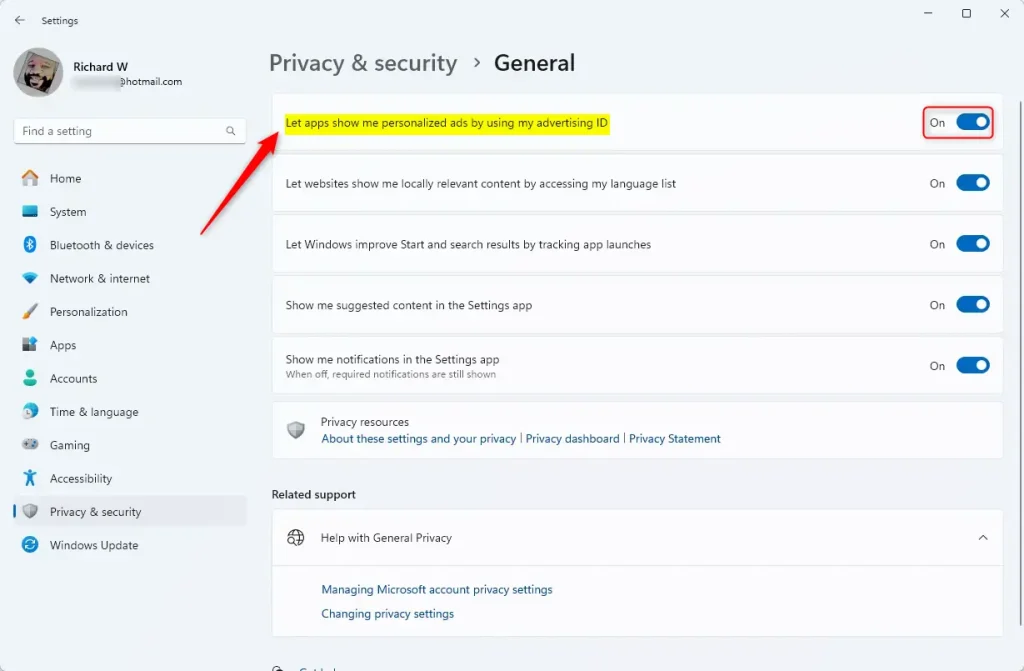
- Find the option that says “Let apps show me personalized ads by using my advertising ID.”
- Toggle the switch to Off to disable it.
Method 2: Using Group Policy (Requires Admin Privileges)
This method is for advanced users who want to apply settings across the whole system.
- Press the Windows key, type
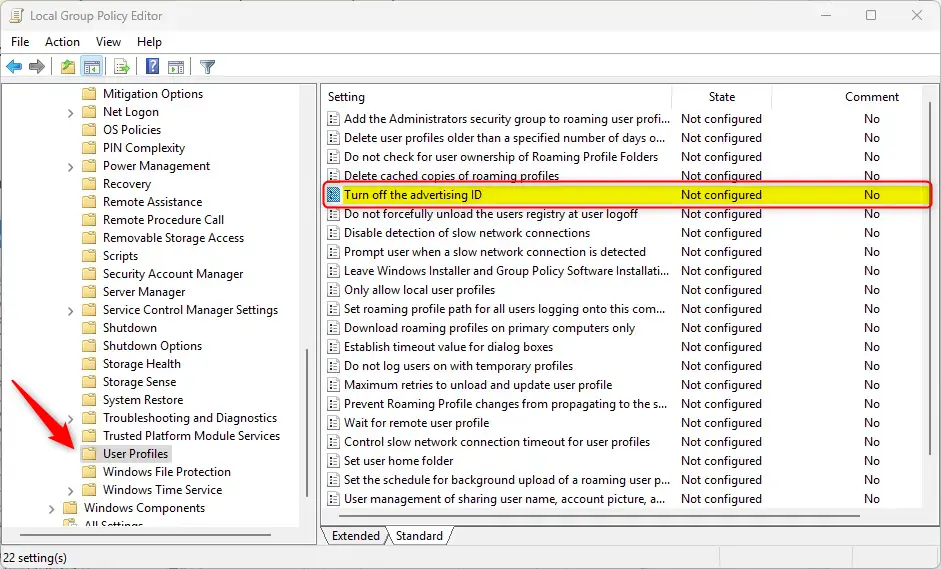
gpedit.msc, and hit Enter. - Go to: Computer Configuration > Administrative Templates > System > User Profile.
- Double-click on Turn off the advertising ID.
- Not Configured: The feature stays on by default.
- Enabled: This turns off the advertising ID for all users.
- Disabled: This lets individual users control the setting themselves.
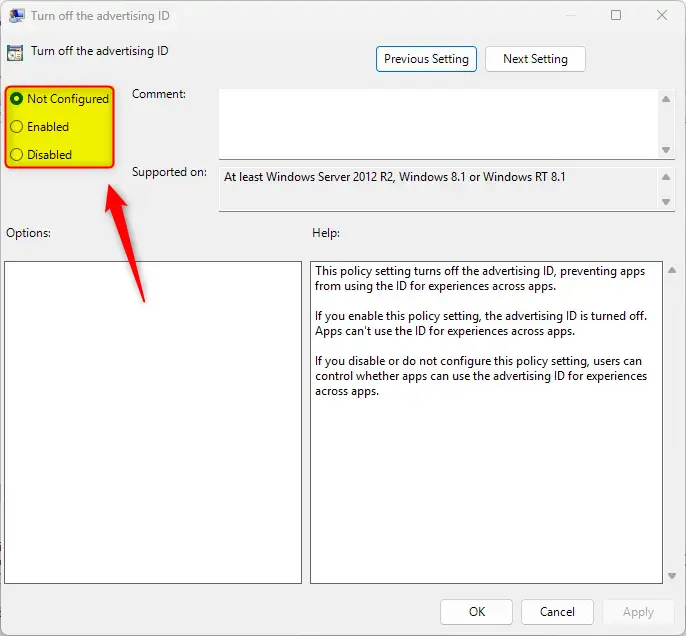
Click OK to save. You may need to restart your computer for this to take effect.
Method 3: Using Registry Editor (Requires Admin Privileges)
Warning: Be careful when editing the registry. Only do this if you are comfortable with system files.
- Press the Windows key, type
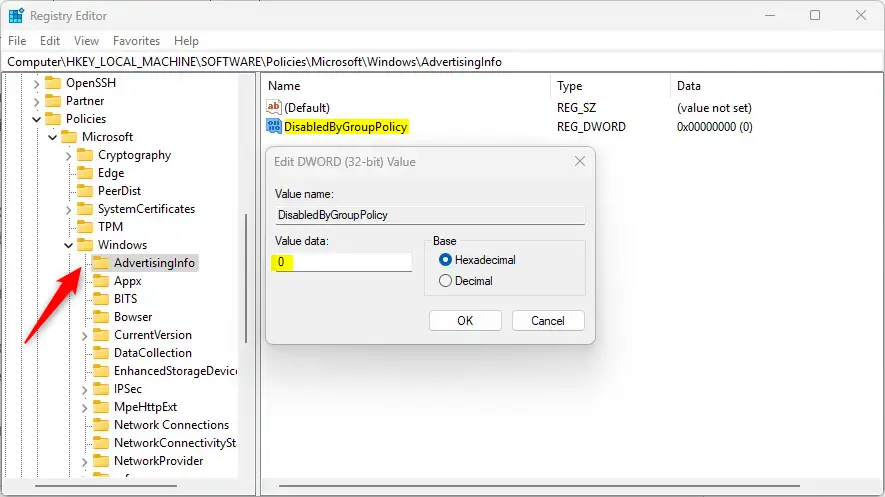
regedit, and hit Enter. - Navigate to this path:
HKEY_LOCAL_MACHINE\\SOFTWARE\\Policies\\Microsoft\\Windows\\AdvertisingInfo - Look for
DisabledByGroupPolicyon the right side. If it is not there, right-click, select New > DWORD (32-bit) Value, and name itDisabledByGroupPolicy. - Double-click the item and set the value to
1to disable the ID.
Restart your computer to apply the changes.
Summary
Your advertising ID is a tracking tool used for personalized ads. By disabling it through the Settings app, Group Policy, or the Registry, you regain control over your privacy. Choose the method that feels most comfortable for your skill level, and remember to restart your device if you use the advanced methods.
Does disabling the advertising ID stop all ads in Windows 11?
No, disabling the advertising ID does not stop all ads. It only prevents apps from using your unique ID to show you personalized, targeted advertisements. You will still see generic ads within the operating system and various applications, but they will not be based on your personal browsing history or habits.
Does resetting my advertising ID delete my personal data?
Resetting your advertising ID does not delete your personal files or browsing history. It simply clears the existing profile associated with that specific ID. This forces apps to start building a new profile from scratch, effectively wiping the slate clean for future ad targeting based on your recent activity.
Was this guide helpful?

About the Author
Richard
Tech Writer, IT Professional
Richard, a writer for Geek Rewind, is a tech enthusiast who loves breaking down complex IT topics into simple, easy-to-understand ideas. With years of hands-on experience in system administration and enterprise IT operations, he’s developed a knack for offering practical tips and solutions. Richard aims to make technology more accessible and actionable. He's deeply committed to the Geek Rewind community, always ready to answer questions and engage in discussions.


No comments yet — be the first to share your thoughts!