
This article explains how to activate or enable Microsoft Defender in Windows 11..
Microsoft Defender, formerly known as Windows Defender, is included in Windows 11 as part of Microsoft Security.
If you don’t have any other security programs installed, it is advisable to keep Microsoft Defender activated to safeguard your computer against unauthorized access and harmful software.
How to Enable Microsoft Defender
Below are steps that help you turn on or enable Microsoft Defender if it’s disabled:
Windows 11 has a centralized location for the majority of its settings. Everything can be done, from system configurations to creating new users and updating Windows from its System Settings pane.
To get to System Settings, you can use the Windows key + I shortcut or click on Start ==> Settings, as shown in the image below:

Alternatively, you can use the search box on the taskbar and search for Settings. Then select to open it.
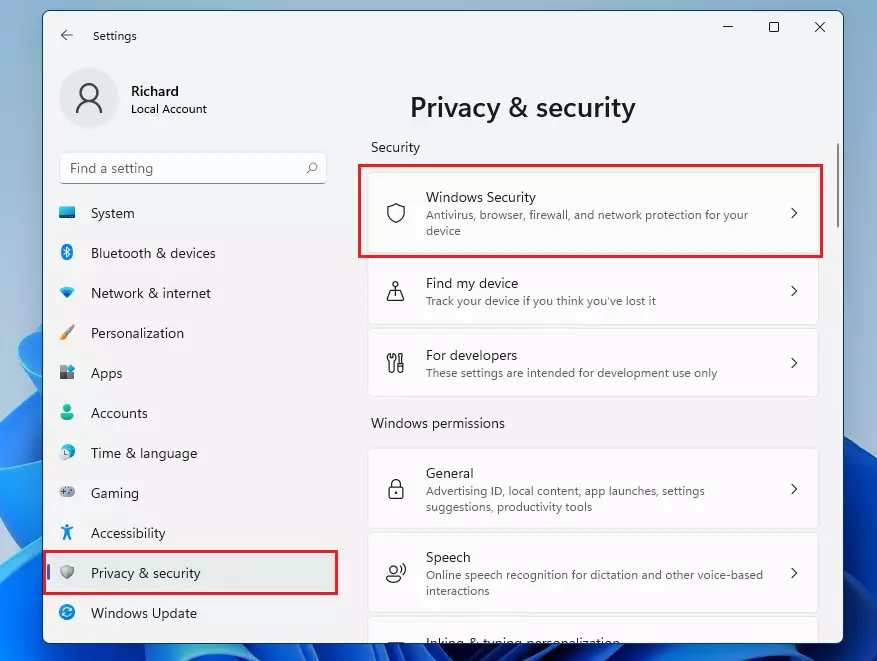
Windows Settings pane should look similar to the image below. In Windows Settings, click Privacy & security, and select Windows Security on the right pane of your screen, as shown in the image below.
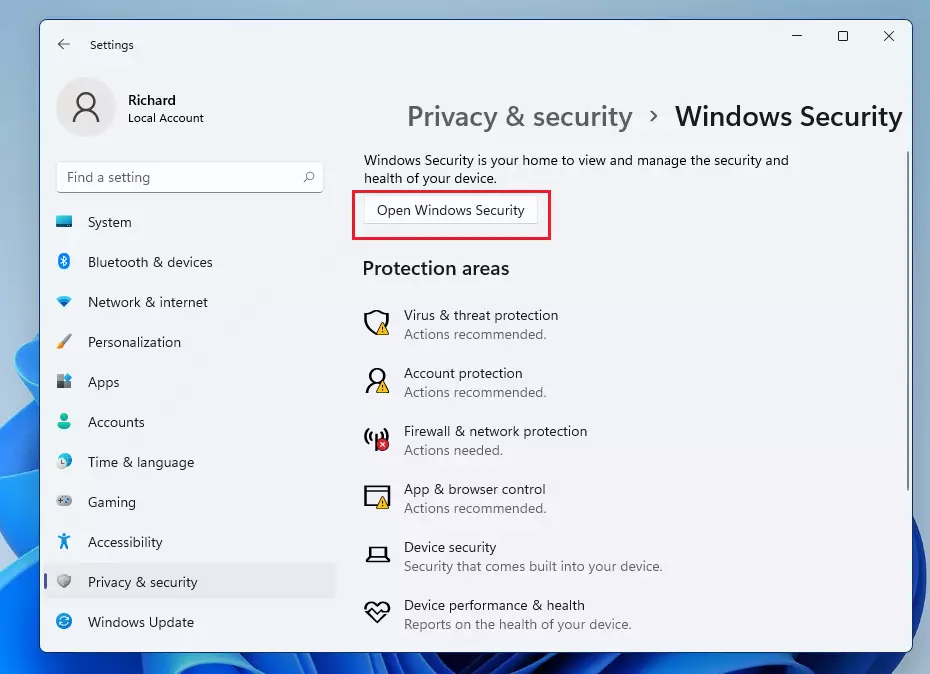
On the Windows Security settings pane, click the “Open Windows Security” button as highlighted below,
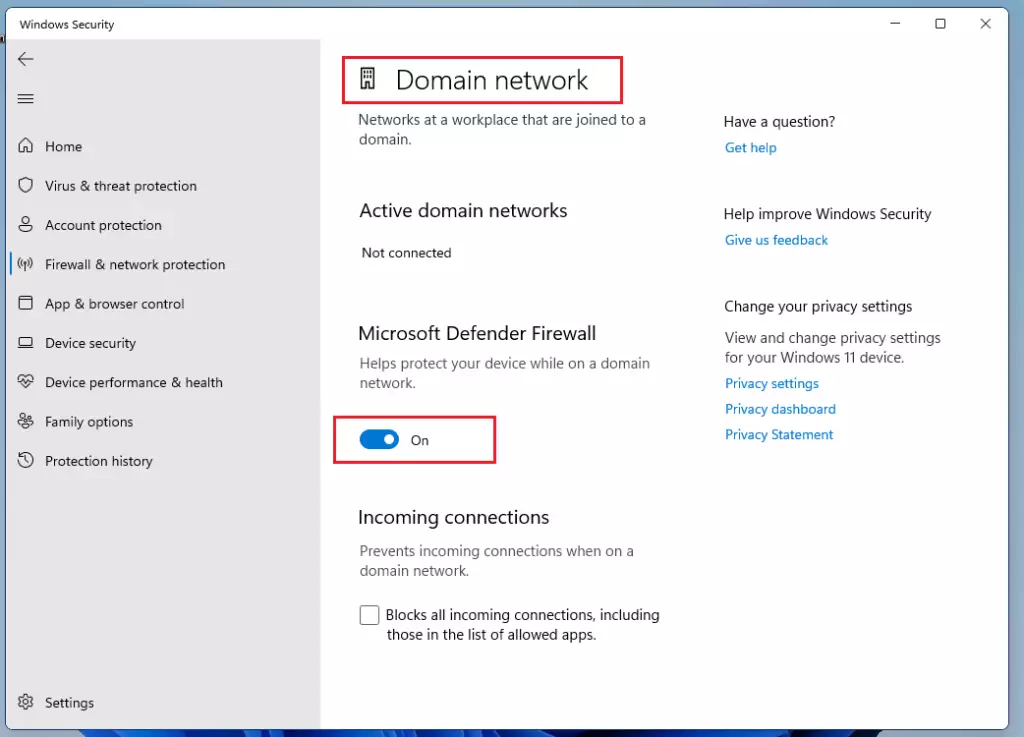
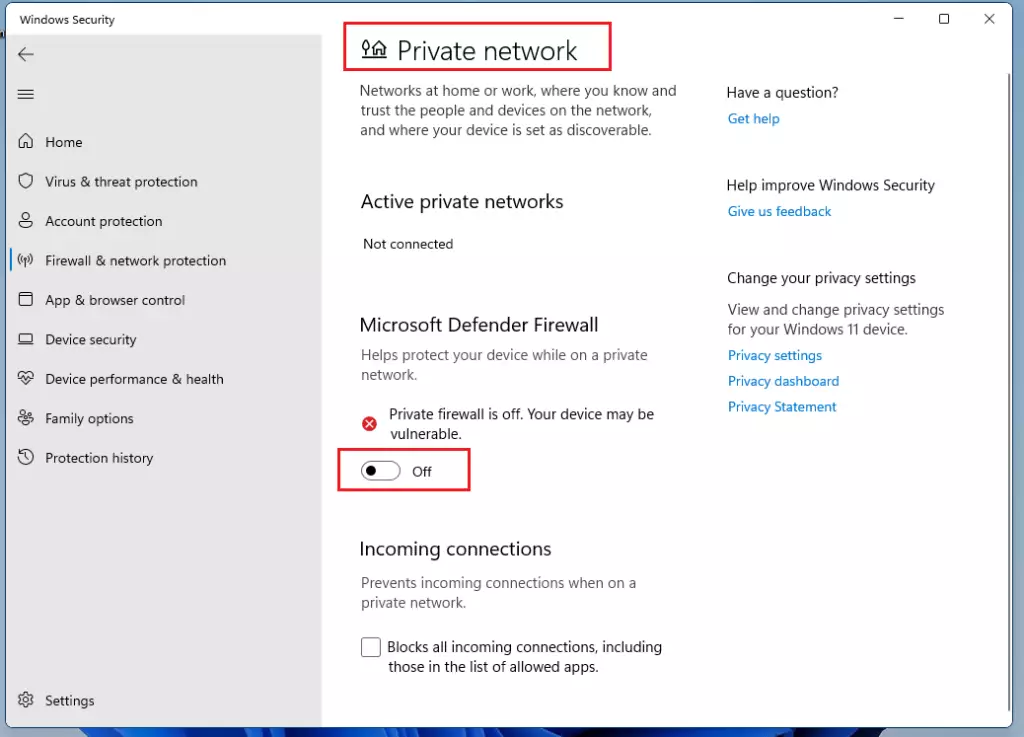
That will bring you to the Windows Security home settings pane. From the left menu items, go to Firewall & Network Protection.
There, you will see up to three network profiles.
- Domain network: Network at the workplace that is joined to a domain. This is mostly found in business environments.
- Private network: Networks are home or work where you know you trust the devices in your network and where devices are set to be discovered via network discovery.
- Public network: Network in public areas such as airports, coffee shops, and others where devices are not configured to be discovered.
You can go into each network profile above and turn on or turn off the Microsoft Defender firewall for each.

Select a network profile, and turn it on or enable it if it is already disabled.
If the profile is enabled, you can disable or turn it off.
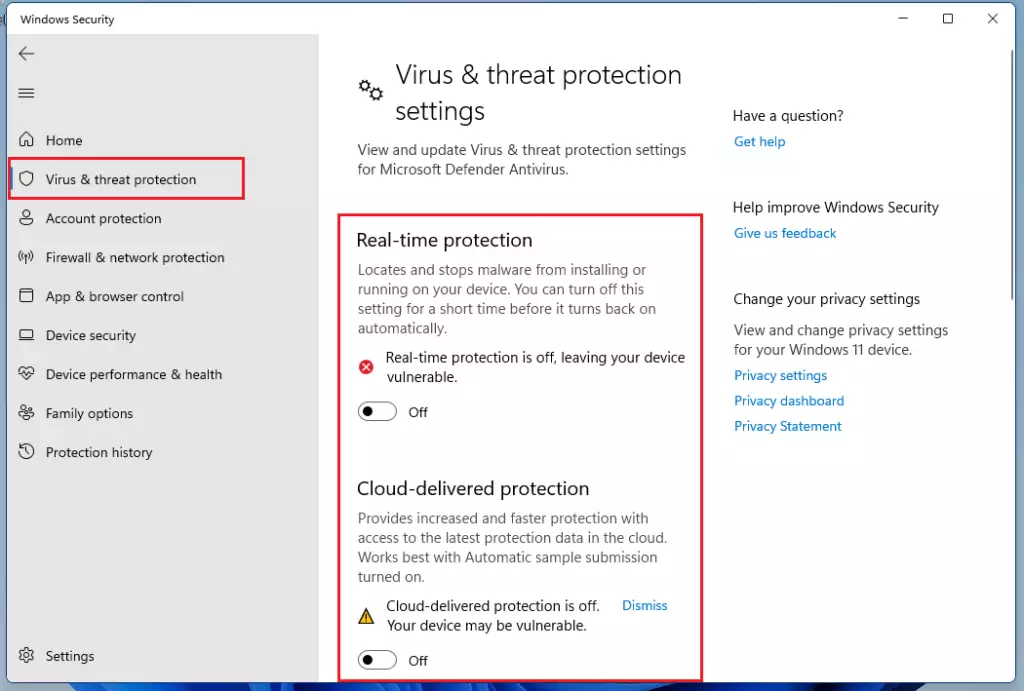
Next, go to Virus & threat protection on the left menu; under Virus & threat protection on the right pane, click the Manage settings link.
Then enable or turn Real-time protection and Cloud-delivered protection. If enabled, you can then disable or turn it off.
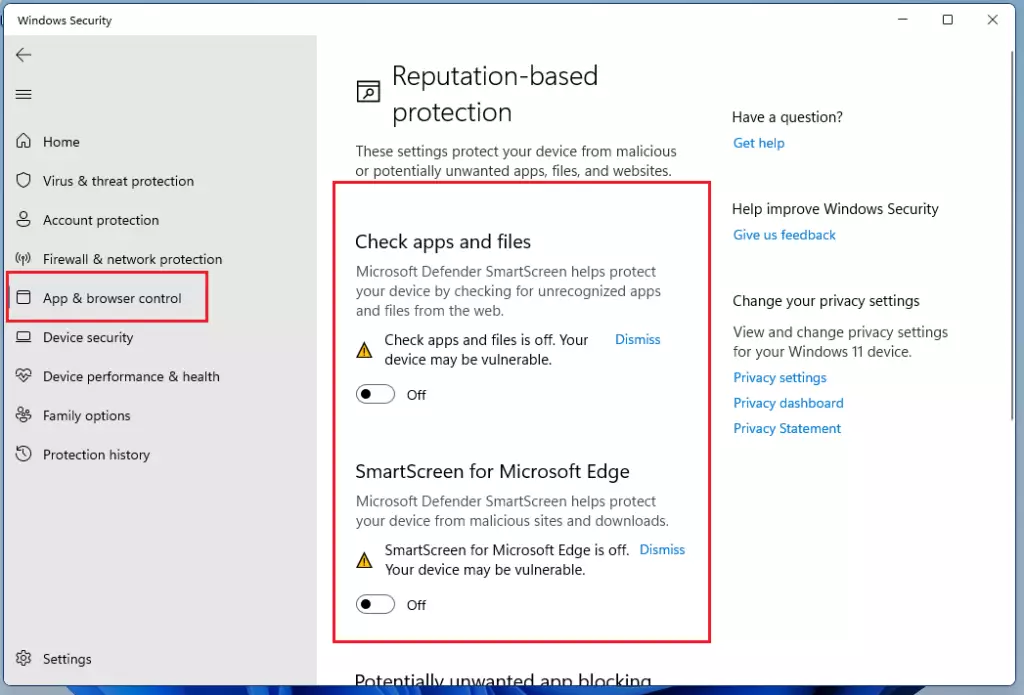
App & browser control can also be turned off or disabled.
By all means, Microsoft Defender should be enabled to receive updates on your Windows computer. The only reason you may want to turn it off is when you have other security products installed, and Microsoft Defender is interfering with them.
If Microsoft Defender is not impacting your PC performance or interfering with other security suites installed, you should keep both installed and enabled.
Conclusion:
- Microsoft Defender is essential for protecting your Windows 11 device from viruses and malware.
- It is advisable to keep Microsoft Defender enabled if you do not have other security software installed.
- To enable or manage Microsoft Defender, navigate through Windows Settings, Privacy & Security, and Windows Security.
- Regularly check the status of Microsoft Defender, ensuring features like Real-time protection and Firewall settings are configured according to your needs.
- Disabling Microsoft Defender may only be necessary when other antivirus programs are installed and causing conflicts.
- Always ensure that your security software is up to date to maintain optimal protection against threats.
Leave a Reply to HoangPhi Cancel reply