How to turn Automatically Move Pointer to the Default Button on or off in Windows 11
Automatically Move Pointer to the Default Button in Windows 11 jumps your mouse cursor to the highlighted option in many pop-up windows. This feature helps you complete tasks faster by placing your cursor directly over buttons like “Yes” or “OK” when they appear.
Many users find this setting useful because it saves a small but noticeable amount of time and clicking. Instead of moving your mouse each time a confirmation box pops up, the pointer is already waiting.
To automatically move your pointer to the default button in Windows 11, go to Settings > Bluetooth & devices > Mouse > Additional mouse settings. In the “Mouse Properties” window, select the Pointer Options tab, check “Automatically move pointer to the default button in a dialog box,” then click Apply and OK.
How to Turn On Automatic Pointer Movement
Let’s turn on this feature by going into your mouse settings.
Step 1Open Mouse Settings
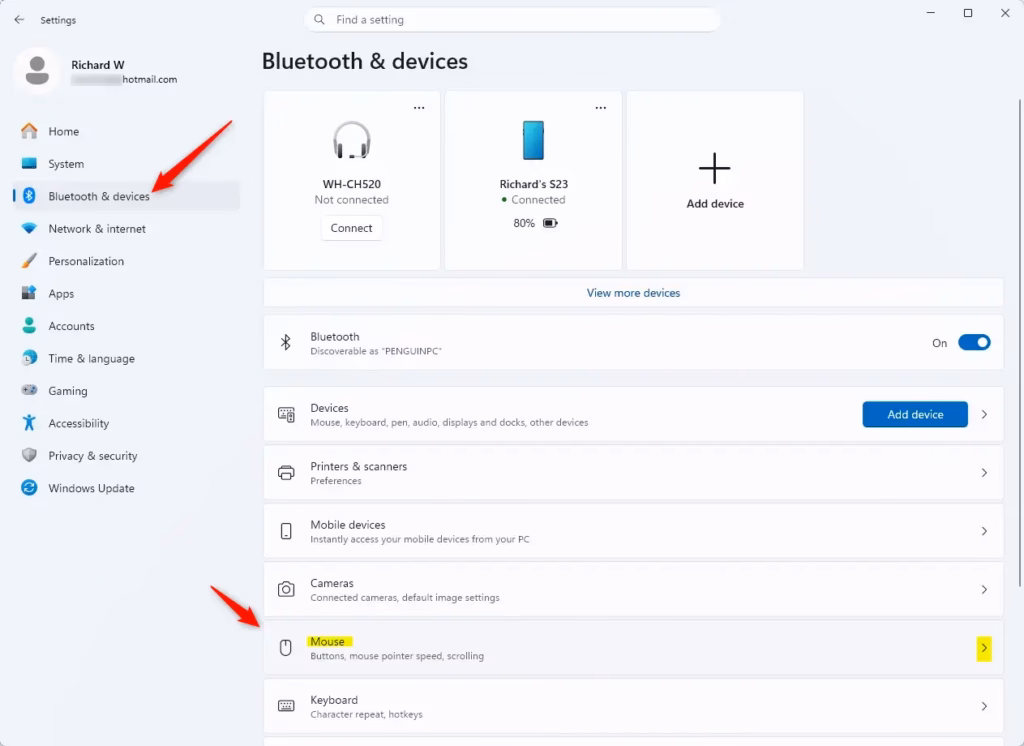
First, let’s find the right place. Click the Start button (the Windows logo, usually in the bottom-left corner). Then, click on Settings (it looks like a gear icon).
In the Settings window, click on Bluetooth & devices on the left side. Now, find and click on Mouse.
Step 2Access More Mouse Options
You can access more mouse options in Windows 11 by going to your main Mouse settings and then looking for ‘Related settings’ to click on ‘Additional mouse settings’. This action opens a window with more detailed controls for your mouse, letting you adjust how it behaves.
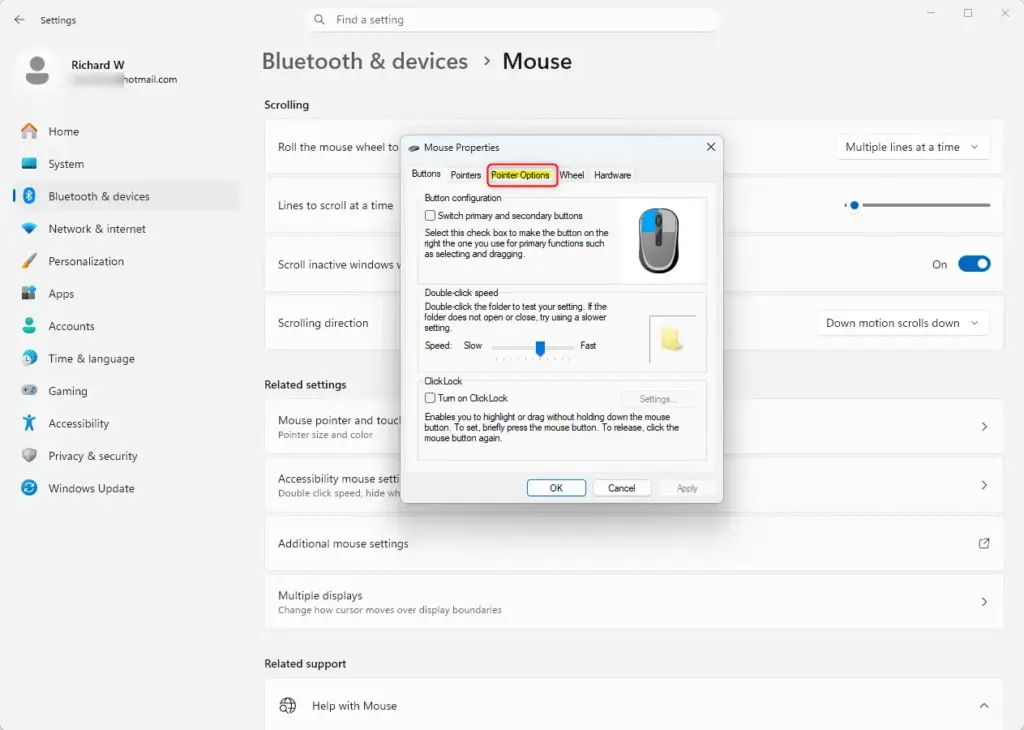
The "Mouse Properties" window, which has a slightly older appearance, opens when you adjust mouse settings in Windows 11. This window lets you control various mouse behaviors, including where the mouse pointer moves automatically.

Step 3Find the “Snap To” Option
In the “Mouse Properties” window, look for tabs at the top. You’ll see Buttons, Pointers, Pointer Options, and Wheel. Click on the Pointer Options tab.
Step 4Enable Automatic Pointer Movement
Now, look for a section called Snap To. You should see a checkbox that says Automatically move pointer to the default button in a dialog box. Click this box to put a checkmark in it.
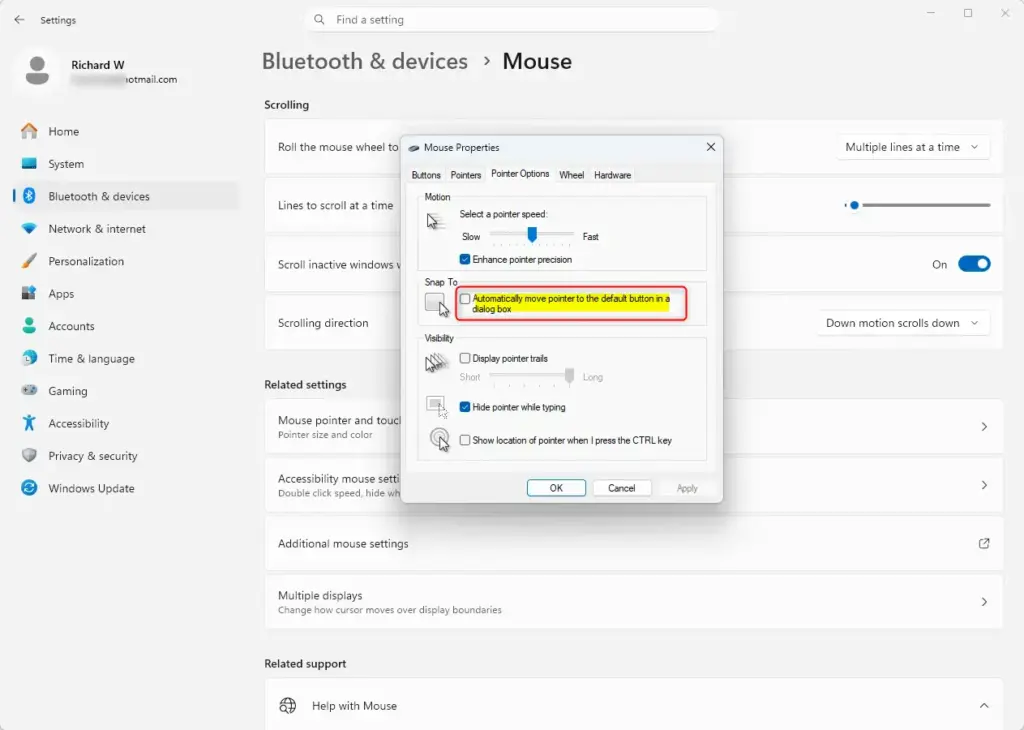
This is the setting that does the magic!
Step 5Apply Your Changes
Almost done! At the bottom of the “Mouse Properties” window, click the Apply button. This saves your change without closing the window.
Then, click the OK button to close the “Mouse Properties” window. You can now close the main Settings window too.
How to Turn Off Automatic Pointer Movement
To turn off the feature that automatically moves your mouse pointer to the default button in Windows 11, open Settings, go to Bluetooth & devices, select Mouse, and then click Additional mouse settings. In the ‘Mouse Properties’ window, find the Pointer Options tab and uncheck the box next to ‘Automatically move pointer to the default button’.
Go to Settings > Bluetooth & devices > Mouse > Additional mouse settings.
In the “Mouse Properties” window, click the Pointer Options tab.
Click Apply, then click OK.
Reference:
Summary
This guide showed you how to control whether your mouse pointer jumps to the default button in Windows 11 pop-up windows, saving you time by making common actions quicker.
How do I change the default mouse button?
And then when the mouse properties. Open. Um you will see um a a tab called buttons. And then under buttons you will see this option there. And you can see that the primary.
How to reset mouse pointer to default?
Then go to pointers. And then make sure that normal select is chosen. And then use defaults then click apply and then click okay. And we're all done there you go.
What is the snap to default button?
Gets a value indicating whether the snap-to-default button is enabled. If enabled, the mouse cursor automatically moves to the default button of a dialog box, such as OK or Apply.
Was this guide helpful?

About the Author
Richard
Tech Writer, IT Professional
Richard, a writer for Geek Rewind, is a tech enthusiast who loves breaking down complex IT topics into simple, easy-to-understand ideas. With years of hands-on experience in system administration and enterprise IT operations, he’s developed a knack for offering practical tips and solutions. Richard aims to make technology more accessible and actionable. He's deeply committed to the Geek Rewind community, always ready to answer questions and engage in discussions.

No comments yet — be the first to share your thoughts!