How to Identify Windows 11 Account Type
You can easily check your Windows 11 account type directly from your PC’s settings. Your account type determines the level of access and control you have over your computer, with two main options: Administrator or Standard.
An Administrator account gives you full system control, letting you install programs and make broad changes. A Standard account offers restricted permissions to help prevent accidental system alterations.
Understanding your account type is crucial, especially if you’re using Windows 11 version 23H2. It helps you manage permissions effectively and know what actions are safe to perform on your PC.
Navigate to Settings, click Accounts, then select Your info to view your account name and type, indicating if it’s a Microsoft or Local account with Administrator or Standard privileges.
What happens when done?
After these steps, you’ll know if you’re using a Local account or a Microsoft account. You’ll also confirm if you have Administrator or Standard user permissions, so you can manage your system settings and security features with confidence.
How to check your account type in Settings
Your Windows 11 account type tells you what you can do on your PC. To check if you have an Administrator or Standard account, open the Settings app and go to the Accounts section.
1. Click on the Start menu and select Settings to open the app.
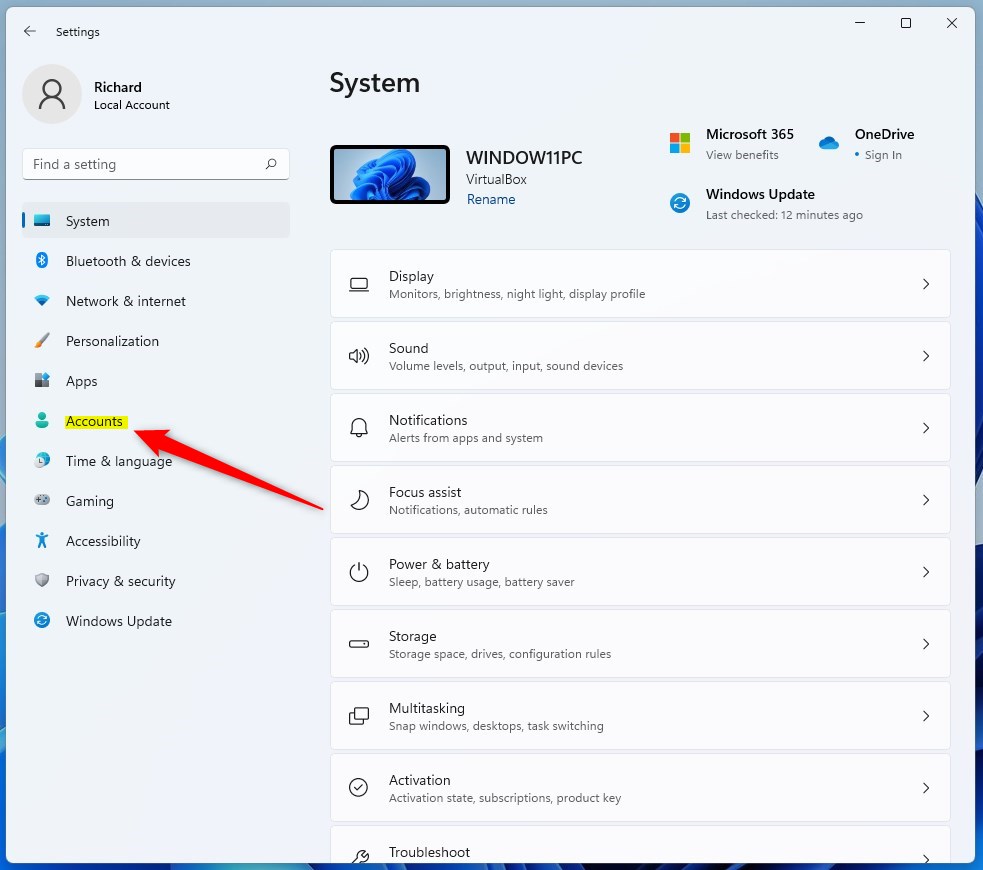
2. In the Settings app, click on Accounts on the left menu.
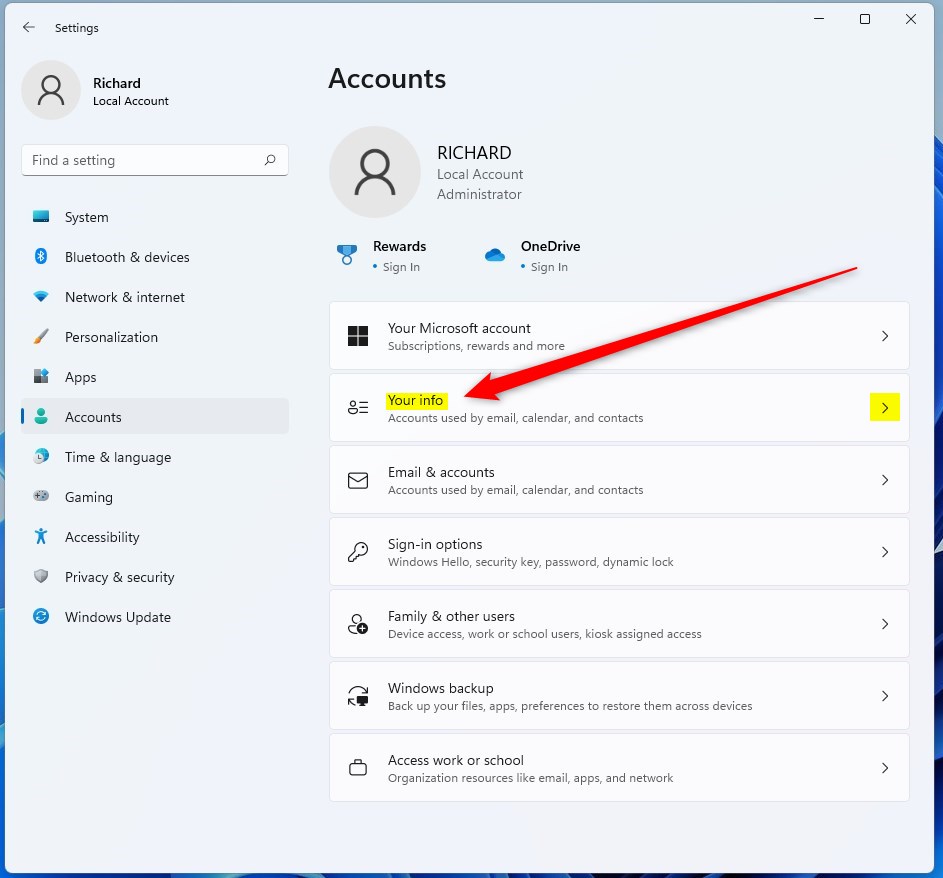
3. On the Accounts page, click on the Your info tile to expand it.
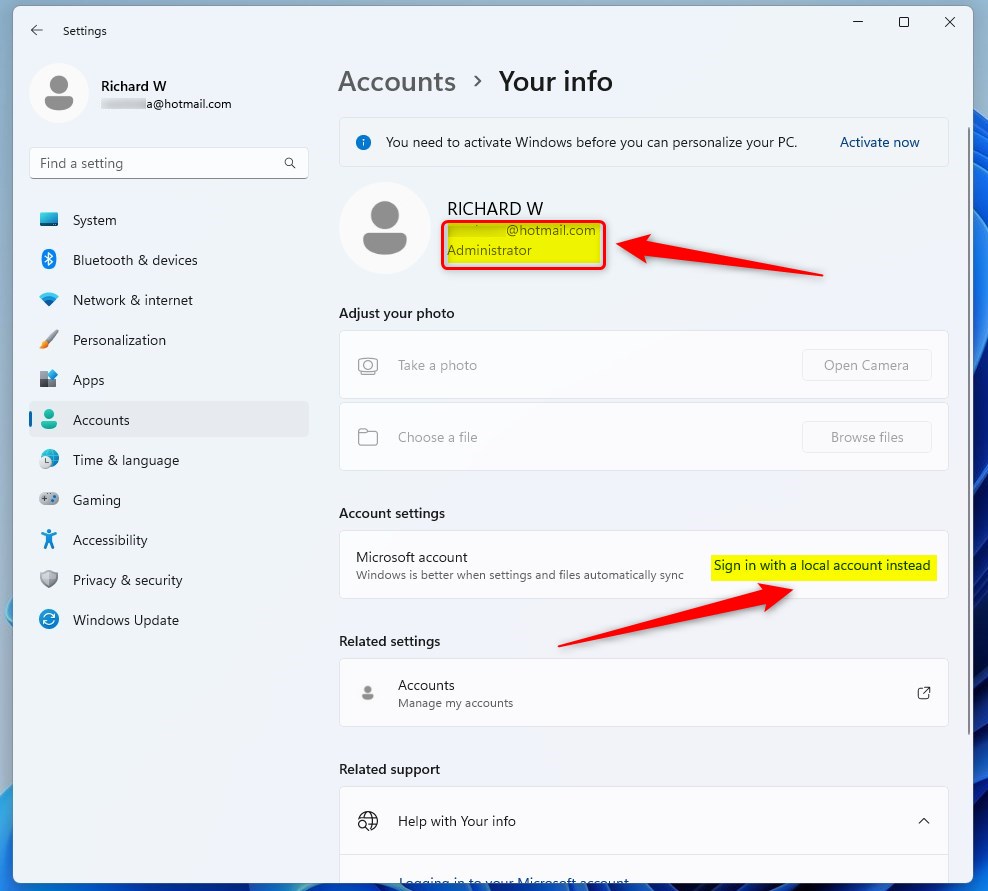
4. On the Your info page, you will see your account name and type displayed clearly.
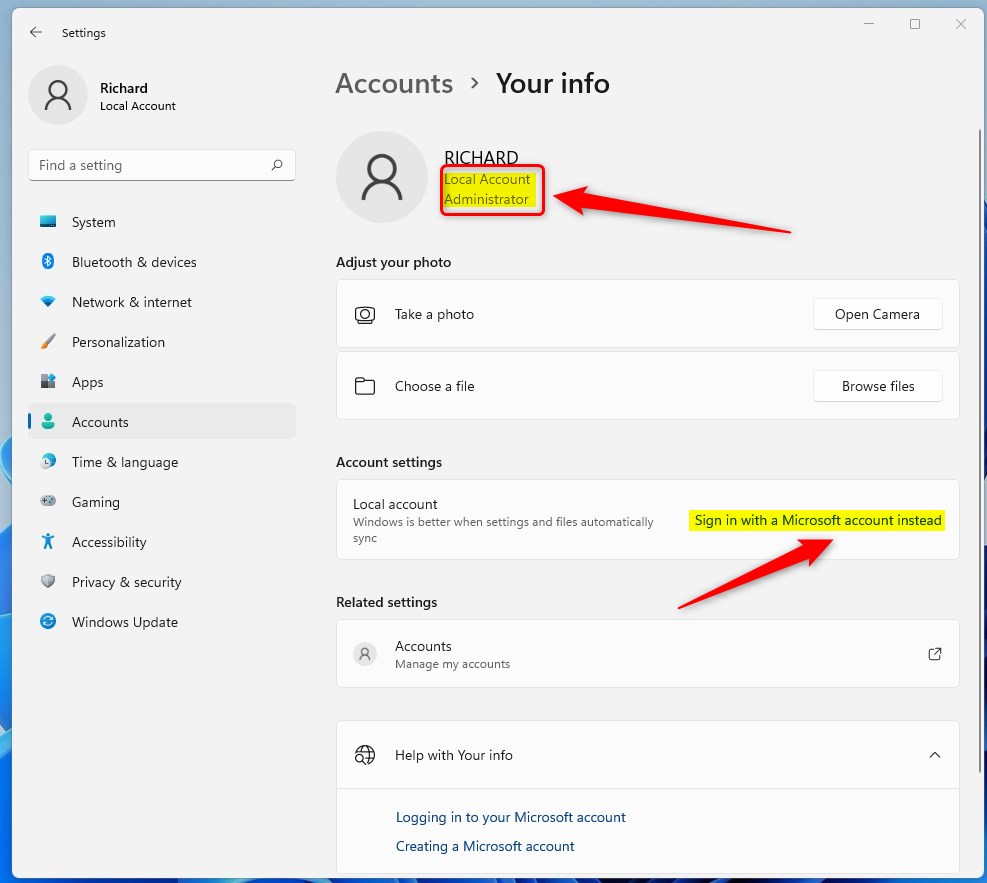
If you see a Local Account, you will see a link to “Sign in with a Microsoft account instead.” If you see an email address, you are using a Microsoft account.
Difference between Standard and Administrator accounts
A Standard user can perform most daily tasks like browsing the web or using apps. An Administrator has elevated privileges, meaning they can install software, change system settings, and manage other user accounts. Using a Standard account for daily use is a best practice for security.
How to change your account type (Requires Admin Privileges)
If you need to change your Windows 11 account type from Standard to Administrator, or vice versa, you’ll need to be logged in as an admin first. This process lets you give another user more or fewer permissions on your computer.
- Open Settings and go to Accounts.
- Click on Other users or Family & other users.
3. Select the account you want to change.
4. Click Change account type and select either Administrator or Standard user from the dropdown menu.
How to check via Command Prompt
If you’re comfortable with advanced tools, you can check your status using the terminal (also known as Command Prompt). Press the Windows key, type cmd, and press Enter.
net user genericuser
Look for the Local Group Memberships line to see if the account is an Administrator.
Summary
Identifying your Windows 11 account type helps with system security and management. By using the Settings app or Command Prompt, you can distinguish between Local and Microsoft accounts and verify your permission levels. Remember that changing account types requires administrator privileges to ensure system integrity.
Can I have two administrator accounts on 🪟 Windows 11?
Yes, you can have multiple administrator accounts on a single Windows 11 device. This is often useful if multiple people use the same computer and each requires full control to manage their own software, system updates, and security settings independently without interfering with other user profiles.
Was this guide helpful?

About the Author
Richard
Tech Writer, IT Professional
Richard, a writer for Geek Rewind, is a tech enthusiast who loves breaking down complex IT topics into simple, easy-to-understand ideas. With years of hands-on experience in system administration and enterprise IT operations, he’s developed a knack for offering practical tips and solutions. Richard aims to make technology more accessible and actionable. He's deeply committed to the Geek Rewind community, always ready to answer questions and engage in discussions.

[…] Local accounts will use the user name as a display name by default. […]
[…] password reset disk can only be created for a local account, not a Microsoft […]