How to Set Up FileRun and Nginx on Ubuntu 24.04


FileRun and Nginx on Ubuntu 24.04 create a self-hosted cloud storage server that lets you store, access, and share your files through any web browser. FileRun provides a web-based file manager interface, while Nginx handles web traffic to load pages fast and keep your data secure.
Install Nginx using `sudo apt install nginx`, then install MariaDB with `sudo apt install mariadb-server`. Create a database for FileRun using `sudo mariadb` and the appropriate SQL commands. Finally, install PHP with `sudo apt install php-fpm php-intl php-mysql`.
Running this setup on Ubuntu 24.04 LTS gives you total control over your personal files without paying for third-party cloud services. You need an active Ubuntu 24.04 server and administrator access to complete the installation.
- Update your system and install the Nginx web server by running
sudo apt updateandsudo apt install nginxin your terminal. - Install the MariaDB database server using the command
sudo apt install mariadb-serverso FileRun can store its files and settings. - Create a dedicated database and user account for FileRun by logging into MariaDB with
sudo mariadband running the setup commands. - Install PHP and all required extensions, including PHP-FPM, using the apt package manager.
- Download the FileRun application files from your client area, extract them into the
/var/www/filerundirectory, and set the correct file ownership. - Create an Nginx virtual host configuration file for FileRun in
/etc/nginx/sites-available/and enable it. - Restart Nginx using
sudo systemctl restart nginxto make your FileRun site live. - Open your web browser, go to your domain name or server IP address, and follow the on-screen setup wizard to finish installing FileRun.
Install Nginx HTTP server on Ubuntu
Installing Nginx on Ubuntu 24.04 provides the web server foundation required to run FileRun. You can install Nginx by updating your local package list and running the standard apt installation command in your terminal. This sets up the default web service that handles incoming browser traffic for your self-hosted file management system.
To do that, open the Ubuntu terminal and run the commands below to install the Nginx web server.
sudo apt update
sudo apt install nginx
Once Nginx is installed, the commands below can start, stop, and enable the Nginx web server to start automatically when your server boots up.
sudo systemctl stop nginx
sudo systemctl start nginx
sudo systemctl enable nginx
You can test the Nginx web server by opening your web browser and browsing to the server’s localhost or IP address.
http://localhost
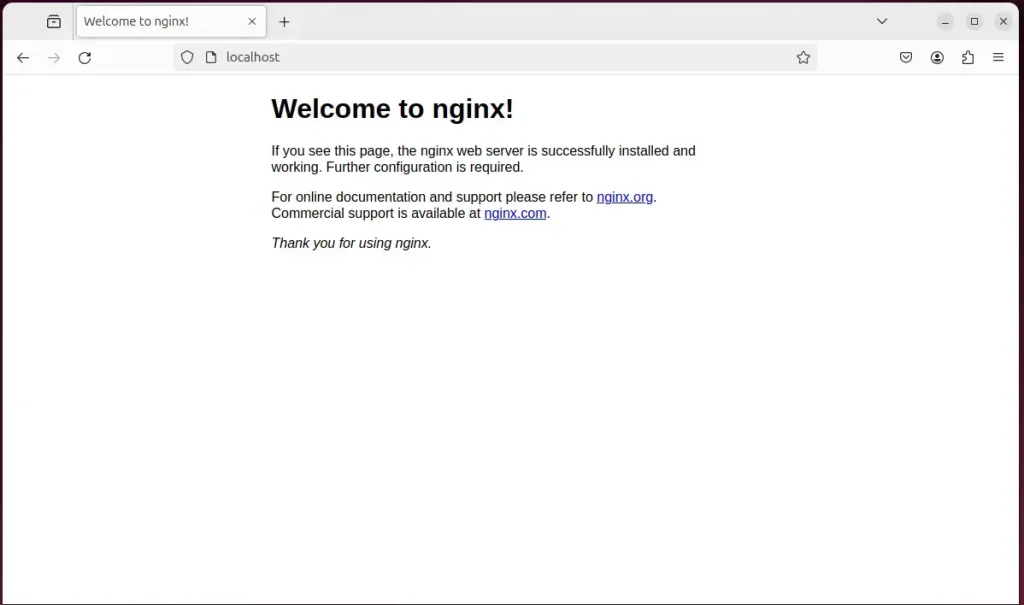
When you see the Welcome to nginx!, it means the Nginx HTTP server is successfully installed.
Additional help on installing Nginx on Ubuntu is in the link below.
Install the MariaDB database server on Ubuntu
Installing MariaDB on Ubuntu 24.04 gives FileRun a reliable database backend to store user accounts, folder structures, and system settings. You add the database server using the Ubuntu package manager in your terminal. This creates the SQL database engine needed before you can configure the FileRun application.
To install and use the MariaDB database server, use the instructions below.
Open the Ubuntu terminal and run the commands below to install the MariaDB database server.
sudo apt update
sudo apt install mariadb-server
Once the MariaDB database server is installed, use the commands below to stop, start, and enable the MariaDB server to start automatically when the server boots.
sudo systemctl stop mariadb
sudo systemctl start mariadb
sudo systemctl enable mariadb
Run the following commands to validate and test if the MariaDB database server is installed successfully.
sudo mariadb
Once you run the commands above, it will log you onto the MariaDB console and display a message similar to the one below.
Welcome to the MariaDB monitor.  Commands end with ; or g.
Your MariaDB connection id is 32
Server version: 10.11.2-MariaDB-1 Ubuntu 23.04

Copyright (c) 2000, 2018, Oracle, MariaDB Corporation Ab and others.

Type 'help;' or 'h' for help. Type 'c' to clear the current input statement.

MariaDB [(none)]>
The message tells you that the server is installed successfully.
Additional help on installing MariaDB.
- How to install MariaDB on Ubuntu Linux
- MariaDB without password prompt
Create a FileRun database
Creating a FileRun database in MariaDB requires setting up a dedicated database named filerundb alongside a secure user account called filerundbuser. You complete this step by logging into the MariaDB command-line interface and running SQL queries to grant full privileges. This isolation ensures your file manager data stays organized and secure from other services.
As part of the setup, we will create a filerundb database and a user account called filerundbuser.
The `filerundbuser` account receives full access rights to the `filerundb` database, which stores FileRun's settings and user data. This access lets `filerundbuser` manage and write information for FileRun to operate correctly on your Ubuntu 24.04 system.
All the database steps above can be done using the commands below:
But first, log on to the MariaDB database server:
sudo mariadb
Then run the commands below to complete the steps:
CREATE DATABASE filerundb CHARACTER SET utf8mb4 COLLATE utf8mb4_general_ci;
CREATE USER filerundbuser@localhost IDENTIFIED BY 'type_your_password_here';
GRANT ALL ON filerundb.* TO filerundbuser@localhost WITH GRANT OPTION;
FLUSH PRIVILEGES;
exit
Ensure to replace ‘type_your_password_here ‘with your password.
Install PHP on Ubuntu Linux
Installing PHP on Ubuntu 24.04 along with its required extensions lets your server process the FileRun application code properly. You install PHP-FPM and necessary modules like mysql, gd, and zip using the terminal package manager. These extensions ensure that image previews, zip downloads, and database connections work without errors.
Then, run the commands below to install the latest PHP version.
sudo apt install php-fpm php-intl php-mysql php-curl php-cli php-zip php-xml php-gd php-common php-mbstring php-xmlrpc php-bcmath php-json php-sqlite3 php-soap php-zip php-imagick php-ldap imagemagick ffmpeg
Additional help on installing PHP
How to install PHP on Ubuntu Linux
FileRun uses PHP configuration settings for its operation. You can create a new PHP configuration file for FileRun by running the commands provided below.
sudo nano /etc/php/8.3/fpm/conf.d/filerun.ini
Then, copy the lines below and paste them into the file above. Adjust as you wish.
expose_php              = Off
error_reporting         = E_ALL & ~E_NOTICE
display_errors          = Off
display_startup_errors  = Off
log_errors              = On
ignore_repeated_errors  = Off
allow_url_fopen         = On
allow_url_include       = Off
variables_order         = "GPCS"
allow_webdav_methods    = On
memory_limit            = 128M
max_execution_time      = 300
output_buffering        = Off
output_handler          = ""
zlib.output_compression = Off
zlib.output_handler     = ""
safe_mode               = Off
register_globals        = Off
magic_quotes_gpc        = Off
upload_max_filesize     = 20M
post_max_size           = 20M
enable_dl               = Off
disable_functions       = ""
disable_classes         = ""
session.save_handler     = files
session.use_cookies      = 1
session.use_only_cookies = 1
session.auto_start       = 0
session.cookie_lifetime  = 0
session.cookie_httponly  = 1
date.timezone            = "UTC"
Save your changes and exit.
One last module that is required is ionCube. Run the steps below to install it and add it to PHP configurations.
Download the package for Ubuntu 64-bit.
sudo wget https://downloads.ioncube.com/loader_downloads/ioncube_loaders_lin_x86-64.tar.gz
Next, run the commands below to extract it into the /usr/lib/php directory.
sudo tar -xzf ioncube_loaders_lin_x86-64.tar.gz -C /usr/lib/php
Then, run the commands below to create an ioncube config file.
sudo nano /etc/php/8.3/fpm/conf.d/00-ioncube.ini
Paste the following line into the file and save.
zend_extension = /usr/lib/php/ioncube/ioncube_loader_lin_8.3.so
Save the file and exit.
Download FileRun files
Downloading FileRun installation files gives you the core application code needed to host the platform on your server. You log into your official FileRun client area account to grab the latest application zip archive. Since public downloads are not available, you must transfer this downloaded archive directly to your Ubuntu web directory.
Download the installation zip archive from the FileRun client area: https://filerun.com/client-area/client-area-orders. There's no zip archive file available for public download at the moment.
The download is available only for holders of an Enterprise license with valid support service.
After downloading, extract the file to the Nginx root directory.
cd /tmp
sudo unzip FileRun.zip -d /var/www/filerun
Next, run the command below to make the Nginx user the directory owner.
sudo chown -R www-data:www-data /var/www/filerun/
Once you have completed all the above steps, continue configuring the Nginx web server below to serve the FileRun content.
Run the commands below to create a Nginx virtual host file for FileRun.
sudo nano /etc/nginx/sites-available/filerun.conf
Then, copy and paste the content block below into the Nginx server block.
server {
  listen 80;
  listen [::]:80;
  root /var/www/filerun/;
  index index.php index.html;
  server_name filerun.example.com;

  location / {
    try_files $uri $uri/ /index.php;
  }

  location ~ [^/].php(/|$) {
    fastcgi_split_path_info ^(.+?.php)(/.*)$;
    if (!-f $document_root$fastcgi_script_name) {
        return 404;
    }

    include snippets/fastcgi-php.conf;
    fastcgi_pass unix:/var/run/php/php8.3-fpm.sock;
    fastcgi_param SCRIPT_FILENAME $document_root$fastcgi_script_name;
    include fastcgi_params;
  }

 # A long browser cache lifetime can speed up repeat visits to your page
  location ~* .(jpg|jpeg|gif|png|webp|svg|woff|woff2|ttf|css|js|ico|xml)$ {
       access_log        off;
       log_not_found     off;
       expires           360d;
  }

  # disable access to hidden files
  location ~ /.ht {
      access_log off;
      log_not_found off;
      deny all;
  }
}
Save the file.
You enable the virtual host for FileRun on Nginx and restart the Nginx server by running the commands `sudo ln -s /etc/nginx/sites-available/file-run.conf /etc/nginx/sites-enabled/` followed by `sudo systemctl restart nginx`. This action makes your FileRun website live and accessible on the internet.
sudo ln -s /etc/nginx/sites-available/filerun.conf /etc/nginx/sites-enabled/
sudo systemctl restart nginx
Setup Let’s Encrypt SSL/TLS for FileRun
Setting up a Let's Encrypt SSL certificate for FileRun secures your login credentials and transferred files with HTTPS encryption. You configure this certificate alongside your Nginx server blocks using Certbot on Ubuntu 24.04. This encryption protects your private data from being intercepted while traveling over the internet.
Please read the post below for additional resources on installing and creating Let’s Encrypt SSL certificates for Nginx.
How to set up Let’s Encrypt SSL certificate for Nginx on Ubuntu Linux
Once you have restarted the Nginx web server, open your browser and browse to the server hostname or IP address defined in the Nginx server block.
http://filerun.example.com
A FileRun setup wizard should appear. Follow the wizard to complete the setup.

Make sure all requirements are met.

You will need to know the following items before proceeding. Use the database connection info you created above.
- Database name
- Database username
- Database password
- Database host
Then, type in the database connection info and click Next

Take notes of the super admin account password.

Log in and begin setting up your environment.

FileRun should be installed and ready to use.
That should do it!
Conclusion:
Installing FileRun with Nginx on Ubuntu 24.04 involves several key steps that set up a robust file management environment. Here's a quick recap of the essential points:
- Install Nginx: A high-performance web server essential for hosting FileRun.
- Setup MariaDB: Creates a dedicated database for FileRun to manage its data effectively.
- Install PHP: Ensures compatibility with the FileRun application for processing requests.
- Download FileRun: Obtain the application files and place them in the appropriate server directory.
- Configure Nginx: Set up a virtual host to serve the FileRun application correctly.
- Secure with SSL: Implement HTTPS for secure data transmission using Let’s Encrypt.
- Follow the Setup Wizard: Complete the installation by providing database credentials and setting up the admin account.
By following these steps, you can successfully set up FileRun with Nginx and utilize its file management capabilities for your personal or business needs.
Does nginx work on Ubuntu?
Nginx is available in Ubuntu's default repositories. Install it using the apt packaging system. First, update the local package index to access the most recent package listings, then install nginx : sudo apt update.
How do I know if nginx is installed on Ubuntu?
You can verify that nginx is running via this command: $ sudo systemctl status nginx ● nginx. service - A high performance web server and a reverse proxy server Loaded: loaded (/lib/systemd/system/nginx.
Was this guide helpful?





No comments yet — be the first to share your thoughts!