
If an app on your Windows 11 PC is not working right, resetting it to its original state can help fix the problem. When you reset an app, all its data and settings are erased, and the app goes back to how it was when you first installed it.
Before resetting, you can try repairing the app, which fixes some issues without deleting your data. But if the app still misbehaves, resetting is the next step.
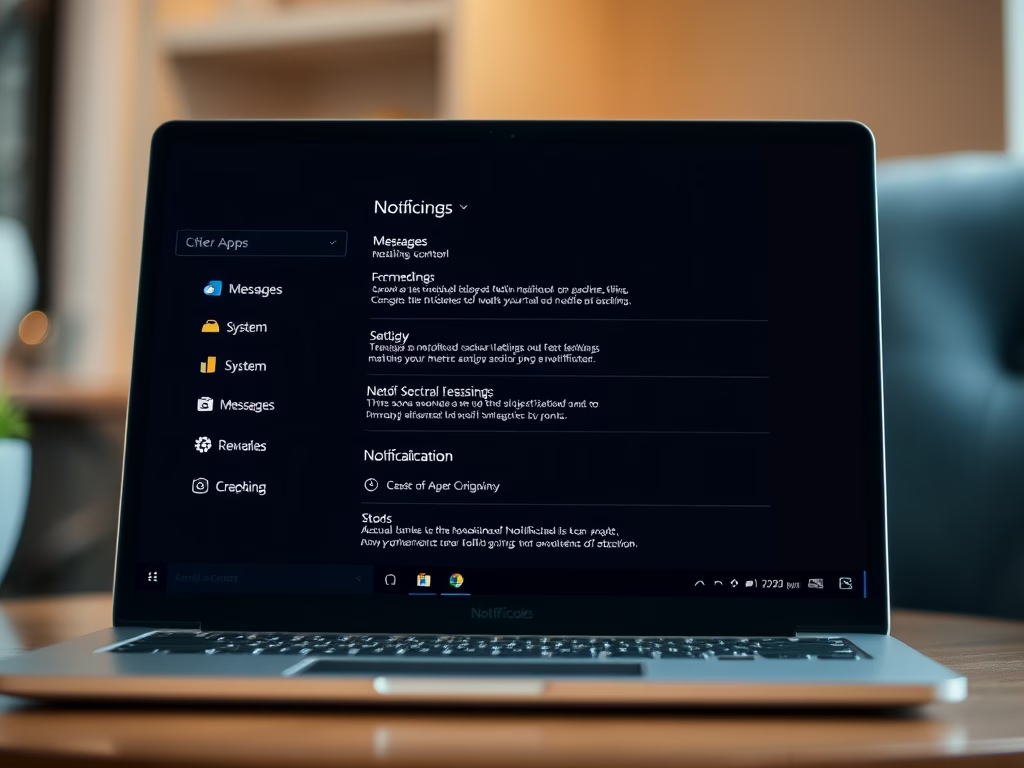
How to Reset an App Using Windows Settings
Follow these simple steps to reset an app using the Windows Settings:
- Open the Settings app: Click the Start menu button (the Windows icon in the bottom-left corner) and then click Settings. Or, press Windows key + I on your keyboard to open it quickly.

Click the Start menu then select Settings or press Windows + I. - In the Settings window, click Apps from the left side menu.
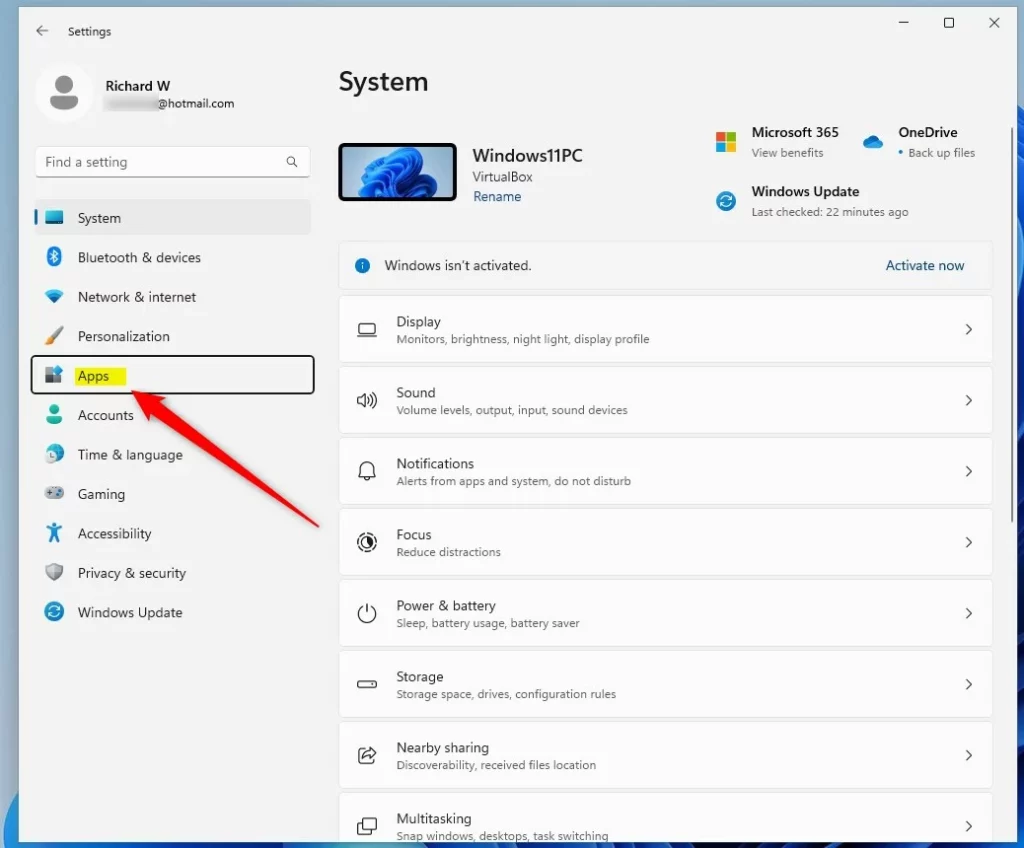
Click on Apps in the Settings menu. - Next, click on Installed apps (or it may say Apps & features) on the right side.
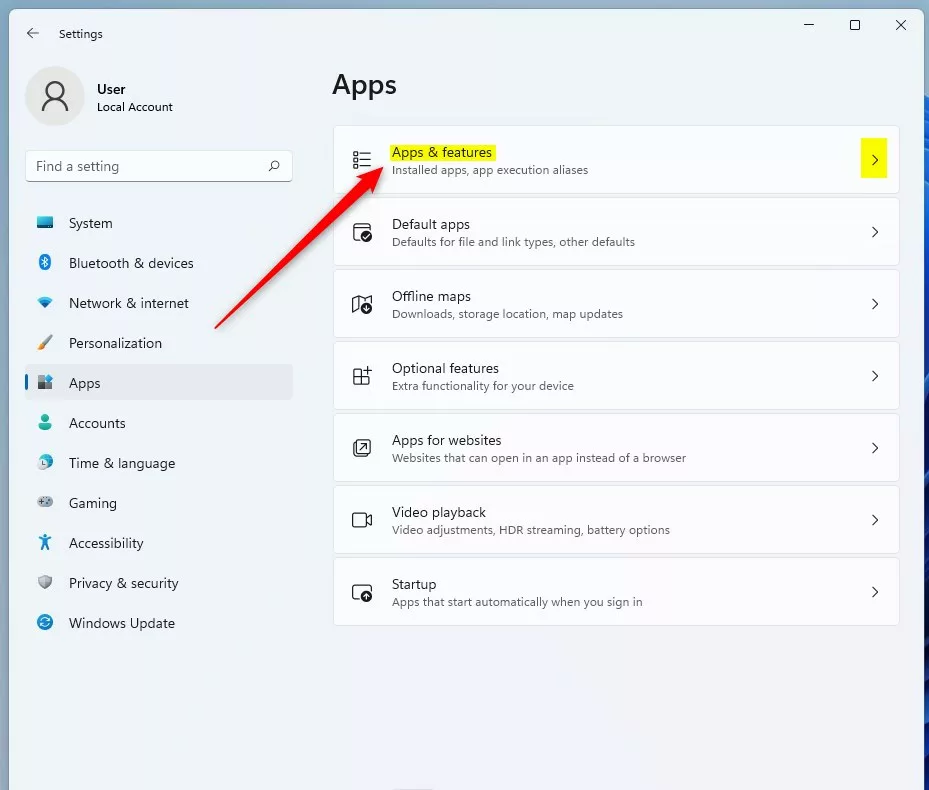
Click Installed apps or Apps & features. - Find the app you want to reset. Click the three dots (More options) button next to that app, then click Advanced options.
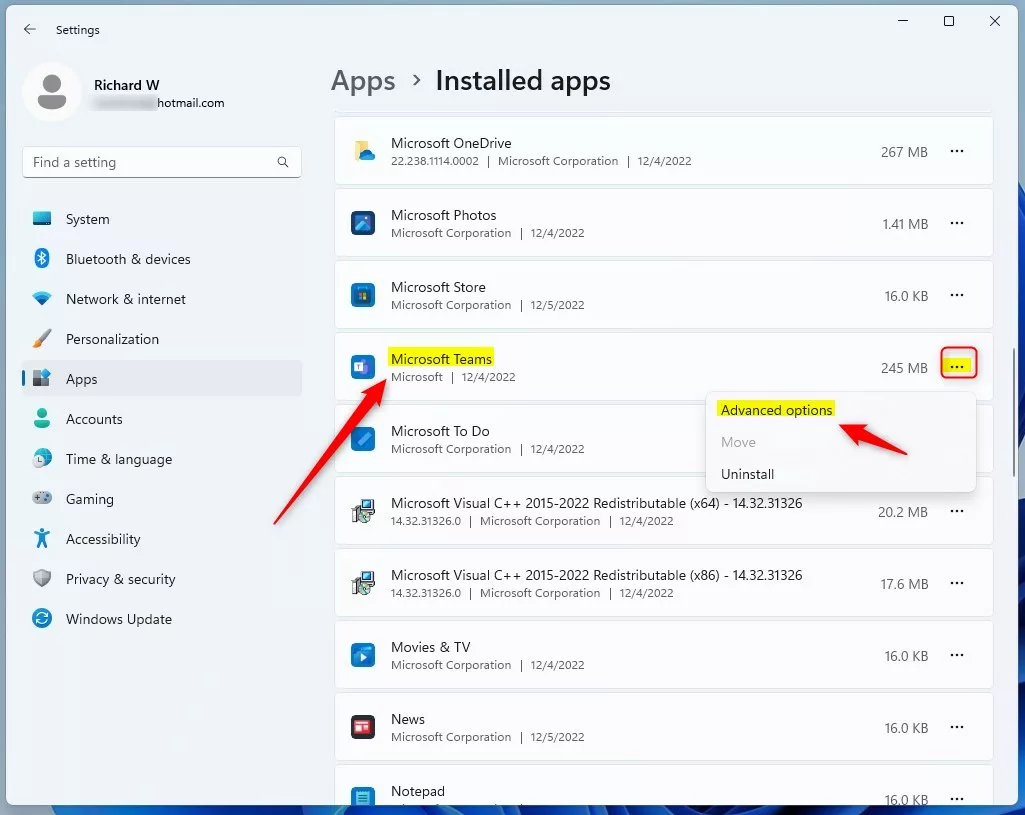
Click the three dots next to the app, then choose Advanced options. - In the Advanced options page, click the Terminate button to close the app completely.
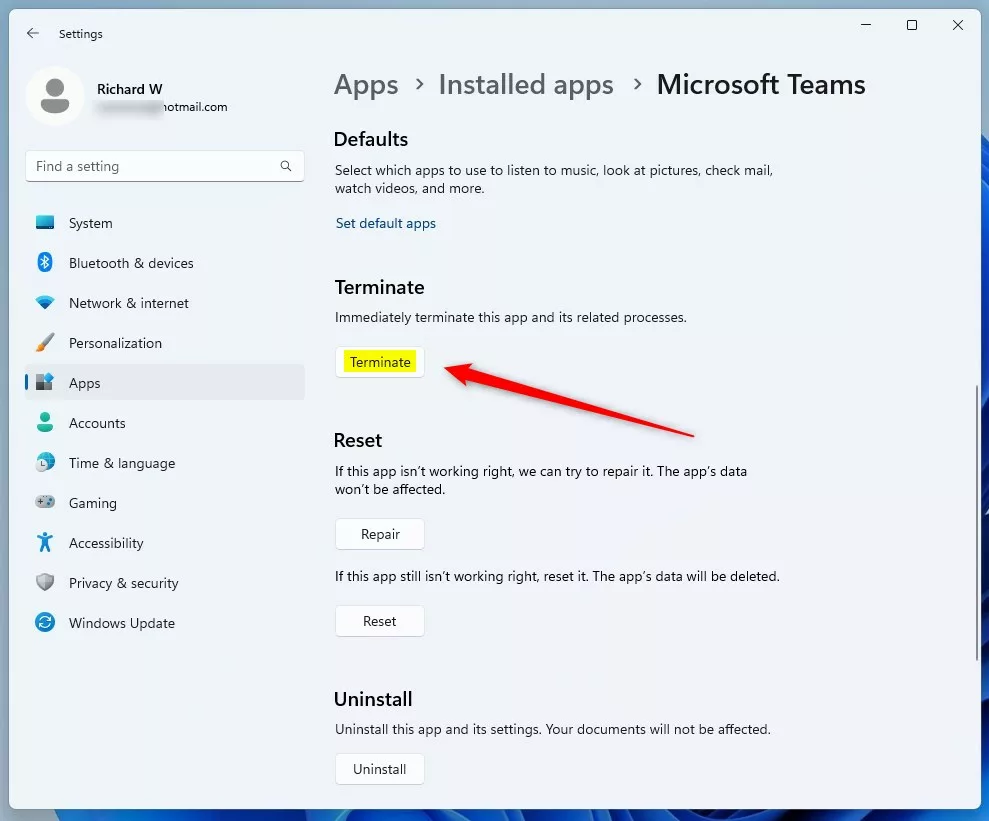
Click Terminate to stop the app and its background processes. - Now, click the Reset button.
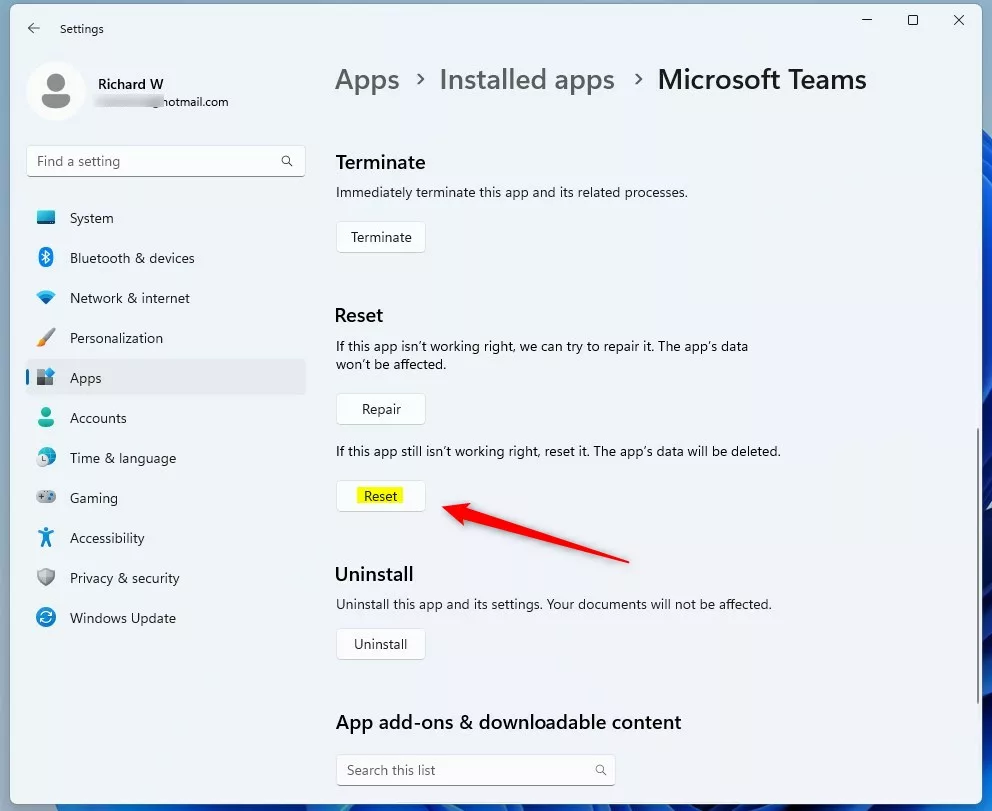
Click Reset to start resetting the app. - When asked to confirm, click Reset again.
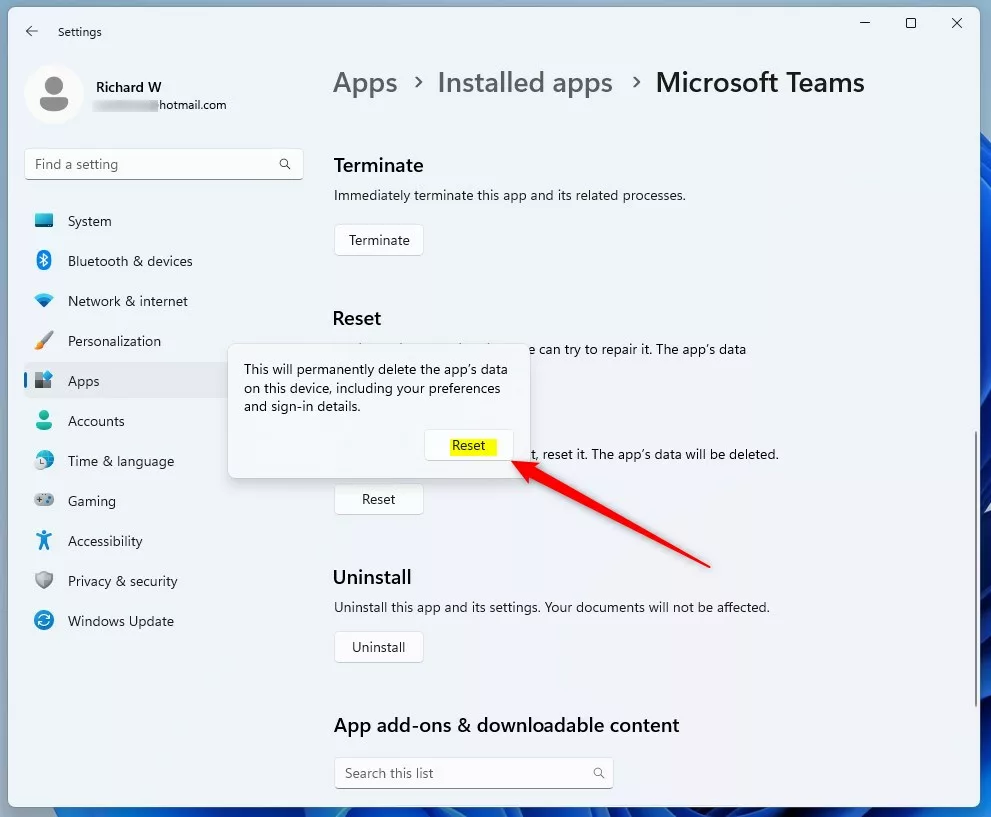
Confirm the reset by clicking Reset again. - Wait a few moments. When done, you’ll see a checkmark next to the Reset button.
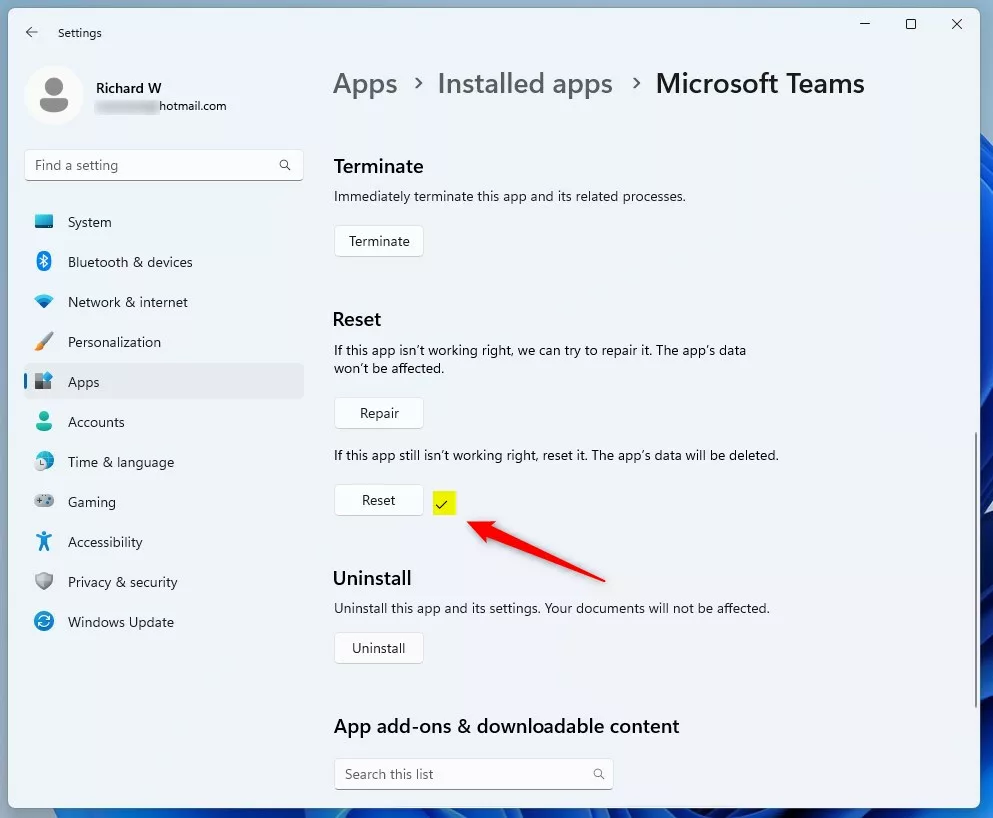
The app has been reset successfully.
How to Reset Apps Using PowerShell (Advanced Users)
If you prefer using commands or want to reset apps that don’t show the reset option in Settings, you can use Windows PowerShell. Here’s how:
- Open PowerShell as an administrator: Search for PowerShell in the Start menu, right-click it, and select Run as administrator.
- Type the following command to see a list of all installed apps:
Get-AppxPackage | Select Name
Scroll through the list to find the app you want to reset. Note the exact name.
To reset the app, use this command, replacing AppName with the app’s name:
Get-AppxPackage *AppName* | Reset-AppxPackage
Example: To reset Microsoft Teams, run:
Get-AppxPackage *MicrosoftTeams* | Reset-AppxPackage
This will reset the app to its default settings.
Important Things to Remember
- Resetting an app deletes all its data and settings permanently. Make sure you back up anything important before you reset.
- If you just want to fix small problems, try repairing the app first instead of resetting.
- Using PowerShell is more advanced and should be done carefully.
- If you run into any problems or have tips, feel free to share in the comments below!
Resetting apps can often fix issues and make your Windows 11 apps work smoothly again. Try these steps next time an app is acting up!


Leave a Reply