How to Rename Your Windows 11 Computer
You rename your Windows 11 computer through the Settings app or System Properties to give it a unique, identifiable name on your network.
This custom name helps you easily distinguish your PC from others, especially when sharing files or connecting to devices. Your computer name is used by Windows 11 for network identification and peer-to-peer communication.
Changing your PC’s name in Windows 11 is a straightforward process and can be done in under two minutes, without impacting any of your installed applications.
You can rename your Windows 11 computer through Settings or System Properties. Open Settings and click “Rename this PC,” or open System Properties via `sysdm.cpl`, click “Change,” and enter the new name. A restart is required for the changes to take effect.
Why Rename Your Computer?
Changing your computer’s name helps you:
- Make your device feel more personal
- Find your PC easily on a home or work network
- Stay organized if you have multiple computers
Method 1Rename Your Computer Using Settings
You can easily rename your Windows 11 computer using the built-in Settings app, which is usually the fastest way to get it done.
- Click the Start menu (Windows icon at the bottom-left) and select Settings. Or press Windows key + I to open Settings right away.
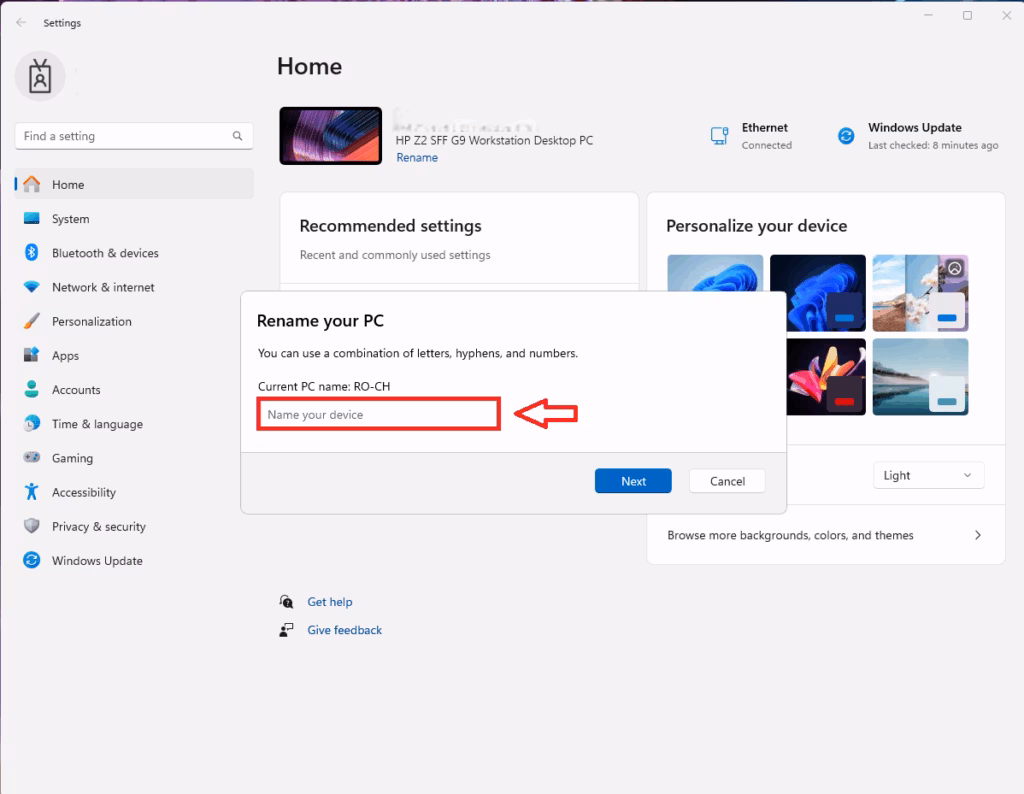
- Look at the top of the Home section. You will see your current computer name.
- Click the Rename this PC button or link below the name.
- A small window will pop up. Type your new computer name here. You can use letters, numbers, and hyphens (but no spaces or special characters).
- Click Next. Then choose to restart now or later. Your PC will restart to apply the new name.
Method 2Rename Using System Properties
Renaming your Windows 11 computer is also possible through the classic System Properties window, a method familiar to many users.
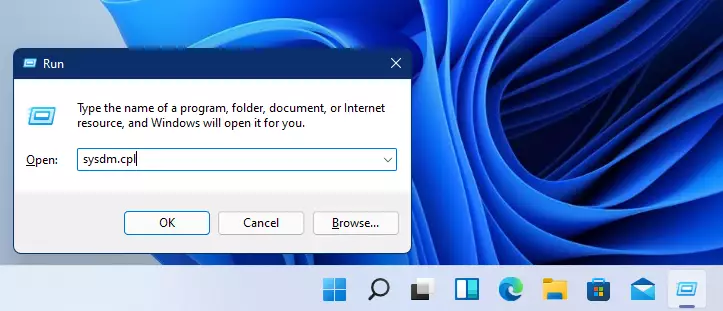
- Press Windows key + R on your keyboard to open the Run box.
- Type
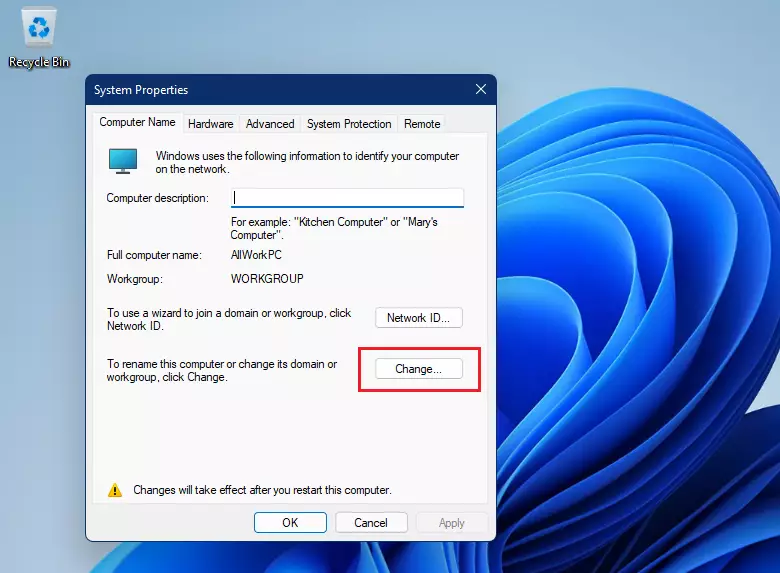
sysdm.cpland press Enter. This opens the System Properties window. - Click the Computer Name tab if it’s not already selected.
- Click the Change… button.
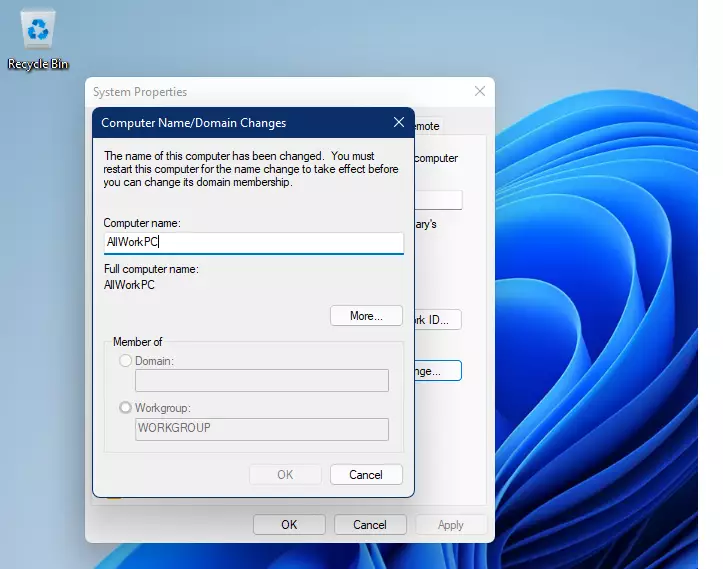
- In the new window, enter your desired computer name in the Computer name box.
- Click OK. Then close all windows.
- Restart your computer to save the changes.
Method 3Rename Using Command Prompt
For those who prefer using text commands, you can rename your Windows 11 computer using the Command Prompt, but you’ll need administrator rights.
- Click the Start button. Type Command Prompt.
- FLAG: Admin privileges required — Right-click on Command Prompt in the search results and choose Run as administrator.
- Type the following command. Replace Old_Name with your current PC name and New_Name with the new name you want:
wmic computersystem where name="Old_Name" call rename name="New_Name" - For example, if your old name is DESKTOP-ABC123 and you want to rename it to MyPC, type:
wmic computersystem where name="DESKTOP-ABC123" call rename name="MyPC" - Press Enter. If it works, you’ll see a message saying the rename was successful.
- Restart your computer to apply the new name.

Method 4Rename Using PowerShell
You can rename your Windows 11 computer using PowerShell, a powerful command-line tool that requires administrator privileges to run.
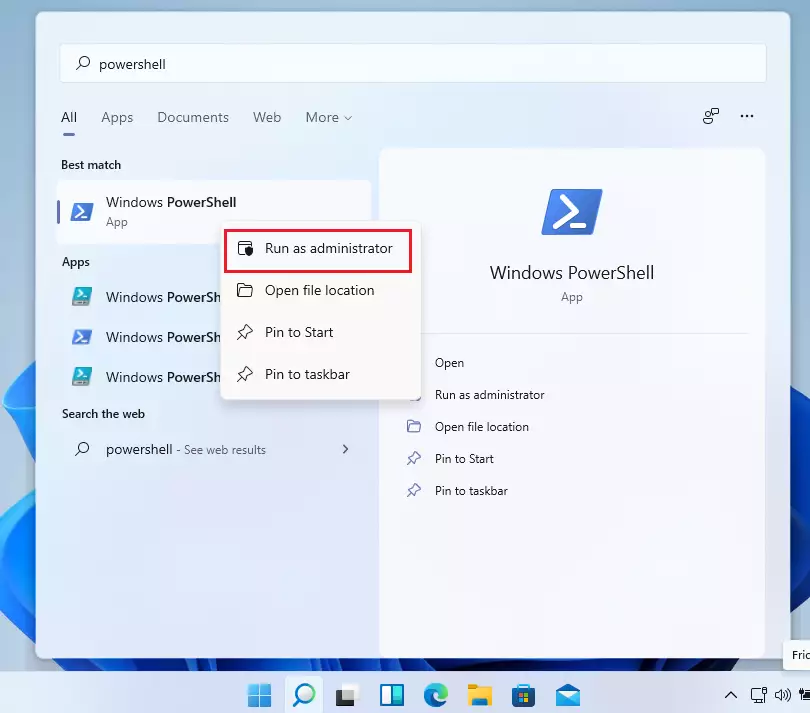
- Click the Start button. Type PowerShell.
- FLAG: Admin privileges required — Right-click Windows PowerShell and select Run as administrator.
- Type this command. Replace NewName with the name you want:
Rename-Computer -NewName "NewName" - For example:
Rename-Computer -NewName "MyNewPC" - Press Enter. Then restart your computer for the change to take effect.
Summary
You’ve learned four ways to rename your Windows 11 computer, making it easier to spot on your network and giving it a personal touch.
Why this matters: Renaming your computer makes it easier to identify on your network and adds a personal touch to your device.
What you need to do: Choose whichever method feels right for you. All methods work the same way — you just need to restart your PC to see the new name.
Enjoy your newly named computer!
Was this guide helpful?

About the Author
Richard
Tech Writer, IT Professional
Richard, a writer for Geek Rewind, is a tech enthusiast who loves breaking down complex IT topics into simple, easy-to-understand ideas. With years of hands-on experience in system administration and enterprise IT operations, he’s developed a knack for offering practical tips and solutions. Richard aims to make technology more accessible and actionable. He's deeply committed to the Geek Rewind community, always ready to answer questions and engage in discussions.


No comments yet — be the first to share your thoughts!