How to Optimize Storage Pools in Windows 11
This guide will help you understand how to make your Storage Pools work better on Windows 11 in simple steps.
To optimize your storage pool in Windows 11, navigate to Settings > System > Storage > Advanced storage settings > Storage Spaces. Select your pool and click the Optimize button. This distributes data evenly across your drives for better performance and reliability.
What is a Storage Pool?
A storage pool in Windows is like a big virtual drive made by combining several of your hard drives together.
With Storage Spaces, you can:
- Create a Storage Pool
- Rename your Storage Pool
- Add more drives to your Storage Pool
- Add extra storage space to your pool
When you add new drives, you can optimize your storage pool. This means Windows will move data around to use all your drives evenly. This can make your computer faster and safer.
Why Optimize Your Storage Pool?
Optimizing makes sure your data is spread out across all drives in your pool. This helps:
- Use all your drive space efficiently
- Improve your computer’s speed
- Lower the chance of losing data if a drive fails
- Balance storage when you add new drives
How to Optimize Storage Pools Using Windows Settings
You can easily optimize your storage pools right within Windows Settings by following a few simple steps.
- Open Settings: Click the Start menu button and select Settings, or press Windows key + I on your keyboard.
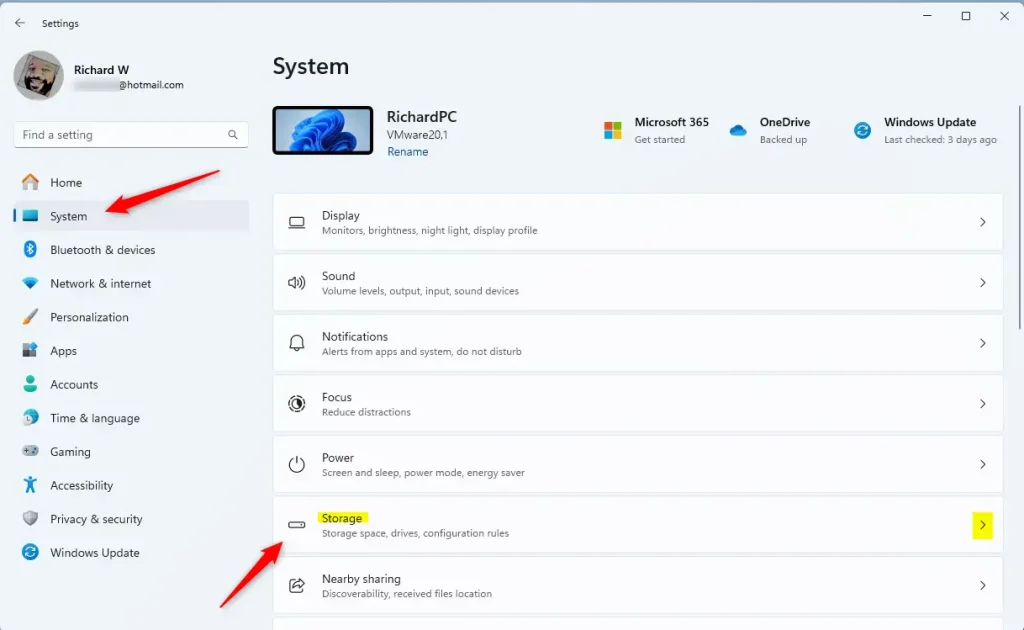
- Go to System: In the Settings window, click on System on the left side.
Windows 11 System button in Settings - Open Storage Settings: Click on the Storage tile on the right side.
Windows 11 Storage tile in Settings app - Find Storage Spaces: Scroll down and open Advanced storage settings, then click Storage Spaces.
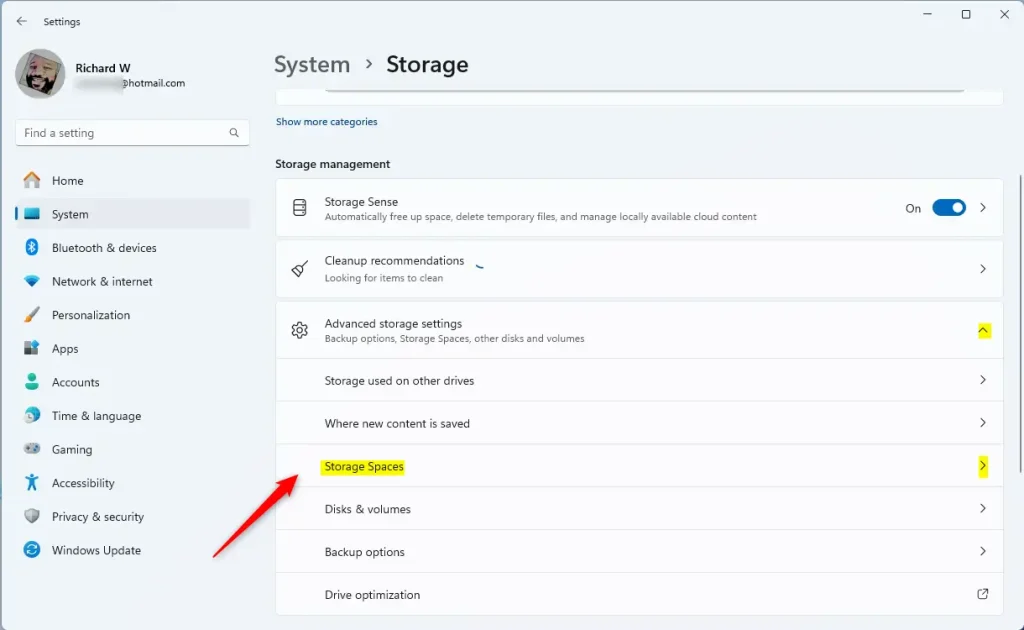
Windows 11 Storage Spaces tile in Settings app - Open Your Storage Pool: Click on your Storage pool to see its details.
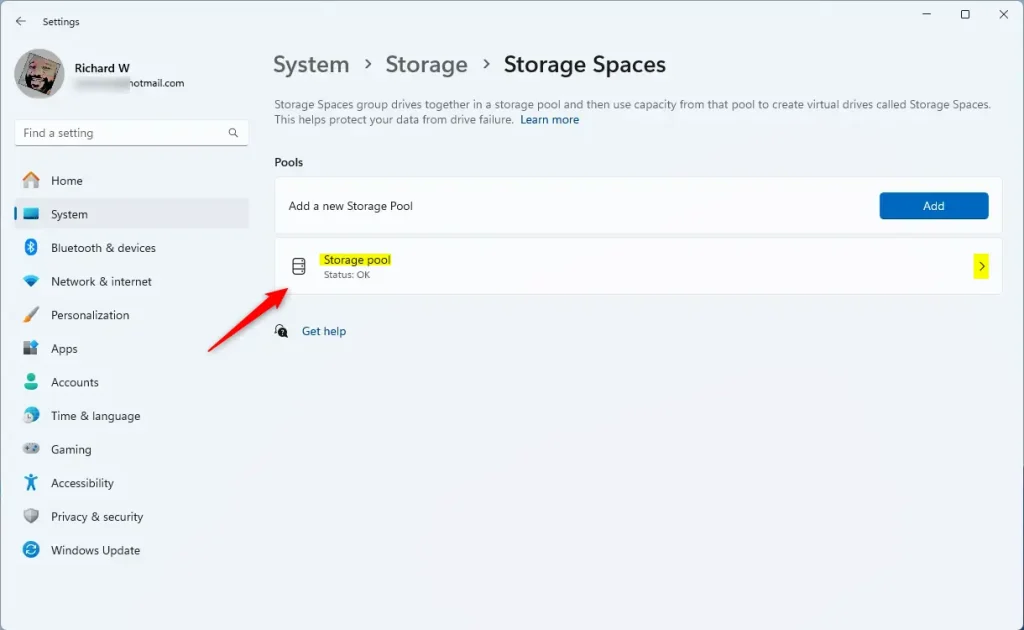
Windows 11 storage pool tile - Optimize: Click the Optimize button to start spreading your data evenly across all drives.
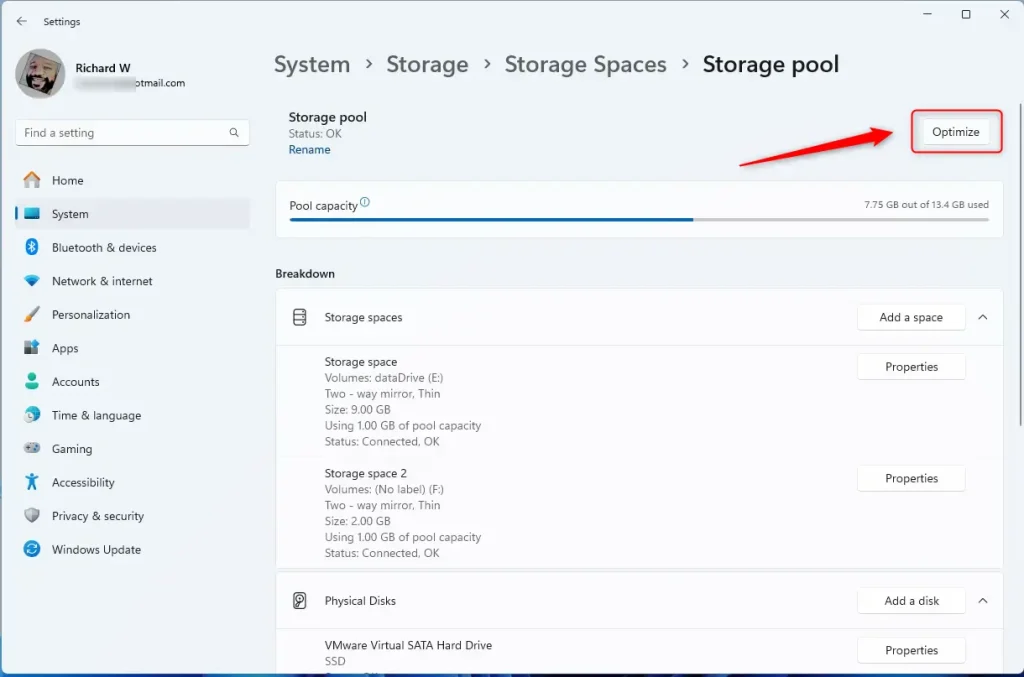
Storage pool optimize button - Wait for the process to finish. You can see the progress on the screen.
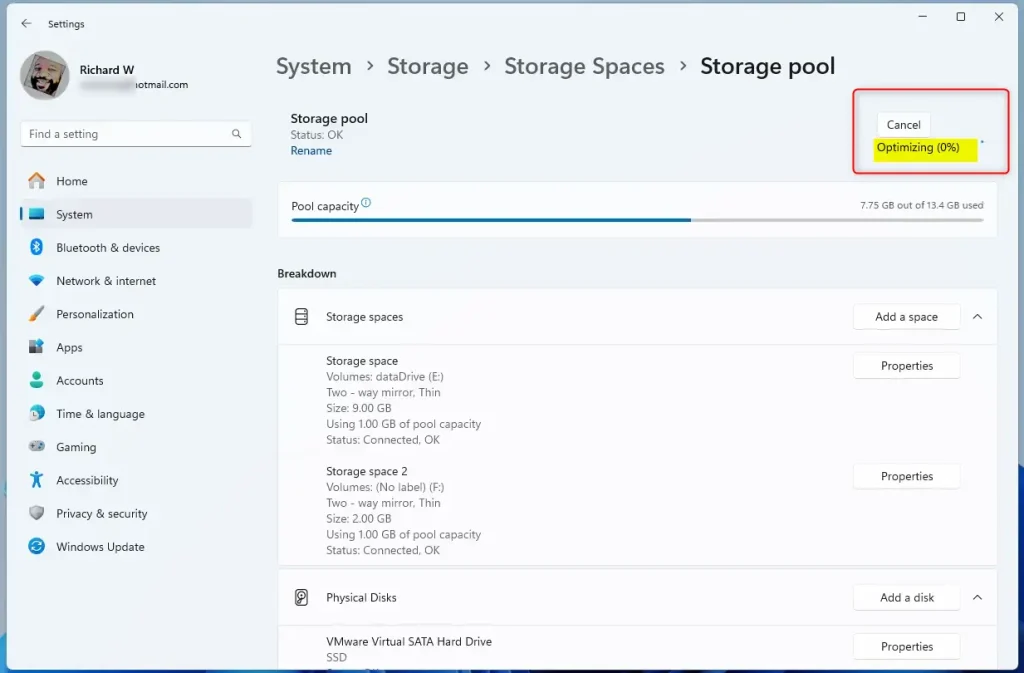
Storage pool optimize status - When done, just close the Settings app.
How to Optimize Storage Pools Using PowerShell
Optimizing your storage pools using PowerShell is a quick process for those who prefer command-line tools.
- Open PowerShell as Administrator: ⚠️ REQUIRES ADMIN PRIVILEGES Search for PowerShell in the Start menu, right-click it, and choose Run as administrator. Or use this guide to open PowerShell in Windows Terminal.
- See your Storage Pools: Type the command below and press Enter:PowerShell
Get-StoragePool - Optimize your Storage Pool: Use this command, replacing Storage pool name with the name of your pool (usually shown from the previous command):Code
Optimize-StoragePool -FriendlyName "Storage pool name" - For example, if your storage pool is named Storage pool, run:Code
Optimize-StoragePool -FriendlyName "Storage pool" - That’s it! PowerShell will start optimizing your pool.
Summary
Optimizing your storage pool makes your computer run better and helps keep your important files safer by balancing data across your drives.- Optimizing your Storage Pool helps your computer run better and keeps your data safer.
- You can optimize your pool using the easy Windows Settings or by using PowerShell commands.
- This process balances the data across all your drives, making the best use of your disk space.
- If you have questions, feel free to leave a comment below!
Is Optimize storage legit?
Is Optimize iPhone Storage safe? Yes, it's safe because your original photos and videos are stored securely in iCloud.
How to increase storage pool?
You can increase your storage pool by adding more drives, which expands your available storage space.
Was this guide helpful?

About the Author
Richard
Tech Writer, IT Professional
Richard, a writer for Geek Rewind, is a tech enthusiast who loves breaking down complex IT topics into simple, easy-to-understand ideas. With years of hands-on experience in system administration and enterprise IT operations, he’s developed a knack for offering practical tips and solutions. Richard aims to make technology more accessible and actionable. He's deeply committed to the Geek Rewind community, always ready to answer questions and engage in discussions.


No comments yet — be the first to share your thoughts!