How to Add Drive to Windows 11 Storage Pool
You add a drive to a Windows 11 Storage Pool using the Storage Spaces utility, allowing you to expand your virtual drive’s capacity and enhance data redundancy.
Storage Spaces in Windows 11 lets you combine multiple physical hard drives into a single, flexible storage pool, acting like a virtual drive for better data management.
This process is crucial for increasing the total storage space available to you or improving data protection by distributing your files across several disks.
For example, you might add a new 4TB drive to an existing Storage Pool that currently uses two 2TB drives to gain an additional 4TB of space.
You can easily manage your Storage Spaces from the Control Panel or the Settings app, ensuring your data is both safe and easily accessible.
Navigate to Settings > System > Storage > Advanced storage options > Storage Spaces. Select your pool, then click “Add a disk” under Physical Disk and choose the drive to add.
How to Add a Drive to a Storage Pool on 🪟 Windows 11
Adding a drive to a storage pool in Windows 11 is simple using Storage Spaces. You’ll open Settings and go to System, then Storage, and finally Advanced storage options to find your pool and add a new physical disk.
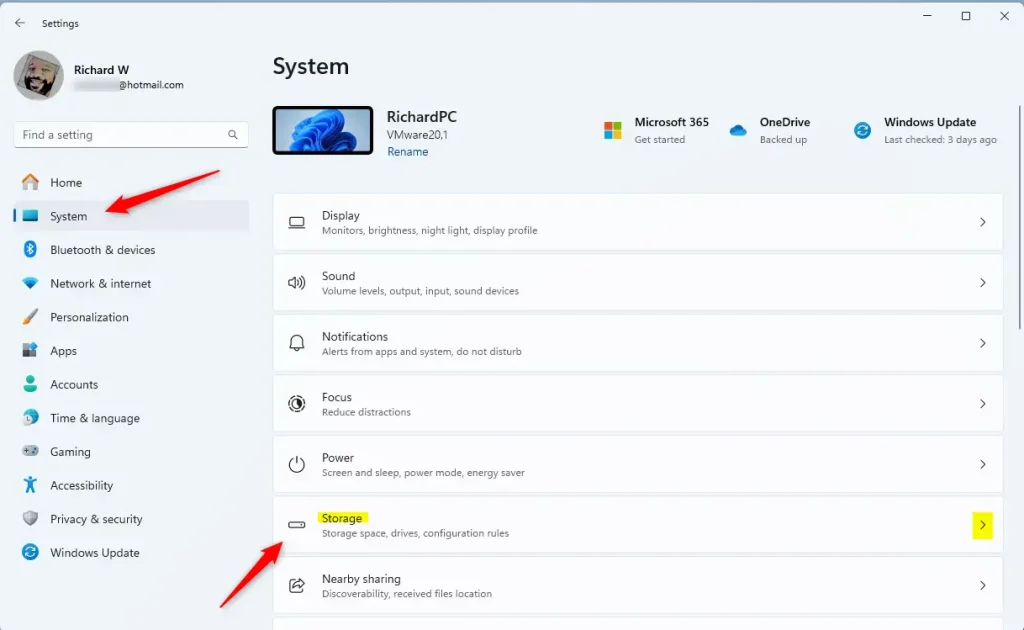
Click the Start menu and select Settings. Or press Windows key + I on your keyboard to open the Settings app.
Step 2: Go to System Settings
When the Settings app opens, click the System button on the left side.
Step 3: Find Storage Settings
Select the Storage tile on the right to expand it.
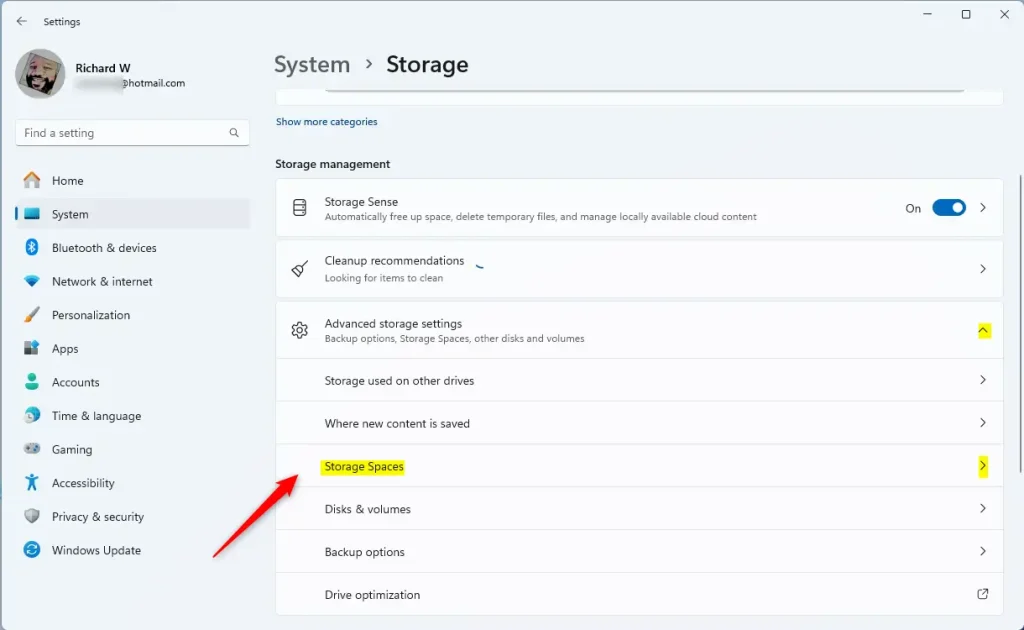
Step 4: Open Advanced Storage Settings
On the System → Storage settings page, find and expand the “Advanced storage options” tile. Then, click on the “Storage Spaces” tile to open it.
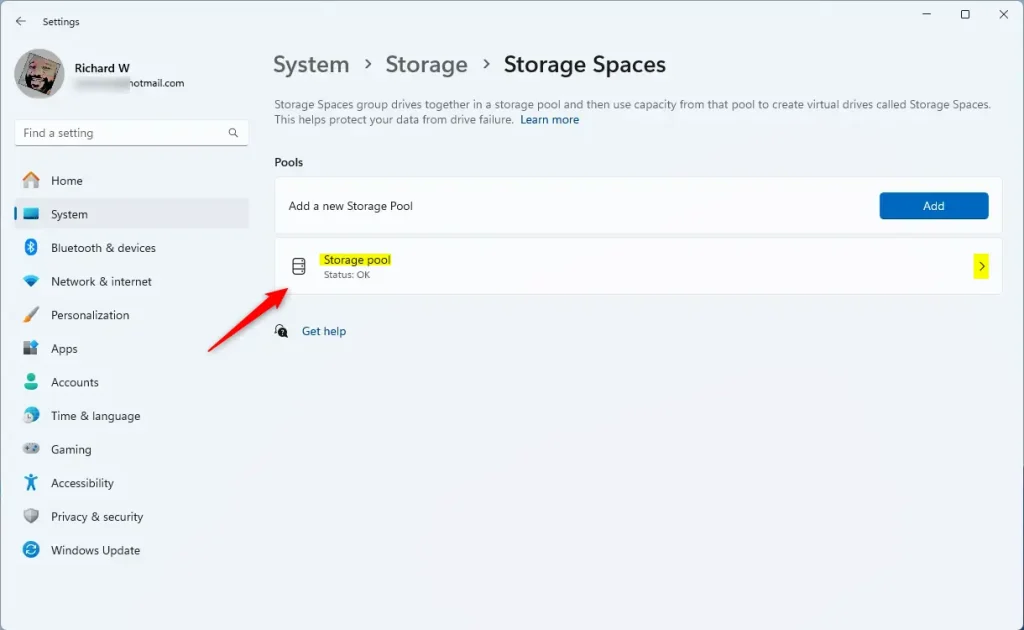
Step 5: Select Your Storage Pool
Select the “Storage pool” tile to expand it.
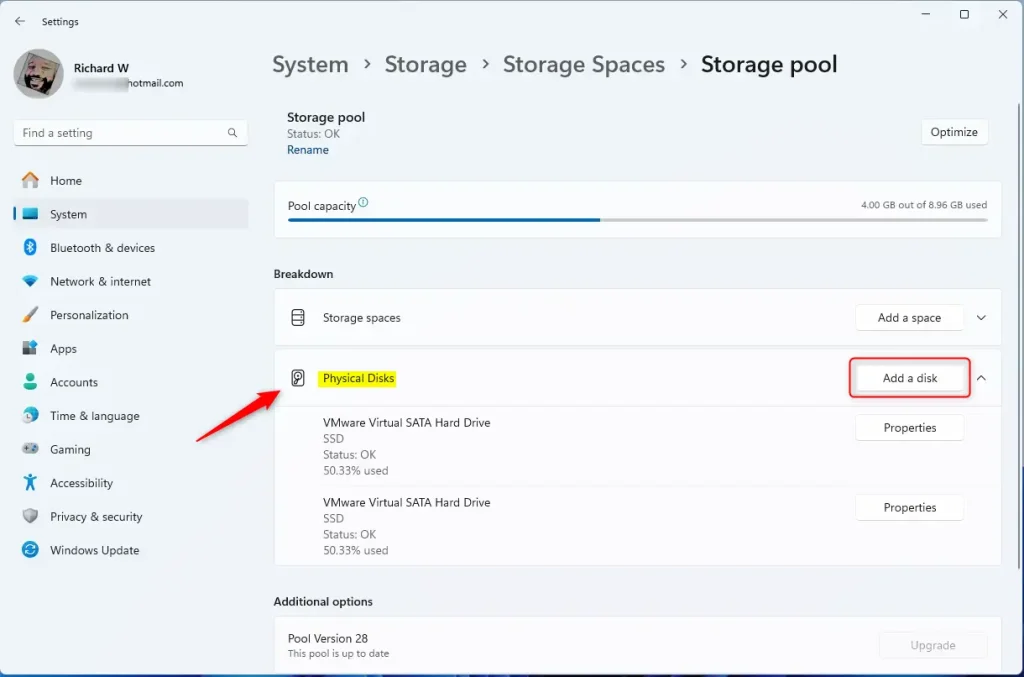
Step 6: Add a New Disk ⚙️ (Note: You’ll need administrator privileges for this step)
Now, select the “Physical disk” tile. You’ll then click the “Add a disk” button to add a new disk drive to your pool.
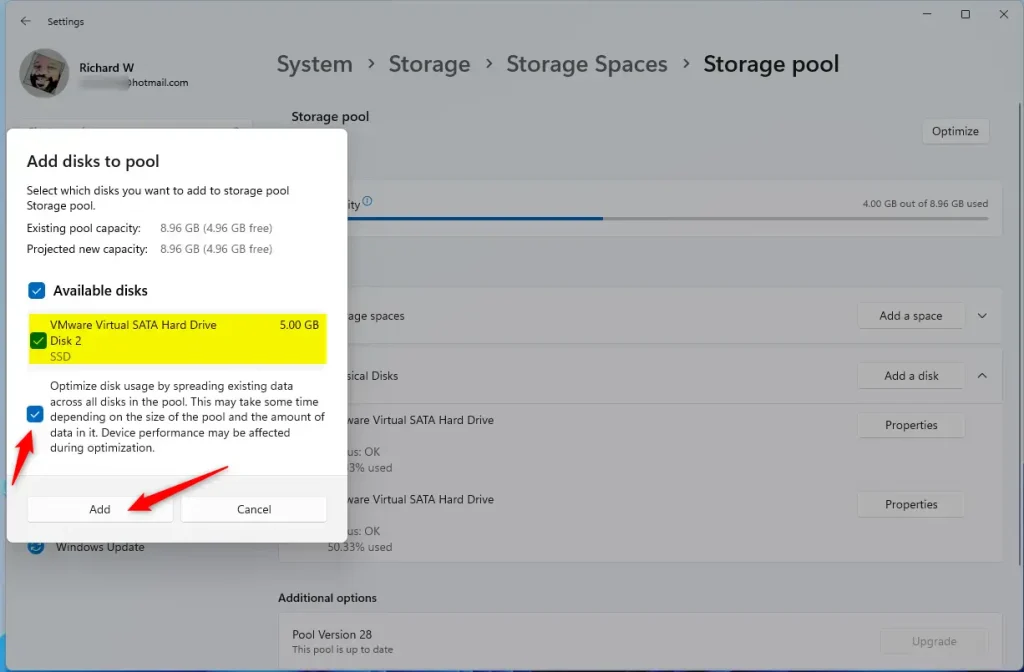
Step 7: Choose the Disk
Select the disk you want to add to the pool and click the Add button. The disk will be formatted and added to the pool automatically.
Step 8: Close Settings
You can close the Settings app when you are done.
That’s it! Your new drive is now part of your storage pool.
Summary
Adding a drive to your Windows 11 storage pool gives you more space, protects your data better, and can make things faster. It’s a straightforward process that helps you build a flexible storage setup.
Was this guide helpful?

About the Author
Richard
Tech Writer, IT Professional
Richard, a writer for Geek Rewind, is a tech enthusiast who loves breaking down complex IT topics into simple, easy-to-understand ideas. With years of hands-on experience in system administration and enterprise IT operations, he’s developed a knack for offering practical tips and solutions. Richard aims to make technology more accessible and actionable. He's deeply committed to the Geek Rewind community, always ready to answer questions and engage in discussions.


[…] Storage spaces, you can create a Storage pool, rename a Storage pool, add physical disk drives to a Storage pool, add a Storage space to an existing Storage pool, and […]
[…] is logical rather than physical, allowing you to configure the Storage Space to exceed the current capacity of the storage pool. You can then expand the pool capacity by adding more disks […]
[…] Storage spaces, you can create a Storage pool, rename it, add physical disk drives to it, add a Storage space to an existing Storage pool, optimize it, and […]
[…] If you don’t have enough physical space right now, you can always add more hard drives to your Storage Pool later to increase capacity. Learn how to add drives to your Storage Pool here. […]