How to Apply a Restore Point from Windows RE on Windows 11
You can apply a restore point from Windows Recovery Environment (Windows RE) on Windows 11 to fix system issues when Windows won’t start normally.
System Restore allows you to revert your computer’s system files, installed applications, and settings back to a previous state, effectively undoing recent changes that might have caused problems.
It’s a powerful tool for resolving issues like those caused by a faulty driver update or a problematic new application, without deleting your personal documents, photos, or music files.
This process uses the advanced troubleshooting options found within Windows RE, which is accessible even when your operating system fails to boot.
From the Windows RE “Choose an option” screen, select Troubleshoot, then Advanced options. Click System Restore, choose your account, and follow the wizard to select a restore point. Click Next, optionally scan for affected programs, then click Finish to begin.
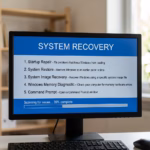
Getting into the Windows Recovery Environment (Windows RE)
The Windows Recovery Environment, or Windows RE, is a special startup mode that helps you fix and repair Windows when it won’t start normally.
Why do we need Windows RE?
You need Windows RE because if Windows itself isn’t starting, you can’t run System Restore from inside Windows. Windows RE is a separate environment that can access your system files to make changes.
What happens when you enter Windows RE?
When you enter Windows RE, you’ll see a screen with options to troubleshoot or repair your computer. It looks different from your normal Windows desktop.
Method 1If Your PC Boots, But Windows Doesn’t Load Correctly
- Go to Settings in Windows.
- Click on System.
- Scroll down and click on Recovery.
- Under “Recovery options,” find Advanced startup and click Restart now.
- Your PC will restart and show a screen with options.
Method 2If Your PC Won’t Boot at All
If your PC won’t boot at all, you can force it to start into Windows RE by interrupting the normal startup process three times in a row.
- Turn on your PC.
- As soon as you see the Windows logo or the spinning dots, press and hold the power button to turn it off.
- Repeat this process two more times.
- On the third time you turn your PC on, Windows should start into the “Automatic Repair” screen. From there, you can access Windows RE.
Applying a Restore Point from Windows RE
Once you’re in the Windows Recovery Environment, you can apply a restore point by first clicking Troubleshoot, then Advanced options, and finally System Restore.
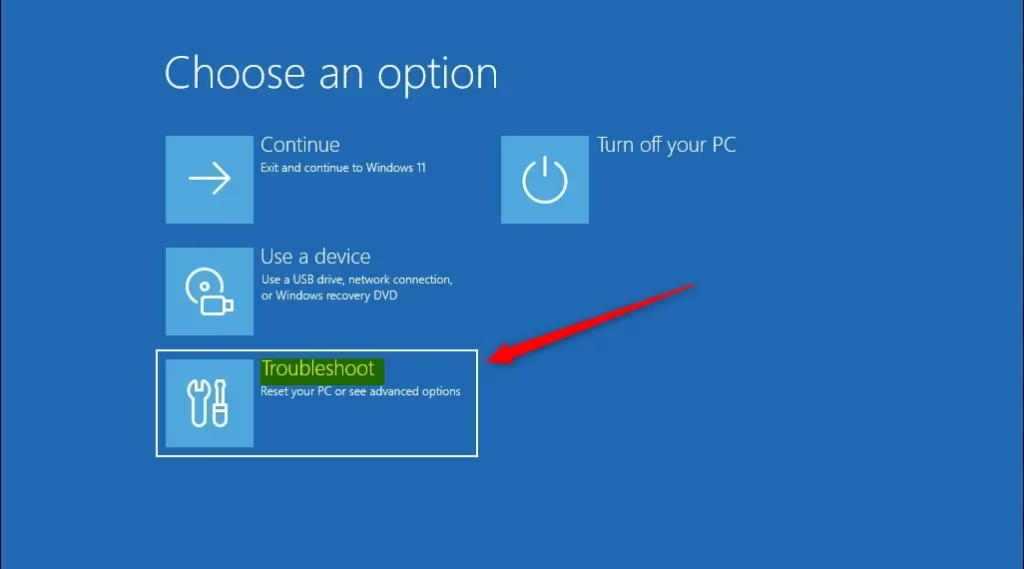
- On the “Choose an option” screen, click on Troubleshoot.
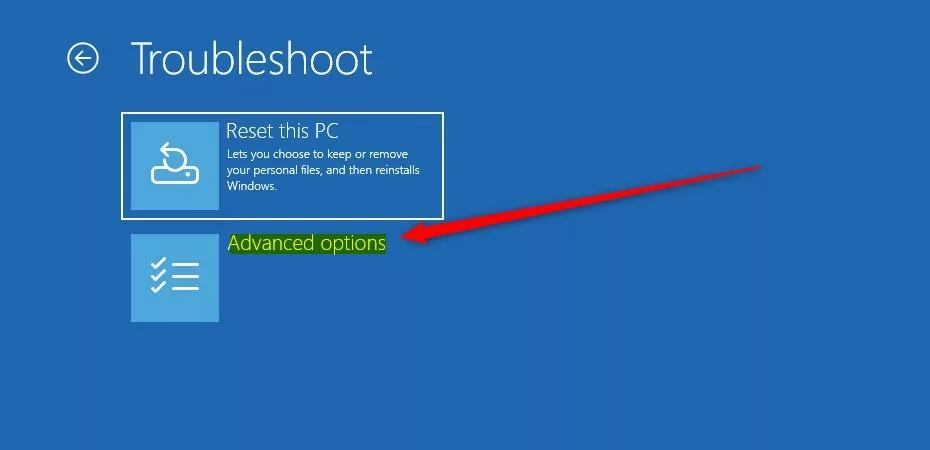
- On the “Troubleshoot” screen, click on Advanced options. This screen gives you access to more tools for fixing your computer.
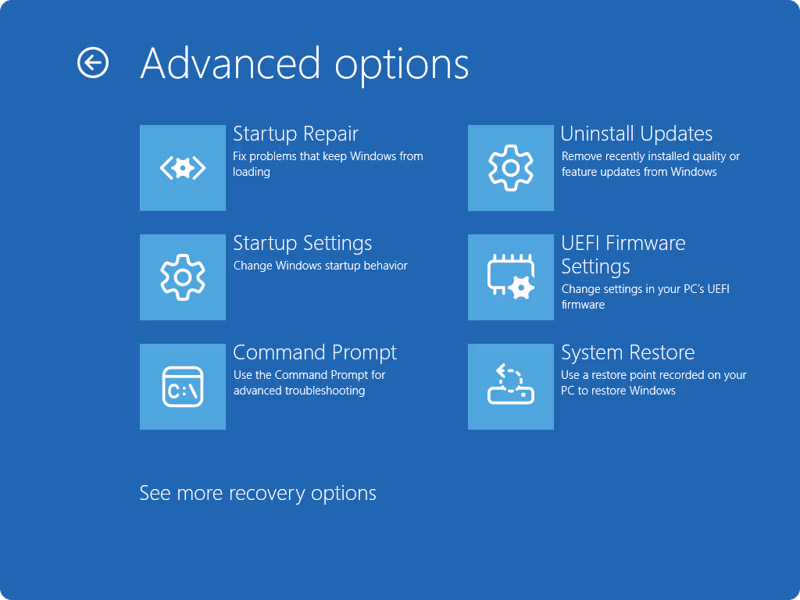
- On the “Advanced options” screen, click on System Restore. This is the option that lets you go back to an earlier time.
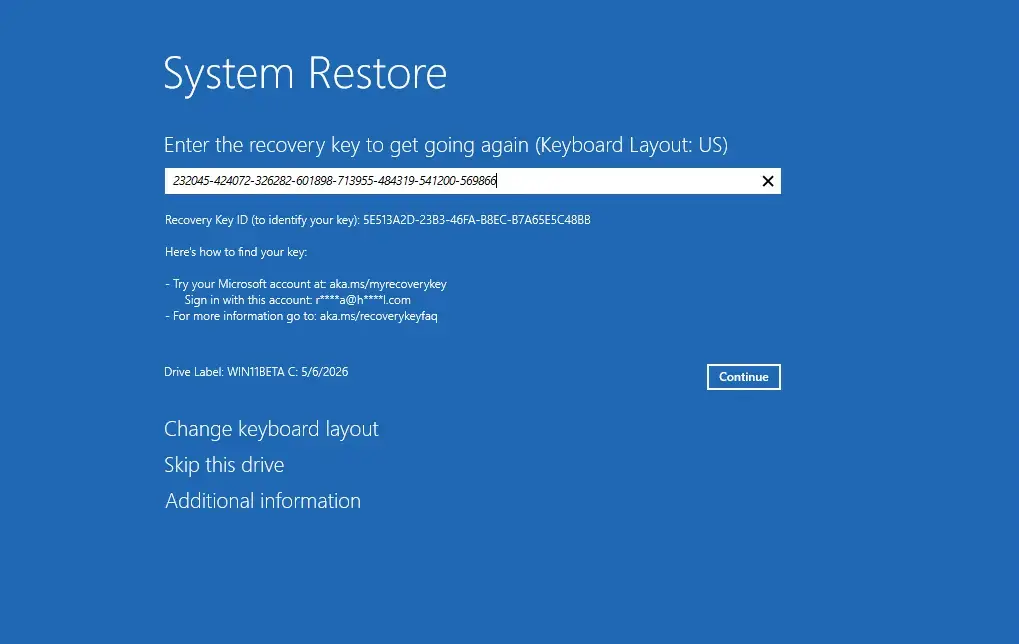
- Admin Access Required: Windows might ask you to choose an account. Pick your user account and type in your password if you have one. If you don’t have a password, just click “Continue.”
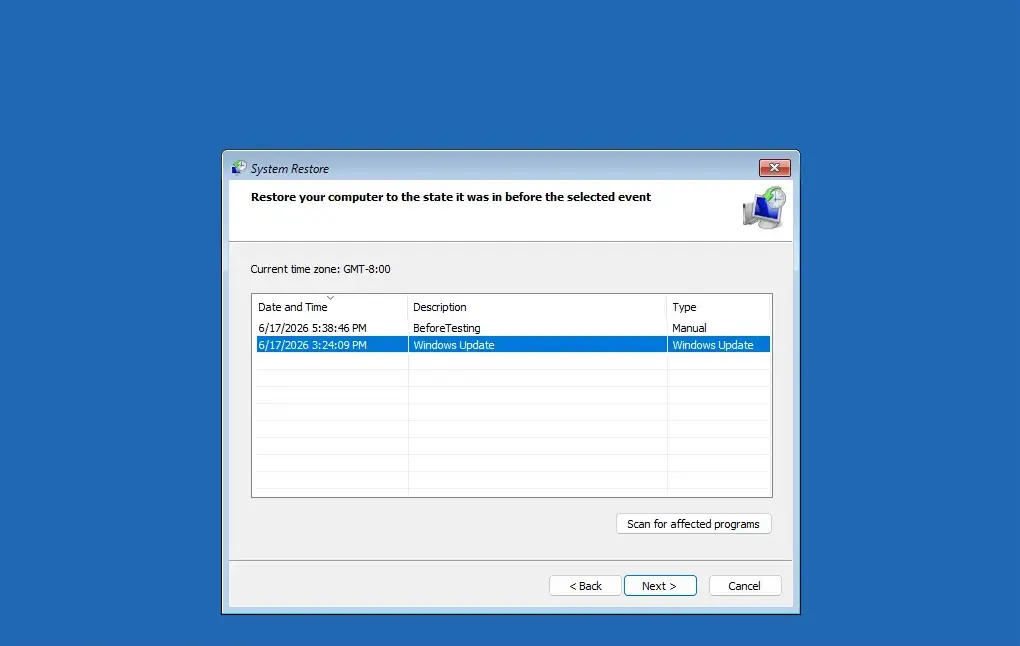
- You will see the System Restore wizard. Click Next.
- Windows will show you a list of restore points. These are like saved snapshots of your system.
- Optional but Recommended: Before you continue, click the Scan for affected programs button. This shows you which programs and drivers might be removed or restored. This helps you understand what will change.
- After checking the affected programs, click Next.
- On the final screen, look carefully at the restore point you chose. When you are sure, click Finish.
- Your computer will restart and begin applying the restore point. This might take 15 minutes or more than an hour. You’ll see a progress bar.
- When the restore is done, your computer will restart again. If it worked, Windows should start normally. Your system will be back to how it was at the time of the restore point. You can then try using your programs to see if the problem is fixed.

Reference:
https://support.microsoft.com/en-us/windows/system-restore-a5ae3ed9-07c4-fd56-45ee-096777ecd14e
Summary
You can use System Restore from the Windows Recovery Environment (Windows RE) to fix problems that stop your Windows 11 computer from starting normally by returning it to an earlier working state.
Was this guide helpful?

About the Author
Richard
Tech Writer, IT Professional
Richard, a writer for Geek Rewind, is a tech enthusiast who loves breaking down complex IT topics into simple, easy-to-understand ideas. With years of hands-on experience in system administration and enterprise IT operations, he’s developed a knack for offering practical tips and solutions. Richard aims to make technology more accessible and actionable. He's deeply committed to the Geek Rewind community, always ready to answer questions and engage in discussions.


No comments yet — be the first to share your thoughts!