
This article explains how to install Windows 11 on a VirtualBox guest machine.
VirtualBox is an open-source, cross-platform virtualization software that allows users to run multiple guest machines (virtual machines) simultaneously on a single host computer.
The most recent version of VirtualBox includes a template specifically for Windows 11. However, when you create a Windows 11 virtual machine (VM) and try to install Windows 11, you may encounter an error indicating that the machine does not meet the basic requirements for Windows 11.
To install Windows 11 on VirtualBox, you must modify some registry settings to bypass the checks for TPM, RAM, and Secure Boot requirements. We will guide you through these steps during the Windows 11 installation process.
Install Windows 11 VM on VirtualBox
Users can create a VM on VirtualBox to install Windows 11 using alternative installation methods. Below, we will show you how to do this with VirtualBox.
To install Windows 11 on VirtualBox, the first step is to properly configure the virtual machine to meet Microsoft requirements for running Windows 11.
Before starting, ensure that you have VirtualBox installed. If you have not done so already, please read the post below:
How to install VirtualBox on Windows 11
Next, create a Windows 11 virtual machine (VM). To learn how to do this, read the following post:
How to create a Windows 11 virtual machine
After completing the previous steps, access these settings to verify that they meet the requirements for Windows 11.
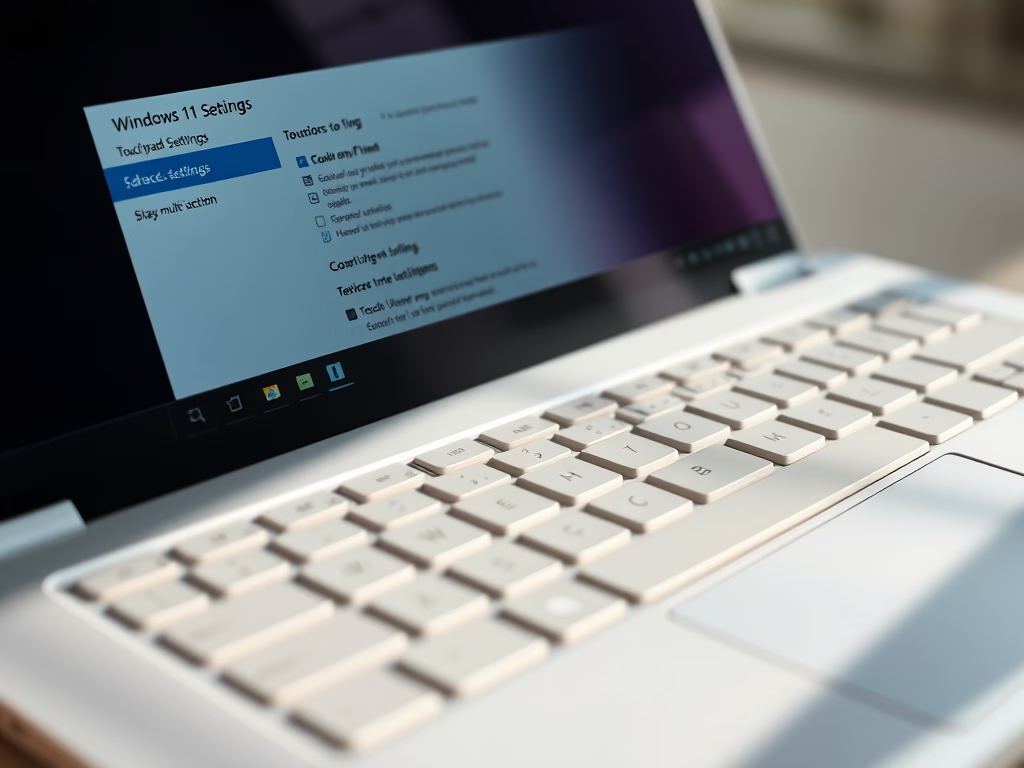
Open VirtualBox and go to Settings > System. Under the Motherboard tab, make sure 4096 MB or 4 GB of RAM is set up.

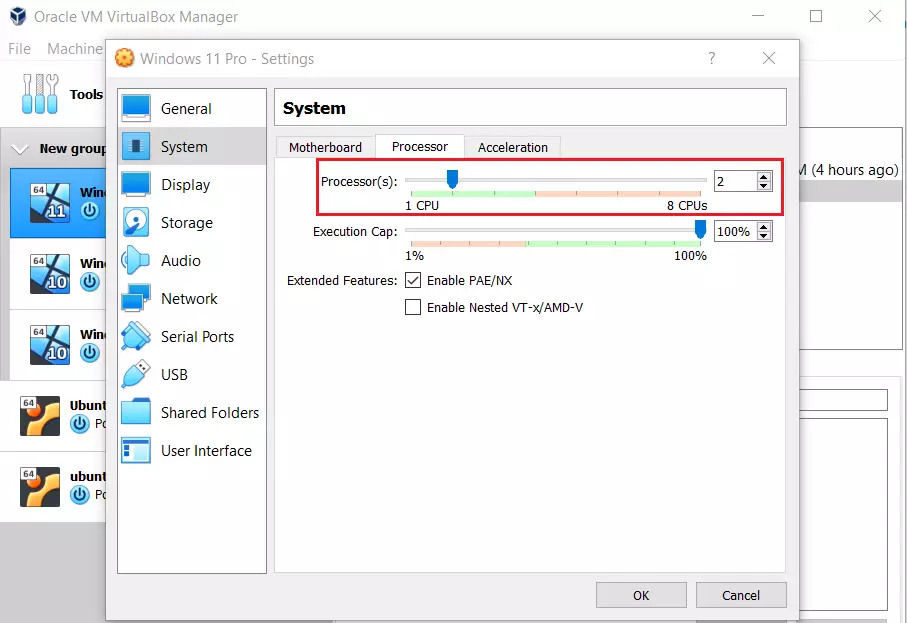
In the same window, under the Processor tab, ensure that the option for ‘2’ is selected.
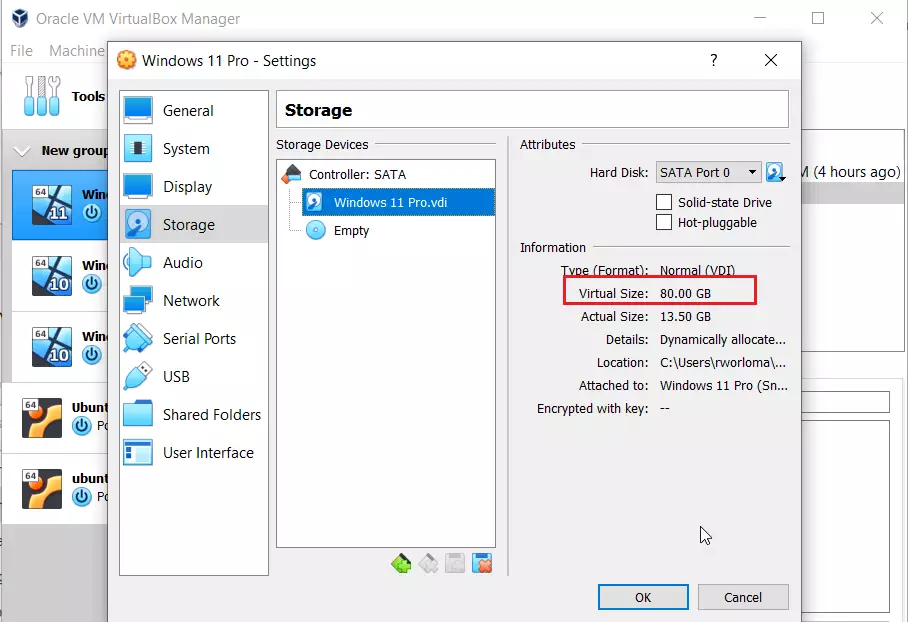
Next, select the Storage window and set it to a minimum of 64 GB.
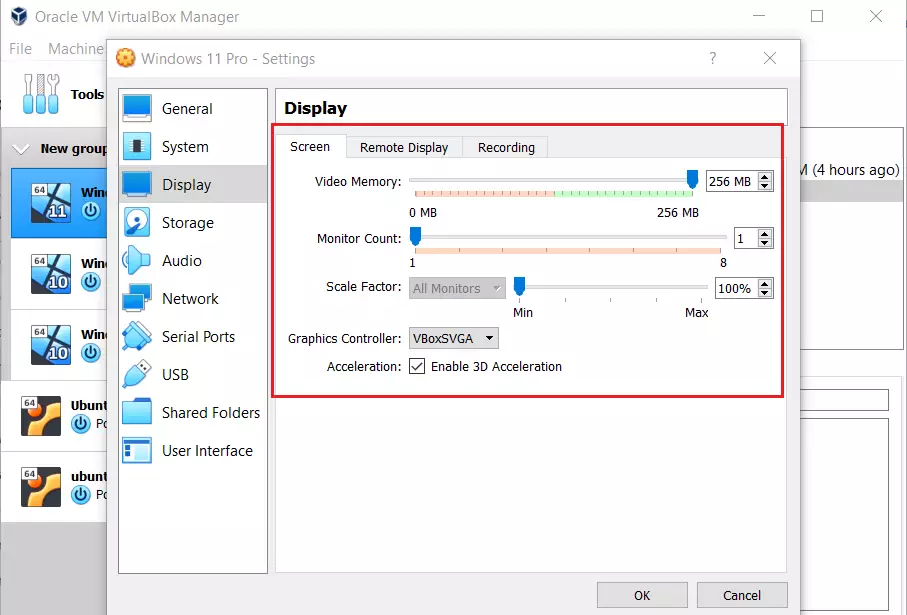
On the Display window, verify that the Video Memory is 256 MB and the Graphics Controller is VBoxSVGA, with 3D Acceleration enabled.
After validating everything, you can continue installing Windows 11 on the virtual machine.
Set up Windows 11
After validating that the VM meets Windows requirements, select the Windows 11 ISO file or insert a disc containing Windows 11.
Navigate to Settings > Storage in the VirtualBox menu and select the Empty drive. Next, click the browse button to find the ISO file or DVD containing Windows 11.
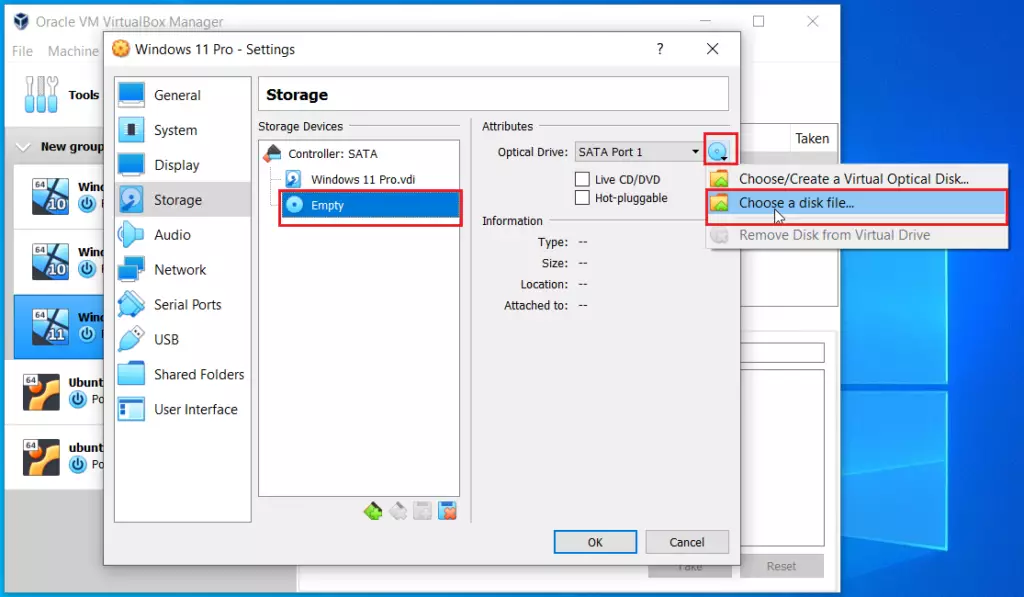
Once mounted, you should see the Windows 11 ISO attached to the CD/DVD drive. Click the OK button to return to the VM center.

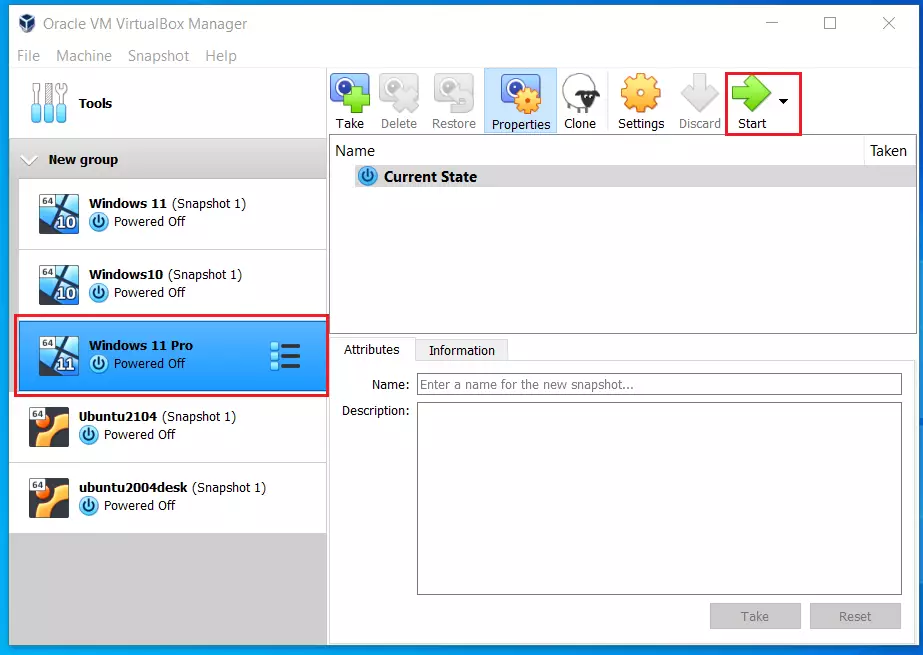
Next, click the Start button to start the Windows 11 VM.
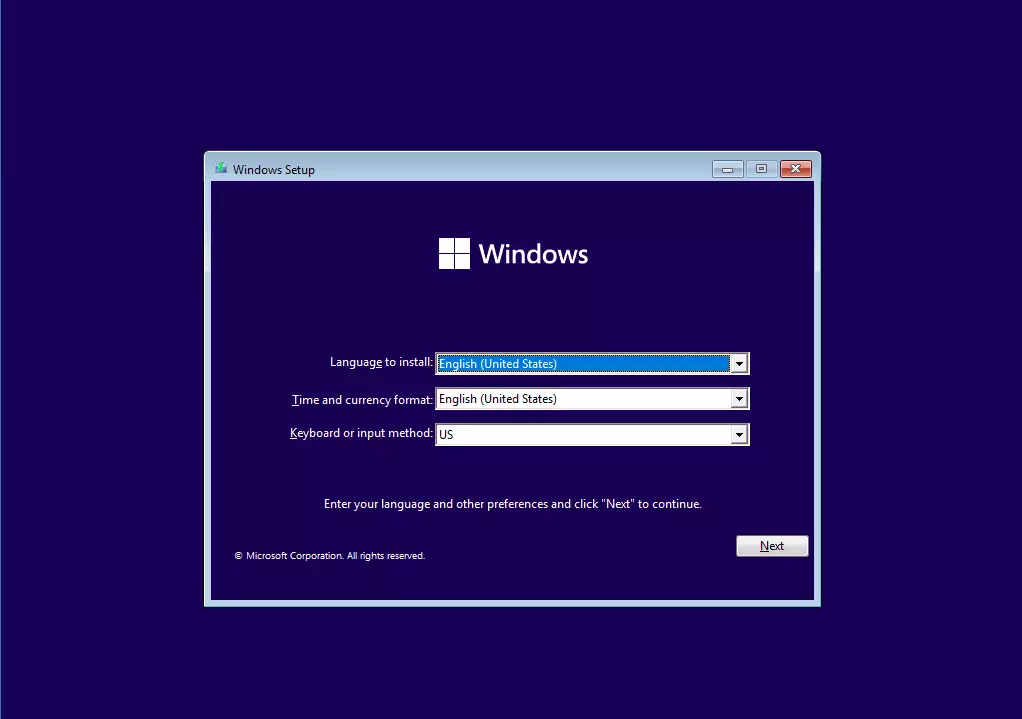
When the machine starts, you will be prompted to press any key on your keyboard to boot into Windows 11.
On the Windows Setup window, select the language to install, time and currency format, keyboard input method, and click Next.
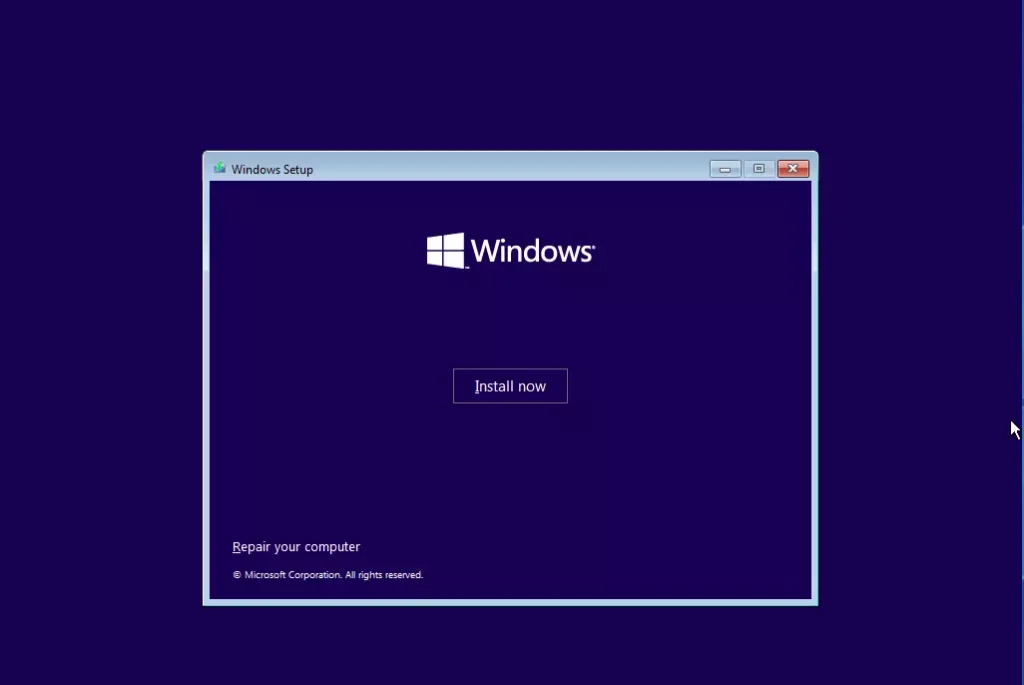
Next, click on the Install Now screen, and then press SHIFT + F10 on your keyboard to open a command prompt.
At this command prompt, type regedit and press enter to launch the Windows Registry Editor.

HKEY_LOCAL_MACHINE\SYSTEM\Setup
There, right-click on the Setup key and select New => Key. Then type in the new key value LabConfig and press Enter.
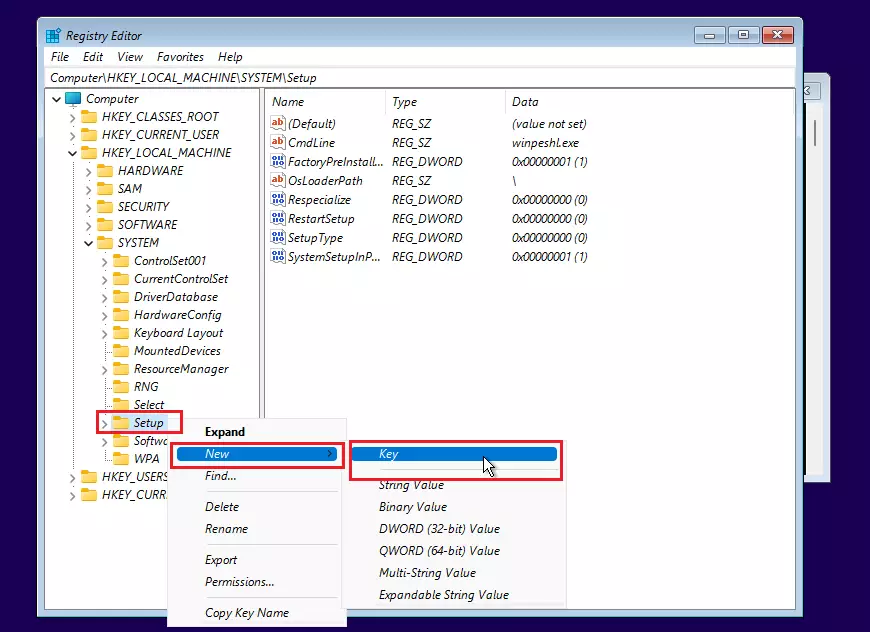
After creating the LabConfig Key, right-click on the LabConfig Key and select New => DWORD (32-bit). Then, name the BypassTPMCheck and its data to 1.
Follow the same steps above for BypassTPMCheck and create and DWORD (32-bit) value name BypassRAMCheck and set its data to 1. Next, create another DWORD (32-bit) value named BypassSecureBootCheck and set its data to 1.

With those three values created under LabConfig, close the regedit windows and exit the Command Prompt to return to the setup windows.
Click the Install now button to start the installation.
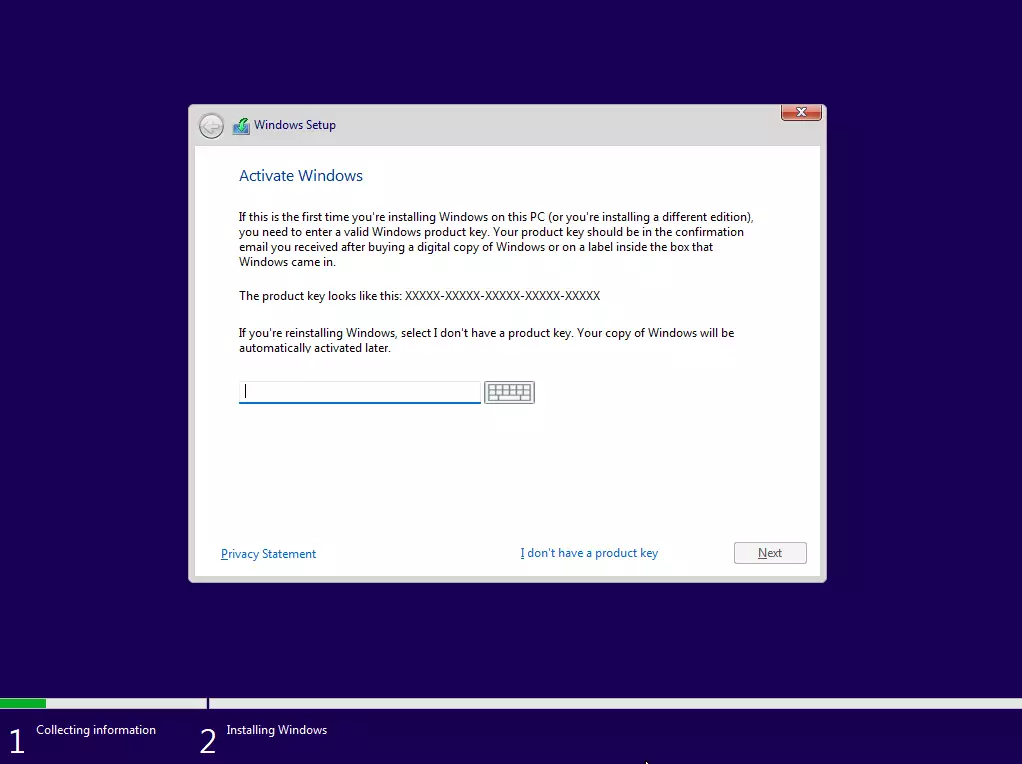
Windows will now continue and prompt for a product key to activate Windows. If you have it, type it in the field or click the link that you don’t have a product key to continue with the installation.
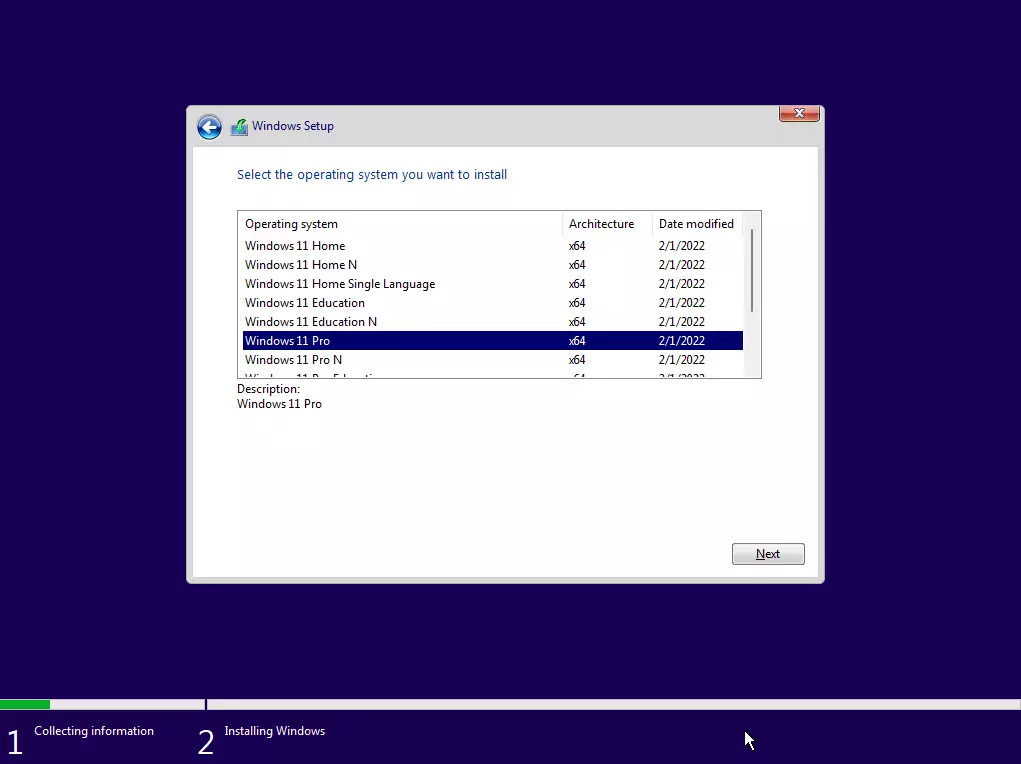
Next, select the version of Windows 11 you wish to install and click Next.
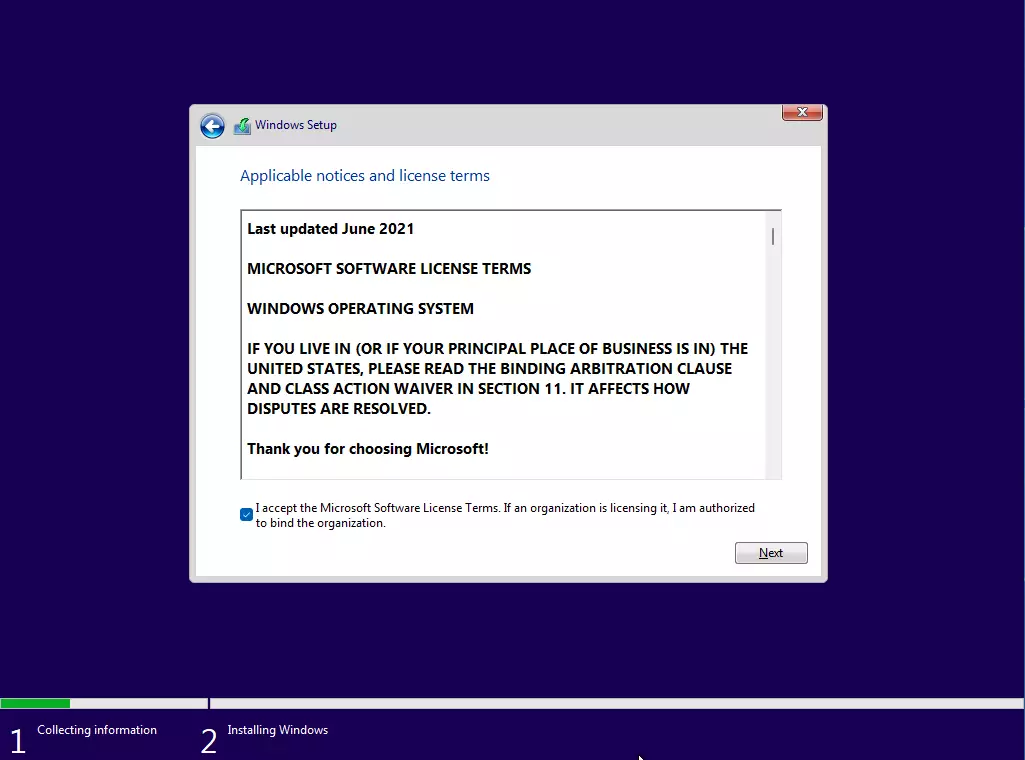
After that, accept the end user license agreement and continue.
Next, select which type of installation you want. You can upgrade the previous Windows version or install a new copy. For this tutorial, we’re installing a new Windows 11.

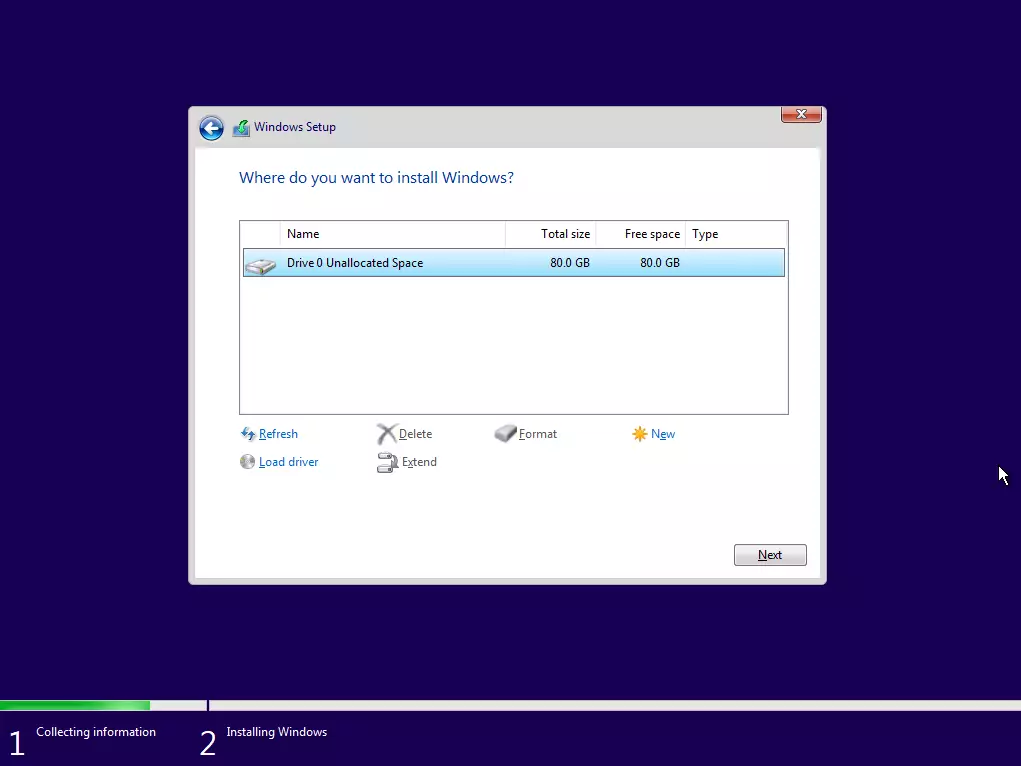
Next, select the Unallocated space and click Next.
Then choose the country or region you are currently located.

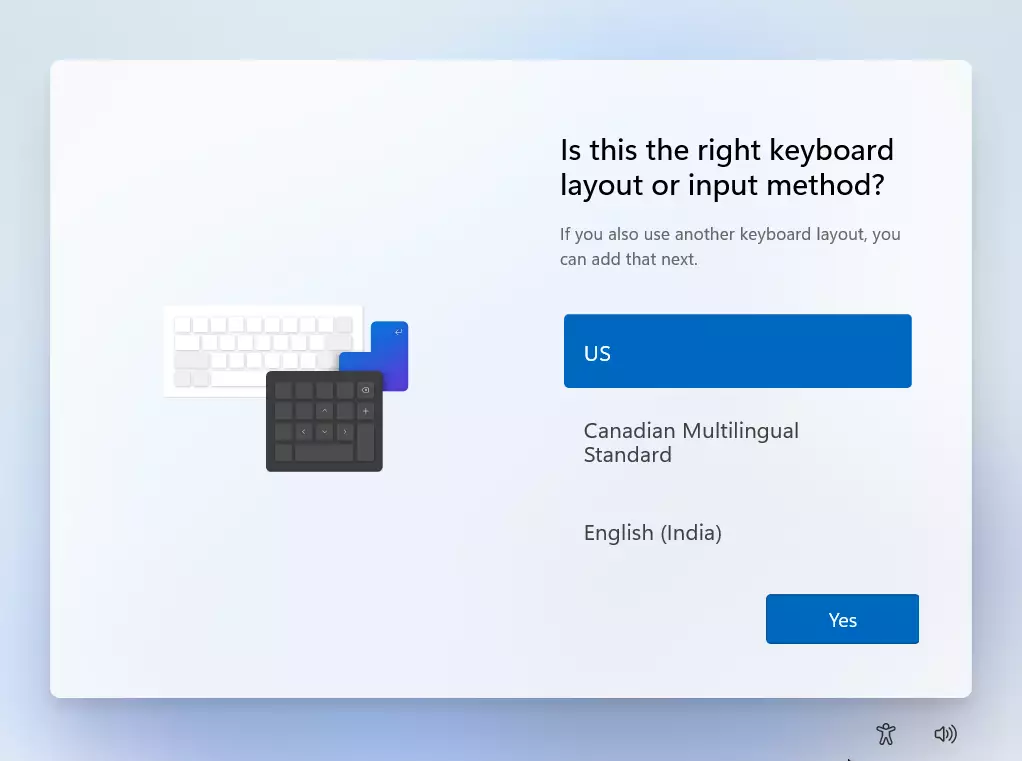
Next, choose the keyboard layout or input method for your selected location.
Next, type in the name of your computer and click Next.

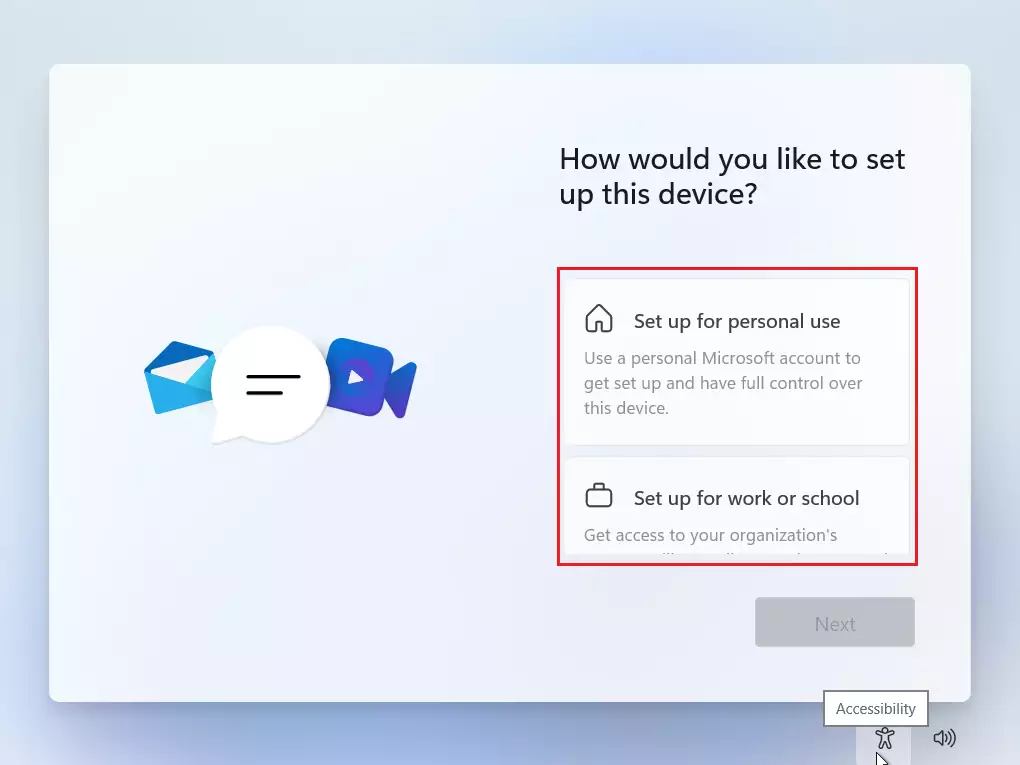
After that, choose where and how you will use the Windows device, whether for personal use or set up for work or school.
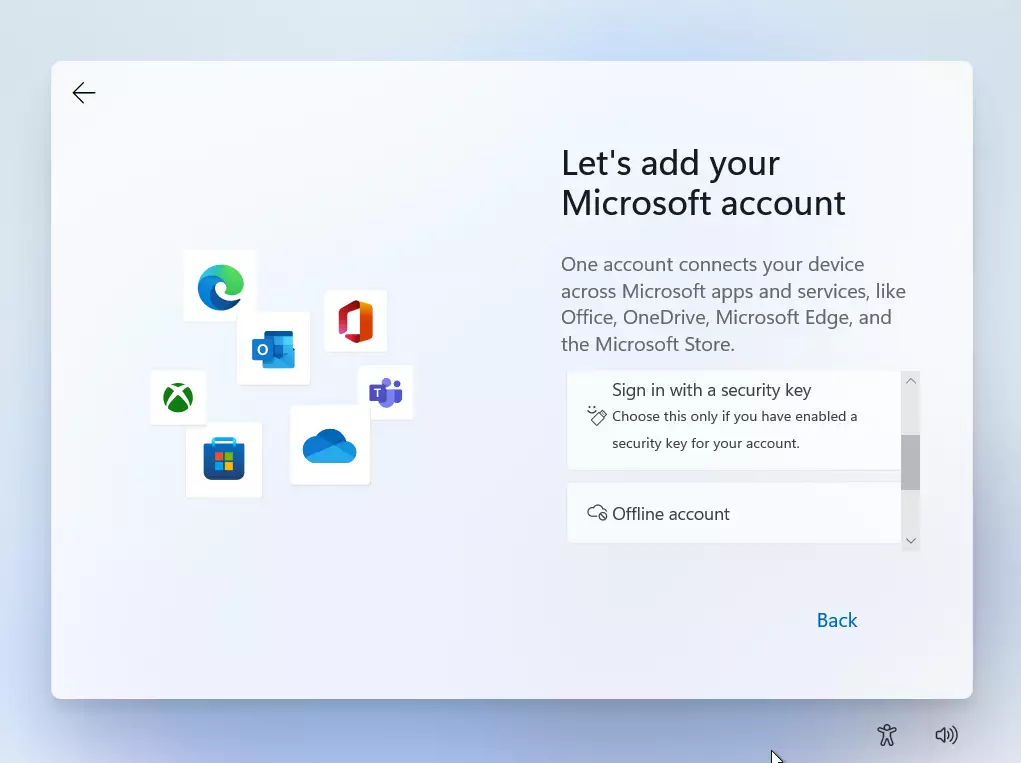
Next, choose Offline account if you want to set up a local account on the computer without a Microsoft online account.
Next, type and confirm your password, including security questions.

When you’re done, Windows will reboot several times and complete the setup. After that, you should be able to log in with the password created above.

That should do it!
Conclusion:
- Installing Windows 11 on a VirtualBox virtual machine requires some non-standard steps but can be accomplished effectively following the outlined process.
- Ensure VirtualBox is appropriately configured to meet minimum system requirements before installation.
- Utilize registry modifications to bypass Windows 11’s TPM, RAM, and Secure Boot checks for a successful installation.
- Follow the installation steps carefully, including selecting appropriate options for localization, account setup, and security.
- Once completed, users will have a functional Windows 11 environment within VirtualBox for testing or development purposes.


Leave a Reply