How to Install VMware Workstation Pro on Ubuntu Linux


VMware Workstation Pro lets you run other operating systems, such as Windows, in a window on your Ubuntu desktop without restarting your PC. It creates isolated virtual machines, so you can run several operating systems at the same time on one computer.
This guide installs version 17.5 on Ubuntu. You download the official installer file and run it from the terminal with a few commands. Workstation Pro has been a paid product, and the original trial runs for 30 days. Broadcom, which now owns VMware, has changed its licensing terms more than once, so check its site for the current terms before you buy anything. Either way, it is a reliable way to test other operating systems and apps from your Linux desktop.
Install VMware Workstation Pro on Ubuntu by first running sudo apt install wget gcc build-essential linux-headers-generic linux-headers-$(uname -r) in a terminal, then downloading the Linux bundle from the VMware site and running sudo chmod +x on it followed by sudo./VMware-Workstation-*.bundle. The installer needs no wizard, and you launch the app from Activities.
How to install packages on Ubuntu Linux
Without them the installation, or the first launch, can fail with a module build error.
Install the supporting packages and build dependencies like this:
- Press Ctrl+Alt+T to open a terminal window.
- Run the commands below one after another. Use an account that can run sudo.
- Enter your password if you are asked for it. Nothing appears on screen while you type it, which is normal. Press Enter when you finish.
- Wait for each command to finish and return to the prompt before you run the next one. You need an internet connection, because the packages download from the Ubuntu repositories.
sudo apt update
sudo apt install wget gcc build-essential linux-headers-generic linux-headers-$(uname -r)
How to download and install VMware Pro on Ubuntu Linux
Next, get the installer. You can download the official Linux installer from the Broadcom support portal in your browser, or fetch the installation bundle directly from the terminal. Once you have the file, make it executable and run it from the terminal. That completes the installation.
To download through your browser, open the download page here: https://www.vmware.com/go/getworkstation-linux. Pick the Linux version of Workstation Pro and save the file. By default it goes into your Downloads folder. Broadcom’s portal may ask you to sign in or create a free account before it lets you download.
If you prefer the terminal, run the commands below instead. They download the installer bundle directly, so you can skip the browser.
Newer releases exist, including the 17.5 version mentioned at the start. If you use a different version, make sure the file name in the later commands matches the file you actually downloaded.
cd /tmp
wget https://download3.vmware.com/software/wkst/file/VMware-Workstation-Full-17.5.0-22583795.x86_64.bundle
Once the download finishes, make the package executable and then install VMware Workstation Pro:
- Open a terminal in the folder that contains the downloaded file, or move into that folder first.
- Run the command below that makes the bundle executable. Without this step, Ubuntu refuses to run the file.
- Run the install command. It needs administrator rights, so enter your password if you are asked.
sudo chmod +x VMware-Workstation-*.bundle
sudo ./VMware-Workstation-*.bundle
On Ubuntu, the installation runs non-interactively. You do not have to click through an installation wizard here. The terminal prints progress and finishes on its own.
After a brief moment, the installation should end with a success message similar to the one below. When you see it, the installation is done. If you see an error instead, check that every package from the first step installed correctly, then run the installer again.
Extracting VMware Installer…done.
Installing VMware Workstation 17.5.0
    Configuring…
[######################################################################] 100%
Installation was successful.
Now start VMware Workstation Pro from the Activities overview:
- Click Activities at the top left of the screen.
- Click the Show Applications button at the bottom left. The grid of installed apps appears.
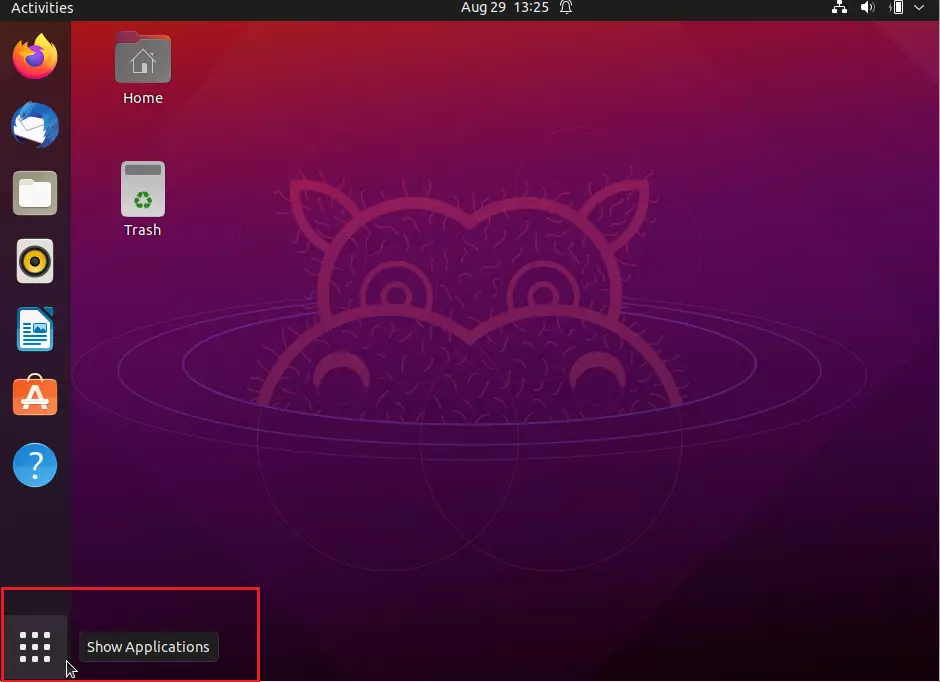
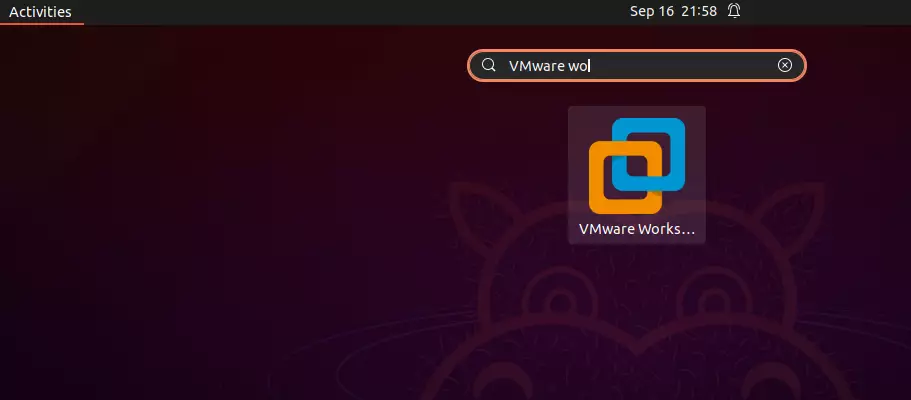
In the app grid, search for VMware Workstation and click it. If it does not appear right away, type the name into the search box at the top.
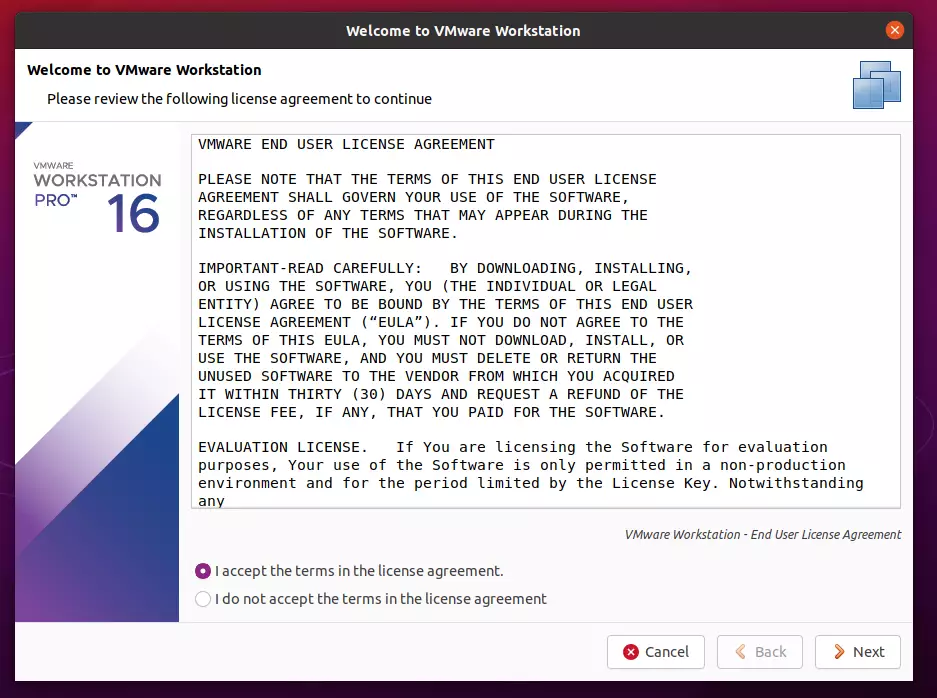
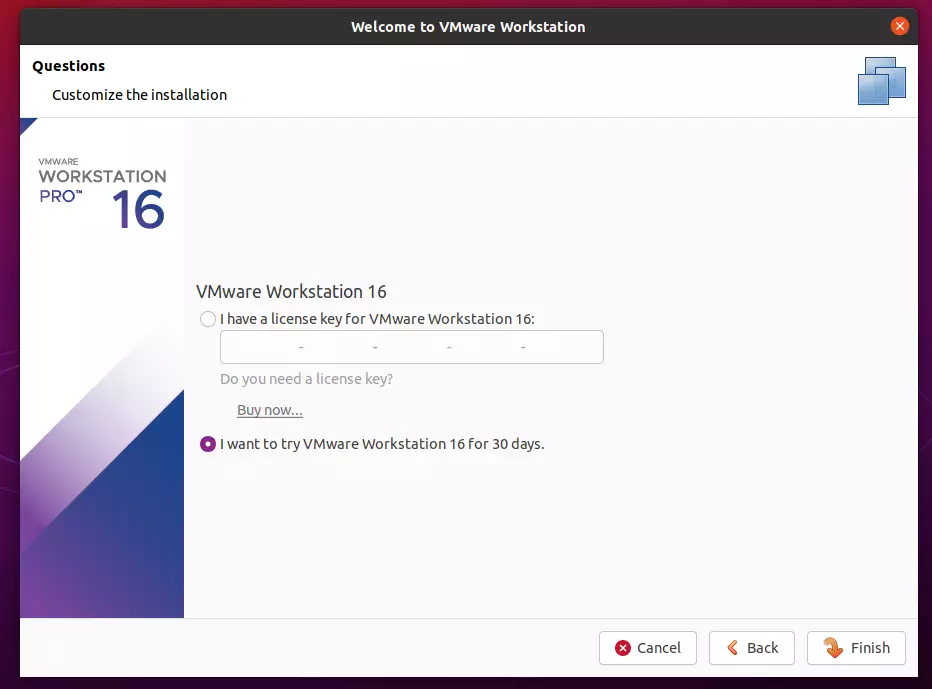
The first time you open the app, its Welcome wizard starts. Read the license terms, accept them, and continue. You cannot go further without accepting.
On first launch, Workstation may also ask for administrator rights and compile its kernel modules. This can take a minute. If your PC uses Secure Boot, Ubuntu may block these modules until they are signed or Secure Boot is turned off in the firmware settings. If that happens, you will see a module error rather than the wizard.
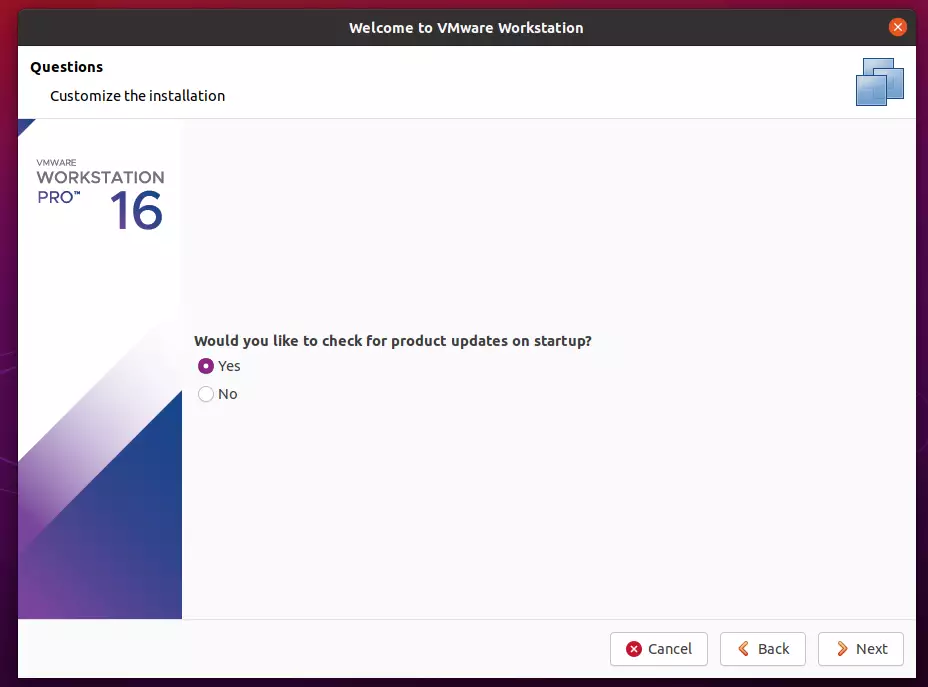
On the next page, choose whether Workstation should check for product updates when it starts, then continue. Accepting is the safer choice, because you get fixes without having to look for them.
On the license key page, you can skip the key and use the 30-day trial period. When the trial ends, you will need to buy a license to keep using Workstation Pro. If you already have a license key, enter it here instead.
Finally, click Install to apply your choices and finish setup. The wizard may ask for your password one more time.
When the wizard finishes, the main VMware Workstation window opens on its Home tab. From here you can create your first virtual machine or open an existing one. You do not need to restart Ubuntu.
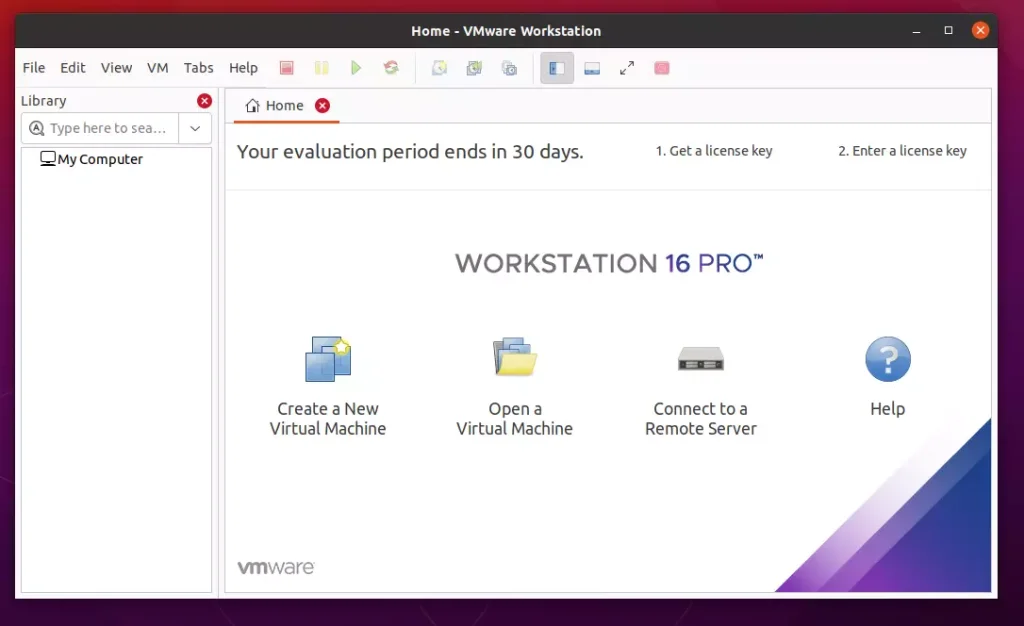
That should do it! Workstation Pro is now installed and ready to use.
Conclusion:
This guide explained how to install and start using VMware Workstation Pro on Ubuntu Linux. You installed the build dependencies, downloaded and ran the installer, and finished the first-run wizard. Readers can use the comment form below to report errors or add information.
Have a question about this guide?
Answered by AI from this guide. Good questions may be added to this page — please don't include personal details.
Did this guide fix your problem?

About the Author
Richard
Tech Writer, IT Professional
Richard is a writer at Geek Rewind who turns complex IT tasks into clear, step-by-step guides. He draws on years of hands-on experience in system administration and enterprise IT operations, focusing on Windows, Linux and WordPress: the problems people actually run into, and the fixes that work. His server and WordPress guides come from systems he runs himself. Richard builds and maintains the platform behind Geek Rewind, from its Ubuntu servers and Nginx configuration to its custom WordPress plugins. Many new tutorials start with readers' questions, and he's always glad to answer them in the comments.
… liked this!
I gotta get a laptop