How to Install SilverStripe with Nginx on Ubuntu 24.04


Install PHP-FPM on Ubuntu Linux
You install PHP-FPM and the required PHP extensions on Ubuntu by running the package installation command for your specific PHP version. PHP-FPM (FastCGI Process Manager) handles the dynamic code execution that SilverStripe needs to function properly on your server. Run sudo apt install php-fpm along with the necessary modules like curl, xml, and mbstring. Make sure to check that the PHP-FPM service is running after the installation finishes.
SilverStripe is built using PHP, a programming language for websites. To make SilverStripe work properly on your Ubuntu system, you need to install PHP-FPM, which helps manage PHP.
Run the commands below to install PHP-FPM.
sudo apt install php-fpm php-intl php-mysql php-curl php-cli php-zip php-xml php-gd php-common php-mbstring php-xmlrpc php-json php-sqlite3 php-soap php-zip
Additional help on installing PHP
Download SilverStripe files
You download the SilverStripe website files to your server by using Composer, a package manager for PHP. Before grabbing the project files, you must install Composer, Curl, and Git on your system. Run the installer script to set up Composer globally so you can use it from any folder. Then, use the create-project command to download the latest stable version of SilverStripe into your web root directory.
It's time to get the SilverStripe website files onto your Ubuntu server. We'll download the latest version, usually by using a tool called Composer.
You may want to use the GitHub repository to get SilverStripe's latest release. To get started, install Composer, Curl, and other dependencies.
sudo apt install curl git
curl -sS https://getcomposer.org/installer | sudo php -- --install-dir=/usr/local/bin --filename=composer
After installing curl and Composer above, change the directory to the Nginx root directory and download the SilverStripe packages from Github.
cd /var/www/
sudo composer create-project silverstripe/installer silverstripe
Now create a .env file in your project root (not the public/ folder).
If you used silverstripe/installer to create your project, you can rename the .env.example file to .env. It includes the minimum required environment variables.
sudo nano /var/www/silverstripe/.env
Replace the placeholders as required:
SS_DATABASE_CLASS="MySQLDatabase"
SS_DATABASE_NAME="silverstripedb"
SS_DATABASE_SERVER="localhost"
SS_DATABASE_USERNAME="silverstripedbuser"
SS_DATABASE_PASSWORD="type_database_password"
SS_DEFAULT_ADMIN_USERNAME="superadmin"
SS_DEFAULT_ADMIN_PASSWORD="superadminPassword"
SS_ENVIRONMENT_TYPE="live"
You can build your database and make Nginx the owner of the SilverStripe installation directory by running the `sudo chown -R www-data:www-data /var/www/silverstripe` command.
sudo /var/www/silverstripe/vendor/bin/sake dev/build
sudo chown -R www-data:www-data /var/www/silverstripe
Once you have completed all the above steps, continue configuring the Nginx web server below to serve the SilverStripe content.
Run the commands below to create a Nginx virtual host file for SilverStripe.
sudo nano /etc/nginx/sites-available/silverstripe.conf
Then, copy and paste the content block below into the Nginx server block.
server {
    listen 80;
    listen [::]:80;
    root /var/www/silverstripe/public;
    index  index.php;
    server_name  silverstripe.example.com;


    location / {
           try_files $uri /index.php?$query_string;
        }


    location ~ .php$ {
         include snippets/fastcgi-php.conf;
         fastcgi_pass unix:/var/run/php/php8.3-fpm.sock;
         fastcgi_param SCRIPT_FILENAME $document_root$fastcgi_script_name;
         include fastcgi_params;
    }
}
Save the file.
To activate the SilverStripe website configuration and make Nginx serve your site, run the commands `sudo a2ensite silverstripe.conf` to enable the virtual host file and then `sudo systemctl restart nginx` to restart the Nginx web server.
sudo ln -s /etc/nginx/sites-available/silverstripe.conf /etc/nginx/sites-enabled/
sudo systemctl restart nginx.service
Setup Let's Encrypt SSL/TLS for SilverStripe
You secure your SilverStripe website with an SSL/TLS certificate by installing Certbot and configuring it for your Nginx server. Let's Encrypt provides free encryption certificates that protect user data passing between visitors and your server. Install the Certbot package using your terminal and run the Nginx plugin command to automatically update your site configuration. Finally, test the automatic renewal process to ensure your security certificate does not expire unexpectedly.
To make your SilverStripe website secure and trustworthy, you should add an SSL/TLS certificate using Let's Encrypt. This works with your Nginx web server on Ubuntu.
Please read the post below for additional resources on installing and creating Let's Encrypt SSL certificates for Nginx.
How to set up Let's Encrypt SSL certificate for Nginx on Ubuntu Linux
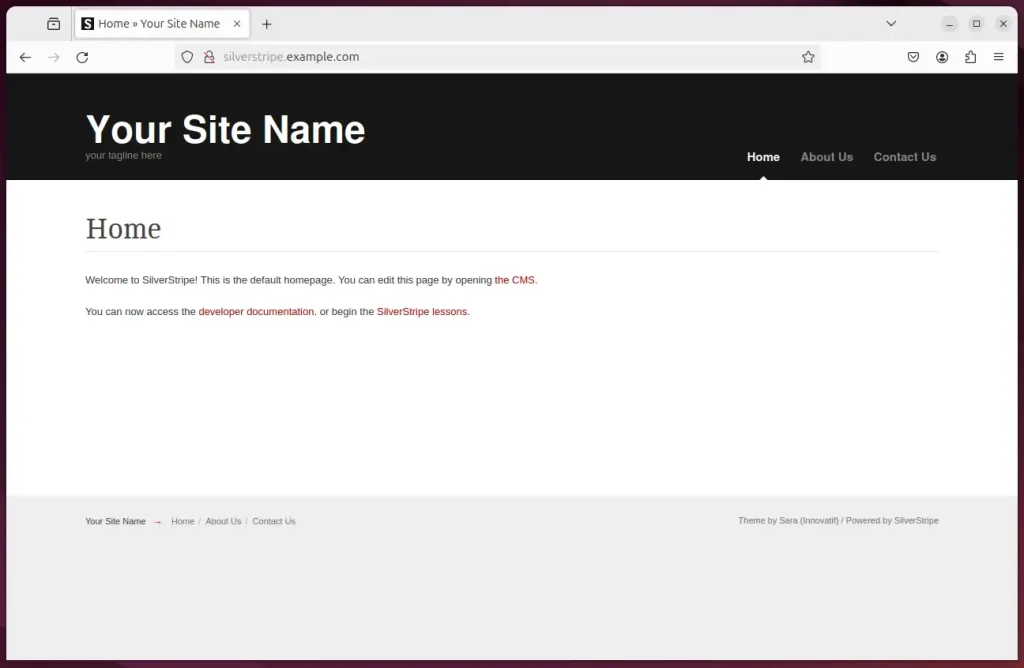
Once you have restarted the Nginx web server, open your browser and browse to the server hostname or IP address defined in the Nginx server block.
http://silverstripe.example.com
Your SilverStripe site should be set up and ready to use.
That should do it!
Conclusion:
With this comprehensive guide, you have successfully installed and configured SilverStripe CMS with Nginx on Ubuntu. By following each step meticulously, you have set up a powerful and flexible content management system with a high-performance web server, forming a robust platform for hosting web applications. Your SilverStripe site is now operational, secure, and ready to utilize. Cheers to your successful deployment!
Create a SilverStripe database
You create a dedicated SilverStripe database by logging into the MariaDB command line interface and running SQL queries. This process sets up a new database named silverstripedb and a secure user account to manage it. Access the database prompt using sudo mysql, then create the database and user with the proper permissions. These credentials allow your SilverStripe installation to read and write site data safely.
You will create a special database named 'silverstripedb' for your SilverStripe site and a user called 'silverstripedbuser' to manage it.
As part of the setup, we will create a silverstripedb database and a corresponding user account called silverstripedbuser.
Finally, we'll grant the silverstripedbuser full access to the silverstripedb database.
All the database steps above can be done using the commands below:
But first, log on to the MariaDB database server:
sudo mariadb
Then run the commands below to complete the steps:
CREATE DATABASE silverstripedb CHARACTER SET utf8mb4 COLLATE utf8mb4_general_ci;
CREATE USER silverstripedbuser@localhost IDENTIFIED BY 'type_your_password_here';
GRANT ALL ON silverstripedb.* TO silverstripedbuser@localhost WITH GRANT OPTION;
FLUSH PRIVILEGES;
exit
Ensure to replace 'type_your_password_here 'with your password.
Install PHP-FPM on Ubuntu Linux
You install PHP-FPM and the required PHP extensions on Ubuntu by running the package installation command for your specific PHP version. PHP-FPM (FastCGI Process Manager) handles the dynamic code execution that SilverStripe needs to function properly on your server. Run sudo apt install php-fpm along with the necessary modules like curl, xml, and mbstring. Make sure to check that the PHP-FPM service is running after the installation finishes.
SilverStripe is built using PHP, a programming language for websites. To make SilverStripe work properly on your Ubuntu system, you need to install PHP-FPM, which helps manage PHP.
Run the commands below to install PHP-FPM.
sudo apt install php-fpm php-intl php-mysql php-curl php-cli php-zip php-xml php-gd php-common php-mbstring php-xmlrpc php-json php-sqlite3 php-soap php-zip
Additional help on installing PHP
Download SilverStripe files
You download the SilverStripe website files to your server by using Composer, a package manager for PHP. Before grabbing the project files, you must install Composer, Curl, and Git on your system. Run the installer script to set up Composer globally so you can use it from any folder. Then, use the create-project command to download the latest stable version of SilverStripe into your web root directory.
It's time to get the SilverStripe website files onto your Ubuntu server. We'll download the latest version, usually by using a tool called Composer.
You may want to use the GitHub repository to get SilverStripe's latest release. To get started, install Composer, Curl, and other dependencies.
sudo apt install curl git
curl -sS https://getcomposer.org/installer | sudo php -- --install-dir=/usr/local/bin --filename=composer
After installing curl and Composer above, change the directory to the Nginx root directory and download the SilverStripe packages from Github.
cd /var/www/
sudo composer create-project silverstripe/installer silverstripe
Now create a .env file in your project root (not the public/ folder).
If you used silverstripe/installer to create your project, you can rename the .env.example file to .env. It includes the minimum required environment variables.
sudo nano /var/www/silverstripe/.env
Replace the placeholders as required:
SS_DATABASE_CLASS="MySQLDatabase"
SS_DATABASE_NAME="silverstripedb"
SS_DATABASE_SERVER="localhost"
SS_DATABASE_USERNAME="silverstripedbuser"
SS_DATABASE_PASSWORD="type_database_password"
SS_DEFAULT_ADMIN_USERNAME="superadmin"
SS_DEFAULT_ADMIN_PASSWORD="superadminPassword"
SS_ENVIRONMENT_TYPE="live"
You can build your database and make Nginx the owner of the SilverStripe installation directory by running the `sudo chown -R www-data:www-data /var/www/silverstripe` command.
sudo /var/www/silverstripe/vendor/bin/sake dev/build
sudo chown -R www-data:www-data /var/www/silverstripe
Once you have completed all the above steps, continue configuring the Nginx web server below to serve the SilverStripe content.
Run the commands below to create a Nginx virtual host file for SilverStripe.
sudo nano /etc/nginx/sites-available/silverstripe.conf
Then, copy and paste the content block below into the Nginx server block.
server {
    listen 80;
    listen [::]:80;
    root /var/www/silverstripe/public;
    index  index.php;
    server_name  silverstripe.example.com;


    location / {
           try_files $uri /index.php?$query_string;
        }


    location ~ .php$ {
         include snippets/fastcgi-php.conf;
         fastcgi_pass unix:/var/run/php/php8.3-fpm.sock;
         fastcgi_param SCRIPT_FILENAME $document_root$fastcgi_script_name;
         include fastcgi_params;
    }
}
Save the file.
To activate the SilverStripe website configuration and make Nginx serve your site, run the commands `sudo a2ensite silverstripe.conf` to enable the virtual host file and then `sudo systemctl restart nginx` to restart the Nginx web server.
sudo ln -s /etc/nginx/sites-available/silverstripe.conf /etc/nginx/sites-enabled/
sudo systemctl restart nginx.service
Setup Let's Encrypt SSL/TLS for SilverStripe
You secure your SilverStripe website with an SSL/TLS certificate by installing Certbot and configuring it for your Nginx server. Let's Encrypt provides free encryption certificates that protect user data passing between visitors and your server. Install the Certbot package using your terminal and run the Nginx plugin command to automatically update your site configuration. Finally, test the automatic renewal process to ensure your security certificate does not expire unexpectedly.
To make your SilverStripe website secure and trustworthy, you should add an SSL/TLS certificate using Let's Encrypt. This works with your Nginx web server on Ubuntu.
Please read the post below for additional resources on installing and creating Let's Encrypt SSL certificates for Nginx.
How to set up Let's Encrypt SSL certificate for Nginx on Ubuntu Linux
Once you have restarted the Nginx web server, open your browser and browse to the server hostname or IP address defined in the Nginx server block.
http://silverstripe.example.com
Your SilverStripe site should be set up and ready to use.
That should do it!
Conclusion:
With this comprehensive guide, you have successfully installed and configured SilverStripe CMS with Nginx on Ubuntu. By following each step meticulously, you have set up a powerful and flexible content management system with a high-performance web server, forming a robust platform for hosting web applications. Your SilverStripe site is now operational, secure, and ready to utilize. Cheers to your successful deployment!
Install the MariaDB database server on Ubuntu
You can install the MariaDB database server on Ubuntu by running the package manager command in your terminal. MariaDB stores all the content, user accounts, and settings for your SilverStripe website. Run sudo apt install mariadb-server to download and set up the database software on your system. After the installation completes, run the security script to remove unsafe default settings and protect your new database server.
Your SilverStripe site needs a place to store information, which is called a database. The next step is to install the MariaDB database server on your Ubuntu system.
To install and use the MariaDB database server, use the instructions below.
Open the Ubuntu terminal and run the commands below to install the MariaDB database server.
sudo apt update
sudo apt install mariadb-server
Once the MariaDB database server is installed, use the commands below to stop, start, and enable the MariaDB server to start automatically when the server boots.
sudo systemctl stop mariadb
sudo systemctl start mariadb
sudo systemctl enable mariadb
MariaDB database server installation validation involves running specific commands. These commands confirm the MariaDB database server installed successfully, ensuring a stable foundation for your SilverStripe website.
sudo mariadb
Once you run the commands above, it will log you onto the MariaDB console and display a message similar to the one below.
Welcome to the MariaDB monitor.  Commands end with ; or g.
Your MariaDB connection id is 32
Server version: 10.11.2-MariaDB-1 Ubuntu 23.04

Copyright (c) 2000, 2018, Oracle, MariaDB Corporation Ab and others.

Type 'help;' or 'h' for help. Type 'c' to clear the current input statement.

MariaDB [(none)]>
The message tells you that the server is installed successfully.
Additional help on installing MariaDB.
-
- MariaDB without password prompt
Create a SilverStripe database
You create a dedicated SilverStripe database by logging into the MariaDB command line interface and running SQL queries. This process sets up a new database named silverstripedb and a secure user account to manage it. Access the database prompt using sudo mysql, then create the database and user with the proper permissions. These credentials allow your SilverStripe installation to read and write site data safely.
You will create a special database named 'silverstripedb' for your SilverStripe site and a user called 'silverstripedbuser' to manage it.
As part of the setup, we will create a silverstripedb database and a corresponding user account called silverstripedbuser.
Finally, we'll grant the silverstripedbuser full access to the silverstripedb database.
All the database steps above can be done using the commands below:
But first, log on to the MariaDB database server:
sudo mariadb
Then run the commands below to complete the steps:
CREATE DATABASE silverstripedb CHARACTER SET utf8mb4 COLLATE utf8mb4_general_ci;
CREATE USER silverstripedbuser@localhost IDENTIFIED BY 'type_your_password_here';
GRANT ALL ON silverstripedb.* TO silverstripedbuser@localhost WITH GRANT OPTION;
FLUSH PRIVILEGES;
exit
Ensure to replace 'type_your_password_here 'with your password.
Install PHP-FPM on Ubuntu Linux
You install PHP-FPM and the required PHP extensions on Ubuntu by running the package installation command for your specific PHP version. PHP-FPM (FastCGI Process Manager) handles the dynamic code execution that SilverStripe needs to function properly on your server. Run sudo apt install php-fpm along with the necessary modules like curl, xml, and mbstring. Make sure to check that the PHP-FPM service is running after the installation finishes.
SilverStripe is built using PHP, a programming language for websites. To make SilverStripe work properly on your Ubuntu system, you need to install PHP-FPM, which helps manage PHP.
Run the commands below to install PHP-FPM.
sudo apt install php-fpm php-intl php-mysql php-curl php-cli php-zip php-xml php-gd php-common php-mbstring php-xmlrpc php-json php-sqlite3 php-soap php-zip
Additional help on installing PHP
Download SilverStripe files
You download the SilverStripe website files to your server by using Composer, a package manager for PHP. Before grabbing the project files, you must install Composer, Curl, and Git on your system. Run the installer script to set up Composer globally so you can use it from any folder. Then, use the create-project command to download the latest stable version of SilverStripe into your web root directory.
It's time to get the SilverStripe website files onto your Ubuntu server. We'll download the latest version, usually by using a tool called Composer.
You may want to use the GitHub repository to get SilverStripe's latest release. To get started, install Composer, Curl, and other dependencies.
sudo apt install curl git
curl -sS https://getcomposer.org/installer | sudo php -- --install-dir=/usr/local/bin --filename=composer
After installing curl and Composer above, change the directory to the Nginx root directory and download the SilverStripe packages from Github.
cd /var/www/
sudo composer create-project silverstripe/installer silverstripe
Now create a .env file in your project root (not the public/ folder).
If you used silverstripe/installer to create your project, you can rename the .env.example file to .env. It includes the minimum required environment variables.
sudo nano /var/www/silverstripe/.env
Replace the placeholders as required:
SS_DATABASE_CLASS="MySQLDatabase"
SS_DATABASE_NAME="silverstripedb"
SS_DATABASE_SERVER="localhost"
SS_DATABASE_USERNAME="silverstripedbuser"
SS_DATABASE_PASSWORD="type_database_password"
SS_DEFAULT_ADMIN_USERNAME="superadmin"
SS_DEFAULT_ADMIN_PASSWORD="superadminPassword"
SS_ENVIRONMENT_TYPE="live"
You can build your database and make Nginx the owner of the SilverStripe installation directory by running the `sudo chown -R www-data:www-data /var/www/silverstripe` command.
sudo /var/www/silverstripe/vendor/bin/sake dev/build
sudo chown -R www-data:www-data /var/www/silverstripe
Once you have completed all the above steps, continue configuring the Nginx web server below to serve the SilverStripe content.
Run the commands below to create a Nginx virtual host file for SilverStripe.
sudo nano /etc/nginx/sites-available/silverstripe.conf
Then, copy and paste the content block below into the Nginx server block.
server {
    listen 80;
    listen [::]:80;
    root /var/www/silverstripe/public;
    index  index.php;
    server_name  silverstripe.example.com;


    location / {
           try_files $uri /index.php?$query_string;
        }


    location ~ .php$ {
         include snippets/fastcgi-php.conf;
         fastcgi_pass unix:/var/run/php/php8.3-fpm.sock;
         fastcgi_param SCRIPT_FILENAME $document_root$fastcgi_script_name;
         include fastcgi_params;
    }
}
Save the file.
To activate the SilverStripe website configuration and make Nginx serve your site, run the commands `sudo a2ensite silverstripe.conf` to enable the virtual host file and then `sudo systemctl restart nginx` to restart the Nginx web server.
sudo ln -s /etc/nginx/sites-available/silverstripe.conf /etc/nginx/sites-enabled/
sudo systemctl restart nginx.service
Setup Let's Encrypt SSL/TLS for SilverStripe
You secure your SilverStripe website with an SSL/TLS certificate by installing Certbot and configuring it for your Nginx server. Let's Encrypt provides free encryption certificates that protect user data passing between visitors and your server. Install the Certbot package using your terminal and run the Nginx plugin command to automatically update your site configuration. Finally, test the automatic renewal process to ensure your security certificate does not expire unexpectedly.
To make your SilverStripe website secure and trustworthy, you should add an SSL/TLS certificate using Let's Encrypt. This works with your Nginx web server on Ubuntu.
Please read the post below for additional resources on installing and creating Let's Encrypt SSL certificates for Nginx.
How to set up Let's Encrypt SSL certificate for Nginx on Ubuntu Linux
Once you have restarted the Nginx web server, open your browser and browse to the server hostname or IP address defined in the Nginx server block.
http://silverstripe.example.com
Your SilverStripe site should be set up and ready to use.
That should do it!
Conclusion:
With this comprehensive guide, you have successfully installed and configured SilverStripe CMS with Nginx on Ubuntu. By following each step meticulously, you have set up a powerful and flexible content management system with a high-performance web server, forming a robust platform for hosting web applications. Your SilverStripe site is now operational, secure, and ready to utilize. Cheers to your successful deployment!
SilverStripe with Nginx on Ubuntu 24.04 runs a popular open-source content management system on a fast, lightweight web server. SilverStripe provides a flexible platform for building websites, while Nginx handles incoming visitor traffic behind the scenes.
Install Nginx and MariaDB using apt, then create a SilverStripe database with `CREATE DATABASE` and `GRANT ALL`. Install PHP-FPM and its required modules using `apt install php-fpm php-intl php-mysql php-curl php-cli php-zip php-xml php-gd php-common php-mbstring php-xmlrpc php-json php-sqlite`.
Setting up this stack on Ubuntu 24.04 LTS requires installing PHP, configuring the Nginx web server, and connecting a database so your site can store content properly. You will prepare your server environment step by step to get the platform ready for your web pages.
- First, install the Nginx web server by opening your terminal and running:
sudo apt updatesudo apt install nginx - Next, start, stop, and make sure Nginx runs automatically when your server starts:
sudo systemctl start nginxsudo systemctl enable nginx - Then, install MariaDB, the database server your SilverStripe site needs:
sudo apt updatesudo apt install mariadb-server - Start and enable MariaDB to run automatically:
sudo systemctl start mariadbsudo systemctl enable mariadb - Create a database named
silverstripedband a usersilverstripedbuserwith a password. Grant this user full access to the database. - Install PHP-FPM and other necessary PHP extensions for SilverStripe:
sudo apt install php-fpm php-intl php-mysql php-curl php-cli php-zip php-xml php-gd php-common php-mbstring php-xmlrpc php-json php-sqlite3 php-soap php-zip - Download SilverStripe using Composer. First, install Composer, Git, and Curl:
sudo apt install curl git
Then download SilverStripe into your web root:curl -sS https://getcomposer.org/installer | sudo php -- --install-dir=/usr/local/bin --filename=composercd /var/www/sudo composer create-project silverstripe/installer silverstripe - Configure SilverStripe by renaming the example environment file and filling in your database details and admin credentials.
- Build your SilverStripe site and set the correct file permissions:
sudo /var/www/silverstripe/vendor/bin/sake dev/buildsudo chown -R www-data:www-data /var/www/silverstripe - Set up Nginx to serve your SilverStripe site by creating a Nginx configuration file and enabling it. Then restart Nginx.
Install Nginx HTTP server on Ubuntu
You can install Nginx on Ubuntu 24.04 by opening your terminal and updating your package list before running the installation command. Nginx acts as the web server that processes incoming requests for your SilverStripe site. Run sudo apt update and then sudo apt install nginx to get the software on your server. Once the installation finishes, you can start and enable the service so it runs automatically when your server boots up.
Nginx is a web server that handles requests for your website, so the first step to install SilverStripe with Nginx on Ubuntu 24.04 is to install Nginx itself.
To do that, open the Ubuntu terminal and run the commands below to install the Nginx web server.
sudo apt update
sudo apt install nginx
Once Nginx is installed, the commands below can start, stop, and enable the Nginx web server to start automatically when your server boots up.
sudo systemctl stop nginx
sudo systemctl start nginx
sudo systemctl enable nginx
You can test the Nginx web server by opening your web browser and browsing to the server's localhost or IP address.
http://localhost
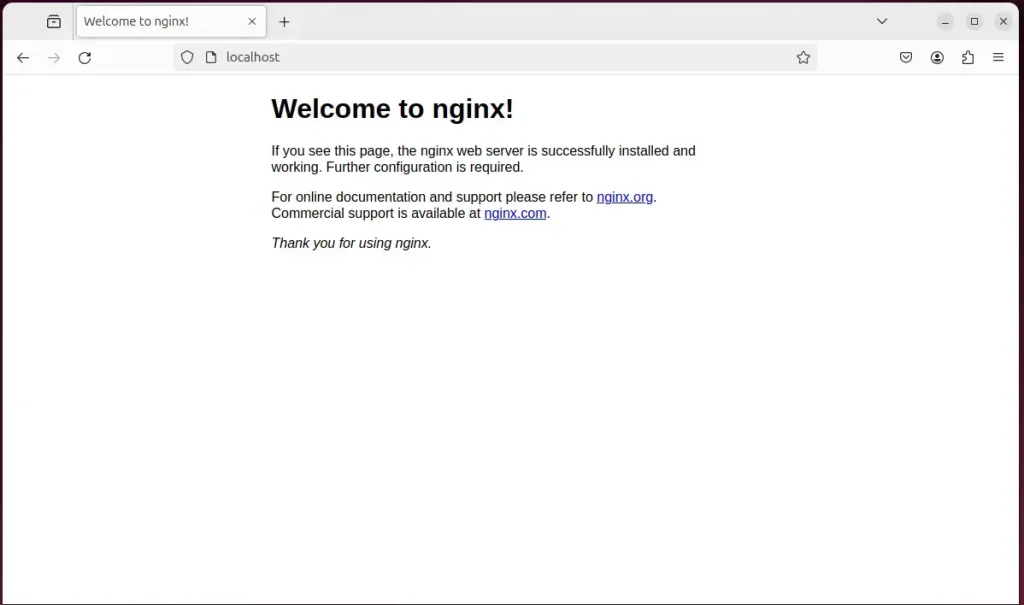
When you see "Welcome to nginx!" the Nginx HTTP server has been installed.
Additional help on installing Nginx on Ubuntu is in the link below.
Install the MariaDB database server on Ubuntu
You can install the MariaDB database server on Ubuntu by running the package manager command in your terminal. MariaDB stores all the content, user accounts, and settings for your SilverStripe website. Run sudo apt install mariadb-server to download and set up the database software on your system. After the installation completes, run the security script to remove unsafe default settings and protect your new database server.
Your SilverStripe site needs a place to store information, which is called a database. The next step is to install the MariaDB database server on your Ubuntu system.
To install and use the MariaDB database server, use the instructions below.
Open the Ubuntu terminal and run the commands below to install the MariaDB database server.
sudo apt update
sudo apt install mariadb-server
Once the MariaDB database server is installed, use the commands below to stop, start, and enable the MariaDB server to start automatically when the server boots.
sudo systemctl stop mariadb
sudo systemctl start mariadb
sudo systemctl enable mariadb
MariaDB database server installation validation involves running specific commands. These commands confirm the MariaDB database server installed successfully, ensuring a stable foundation for your SilverStripe website.
sudo mariadb
Once you run the commands above, it will log you onto the MariaDB console and display a message similar to the one below.
Welcome to the MariaDB monitor.  Commands end with ; or g.
Your MariaDB connection id is 32
Server version: 10.11.2-MariaDB-1 Ubuntu 23.04

Copyright (c) 2000, 2018, Oracle, MariaDB Corporation Ab and others.

Type 'help;' or 'h' for help. Type 'c' to clear the current input statement.

MariaDB [(none)]>
The message tells you that the server is installed successfully.
Additional help on installing MariaDB.
-
- MariaDB without password prompt
Create a SilverStripe database
You create a dedicated SilverStripe database by logging into the MariaDB command line interface and running SQL queries. This process sets up a new database named silverstripedb and a secure user account to manage it. Access the database prompt using sudo mysql, then create the database and user with the proper permissions. These credentials allow your SilverStripe installation to read and write site data safely.
You will create a special database named 'silverstripedb' for your SilverStripe site and a user called 'silverstripedbuser' to manage it.
As part of the setup, we will create a silverstripedb database and a corresponding user account called silverstripedbuser.
Finally, we'll grant the silverstripedbuser full access to the silverstripedb database.
All the database steps above can be done using the commands below:
But first, log on to the MariaDB database server:
sudo mariadb
Then run the commands below to complete the steps:
CREATE DATABASE silverstripedb CHARACTER SET utf8mb4 COLLATE utf8mb4_general_ci;
CREATE USER silverstripedbuser@localhost IDENTIFIED BY 'type_your_password_here';
GRANT ALL ON silverstripedb.* TO silverstripedbuser@localhost WITH GRANT OPTION;
FLUSH PRIVILEGES;
exit
Ensure to replace 'type_your_password_here 'with your password.
Install PHP-FPM on Ubuntu Linux
You install PHP-FPM and the required PHP extensions on Ubuntu by running the package installation command for your specific PHP version. PHP-FPM (FastCGI Process Manager) handles the dynamic code execution that SilverStripe needs to function properly on your server. Run sudo apt install php-fpm along with the necessary modules like curl, xml, and mbstring. Make sure to check that the PHP-FPM service is running after the installation finishes.
SilverStripe is built using PHP, a programming language for websites. To make SilverStripe work properly on your Ubuntu system, you need to install PHP-FPM, which helps manage PHP.
Run the commands below to install PHP-FPM.
sudo apt install php-fpm php-intl php-mysql php-curl php-cli php-zip php-xml php-gd php-common php-mbstring php-xmlrpc php-json php-sqlite3 php-soap php-zip
Additional help on installing PHP
Download SilverStripe files
You download the SilverStripe website files to your server by using Composer, a package manager for PHP. Before grabbing the project files, you must install Composer, Curl, and Git on your system. Run the installer script to set up Composer globally so you can use it from any folder. Then, use the create-project command to download the latest stable version of SilverStripe into your web root directory.
It's time to get the SilverStripe website files onto your Ubuntu server. We'll download the latest version, usually by using a tool called Composer.
You may want to use the GitHub repository to get SilverStripe's latest release. To get started, install Composer, Curl, and other dependencies.
sudo apt install curl git
curl -sS https://getcomposer.org/installer | sudo php -- --install-dir=/usr/local/bin --filename=composer
After installing curl and Composer above, change the directory to the Nginx root directory and download the SilverStripe packages from Github.
cd /var/www/
sudo composer create-project silverstripe/installer silverstripe
Now create a .env file in your project root (not the public/ folder).
If you used silverstripe/installer to create your project, you can rename the .env.example file to .env. It includes the minimum required environment variables.
sudo nano /var/www/silverstripe/.env
Replace the placeholders as required:
SS_DATABASE_CLASS="MySQLDatabase"
SS_DATABASE_NAME="silverstripedb"
SS_DATABASE_SERVER="localhost"
SS_DATABASE_USERNAME="silverstripedbuser"
SS_DATABASE_PASSWORD="type_database_password"
SS_DEFAULT_ADMIN_USERNAME="superadmin"
SS_DEFAULT_ADMIN_PASSWORD="superadminPassword"
SS_ENVIRONMENT_TYPE="live"
You can build your database and make Nginx the owner of the SilverStripe installation directory by running the `sudo chown -R www-data:www-data /var/www/silverstripe` command.
sudo /var/www/silverstripe/vendor/bin/sake dev/build
sudo chown -R www-data:www-data /var/www/silverstripe
Once you have completed all the above steps, continue configuring the Nginx web server below to serve the SilverStripe content.
Run the commands below to create a Nginx virtual host file for SilverStripe.
sudo nano /etc/nginx/sites-available/silverstripe.conf
Then, copy and paste the content block below into the Nginx server block.
server {
    listen 80;
    listen [::]:80;
    root /var/www/silverstripe/public;
    index  index.php;
    server_name  silverstripe.example.com;


    location / {
           try_files $uri /index.php?$query_string;
        }


    location ~ .php$ {
         include snippets/fastcgi-php.conf;
         fastcgi_pass unix:/var/run/php/php8.3-fpm.sock;
         fastcgi_param SCRIPT_FILENAME $document_root$fastcgi_script_name;
         include fastcgi_params;
    }
}
Save the file.
To activate the SilverStripe website configuration and make Nginx serve your site, run the commands `sudo a2ensite silverstripe.conf` to enable the virtual host file and then `sudo systemctl restart nginx` to restart the Nginx web server.
sudo ln -s /etc/nginx/sites-available/silverstripe.conf /etc/nginx/sites-enabled/
sudo systemctl restart nginx.service
Setup Let's Encrypt SSL/TLS for SilverStripe
You secure your SilverStripe website with an SSL/TLS certificate by installing Certbot and configuring it for your Nginx server. Let's Encrypt provides free encryption certificates that protect user data passing between visitors and your server. Install the Certbot package using your terminal and run the Nginx plugin command to automatically update your site configuration. Finally, test the automatic renewal process to ensure your security certificate does not expire unexpectedly.
To make your SilverStripe website secure and trustworthy, you should add an SSL/TLS certificate using Let's Encrypt. This works with your Nginx web server on Ubuntu.
Please read the post below for additional resources on installing and creating Let's Encrypt SSL certificates for Nginx.
How to set up Let's Encrypt SSL certificate for Nginx on Ubuntu Linux
Once you have restarted the Nginx web server, open your browser and browse to the server hostname or IP address defined in the Nginx server block.
http://silverstripe.example.com
Your SilverStripe site should be set up and ready to use.
That should do it!
Conclusion:
With this comprehensive guide, you have successfully installed and configured SilverStripe CMS with Nginx on Ubuntu. By following each step meticulously, you have set up a powerful and flexible content management system with a high-performance web server, forming a robust platform for hosting web applications. Your SilverStripe site is now operational, secure, and ready to utilize. Cheers to your successful deployment!
Was this guide helpful?





No comments yet — be the first to share your thoughts!