How to Install Etherpad on Ubuntu Linux


Etherpad is a free, self-hosted program that lets you and your team edit the same document at the same time, just like Google Docs. Running your own Etherpad server on Ubuntu Linux gives you total control over your text files and privacy.
You can set up a working server in just a few minutes by using the official Docker image. This method handles most of the hard setup work for you.
Install prerequisites, MariaDB, and Node.js. Then, clone Etherpad from GitHub, run npm install, and configure your database in settings.json. Finally, create a systemd service file and restart the Etherpad service.
Install prerequisites
First, update your system and install necessary helper tools.
sudo apt update
sudo apt install gnupg2 git curl unzip libssl-dev pkg-config gcc g++ make build-essential
Install the MariaDB database server
Etherpad needs a database to save your work. MariaDB is a great choice.
sudo apt update
sudo apt install mariadb-server
sudo systemctl stop mariadb
sudo systemctl start mariadb
sudo systemctl enable mariadb
Setup Etherpad database
Note: Modern MariaDB requires you to use your system root account.
sudo mysql -u root
CREATE DATABASE etherdb;
GRANT ALL PRIVILEGES on etherdb.* to etheruser@localhost IDENTIFIED BY 'type_password_here';
FLUSH PRIVILEGES;
exit
Install Node.js
In 2026, it is best to use NVM (Node Version Manager) or the official NodeSource binary distributions to ensure you are running a supported LTS version.
curl -fsSL https://deb.nodesource.com/setup_lts.x | sudo -E bash -
sudo apt install -y nodejs
Install Etherpad
Installing Etherpad on Ubuntu requires creating a dedicated system user and downloading the application files into the correct directory using your terminal. You set up a secure user account, create the program folder in /opt/etherpad, and pull the latest application code to prepare the software for configuration.
sudo useradd --system -d /opt/etherpad --shell=/bin/bash etherpad
sudo install -d -m 755 -o etherpad -g etherpad /opt/etherpad
cd /opt/etherpad
sudo -u etherpad git clone --branch master https://github.com/ether/etherpad-lite.git
cd etherpad-lite
sudo -u etherpad npm install
Next, edit the settings.json file to add your database details and set trustProxy to true.
Create the Service File
Creating a systemd service file for Etherpad lets the application run in the background and start automatically whenever your Ubuntu server reboots. You build this configuration file in /etc/systemd/system/etherpad.service so the operating system manages the application process reliably without manual intervention.
sudo nano /etc/systemd/system/etherpad.service
Paste this template:
[Unit]
Description=Etherpad-lite
After=syslog.target network.target

[Service]
Type=simple
User=etherpad
Group=etherpad
WorkingDirectory=/opt/etherpad/etherpad-lite
Environment=NODE_ENV=production
ExecStart=/usr/bin/node src/node/server.js
Restart=always

[Install]
WantedBy=multi-user.target
sudo systemctl daemon-reload
sudo systemctl start etherpad
sudo systemctl enable etherpad
Configure Nginx and SSL
Configuring Nginx and SSL for Etherpad routes web traffic securely through a reverse proxy and encrypts connections with a Let's Encrypt certificate. You install the required web server packages and edit /etc/nginx/sites-available/etherpad.conf to make your server accessible over HTTPS.
sudo apt install nginx certbot python3-certbot-nginx
Create your Nginx config file:
sudo nano /etc/nginx/sites-available/etherpad.conf
Add your proxy settings:
upstream etherpad {
   server localhost:9001;
}

server {
   listen 80;
   server_name etherpad.example.com;

   location / {
       proxy_pass http://etherpad;
       proxy_set_header Host $host;
       proxy_set_header X-Real-IP $remote_addr;
   }
}
Enable the site and get your certificate:
sudo ln -s /etc/nginx/sites-available/etherpad.conf /etc/nginx/sites-enabled/
sudo systemctl restart nginx
sudo certbot --nginx -d etherpad.example.com
Access Etherpad portal
Open your web browser and go to your domain name. You will see the welcome page.
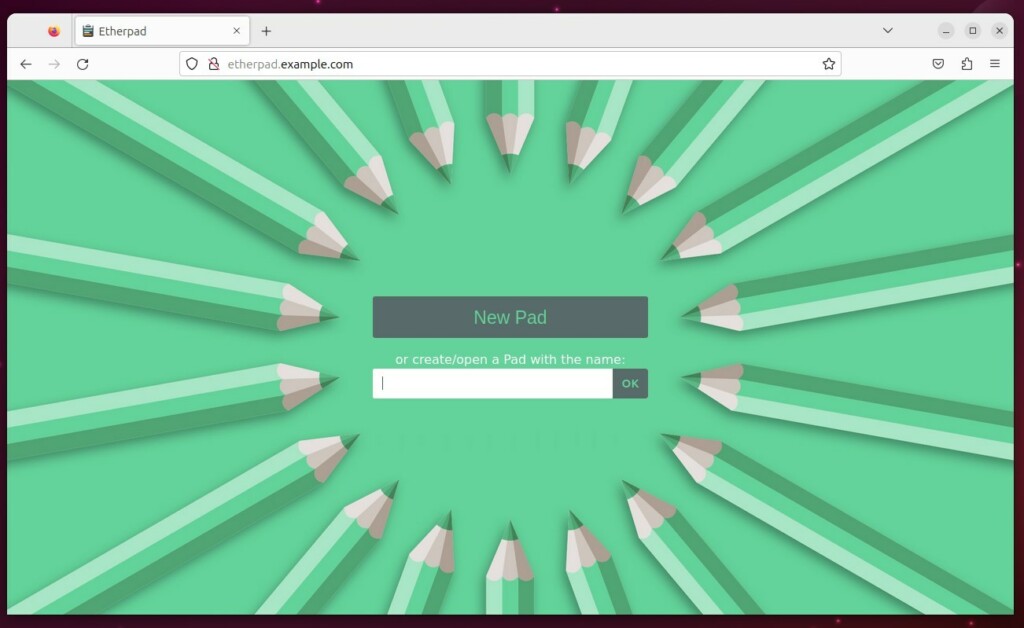
Begin using Etherpad
You can now create new pads or open existing ones to start collaborating.
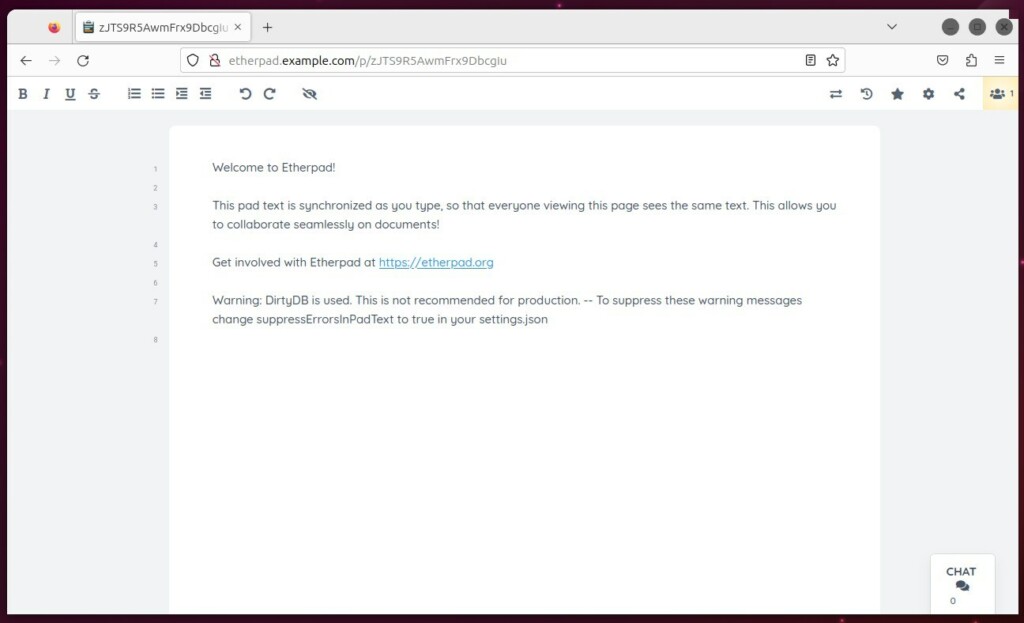
Reference: https://etherpad.org/
[Unit] [Service] [Install]
Was this guide helpful?

About the Author
Richard
Tech Writer, IT Professional
Richard is a writer at Geek Rewind who turns complex IT tasks into clear, step-by-step guides. He draws on years of hands-on experience in system administration and enterprise IT operations, focusing on Windows, Linux and WordPress: the problems people actually run into, and the fixes that work. His server and WordPress guides come from systems he runs himself. Richard builds and maintains the platform behind Geek Rewind, from its Ubuntu servers and Nginx configuration to its custom WordPress plugins. Many new tutorials start with readers' questions, and he's always glad to answer them in the comments.




No comments yet — be the first to share your thoughts!