How to Install BoxBilling with Apache on Ubuntu Linux


Installing BoxBilling version 4.x with Apache on an Ubuntu Linux server gives you a self-hosted platform to manage clients, send invoices, and process payments without monthly third-party fees. This setup runs the open-source billing software on your own server, so you keep full control over your financial data.
The stack has four parts: Apache as the web server, MariaDB as the database, PHP 8.3 with PHP-FPM to run the application, and BoxBilling itself. You need a fresh Ubuntu server (22.04 LTS or 24.04 LTS is a good choice), a user with sudo rights, and a domain name pointed at the server if you want to add SSL later. Work through the sections in order, because each one depends on the one before it.
Install BoxBilling on Ubuntu by running sudo apt update, then sudo apt install apache2 mariadb-server mariadb-client php8.3 php8.3-fpm php8.3-mysql php8.3-curl php8.3-gd php8.3-mbstring php8.3-xml.
How to install Apache on Ubuntu Linux
Apache is the web server software that sends your pages to visitors. Installing it takes two commands in the terminal: one to refresh your package list, one to install the package.
- Open your terminal, or connect to the server over SSH.
- Run sudo apt update to refresh the package list. You should see a list of repositories being checked, ending with a note about how many packages can be upgraded.
- Run sudo apt install apache2 to install the web server. Type Y if apt asks you to confirm. On Ubuntu, Apache starts on its own once the install finishes.
sudo apt update
sudo apt install apache2
Use the commands below to manage the Apache service. They let you start, stop, restart and enable the service so it comes back after a reboot. Run them in the terminal one at a time.
If you change Apache’s configuration later, a restart makes the new settings take effect. A restart briefly drops active connections, which is fine on a new server.
sudo systemctl stop apache2
sudo systemctl start apache2
sudo systemctl enable apache2
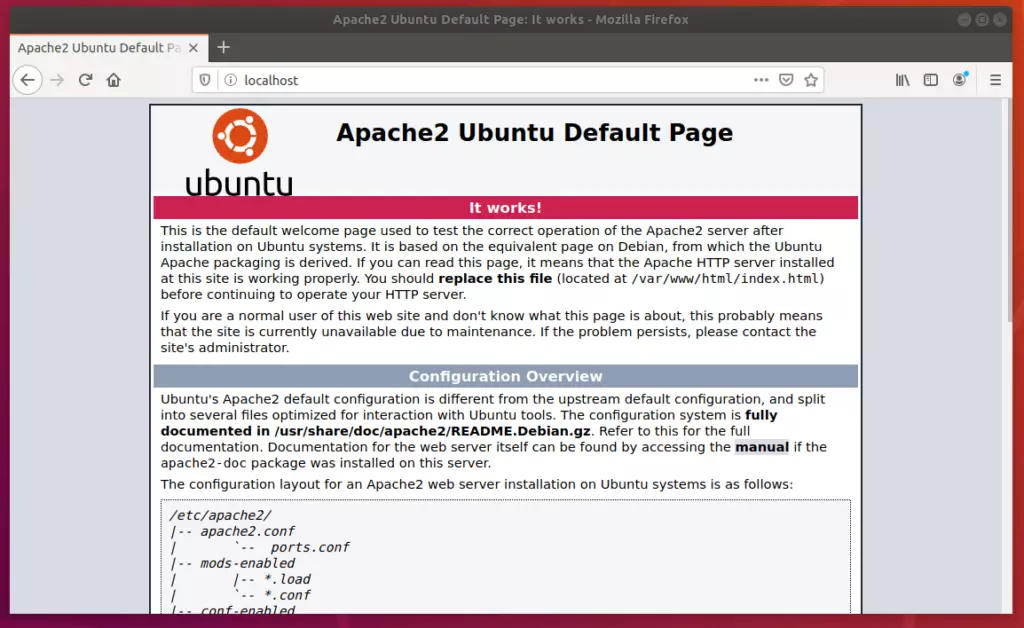
Now check that Apache is serving pages by loading your server IP address in a web browser.
- Type http:// followed by your server's IP address into the browser's address bar and press Enter.
- Look for the Apache default page, titled "Apache2 Ubuntu Default Page", with the words "It works!" near the top.
If the page does not load, check that the Apache service is running. Also check that your firewall, or your cloud provider's security group, allows traffic on port 80 (HTTP) and port 443 (HTTPS). A server that works locally but not from outside is almost always a firewall issue.
How to install MariaDB on Ubuntu Linux
MariaDB is the database that will store BoxBilling's clients, invoices and settings. You install both the server and the client packages from the command line, then run a security script to lock the database down.
- Run sudo apt install mariadb-server mariadb-client in your terminal.
- Wait for the install to finish. The database service starts automatically.
- Run the security script shown below. It removes insecure defaults that ship with a fresh install.
sudo apt install mariadb-server mariadb-clientRun the security script with the command below and answer each prompt as shown in the example. The script asks its questions one at a time and waits for your answer each time.
sudo mysql_secure_installationHere is what each prompt needs from you:
- Current root password: press Enter. A new install has no root password, so you skip this prompt.
- Authentication settings: accept the default secure option. On Ubuntu this keeps the database root account tied to the system root user instead of a password.
- Remove anonymous users, disallow remote root login, remove the test database: enter y for each one. Anonymous users and the test database are not needed, and remote root logins are a common target for attackers.
- Reload privilege tables: enter y so the changes apply right away.
If you answer a prompt wrongly, you can simply run the script again.
How to install PHP on Ubuntu Linux
BoxBilling 4.x needs a recent PHP version, so this guide uses PHP 8.3 together with the extensions the application requires. Ubuntu 24.04 ships PHP 8.3 in its default repositories. On Ubuntu 22.04 the default is older, so you must add a third-party repository that carries PHP 8.3 before you install it.
- Add the PHP repository to your system with the commands shown below. You can skip this step on Ubuntu 24.04.
- Update your package lists so the new packages show up.
- Run the install commands in the next block to get PHP 8.3 and its extensions.
Only add repositories you trust, because packages from them run with full privileges on your server.
sudo apt install software-properties-common
sudo add-apt-repository ppa:ondrej/php
sudo apt updateInstall the full list, because a missing extension is a common reason for the BoxBilling installer to stop with an error. When the install finishes, the PHP-FPM service for version 8.3 should be running.
sudo apt install php8.3 php8.3-mysql php8.3-xml php8.3-mbstring php8.3-fpm php8.3-curl php8.3-gd php8.3-zipGeneral Configuration
In this section you set up Apache to work with PHP-FPM (FastCGI Process Manager), a tool that handles PHP requests separately from the web server so your site runs quickly. You enable the Apache modules it needs, create a virtual host for BoxBilling, and set file ownership. Do this before you start the web installer.
First, enable the necessary Apache modules and make sure PHP-FPM is configured to process PHP files. The commands are in the block below. Apache needs a restart afterwards to load the new modules.
sudo a2enmod proxy_fcgi setenvif
sudo a2enconf php8.3-fpm
Now create a configuration file for the new site with the command below. It opens a new, empty file in a text editor. Save and close the editor when you finish with the next step.
sudo nano /etc/apache2/sites-available/boxbilling.confChange the domain name and any paths to match your own server. A typo here is the most common reason Apache fails to restart, so read the values carefully before you save.
<VirtualHost *:80>
ServerName example.com
DocumentRoot /var/www/boxbilling
<Directory /var/www/boxbilling/>
AllowOverride All
Require all granted
</Directory>
</VirtualHost>
Enable the virtual host, then restart Apache to finish connecting the web server to the site. If Apache reports a syntax error, reopen the configuration file and fix the line it names. Once it restarts without errors, the web server side is done.
sudo a2ensite boxbilling.conf
sudo systemctl restart apache2
Last, set the correct file permissions so the web server user owns the site directory. Wrong ownership leads to blank pages or errors when BoxBilling tries to write its files, so do not skip this step. You can run the commands again at any time to correct ownership.
sudo chown -R www-data:www-data /var/www/boxbillingHow to create a BoxBilling database
BoxBilling needs its own database and its own database user. You create both from the MariaDB console. Using a dedicated user means the application never touches the database root account.
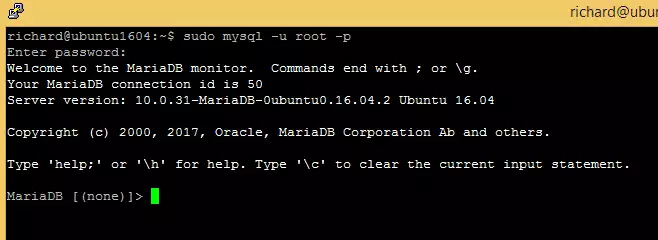
Open the database console with the command below. On Ubuntu, you normally log in as an administrator by running it with sudo. You should see a MariaDB [(none)]> prompt when it works.
sudo mysql -u root -pRun the queries below at the MariaDB prompt. They create the database schema and the user account the application will use.
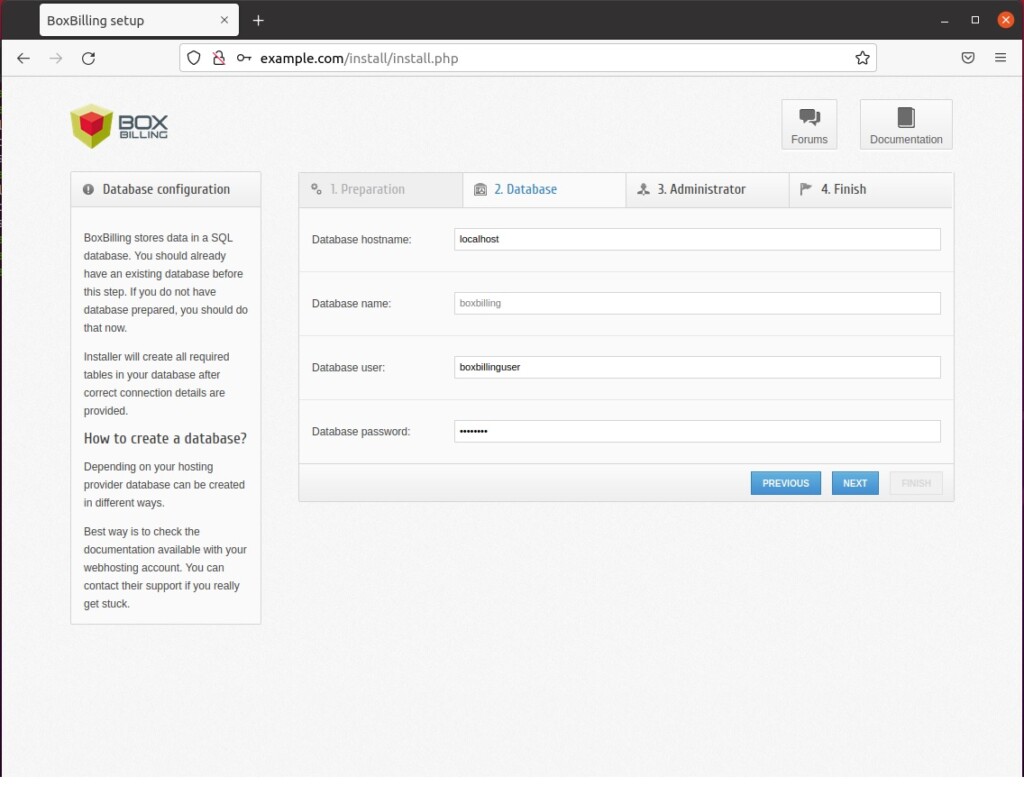
- Replace the example password with a long, unique one before you run the queries. Write down the database name, user name and password, because the web installer asks for them.
- Run each query. Each should answer with Query OK.
- Type exit to leave the console.
CREATE DATABASE boxbilling;
CREATE USER 'boxbillinguser'@'localhost' IDENTIFIED BY 'your_password';
GRANT ALL ON boxbilling.* TO 'boxbillinguser'@'localhost';
FLUSH PRIVILEGES;
EXIT;
How to download BoxBilling
Now download the BoxBilling source files and extract them into the web directory. The commands in the block below use standard terminal tools, so no extra software is needed.
- Run the download command to fetch the BoxBilling archive.
- Extract the archive into the site directory.
- Check the ownership again, as in the earlier permissions step, so Apache can read and write the files.
After this step, opening your site in a browser should show the BoxBilling web installer. Follow its prompts and enter the database details you created earlier.
cd /tmp
wget https://github.com/boxbilling/boxbilling/releases/download/4.22.1.3/BoxBilling.zip
sudo mkdir -p /var/www/boxbilling
sudo unzip BoxBilling.zip -d /var/www/boxbilling
How to setup Let's Encrypt
You should secure the site with SSL so client logins and payment details travel over HTTPS. The steps depend on your domain and certificate provider, so follow this external guide: How to Setup Let's Encrypt on Ubuntu Linux with Apache - Website for Students. You need a domain name that already points at your server, and port 443 must be open in your firewall.
Finalizing the setup
Once the web installer finishes, there are three clean-up jobs. You remove the installer files, lock down the configuration file, and add a cron job so BoxBilling's scheduled tasks run in the background. Do all three before you put the site in front of real clients.
First, run the command below to delete the installation directory. Leaving it in place is a security risk, because anyone who finds it could try to re-run the installer.
sudo rm -rf /var/www/boxbilling/installNext, restrict the permissions on the configuration file with the command below. This file holds your database password, so only the web server user should be able to read it.
sudo chmod 644 /var/www/boxbilling/bb-config.phpFinally, register a background cron job. BoxBilling uses it for automated tasks such as invoice generation and reminders. Without it, those tasks never run.
Open the crontab editor with the command below. If the system asks you to choose an editor the first time, pick one you are comfortable with.
sudo crontab -eAdd the scheduled task line from the block below to the end of the crontab file, then save and close the editor. The system should confirm that it installed the new crontab. Make sure the path in the line matches where you extracted BoxBilling.
*/5 * * * * php /var/www/boxbilling/bb-cron.php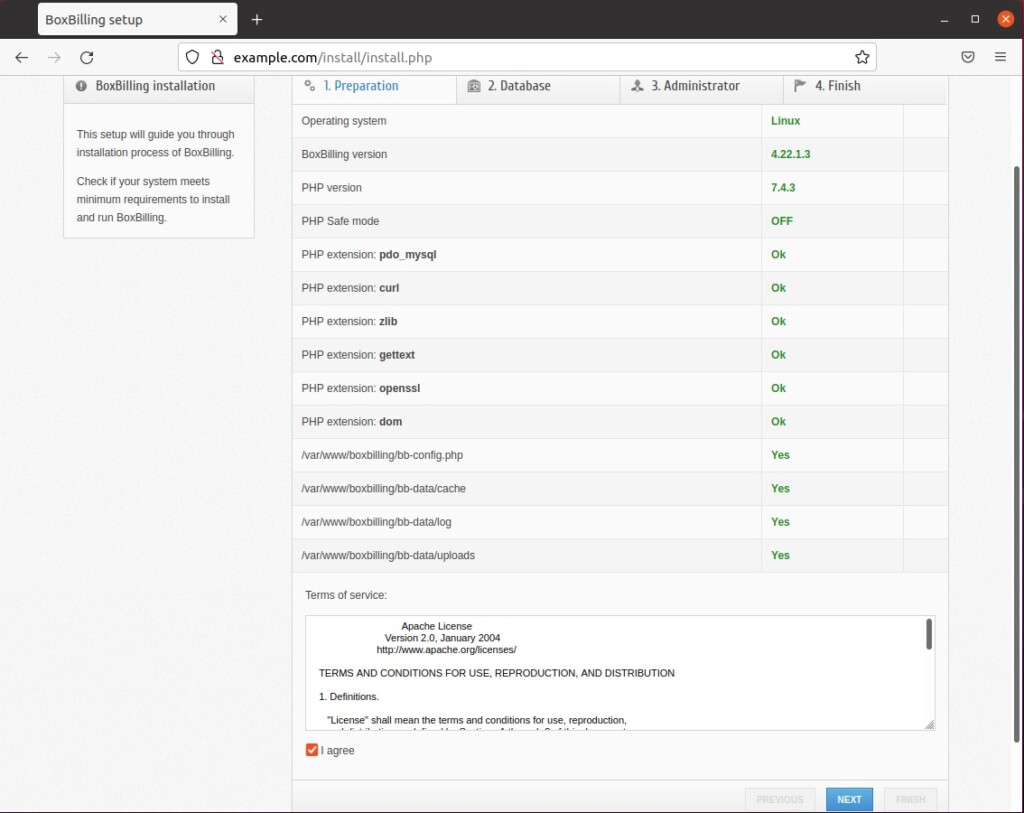
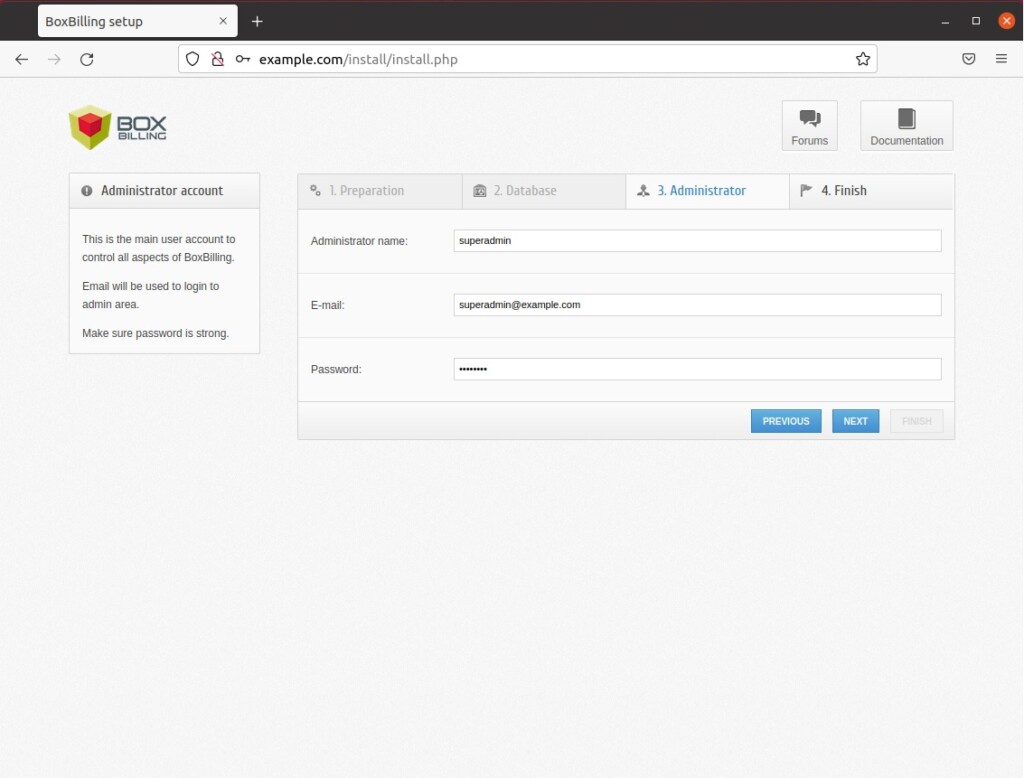
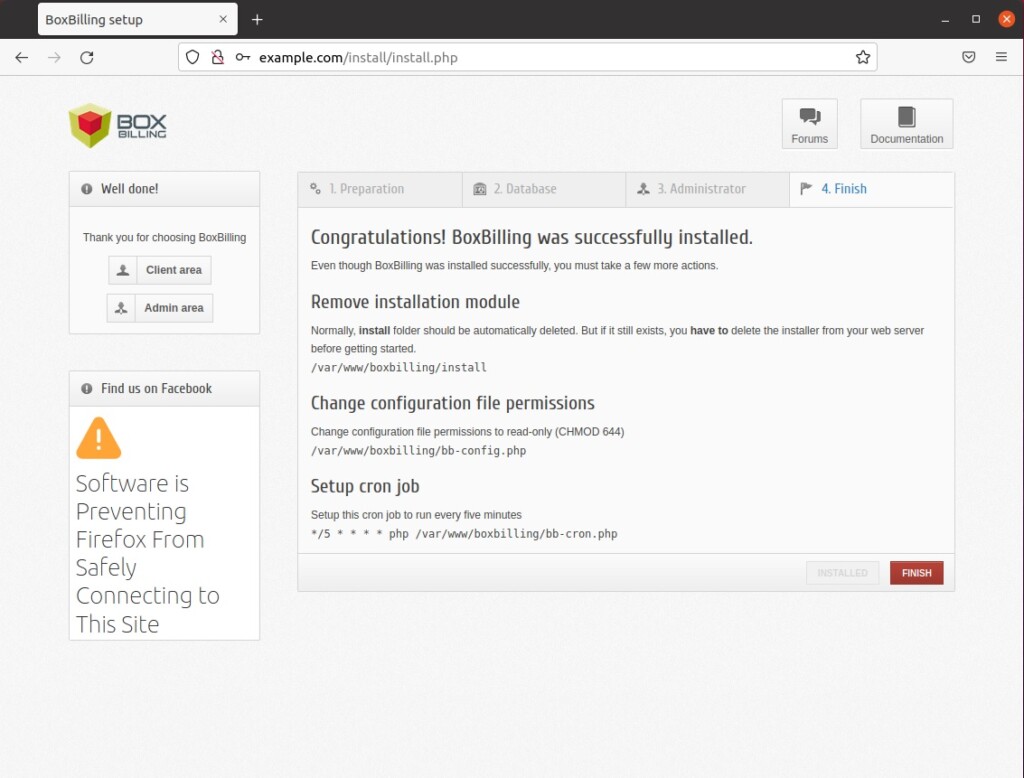
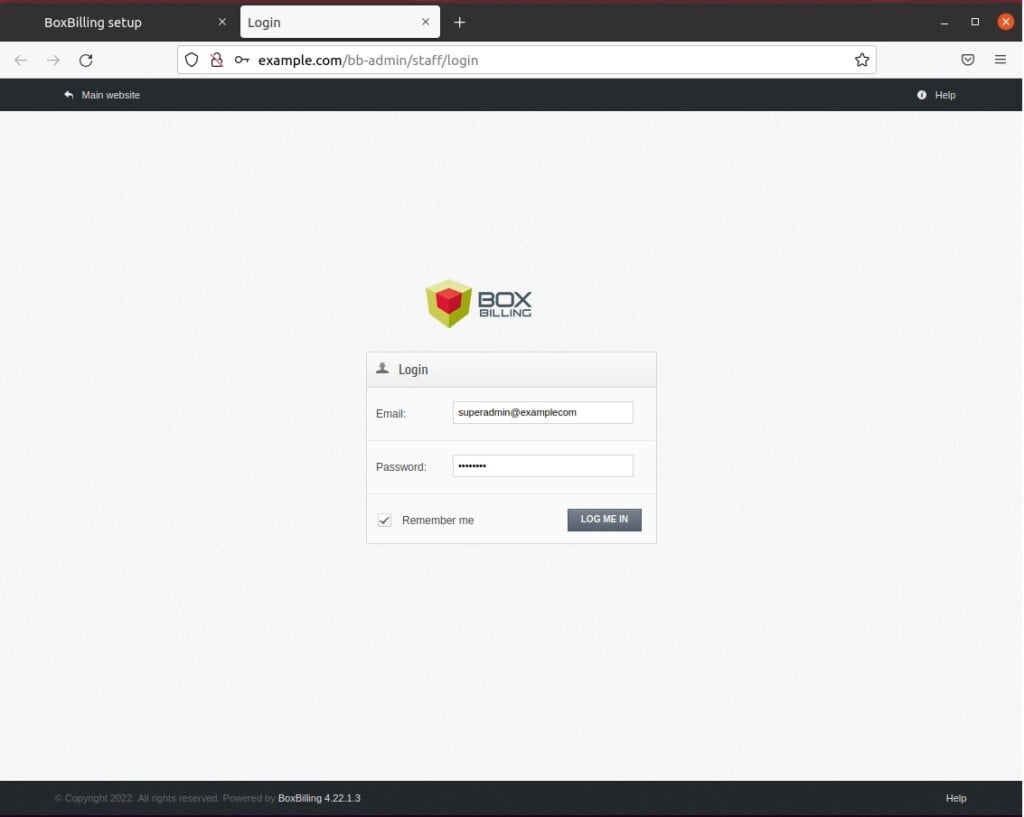
BoxBilling is now installed and ready to use. Log in to the admin area, change any default settings, and add your payment gateways and products. Keep Ubuntu and your packages up to date, and back up the database and the site directory on a regular schedule.
[Y/n] [Y/n] [Y/n] [Y/n] [Y/n] [Y/n]Was this guide helpful?

About the Author
Richard
Tech Writer, IT Professional
Richard is a writer at Geek Rewind who turns complex IT tasks into clear, step-by-step guides. He draws on years of hands-on experience in system administration and enterprise IT operations, focusing on Windows, Linux and WordPress: the problems people actually run into, and the fixes that work. His server and WordPress guides come from systems he runs himself. Richard builds and maintains the platform behind Geek Rewind, from its Ubuntu servers and Nginx configuration to its custom WordPress plugins. Many new tutorials start with readers' questions, and he's always glad to answer them in the comments.



Thanks a lot Sir for your assistance.