How to Install Android Studio on Ubuntu 24.04
Android Studio on Ubuntu 24.04 lets you create Android apps.
Android Studio is Google’s official tool for building mobile apps. It includes everything you need, like code editors and simulators to test your apps.
Installing it via Snap is the simplest way on Ubuntu 24.04. This method often gives you the latest version, such as Android Studio Iguana (2023.2.1) or a newer one, right away.
You can install Android Studio on Ubuntu 24.04 using the Snap package manager. Open a terminal and run ‘sudo snap install android-studio –classic’. Afterwards, search for Android Studio in your applications menu or run ‘sudo snap run android-studio’ from the terminal.
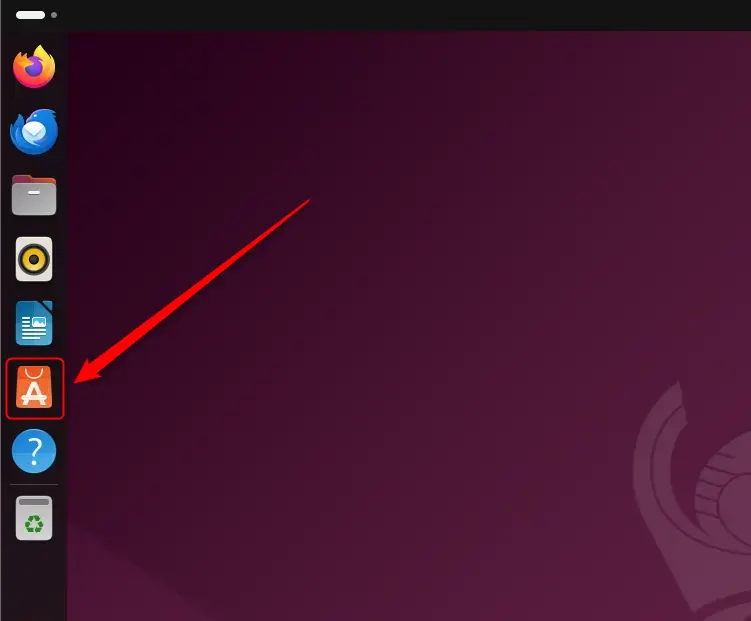
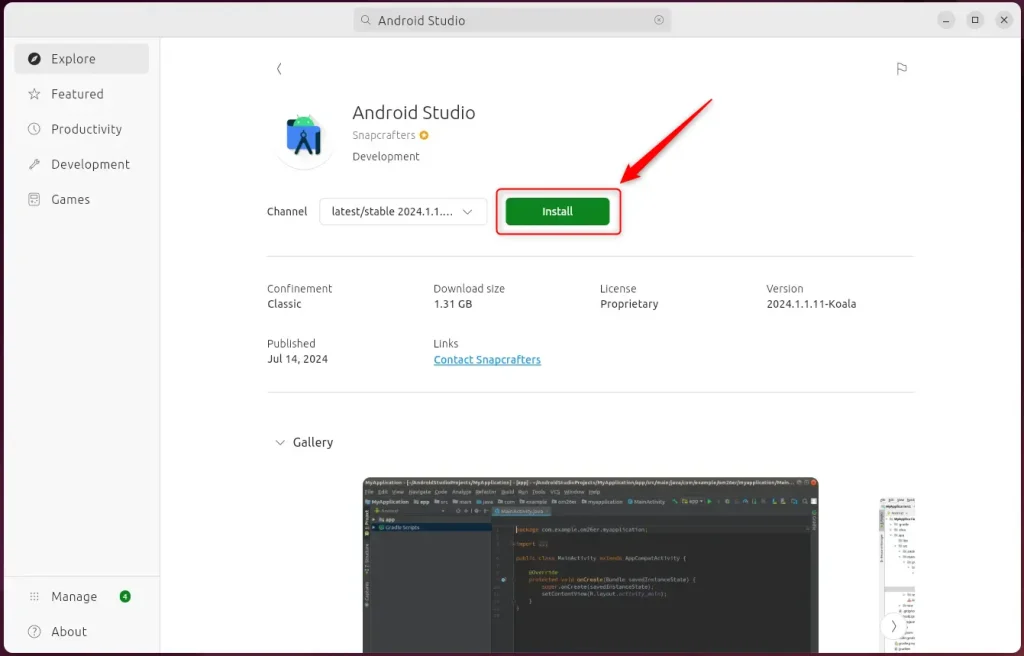
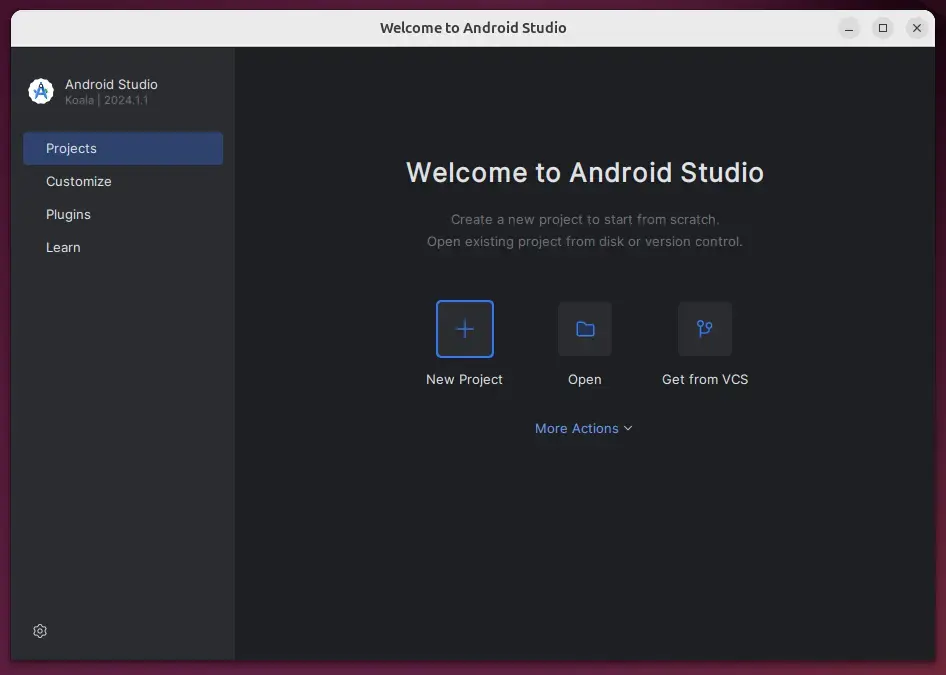
Install Android Studio using the App Center
Installing Android Studio on Ubuntu 24.04 using the App Center is a clear path forward.
Once it’s installed, you’ll find it in your Dock, ready to launch.
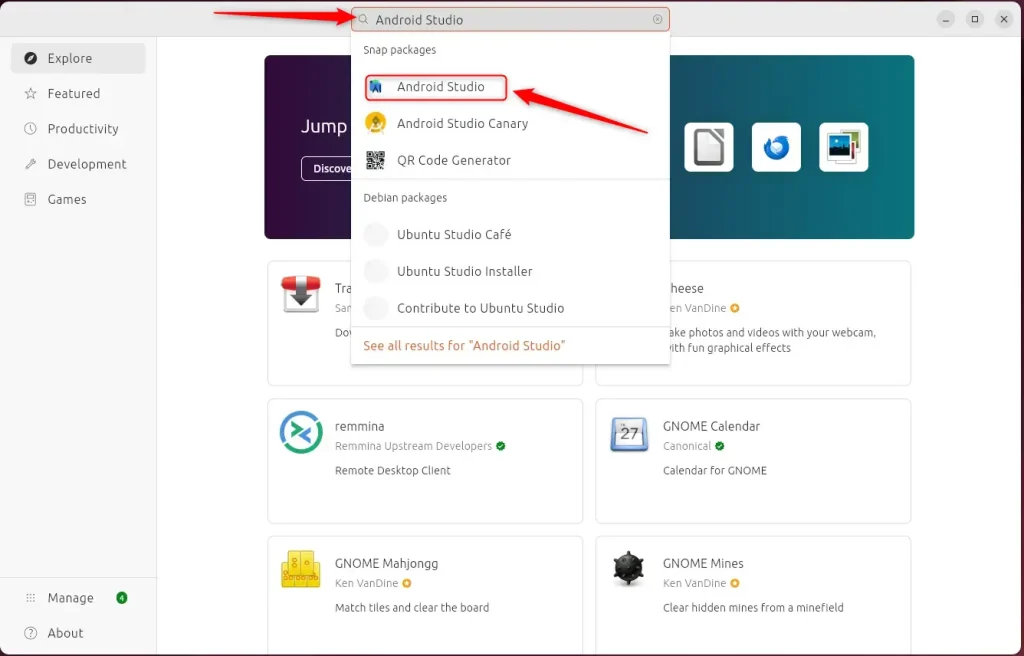
Install the app
Once installed, use the Dock on the left sidebar to search and launch the Android Studio app.
Install Android Studio using PPA repository
Android Studio installation on Ubuntu 24.04 can use a PPA for the latest version. Before installing Android Studio, make sure Java is installed, as Android Studio needs it to run. You can install the default Java version for Ubuntu by running the command `sudo apt install default-jdk`.
If you choose this method, ensure Java is installed on your Ubuntu system, as it’s necessary for Android Studio to run.
First, install the default Java version for Ubuntu by running the command below.
sudo update
sudo apt install default-jdk
Once Java is installed, run the command below to add the PPA repository and install Android Studio.
sudo add-apt-repository ppa:maarten-fonville/android-studio
After adding the repository file, run the command below to update your system’s package index and install Android Studio.
sudo apt update
sudo apt install android-studio
Once installed, use the Dock on the left sidebar to search and launch the Android Studio app.
To uninstall the app, use the command below.
Installing Android Studio on Ubuntu 24.04 using Snap is a secure method that keeps the application updated automatically. If Snap isn’t on your system, install Snap first by running `sudo apt install snapd`. Then, you can install Android Studio with the command `sudo snap install android-studio –classic`.
To install Android Studio on Ubuntu 24.04, first ensure the Snap package manager is present on your system. Snap is a package management system that simplifies software installation by bundling all dependencies into a single package. You can check if Snap is installed by running the command `snap version` in your terminal.
sudo apt install snapd
Then, run the following command to install Android Studio from the Snap package manager:
sudo snap install android-studio --classic
Once installed, use the Dock on the left sidebar to search and launch the Android Studio app.
You can also run the app using the command below.
sudo snap run android-studio
Remove the app using the command below.
You can install Android Studio on Ubuntu 24.04 using Flatpak, a system that runs apps in their own secure space. Flatpak isn’t included in Ubuntu by default, so you’ll need to install Flatpak first. Update your Ubuntu system and install Flatpak by running `sudo apt update` and then `sudo apt install flatpak`.
Flatpak is a third-party application distribution system that isn’t included in Ubuntu by default.
You’ll need to install the Flatpak package manager first, and then you can install Android Studio from there.
First, update your system and install Flatpak.
sudo apt update && sudo apt upgrade
sudo apt install flatpak
Next, add the Flatpak repository to your Ubuntu system.
sudo flatpak remote-add --if-not-exists flathub https://flathub.org/repo/flathub.flatpakrepo
Finally, install Android Studio.
flatpak install flathub com.google.AndroidStudio
Once installed, you can launch it using the command below or by opening the app in your desktop apps center.
flatpak run com.google.AndroidStudio
Uninstall the app using the command below.
flatpak uninstall com.google.AndroidStudio
That should do it!
Conclusion
Installing Android Studio on Ubuntu 24.04 can greatly enhance your Android app development experience. Here are the key points to remember:
- Multiple Installation Methods: You can choose various methods to install Android Studio, including App Center, PPA repository, Snap package manager, and Flatpak.
- Java Requirement: Ensure that Java is installed prior to using PPA or Snap, as it is essential for running Android Studio.
- Ease of Use: Each installation method offers a straightforward approach, making it accessible for developers of all levels.
- Uninstallation: Uninstalling Android Studio is simple, with commands available for each installation method.
- Enhanced Development Tools: Android Studio provides powerful tools for coding, debugging, and testing, streamlining the app development process.
Following the steps outlined above, you can set up a solid development environment on your Ubuntu system, enabling you to create innovative Android applications efficiently.
How do I completely install Android Studio?
After copying the android-studio folder into your Program Files folder, navigate to the `android-studio/bin` directory. Then, launch `studio64.exe` for 64-bit systems or `studio.exe` for 32-bit systems. The Setup Wizard will guide you through installing any recommended SDK packages.
How to run Android Studio on Linux after installation?
Here, type `ls` to see the files. Now, we need to execute the `studio.sh` bash script. Type `sudo ./studio.sh` and press Enter. You’ll then be prompted for your root password.
Was this guide helpful?

About the Author
Richard
Tech Writer, IT Professional
Richard, a writer for Geek Rewind, is a tech enthusiast who loves breaking down complex IT topics into simple, easy-to-understand ideas. With years of hands-on experience in system administration and enterprise IT operations, he’s developed a knack for offering practical tips and solutions. Richard aims to make technology more accessible and actionable. He's deeply committed to the Geek Rewind community, always ready to answer questions and engage in discussions.


No comments yet — be the first to share your thoughts!