How to Install Ampache with Apache on Ubuntu Linux
Ampache installation on Ubuntu Linux sets up your own private media streaming server.
Ampache is a free program that helps you manage your music and videos, letting you stream them to any device online. Think of it like your own personal Netflix or Spotify for your media files.
This guide focuses on installing Ampache using the Apache2 web server on Ubuntu 20.04. This version of Ubuntu is known for being stable and reliable, making it a great choice for running Ampache.
Install Apache2 using `sudo apt install apache2`, then MariaDB with `sudo apt install mariadb-server`. Next, add the PHP 7.4 PPA and install PHP and necessary modules with `sudo apt install php7.4 libapache2-mod-php7.4 php7.4-common php7.4-curl php7.4-mbstring php7.4-xmlrpc php7.4-mysql php7.4-gd php7.4-xml php7.4-cli php7.4-zip`.
Install Apache
Install Apache on Ubuntu to get Ampache working. Apache is the web server software that Ampache uses to stream your music and videos online. You can install it easily using a couple of commands in your terminal.
To install Apache HTTP on the Ubuntu server, run the commands below.
sudo apt update
sudo apt install apache2
After installing Apache2, the commands below can be used to stop, start, and enable Apache2, the service to always start up with the server boots.
sudo systemctl stop apache2.service
sudo systemctl start apache2.service
sudo systemctl enable apache2.service
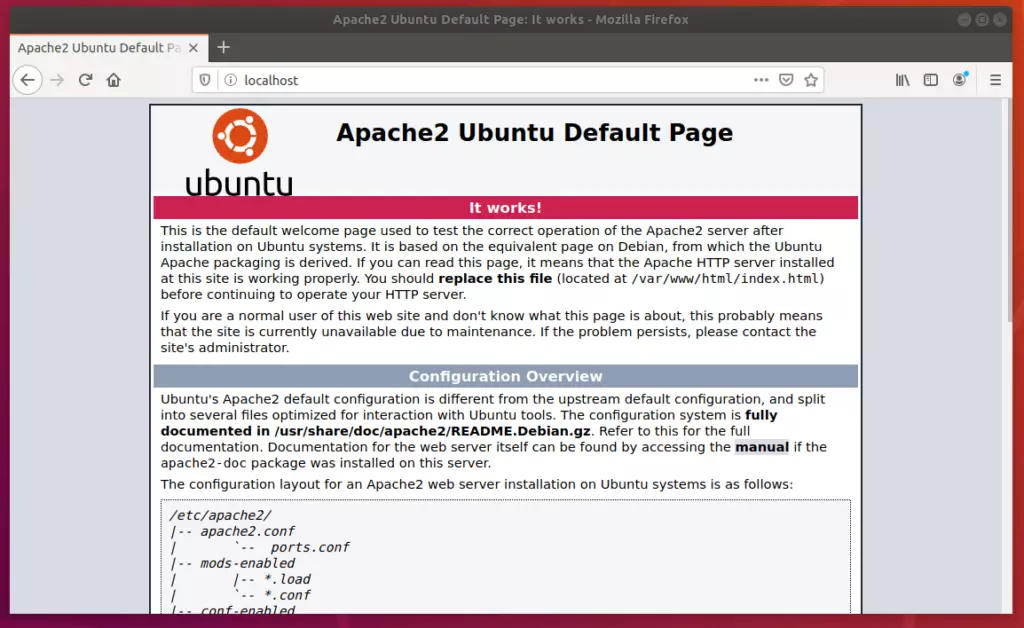
To test the Apache2 setup, open your browser and browse to the server hostname or IP address. You should see the Apache2 default test page, as shown below.
http://localhost
Install MariaDB
Install MariaDB on Ubuntu for Ampache’s database. Ampache needs a database to keep track of your music and videos, and MariaDB is a good choice for Ubuntu. Installing MariaDB involves running a simple command in your terminal to get both the server and client packages needed for Ampache.
To install MariaDB, run the commands below.
sudo apt install mariadb-server mariadb-client
After installing MariaDB, the commands below can stop, start, and enable the service to start when the server boots.
sudo systemctl stop mariadb.service
sudo systemctl start mariadb.service
sudo systemctl enable mariadb.service
sudo mysql_secure_installation
When prompted, answer the questions below by following the guide.
- Enter current password for root (enter for none): Just press the Enter
- Set root password? [Y/n]: Y
- New password: Enter password
- Re-enter new password: Repeat password
- Remove anonymous users? [Y/n]: Y
- Disallow root login remotely? [Y/n]: Y
- Remove test database and access to it? [Y/n]: Y
- Reload privilege tables now? [Y/n]: Y
To test if MariaDB is installed, type the commands below to log on to the MariaDB server.
sudo mysql -u root -p
Then, type the password you created above to sign on… if successful, you should see the MariaDB welcome message

Install PHP 7.4
Install PHP 7.4 on Ubuntu because Ampache requires it to function correctly. Since this version isn’t always installed by default on Ubuntu, you might need to add an extra software source. This involves installing a tool and then adding a specific repository before updating your system.
Run the commands below to add the below third party repository to upgrade to PHP 7.4
sudo apt-get install software-properties-common
sudo add-apt-repository ppa:ondrej/php
Then update and upgrade to PHP 7.4
sudo apt update
Next, run the commands below to install PHP 7.2-FPM and related modules.
sudo apt install php7.4 libapache2-mod-php7.4 php7.4-common php7.4-curl php7.4-mbstring php7.4-xmlrpc php7.4-mysql php7.4-gd php7.4-xml php7.4-cli php7.4-zip
After installing PHP 7.4-FPM, run the commands below to open the PHP default config file for Apache2.
sudo nano /etc/php/7.4/apache2/php.ini
Then, save the changes on the following lines below in the file. The value below is an ideal setting to apply in your environment.
file_uploads = On
allow_url_fopen = On
short_open_tag = On
memory_limit = 256M
upload_max_filesize = 100M
max_execution_time = 360
date.timezone = America/Chicago
Create Ampache Database
Create a specific database for Ampache after installing the necessary software. This database will store all the details about your media library. You’ll log into the MariaDB server and then run commands to create a new database and a user for Ampache.
To log on to the MariaDB database server, run the commands below.
sudo mysql -u root -p
Then, create a database called ampache
CREATE DATABASE ampache;
Create a database user called ampacheuser with a new password
CREATE USER 'ampacheuser'@'localhost' IDENTIFIED BY 'new_password_here';GRANT ALL ON ampache.* TO 'ampacheuser'@'localhost' WITH GRANT OPTION;
Finally, save your changes and exit.
FLUSH PRIVILEGES;
EXIT;
Download and Install Ampache
Download and install Ampache software files onto your Ubuntu server. You’ll use commands to download the zip file and then extract it into the web server’s folder. After that, you’ll need to adjust some file permissions to complete the installation.
cd /tmp
wget https://github.com/ampache/ampache/releases/download/4.1.1/ampache-4.1.1_all.zip
sudo unzip ampache-4.1.1_all.zip -d /var/www/ampache
Next, run the commands below to change the root folder permissions.
sudo chown -R www-data:www-data /var/www/ampache/
sudo chmod -R 755 /var/www/ampache/
Configure Apache Site
Configure the Apache site for Ampache to access it through your web browser. You need to set up a special configuration file for Apache. This file tells Apache how to handle requests for Ampache. You’ll create a new file in Apache’s ‘sites-available’ directory and paste in the necessary details.
sudo nano /etc/apache2/sites-available/ampache.conf
Then copy and paste the content below into the file and save it. Replace the highlighted line with your domain name and directory root location.
<VirtualHost *:80>
     ServerAdmin admin@example.com
     DocumentRoot /var/www/ampache
     ServerName example.com
     ServerAlias www.example.com

     <Directory /var/www/glpi/>
        Options +FollowSymlinks
        AllowOverride All
        Require all granted
     </Directory>

     ErrorLog ${APACHE_LOG_DIR}/error.log
     CustomLog ${APACHE_LOG_DIR}/access.log combined

</VirtualHost>
Save the file and exit.
After configuring the VirtualHost, enable the website by running the `a2ensite your-site.conf` command and restarting Apache2 with `sudo systemctl restart apache2`. This ensures your Ampache website is active.
sudo a2ensite ampache.conf
sudo a2enmod rewrite
sudo systemctl restart apache2.service
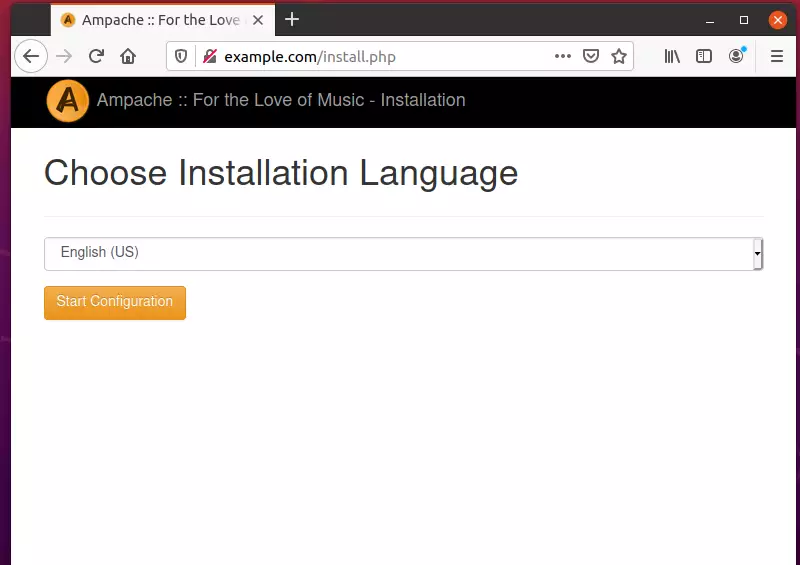
Finally, open your browser and go to the URL.
http://example.com
You should see the Ampache setup wizard. Choose the installation language and start the configuration.
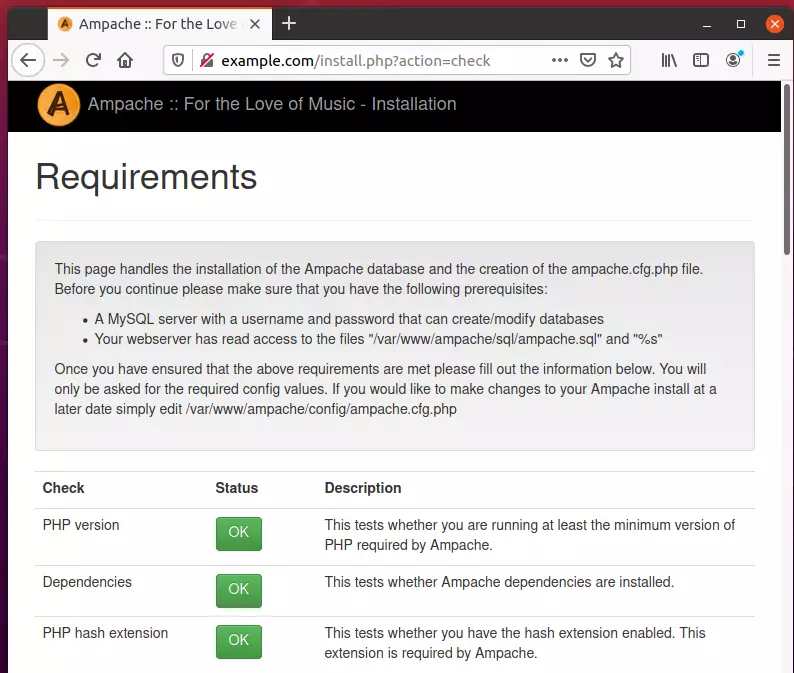
Next, make sure that all PHP requirements are met and continue.
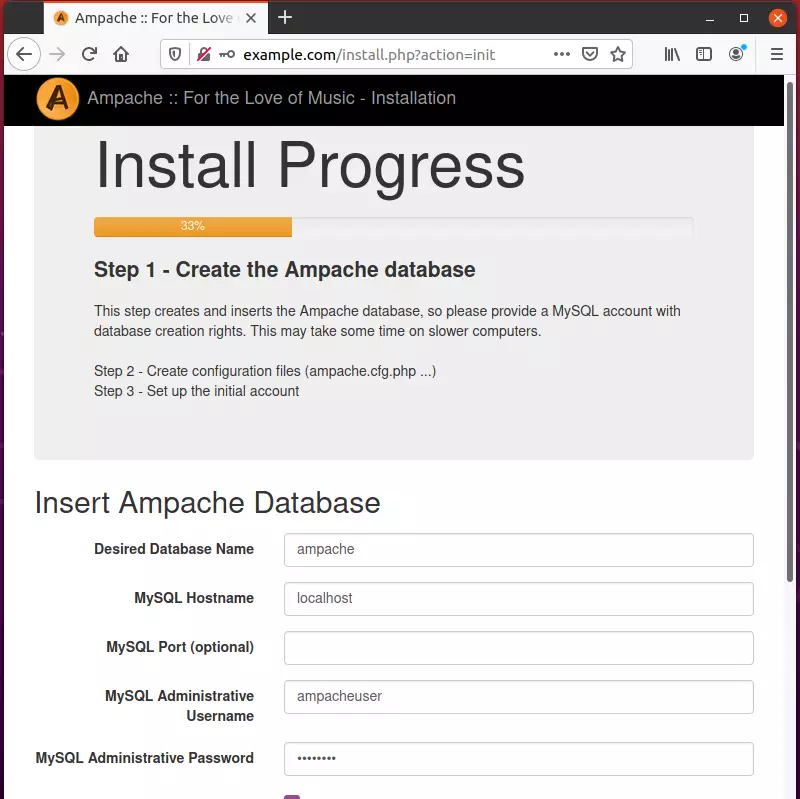
After typing in the database name, username, and password, continue with the wizard.
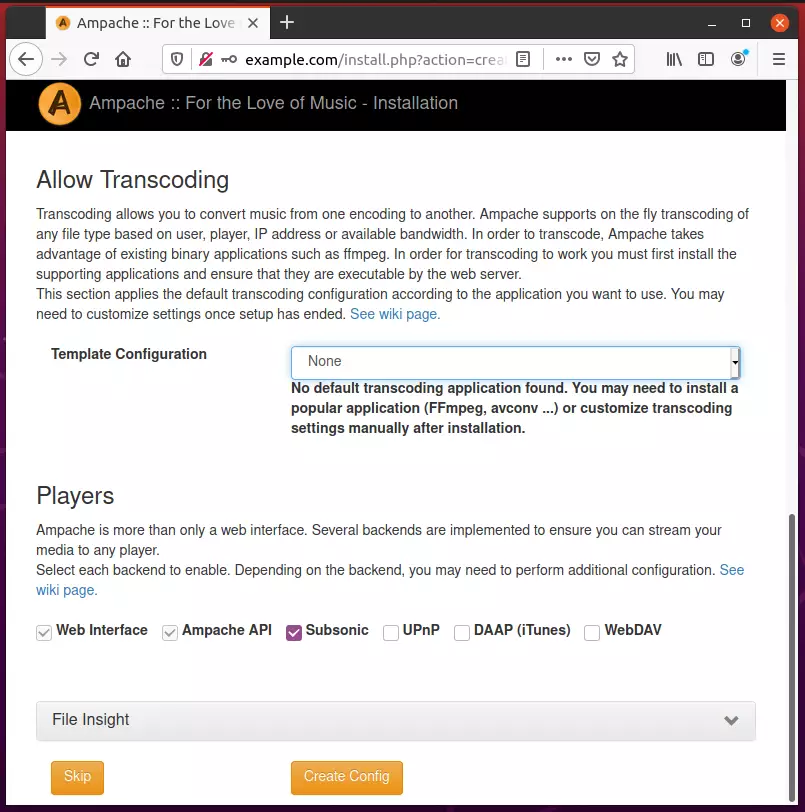
Next, choose the Subsonic backend for Ampache and continue.
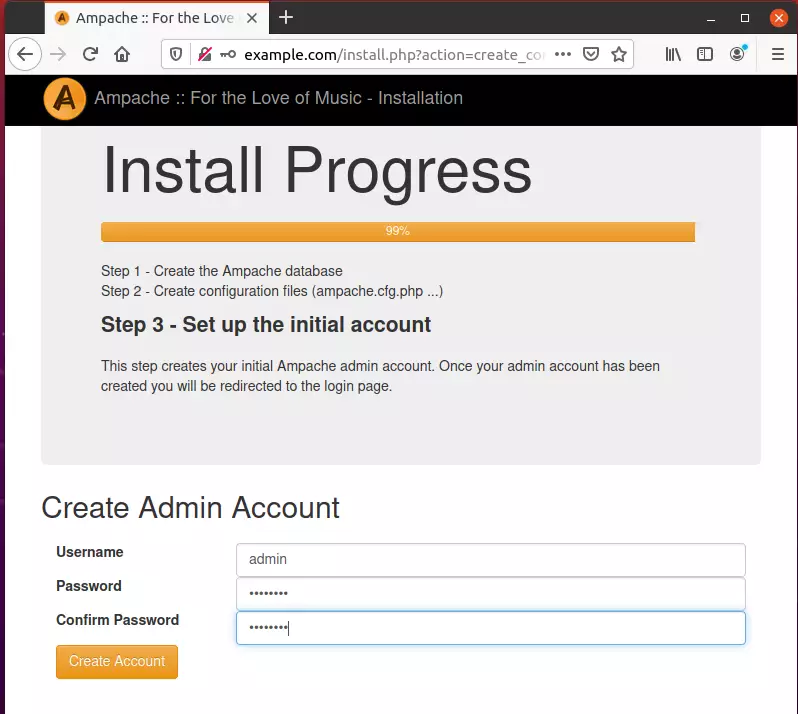
After that, create an initial admin account and continue.
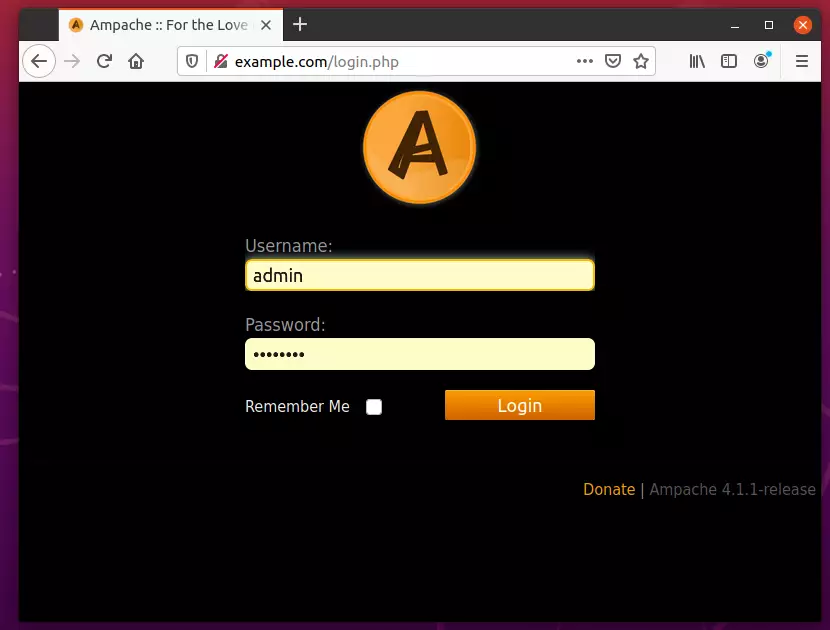
That should complete the setup.
Log in with the admin account you created above when the setup is done.
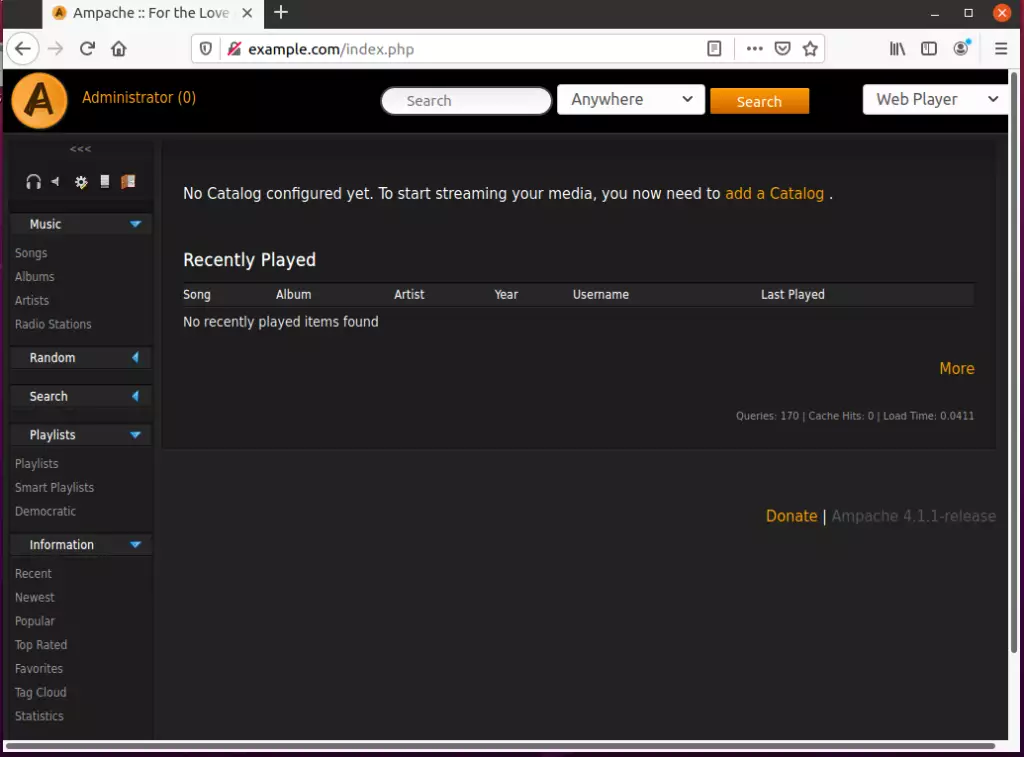
Log in and begin setting up your environment.
That should do it!
Conclusion:
This guide showed you how to install Ampache on Ubuntu with an Apache2 web server. If you find any error in the installation steps, please use the comment form below to report the error.
Was this guide helpful?

About the Author
Richard
Tech Writer, IT Professional
Richard, a writer for Geek Rewind, is a tech enthusiast who loves breaking down complex IT topics into simple, easy-to-understand ideas. With years of hands-on experience in system administration and enterprise IT operations, he’s developed a knack for offering practical tips and solutions. Richard aims to make technology more accessible and actionable. He's deeply committed to the Geek Rewind community, always ready to answer questions and engage in discussions.

Excelent article! helped me a lot, I think you only miss one step. Disabling the default site
sudo a2dissite 000-default.conf