How to Install a Scanner on Windows 11
Do you have papers or photos you want to turn into digital files? Installing a scanner on Windows 11 is simple. Once your scanner is connected, Windows 11 has built-in tools that let you scan documents quickly.
How to Set Up a Scanner Connected by USB
Most scanners plug directly into your computer with a USB cable. Here’s what to do:
- Plug the scanner’s USB cable into a free USB port on your computer.
- Turn on the scanner.
- Windows 11 usually installs the scanner automatically. You might see a message saying it’s setting up the device.
Why does this matter? Automatic installation saves you time and gets your scanner working right away.
What happens if Windows doesn’t install it automatically? Follow these steps to add it manually:
- Open Settings. Click the Start button and then the gear icon. Or press
Windows key + Ion your keyboard. - Click Bluetooth & devices on the left side.
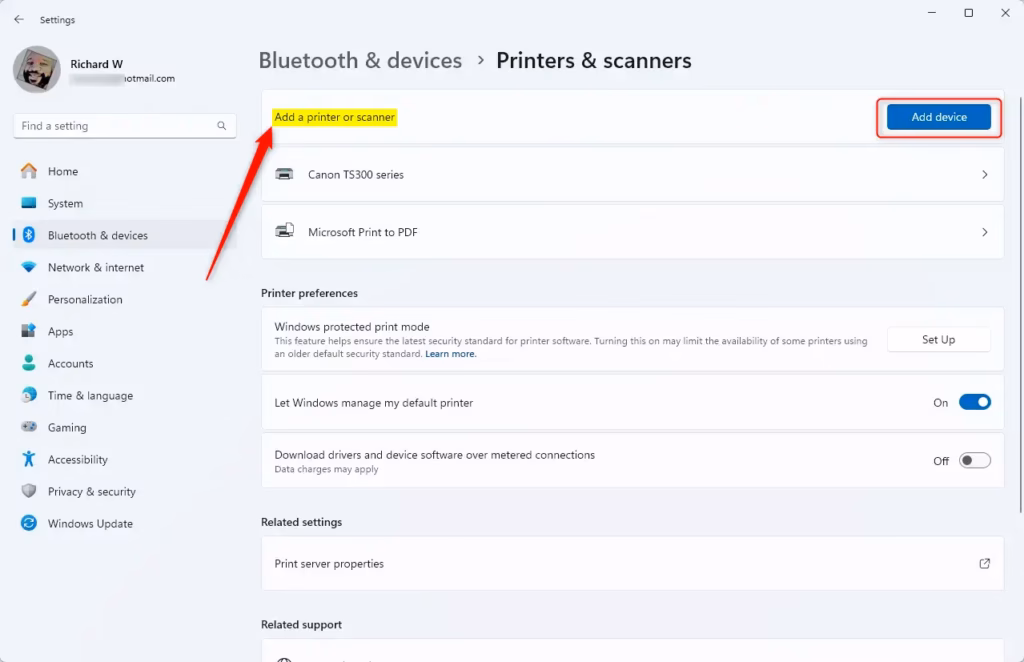
- Click Printers & scanners.
- Click the button that says Add device.
Windows will search for your scanner. When you see it listed, click on it and then click Add device.
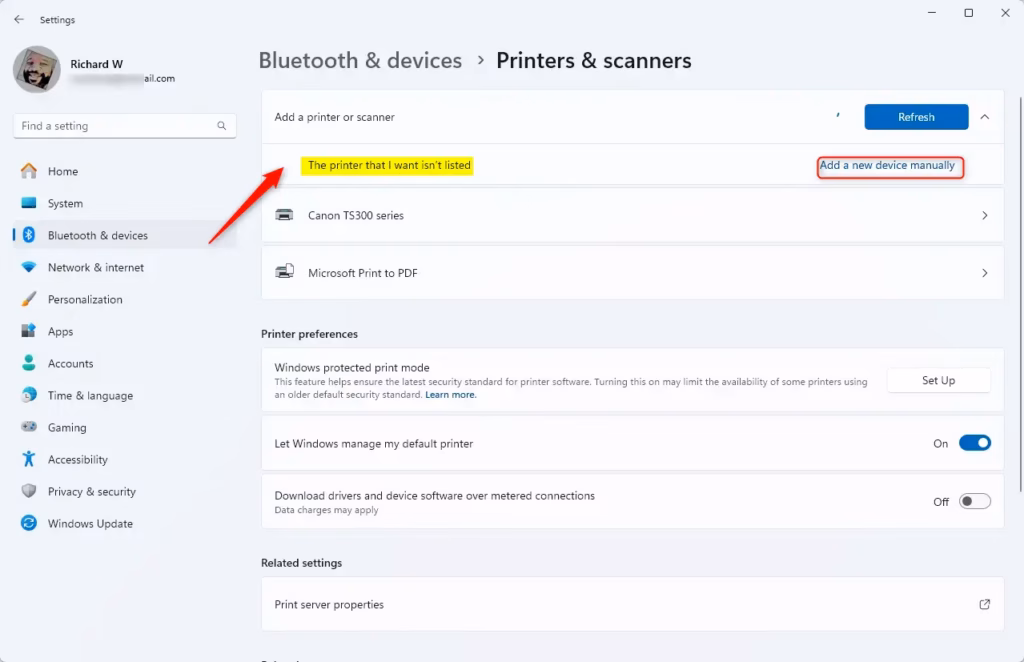
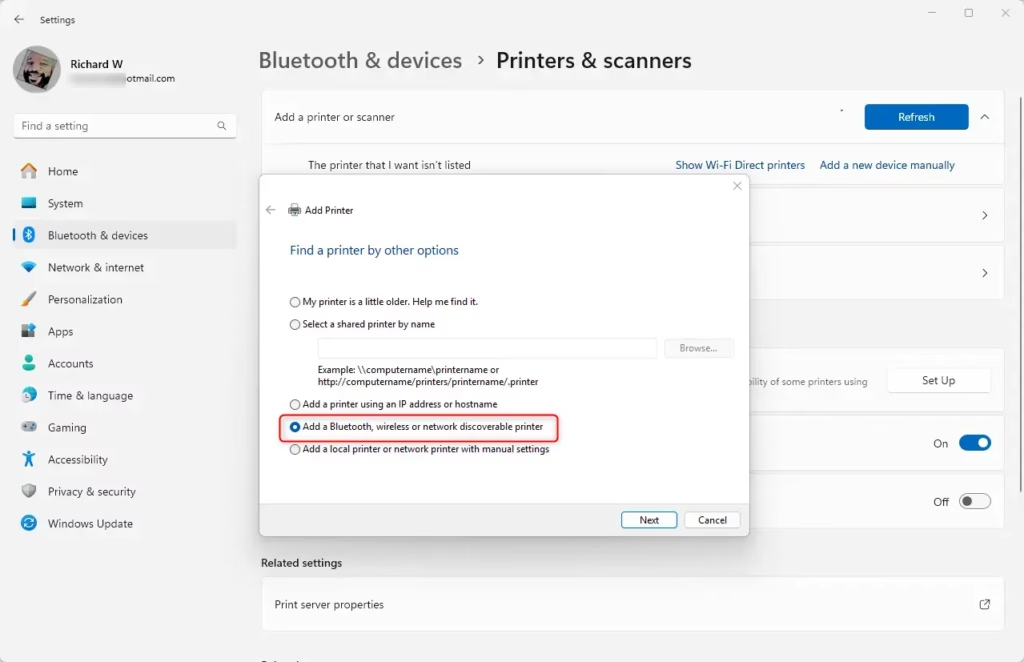
If you don’t see your scanner, click The printer that I want isn’t listed (this also works for scanners).
Choose Add a local printer or network printer with manual settings and click Next.
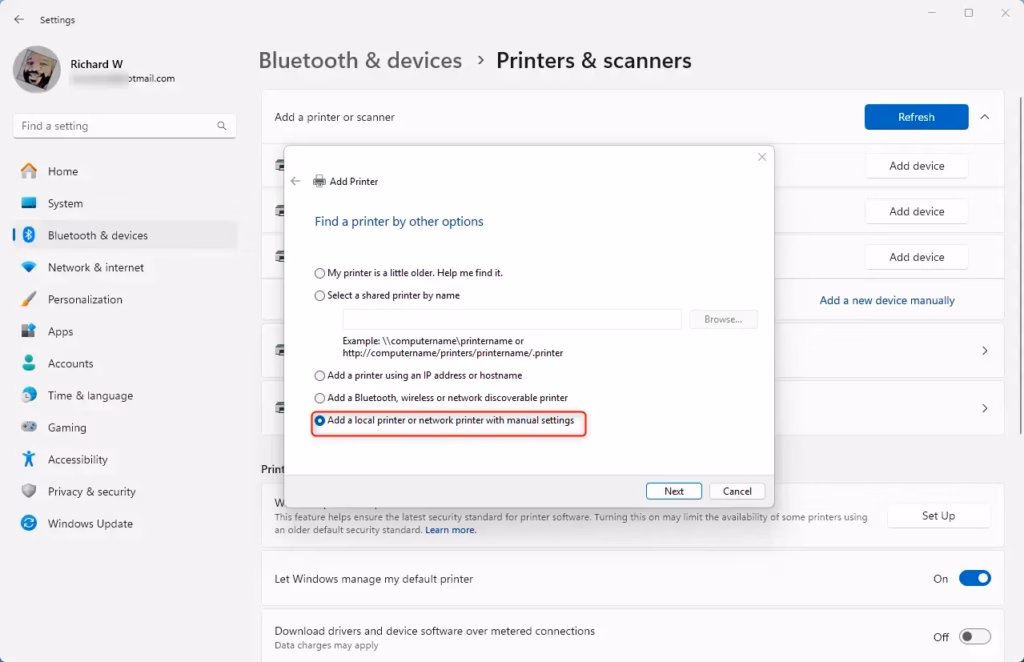
Select the port your scanner uses (usually USB001 or similar), then click Next.

FLAG: Admin privileges may be required for manual installation.
If your scanner came with a CD or a website link for drivers (special software that makes your scanner work), insert the CD or download the drivers from the manufacturer’s website.
Click Have Disk and browse to where you saved the driver files.
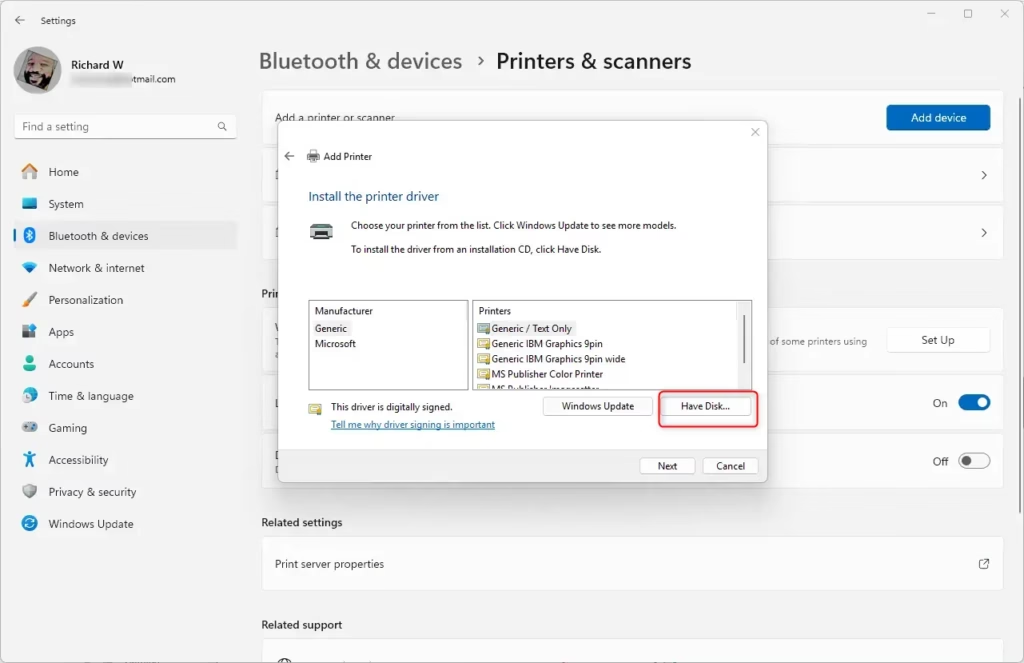
Follow the on-screen instructions to finish installing the driver. When done, you can test your scanner.

How to Add a Wireless Scanner
Some scanners connect to your Wi-Fi instead of using a cable. Here’s how to add one:
- Make sure your scanner is turned on and connected to your home Wi-Fi network. (Check your scanner’s manual if you’re not sure how to do this.)
- Open Settings. Click the Start button and the gear icon. Or press
Windows key + I. - Go to Bluetooth & devices > Printers & scanners.
- Click Add device and wait while Windows searches for nearby wireless scanners.
- When you see your scanner’s name, click it and select Add device.
If you don’t see your scanner, click The printer that I want isn’t listed and follow the steps to add it manually.
Why does this matter? Wireless scanners let you scan from anywhere in your home without cables.
What happens if you have trouble? Check your scanner’s manual or visit the manufacturer’s website for help connecting it to Windows.
Quick Tips
- Always keep your scanner’s drivers updated for best performance.
- Use the built-in Windows Scan app to scan documents easily. You can find it by typing Scan in the Start menu search box.
- If you don’t have the Scan app, you can download it for free from the Microsoft Store.
Summary
- Connecting and installing a scanner on Windows 11 is simple, whether it’s USB or wireless.
- You can add your scanner through Windows Settings in just a few steps.
- Installing the correct drivers helps your scanner work properly.
- Once set up, you can easily scan and save your documents and pictures.
- If you want more help or troubleshooting tips, check out the official Microsoft support page for scanning.
Was this guide helpful?

About the Author
Richard
Tech Writer, IT Professional
Richard, a writer for Geek Rewind, is a tech enthusiast who loves breaking down complex IT topics into simple, easy-to-understand ideas. With years of hands-on experience in system administration and enterprise IT operations, he’s developed a knack for offering practical tips and solutions. Richard aims to make technology more accessible and actionable. He's deeply committed to the Geek Rewind community, always ready to answer questions and engage in discussions.


No comments yet — be the first to share your thoughts!