How to View a Printer’s Print Queue in Windows 11
You view a printer’s print queue in Windows 11 by accessing its properties directly from the Devices and Printers settings.
The print queue is essentially a waiting list for documents sent to your printer, showing you the status of each print job. This list is crucial because a single stuck job can halt your entire printing process.
For example, if you sent a large PDF file and it appears to be stuck, checking the queue will immediately show you the problem.
Knowing how to access this queue allows you to manage, pause, resume, or cancel print jobs efficiently. This ensures your important documents get printed without unnecessary delays.
Go to Settings, then Bluetooth & devices, and click Printers & scanners. Select your printer and click the Open print queue button. This displays a list of all documents waiting to be printed or currently printing.
Getting to Your Printer Settings
You need to get to your printer’s settings in Windows 11 before you can see the queue. It’s easy to find.
The Start Menu is Your Friend
The easiest way to get to most settings is through the Start menu. Click the Windows icon in the bottom-left corner of your screen.
- Click the Start button.
- Then, click the Settings icon (it looks like a gear).
Going to Printers & Scanners
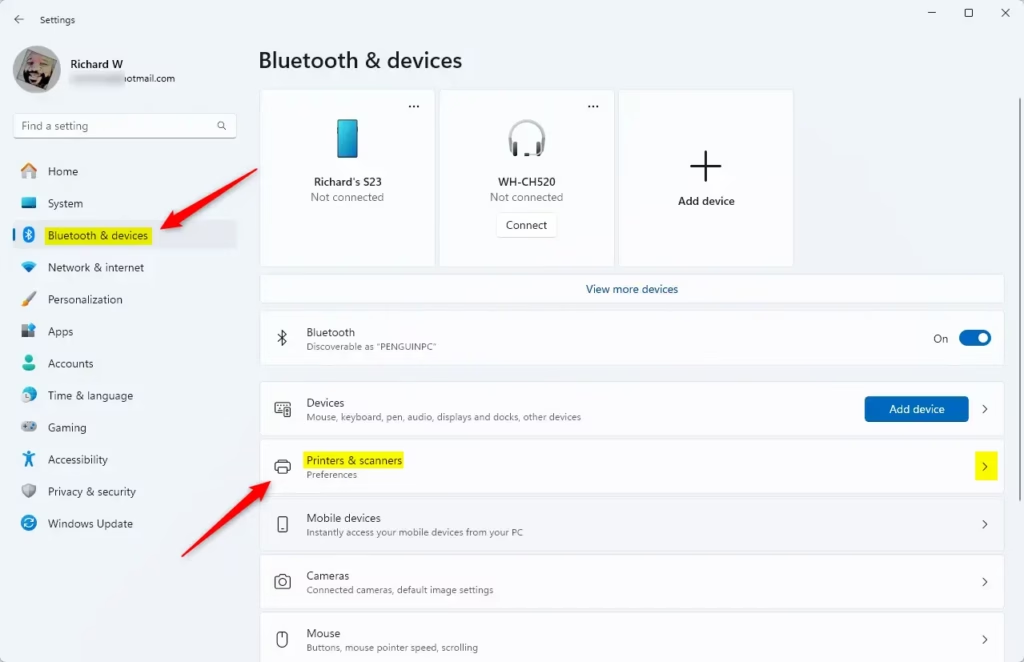
Once you’re in the Settings app, look at the menu on the left side. Click on Bluetooth & devices. Then, on the right side, find and click on Printers & scanners.
This is where Windows keeps all the information about your printers and scanners.
Opening the Print Queue
Now that you’re in the right place, finding the print queue is just a few more clicks away.
Choosing Your Printer
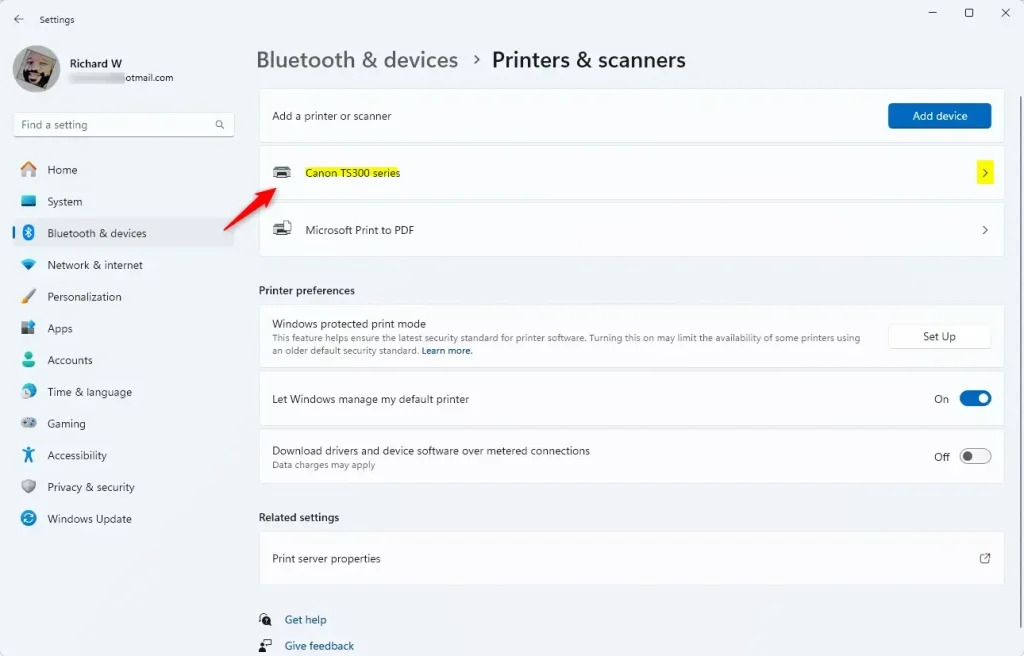
In the Printers & scanners section, you’ll see a list of your printers. Click the name of the printer whose queue you want to see.
The “Open Print Queue” Button
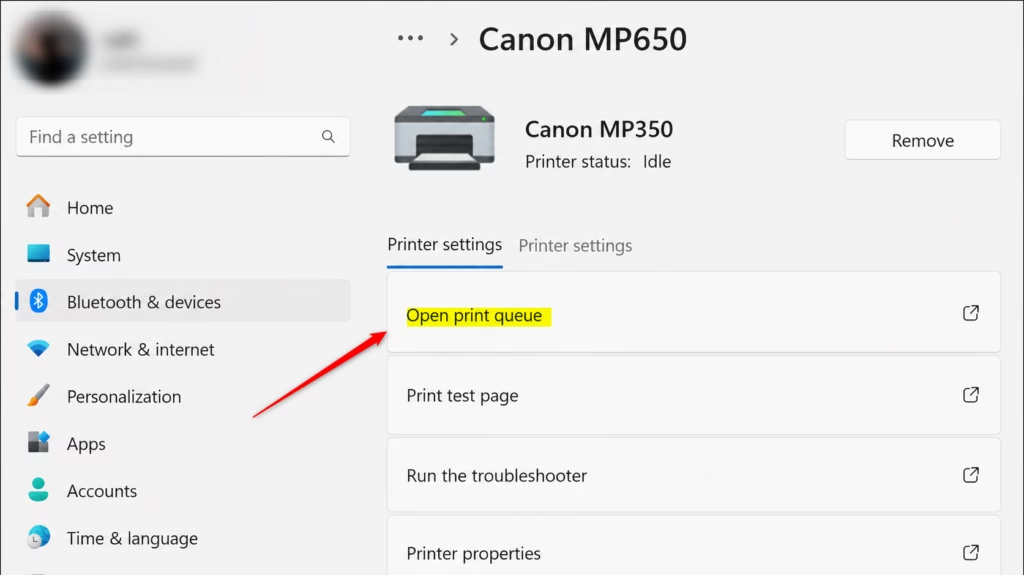
After you select your printer, a new screen will show more details. Look for the Open print queue button. Click it.
A new window will pop up. It shows all the documents waiting to be printed or currently printing.
Understanding the Print Queue Window
The Print Queue window lets you manage your print jobs.
What You’ll See
The window shows a list. Each item is a document sent to the printer. You’ll see:
- Document Name: The name of the file you tried to print.
- Status: What’s happening with the job. Common statuses are “Printing,” “Spooling” (Windows is getting the document ready), “Error,” or “Deleting.”
- Owner: Which user sent the job.
- Pages: How many pages are in the document.
- Submitted: When the job was sent.
- Port: How your printer is connected.
No Jobs? No Problem!
If the list is empty, there are no print jobs waiting. Your printer is ready or finished. This is usually good!
Checking the Right Printer
Pro Tip: If you have more than one printer, make sure you’re looking at the correct one. In the Print Queue window, there’s a Printers menu at the top. Click it to see all your printers and switch between their queues.
Managing Your Print Jobs
You can control your print jobs from the queue window.
Canceling a Print Job
This is common. If you sent the wrong document, or a job is stuck, you can cancel it.
- In the Print Queue window, find the job.
- Right-click on the document.
- Select Cancel.
The status will change to “Deleting,” and the job will disappear.
Pausing or Resuming Printing
You might need to stop all printing for a bit. This is useful if you need to add paper or fix a jam.
- In the Print Queue window, go to the Printer menu at the top.
- Click Pause Printing. The status will show it’s paused.
- To resume, go back to the Printer menu and click Pause Printing again.
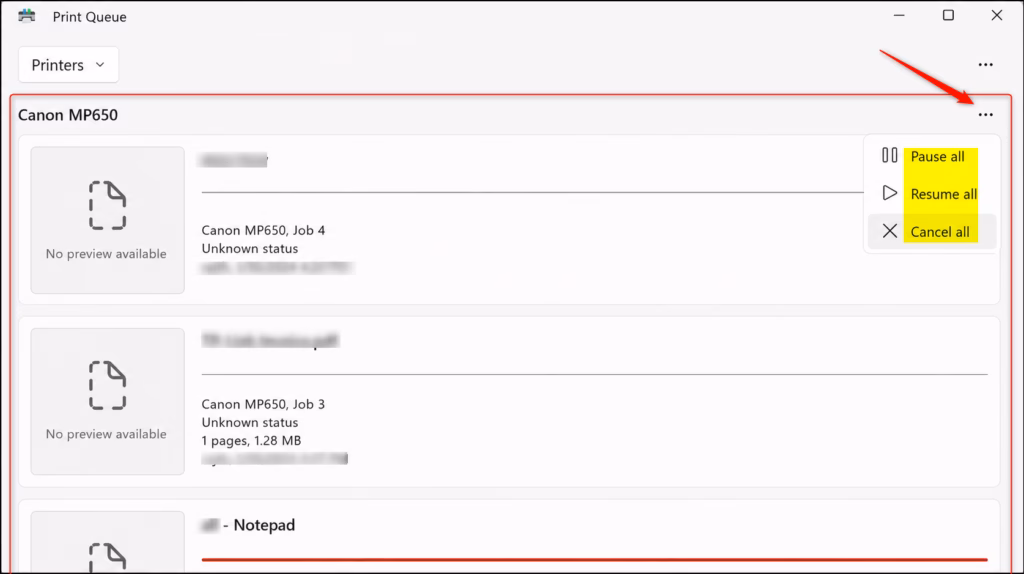
Canceling All Documents
If you have a big problem, you can cancel all jobs at once.
- In the Print Queue window, click the Printer menu.
- Select Cancel All Documents.
Warning: This cannot be undone. All waiting jobs will be removed.
Restart the Print Spooler Service
Windows uses a service called Print Spooler to manage print jobs. If it gets stuck, it can cause printing problems. Restarting it can often fix it.
- Press the Windows key + R on your keyboard.
- Type
services.mscand press Enter. This opens the Services window. - Scroll down and find Print Spooler.
- Right-click on Print Spooler and select Restart.
- If that doesn’t work, right-click, select Properties, click Stop, wait a few seconds, and then click Start.
After restarting the service, try printing again.
Summary
Knowing how to check and manage your printer’s queue in Windows 11 is a useful skill. It makes printing easier to understand. It also lets you fix common problems yourself. So, if your document seems lost, you know where to look.
How to view printer queue in 🪟 Windows 11?
To view the printer queue in Windows 11, go to Settings > Bluetooth & devices > Printers & scanners. Select your printer, then click 'Open print queue'. This displays all pending print jobs, their status, and allows for management.
How do I open the old print queue in 🪟 Windows 11?
To access the classic print queue in Windows 11, navigate to Settings > Bluetooth & devices > Printers & scanners. Click your printer, then select 'Printer properties'. Under the 'General' tab, click 'Print Queue…' to open the older interface.
How do I clear a print queue that is stuck?
To clear a stuck print queue in Windows 11, open the queue (Settings > Printers & scanners > [Your Printer] > Open print queue). Go to Printer > Cancel All Documents. If that fails, restart the 'Print Spooler' service via the Services app.
Can you check your printer's print history?
Windows 11 does not natively store a comprehensive print history by default. However, you can enable print history logging in the printer properties under the 'Advanced' tab. This requires specific configuration and may not be available for all printers.
Was this guide helpful?

About the Author
Richard
Tech Writer, IT Professional
Richard, a writer for Geek Rewind, is a tech enthusiast who loves breaking down complex IT topics into simple, easy-to-understand ideas. With years of hands-on experience in system administration and enterprise IT operations, he’s developed a knack for offering practical tips and solutions. Richard aims to make technology more accessible and actionable. He's deeply committed to the Geek Rewind community, always ready to answer questions and engage in discussions.

No comments yet — be the first to share your thoughts!