
This article explains how to turn the “Help improve Recall Snapshots filtering” feature on or off in Windows 11.
What is Recall?
Recall & Snapshots is an AI feature in Windows 11 that works like a photographic memory. It saves snapshots of your screen so you can search through them later. Think of it as taking automatic screenshots of everything you do on your PC.
To use Recall, you need to agree to save snapshots, which are pictures of your activity on Windows 11.
When Recall is on, you can temporarily pause it, filter apps and websites, delete your snapshots, and do more with your snapshots.
How is your data kept safe?
Recall works on your computer locally. It stores snapshots securely on your device. Your snapshots are encrypted by Device Encryption or BitLocker, which is turned on by default in Windows 11.
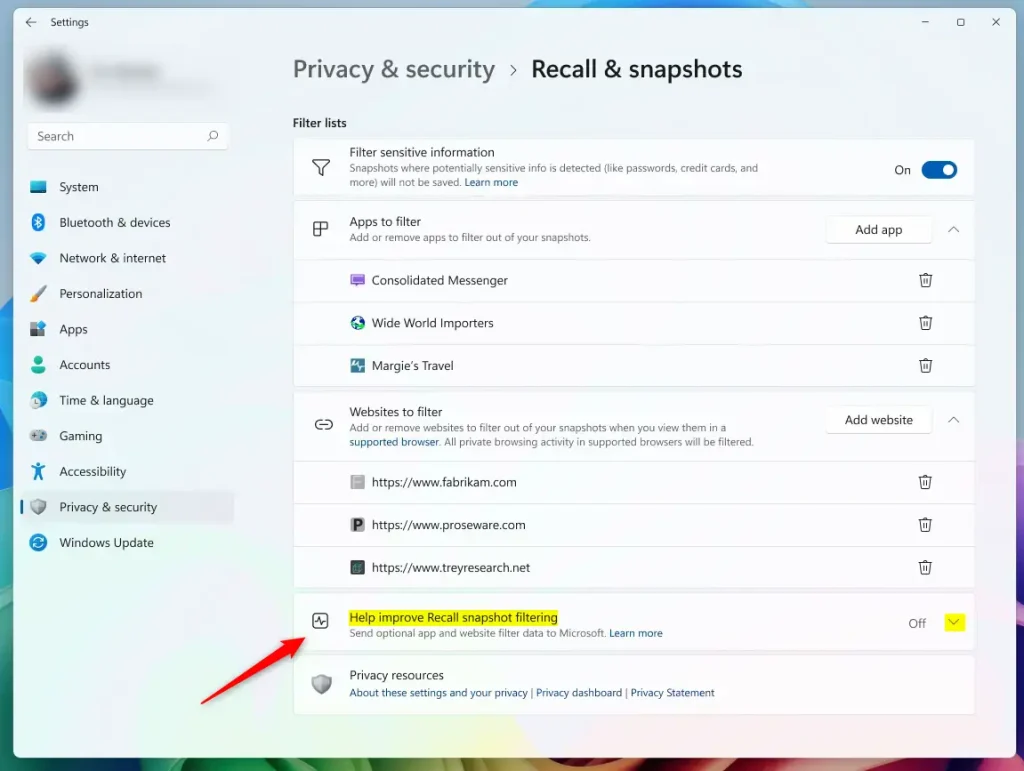
When you turn on filtering, Windows 11 offers an option to “Help improve Recall snapshots filtering.” This means you can share your list of apps and sites that you exclude from Recall to Microsoft. This sharing happens anonymously.
Why help improve Recall Snapshots filtering?
Users who have Recall Snapshots turned on can help make Recall better. You do this by anonymously sharing which apps and websites you exclude from Recall with Microsoft. This helps Microsoft understand what should and should not be recorded.
How to Enable or Disable the Feature Using Settings
Here’s how to turn this feature on or off:
- Open the Windows Settings app. Click the Start menu and select Settings. Or press Windows key + I on your keyboard to open Settings app directly.
- When Settings opens, click Privacy & security on the left side.

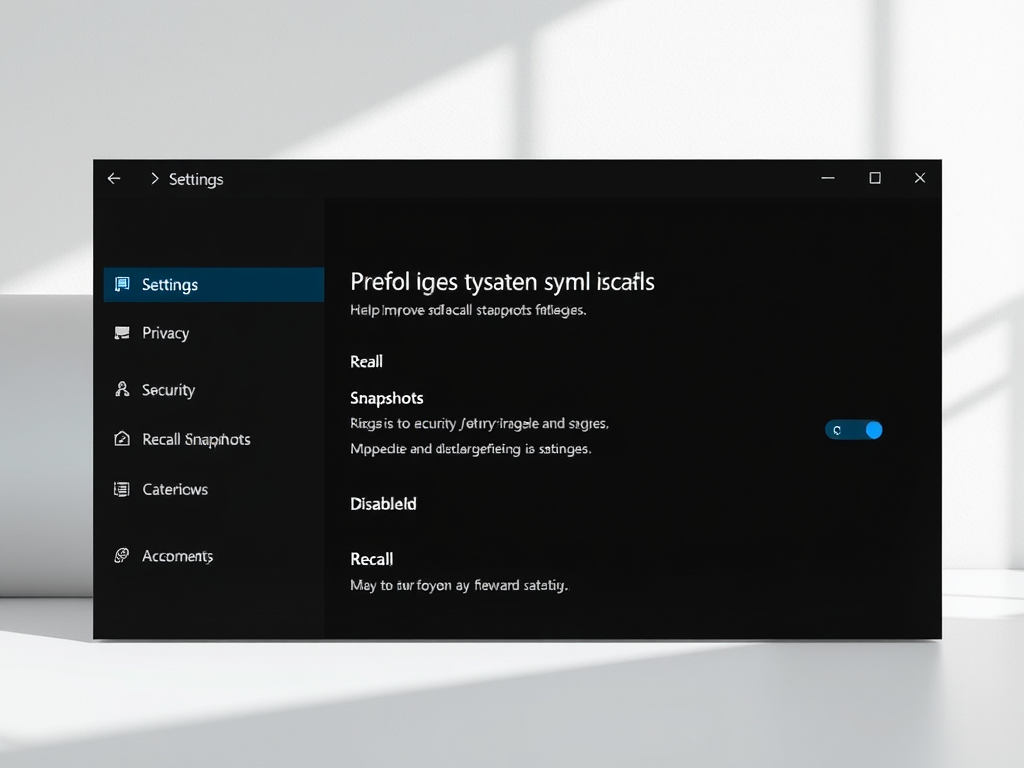
- On the right side, click the Recall & snapshots tile to open its settings. Then turn on the “Save snapshots” feature.
- Next, select the “Help improve Recall snapshots filtering” tile. This will expand to show more options.
- Toggle the switch button to the On position to enable it. Toggle it to Off to disable it.
- Close the Settings app when you’re done.
How to Enable or Disable Using the Windows Registry
⚠️ Admin privileges required
Another way to turn “Help improve Recall snapshots filtering” on or off is to use the Windows Registry editor.
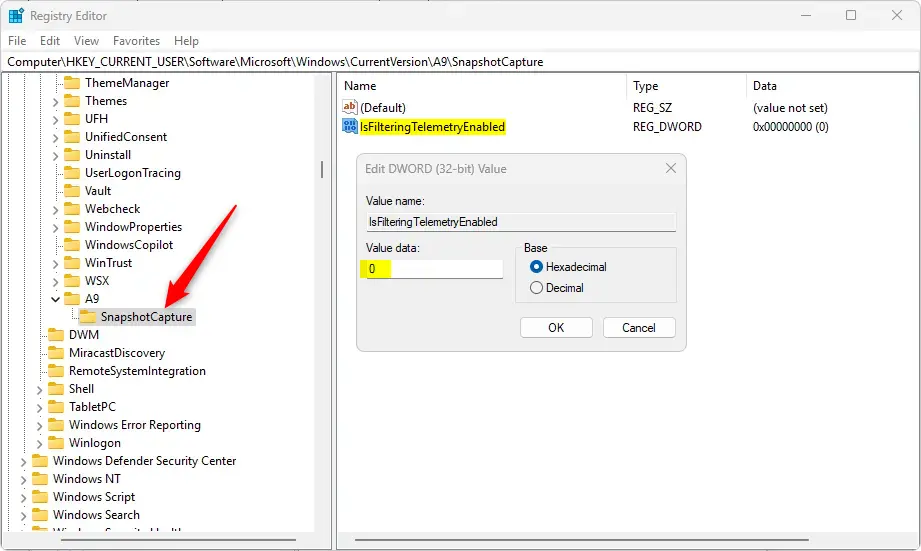
- Open the Windows Registry and go to this folder path:
HKEY_CURRENT_USER\Software\Microsoft\Windows\CurrentVersion\A9SnapshotCapture - Right-click on SnapshotCapture. Select New and then DWORD (32-bit) Value. Name the new DWORD
IsFilteringTelemetryEnabled. - Double-click
IsFilteringTelemetryEnabledand change the value. Enter 1 to turn on “Help improve Recall filtering.” Enter 0 to turn it off.
- You’re done!
Summary
The “Help improve Recall snapshots filtering” feature lets you help Microsoft make Recall better. You share which apps and websites you don’t want recorded. Here’s what you need to know:
- What it does: It shares your excluded apps and websites with Microsoft to improve Recall.
- How to turn it on: Use Settings or the Windows Registry to enable it.
- Your privacy: Snapshots are encrypted and stored on your device. Sharing is done anonymously.
- You’re in control: You can turn it on or off anytime through Settings or the Registry.
Reference:
Frequently Asked Questions
What is Recall Snapshots in Windows 11?
How can I enable Recall Snapshots filtering?
Can I disable Recall Snapshots filtering later?
How does Microsoft use the data from Recall Snapshots filtering?
Is there a way to enable Recall Snapshots filtering using the Windows Registry?

Leave a Reply Cancel reply