
This article explains how to hide (remove) or unhide (add) the Copilot button on the Taskbar in Windows 11.
Microsoft is rolling out the new Copilot experience that works with Bing Chat AI, allowing users to interact with the chatbot using natural language change system settings and more.
The new Copilot feature is only available to some machines enrolled in the Microsoft Insider Preview program.
For computers that have Copilot added, a new Copilot button will appear on the Taskbar. It will appear as a flyout interface when you press the button or use the keyboard shortcut (Windows key + C).
Add or remove the Copilot button from the Taskbar
As mentioned, a new Copilot button will appear on the Taskbar for computers that are enabled or turned on.
Here’s how to hide or unhide the Copilot button.
First, open the Windows Settings app.
You can do that by clicking on the Start menu and selecting Settings. Or press the keyboard shortcut (Windows key + I) to launch the Settings app.
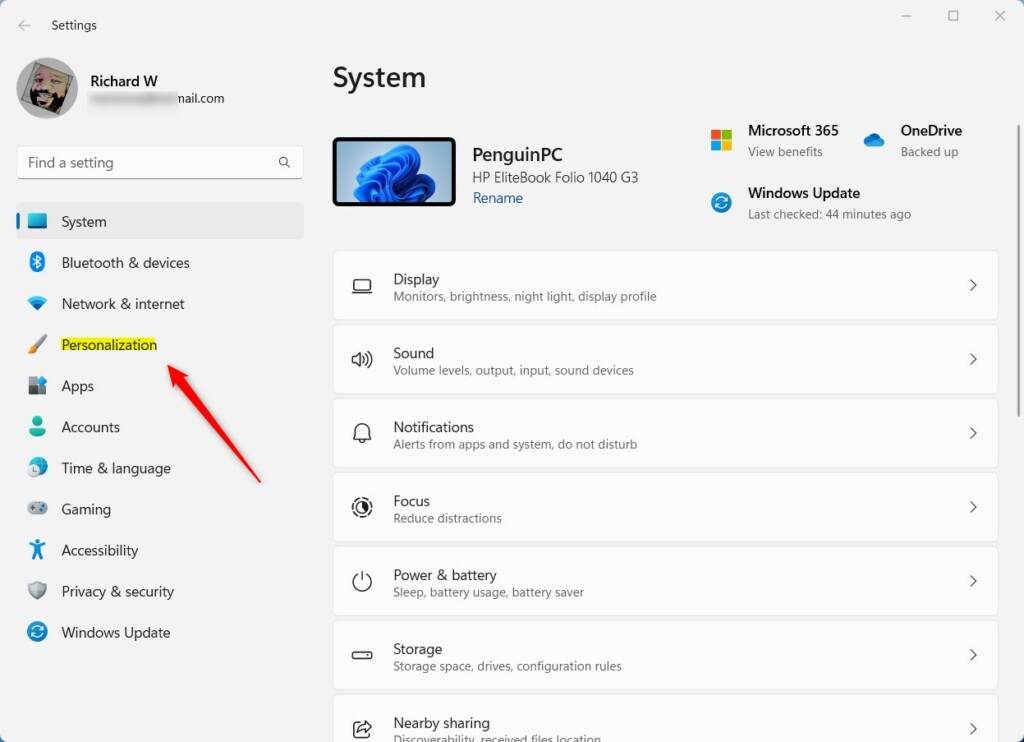
When the Setting app opens, click the Personalization button on the left.
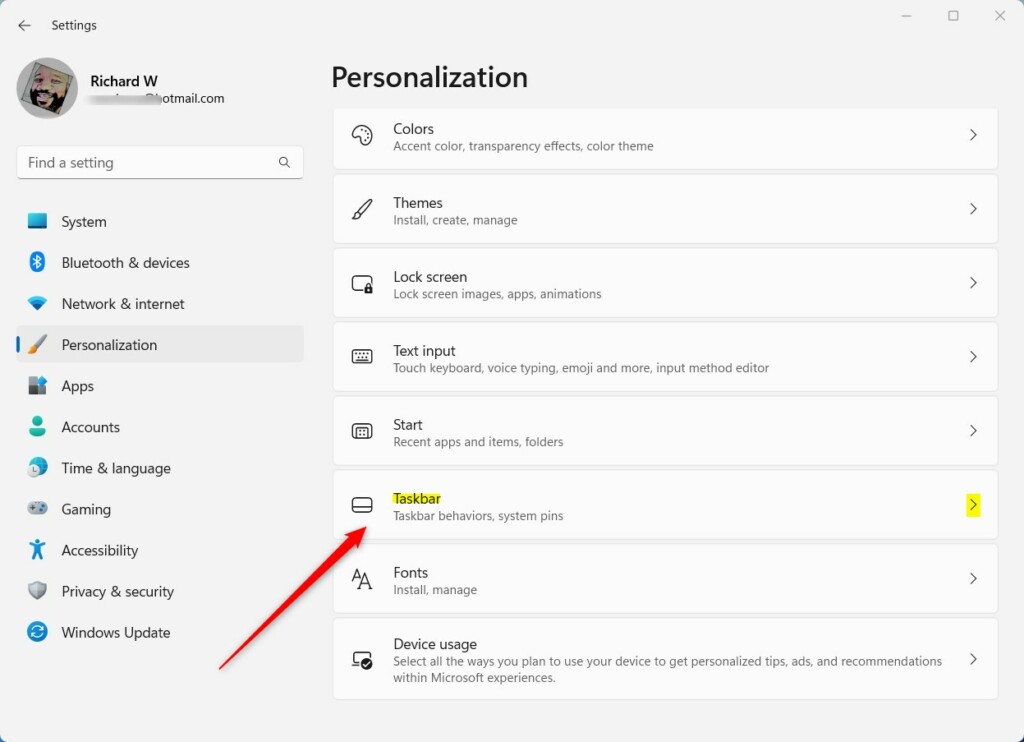
Select the Taskbar tile on the right to expand it.
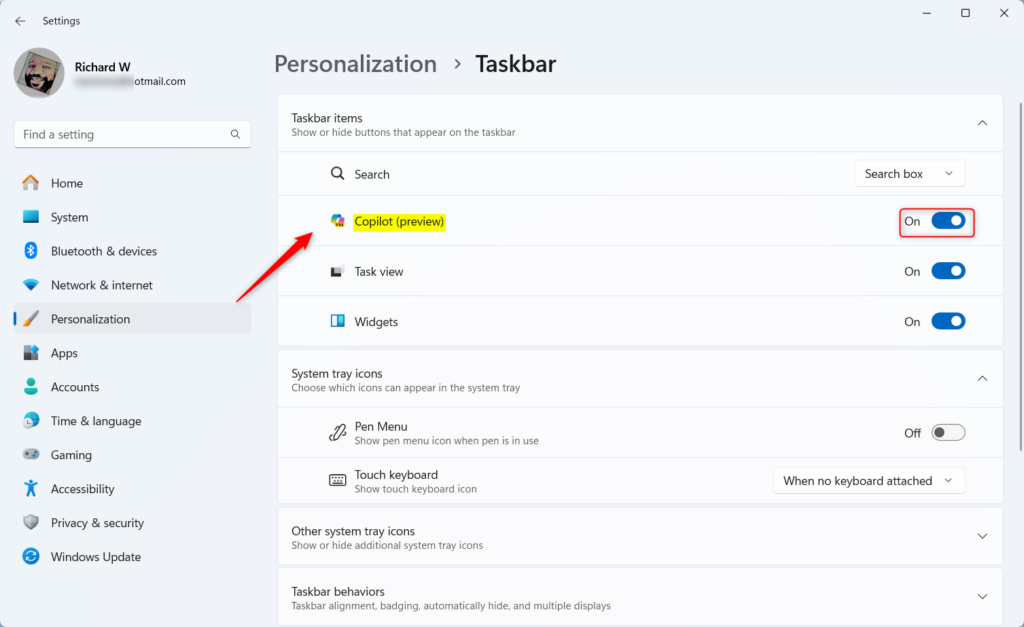
Under Taskbar items on the Personalization -> Taskbar settings pane, toggle the switch button for (Copilot preview) to the On (default) position to enable it.
To disable it, toggle the button back to the Off position.
Exit and Settings app when you are done.
Show or hide the Copilot button on the Taskbar via Local Group Policy Editor
Yet another way to show or hide the Copilot button on the Taskbar is via the Local Group Policy Editor.
To do that, first, open Local Group Policy Editor by clicking on the Start and searching for Edit group policy, as highlighted below.
Then, select Edit group policy under Best match to launch the Local Group Policy Editor.

In the left pane of Local Group Policy Editor, expand the tree:
Computer Configuration > Administrative Templates > Start Menu and Taskbar
In the Start Menu and Taskbar details pane on the right, local and double-click the setting Hide the Copilot button.

On the Hide the Copilot button setting window, choose one of the options below:
- Not Configured – Same as Disabled. The Copilot feature will be available to all users.
- Enabled – The copilot button will be hidden, and the Settings toggle will be disabled.
- Disabled – The Copilot button will be visible, and the Settings toggle will be enabled.
Select OK.
Close Local Group Policy Editor.
Add or remove the Copilot button on the Taskbar via Windows Registry Editor
Yet another way to add or remove the Copilot button on the Taskbar is to use the Windows Registry editor.
To do that, open the Windows Registry editor, and navigate to the folder key below.
HKEY_CURRENT_USER\Software\Policies\Microsoft\Windows\Explorer
If you don’t see the Explorer folder key, right-click on the Windows parent key, then create the subkey (Explorer) folder.
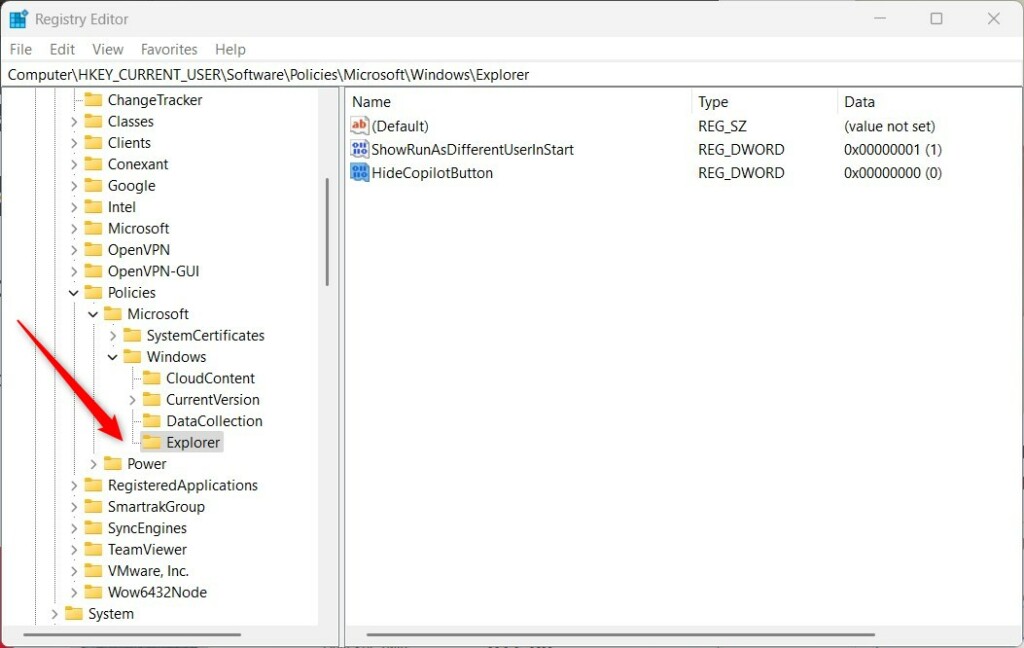
Right-click the Explorer folder key’s right pane and select New -> String Value. Type a new item named HideCopilotButton.
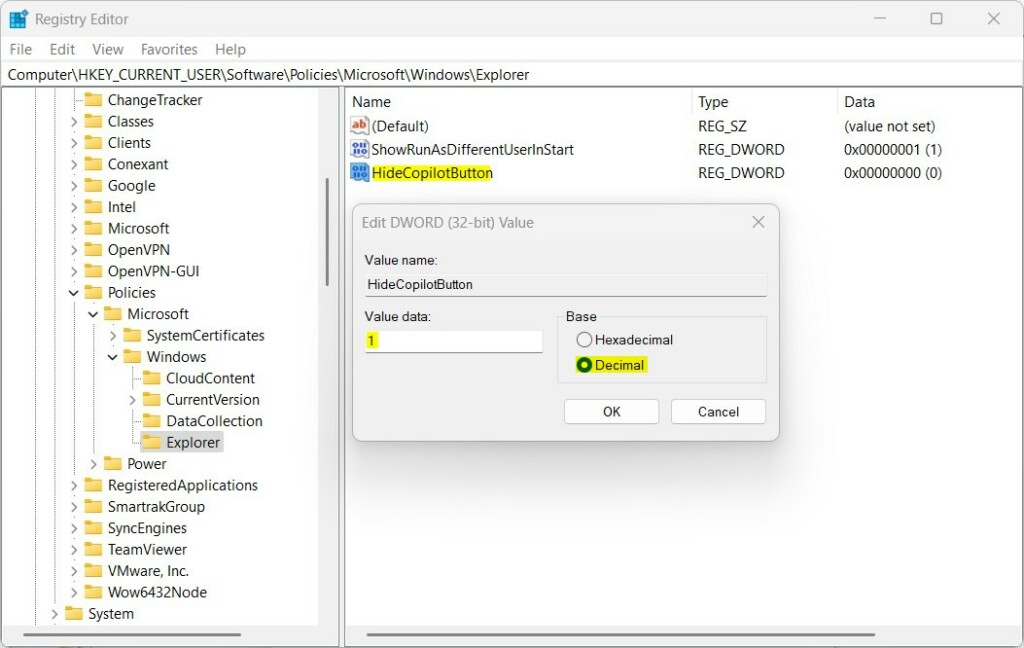
Double-click the new item you created (HideCopilotButton) and update the Value data:
- To hide the Copilot button, type 1.
- To show the Copilot button, delete the HideCopilotButton item.
That should do it. Restart your computer to apply the changes.
That should do it!
Reference:
Conclusion:
- In conclusion, this article provided comprehensive guidelines on hiding or unhiding the Copilot button on the Taskbar in Windows 11 through different methods, including Windows Settings, Local Group Policy Editor, and Windows Registry Editor.
- The step-by-step instructions and accompanying visuals make it easy for users to follow the process seamlessly.
- By referring to the Microsoft Insider Preview program, the article also indicates the availability of the Copilot feature to specific machines, offering insights into its deployment and applicability.
- Readers are encouraged to share feedback or contribute additional insights using the provided comments section, promoting engagement and continuous knowledge-sharing.


Leave a Reply Cancel reply