How to Show or Hide Drive Letters in Windows 11 File Explorer
You can show or hide drive letters in Windows 11 File Explorer to customize how your storage devices appear.
Drive letters, such as C: or D:, are the labels Windows assigns to your storage partitions and connected drives, making them easily identifiable within File Explorer.
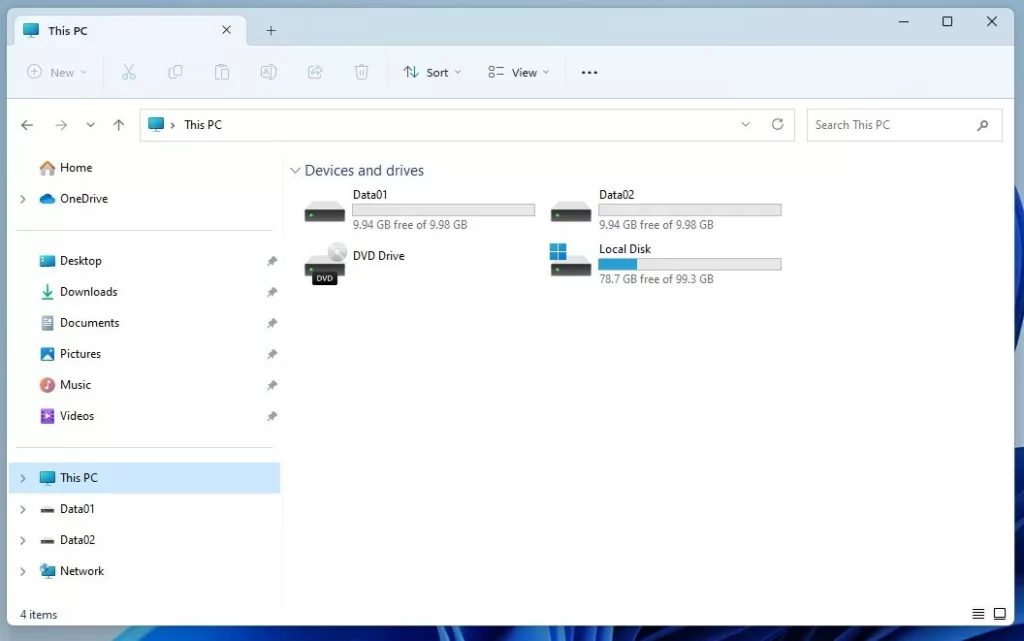
Hiding these letters offers a cleaner, less cluttered view, especially in the ‘This PC’ section. For instance, Windows 11 typically displays drive letters by default for all fixed and removable drives.
You gain more control over your File Explorer’s appearance by managing these labels, allowing you to tailor the view to your preference for a streamlined experience.
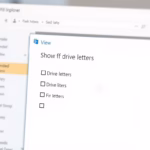
To show or hide drive letters in Windows 11 File Explorer, open Folder Options, click the View tab, and check or uncheck “Show drive letters.” Click OK to apply.
Change settings using Folder Options
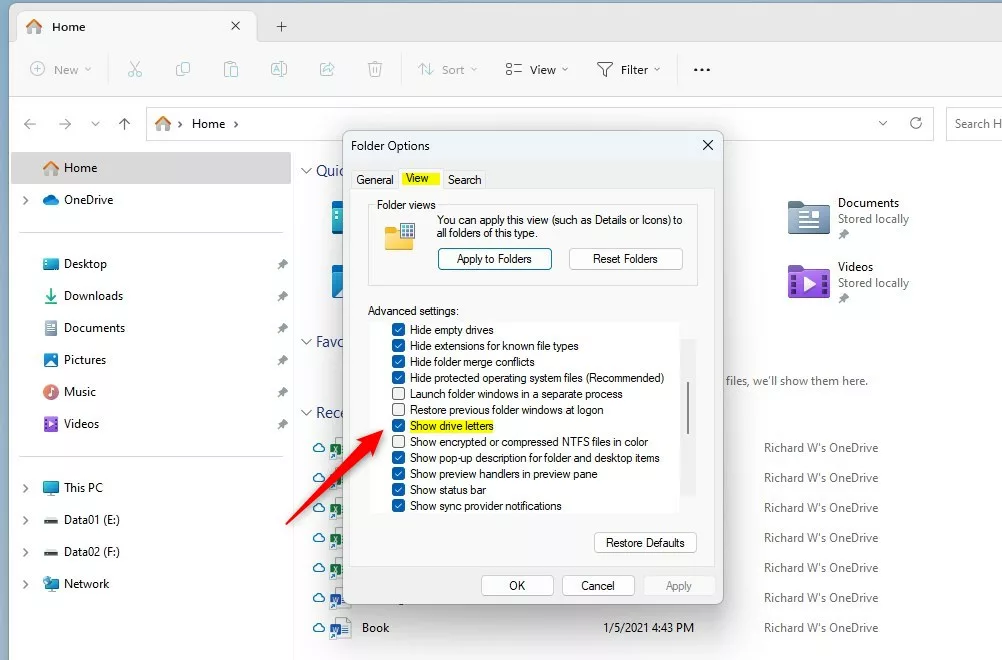
You can show or hide drive letters in Windows 11 File Explorer by changing the Folder Options. This is a simple way to control which drive letters appear in your File Explorer window.
- Open the File Explorer folder options.
- When the window appears, click on the View tab.
- Look for the box labeled Show drive letters.
- Check the box to show the letters, or uncheck it to hide them.
- Click OK to save your changes.
Change settings using the Registry Editor
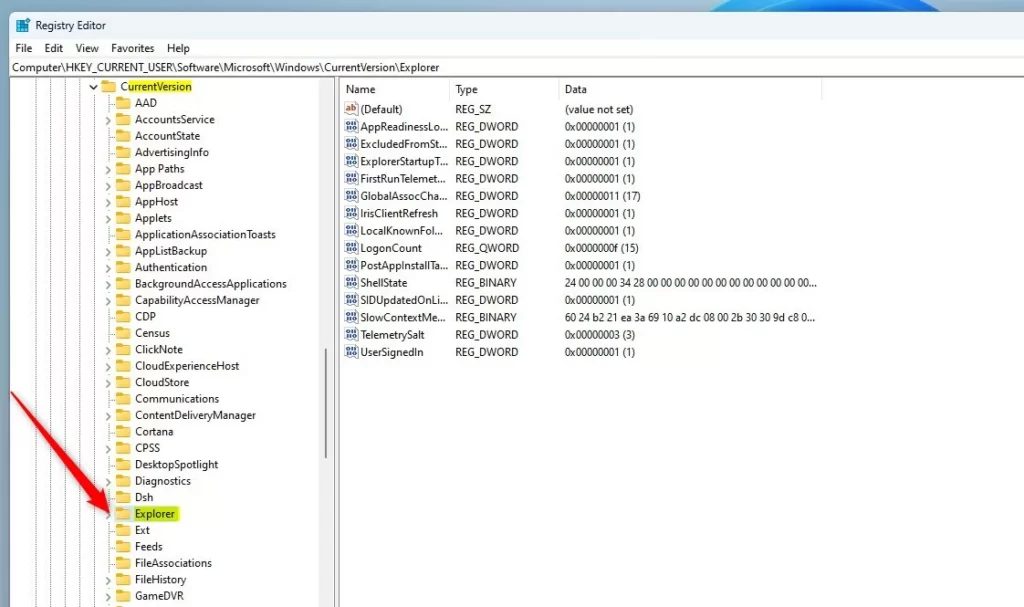
If you’re comfortable with advanced settings, you can show or hide drive letters in Windows 11 using the Registry Editor. This method requires administrator access and involves editing specific system settings.
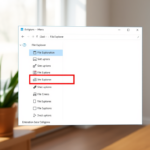
If you prefer advanced settings, edit the Windows Registry. You’ll need to open the Registry Editor to make these changes.
- Open the Windows Registry.
- Navigate to:
HKEY_CURRENT_USER\Software\Microsoft\Windows\CurrentVersion\Explorer
- Right-click in the empty space on the right.
- Select New, then DWORD (32-bit) Value.
- Name it
ShowDriveLettersFirst. - Double-click it and set the Value data to 2 to hide or 0 to show.
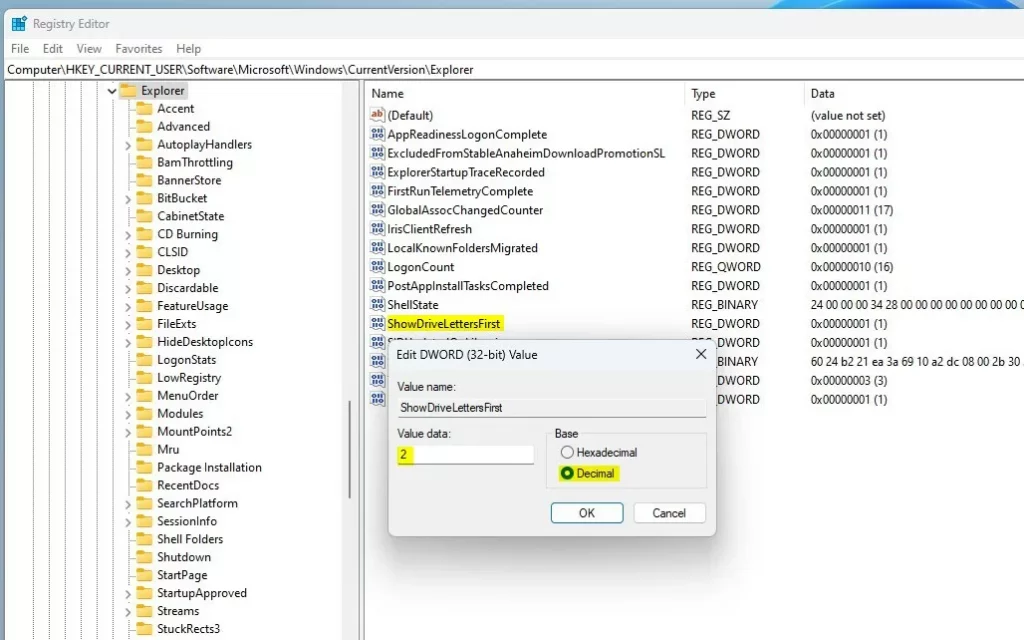
Restart your computer for these changes to take effect.
Managing Drives with Disk Management
You can use the Disk Management utility to assign or remove drive letters entirely. Note: This step requires admin privileges. Right-click the Start button and select Disk Management. Then, right-click any partition to ‘Change Drive Letter and Paths’ to mount it as a folder instead of a letter.
Using Command Line and Diskpart
Advanced users can show or hide drive letters in Windows 11 using the Command Line with Diskpart, a powerful tool for managing disks and volumes directly.
Troubleshooting Missing Drive Letters
If your drive letters disappear after a Windows update, check Disk Management first. Sometimes the system loses the assignment. You can manually reassign a letter to restore access. If a drive is hidden via the Registry NoDrives value, you must delete that entry to make it reappear.
Summary
You can manage drive letters in Windows 11 using Folder Options, the Registry, or Disk Management. Whether you want a clean look or need to hide specific drives, these methods provide full control. Always use caution when editing registry keys or using command-line tools like Diskpart.
Why do my drive letters disappear after a Windows update?
Updates can occasionally reset drive letter assignments or trigger conflicts with external hardware. Check Disk Management to see if the drive is listed without a letter. If so, right-click the volume and select ‘Change Drive Letter and Paths’ to assign a new one manually.
Is it safe to change drive letters in the Registry?
Modifying the registry is safe if you follow instructions exactly. Always back up your registry before making changes. Incorrect values can cause display issues in File Explorer, but they generally do not damage your actual data or files stored on the physical hard drives.
Was this guide helpful?

About the Author
Richard
Tech Writer, IT Professional
Richard, a writer for Geek Rewind, is a tech enthusiast who loves breaking down complex IT topics into simple, easy-to-understand ideas. With years of hands-on experience in system administration and enterprise IT operations, he’s developed a knack for offering practical tips and solutions. Richard aims to make technology more accessible and actionable. He's deeply committed to the Geek Rewind community, always ready to answer questions and engage in discussions.


No comments yet — be the first to share your thoughts!