How to Generate and Manage GPG Keys on Ubuntu Linux

GPG keys on Ubuntu Linux let you keep your digital messages and files private by encrypting and signing them.
GPG, which stands for GNU Privacy Guard, is a free program that helps you secure your information. It works by creating two keys: a public key that others can use to send you encrypted messages, and a private key that only you have to read those messages or to prove you sent something.
Managing these GPG keys is important for keeping your data safe, especially on versions like Ubuntu 20.04 LTS. You’ll learn how to create new key pairs, see the keys you already have, and save copies of your keys.
Generate GPG keys by opening the terminal and running `gpg –gen-key`. You will be prompted for your name and email to identify the key. Confirm the details, and then generate random bytes by performing other actions to create your public and private key pair.
How to install GnuPG
Installing GnuPG on Ubuntu is the first step to managing your GPG keys. GnuPG is a free tool that helps you encrypt and sign your data using GPG encryption, making your communications more secure. On Linux systems, GnuPG is a popular tool to help with GPG encryption.
On Linux systems, a popular tool to help with GPG is GnuPG.
GnuPG is a free software implementation of the OpenPGP standard that enables you to encrypt and sign your data and communications using GPG encryption.
Launch the command line terminal on Ubuntu and execute the following commands to install GnuPG, a free software that lets you encrypt and sign data.
sudo apt update
sudo apt install gnupg
After installing GnuPG, execute the commands below to verify its installation and which encryption algorithms are supported.
gpg --help

Output:
gpg --help
gpg (GnuPG) 2.2.4
libgcrypt 1.8.1
Copyright (C) 2017 Free Software Foundation, Inc.
License GPLv3+: GNU GPL version 3 or later <https://gnu.org/licenses/gpl.html>
This is free software: you are free to change and redistribute it.
There is NO WARRANTY, to the extent permitted by law.

Home: /home/richard/.gnupg
Supported algorithms:
Pubkey: RSA, ELG, DSA, ECDH, ECDSA, EDDSA
Cipher: IDEA, 3DES, CAST5, BLOWFISH, AES, AES192, AES256, TWOFISH,
CAMELLIA128, CAMELLIA192, CAMELLIA256
Hash: SHA1, RIPEMD160, SHA256, SHA384, SHA512, SHA224
Compression: Uncompressed, ZIP, ZLIB, BZIP2

Syntax: gpg [options] [files]
Sign, check, encrypt or decrypt
Default operation depends on the input data
How to generate your GPG key pair
Now that GnuPG is installed, you’ll need to generate your own GPG key pair, consisting of a private and public key.
The private key acts as your master key, allowing you to decrypt or encrypt your files and create signatures using it.
The GPG public key allows others to view content you encrypted with your GPG private key. Sharing your GPG public key also proves that content encrypted with your GPG private key comes from you.
To generate your key pair, run the commands below:
gpg --gen-key
To initiate the GPG key generation process, you will be asked to provide your real name and email address to identify the key. You should see output similar to the following:
gpg --gen-key
gpg (GnuPG) 2.2.4; Copyright (C) 2017 Free Software Foundation, Inc.
This is free software: you are free to change and redistribute it.
There is NO WARRANTY, to the extent permitted by law.

Note: Use "gpg --full-generate-key" for a full featured key generation dialog.

GnuPG needs to construct a user ID to identify your key.

Real name: Richard
Email address: admin@example.com
You selected this USER-ID:
    "Richard <admin@example.com>"

Change (N)ame, (E)mail, or (O)kay/(Q)uit? O
We need to generate a lot of random bytes. It is a good idea to perform
some other action (type on the keyboard, move the mouse, utilize the
disks) during the prime generation; this gives the random number
gpg: revocation certificate stored as '/home/richard/.gnupg/openpgp-revocs.d/77B56FA102AECAC136D1C361F6A785CA937400D3.rev'
public and secret key created and signed.

pub   rsa3072 2019-07-01 [SC] [expires: 2021-06-30]
      77B56FA102AECAC136D1C361F6A785CA937400D3
uid                      Richard <admin@example.com>
sub   rsa3072 2019-07-01 [E] [expires: 2021-06-30]
You’ll be prompted to type and confirm your passphrase for the private key.
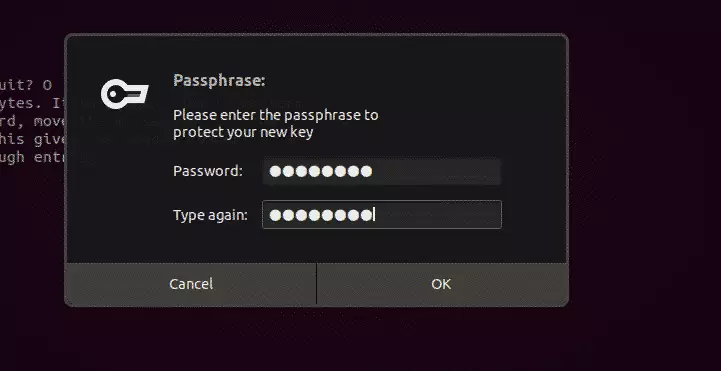
After that, your key pair should be generated.
How to export your public key
Exporting your GPG public key on Ubuntu lets you share it with others so they can verify your identity and send you private messages. You can use the command `gpg –armor –export your_email@example.com > public_key.asc` to export your public key. This key is also used to decrypt content that was encrypted for you.
It is also used to decrypt the content you encrypted.
gpg --armor --export admin@example.com > public_key.asc
gpg --armor --output key.txt --export admin@example.com
You can then send the public key file to those who should get it.
How to encrypt and decrypt files
Encrypting and decrypting files using GPG on Ubuntu is simple once your keys are set up. To encrypt a file, use a command like `gpg –encrypt –recipient ‘your_email@example.com’ –output confidential.txt.enc public.txt`. This command uses your public key to create an encrypted file that only the intended recipient can decrypt with their private key.
gpg --encrypt --recipient 'admin@example.com' --output confidential.txt.enc public.txt
You should see the output below:
Output
gpg: checking the trustdb
gpg: marginals needed: 3  completes needed: 1  trust model: pgp
gpg: depth: 0  valid:   1  signed:   0  trust: 0-, 0q, 0n, 0m, 0f, 1u
gpg: next trustdb check due at 2021-06-30
You can now delete the public.txt file and only have the encrypted version.
Decrypting Files
To decrypt the confidential.txt.enc file using the public key. Run the commands below:
gpg --decrypt --output public.txt confidential.txt.enc
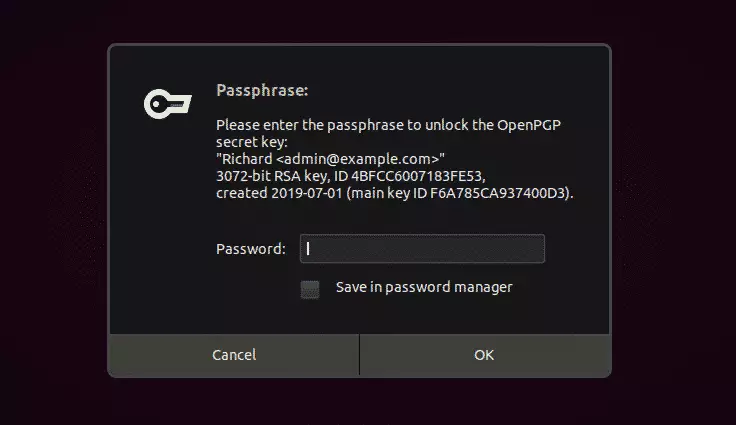
Enter the key to decrypt.
Output
gpg: encrypted with 3072-bit RSA key, ID 4BFCC6007183FE53, created 2019-07-01
"Richard <admin@example.com>"
The confidential.txt.enc file becomes public.txt.
Windows users can use Gpg4win instead.
That should do it!
Conclusion:
In summary, mastering GPG key management on Ubuntu Linux is essential for securing sensitive data. Here are the key takeaways:
- GPG encryption protects your data by requiring a valid key pair for access.
- Installing GnuPG is the first step in leveraging GPG encryption on Ubuntu.
- Generating a GPG key pair includes creating both a public and private key.
- Your public key can be shared with others to allow them to send you secure messages.
- Encrypting files safeguards their content, making them unreadable without the corresponding private key.
- Decrypting files requires providing the passphrase associated with your private key.
- Understanding and utilizing GPG keys can significantly enhance your data security and privacy.
Was this guide helpful?

About the Author
Richard
Tech Writer, IT Professional
Richard, a writer for Geek Rewind, is a tech enthusiast who loves breaking down complex IT topics into simple, easy-to-understand ideas. With years of hands-on experience in system administration and enterprise IT operations, he’s developed a knack for offering practical tips and solutions. Richard aims to make technology more accessible and actionable. He's deeply committed to the Geek Rewind community, always ready to answer questions and engage in discussions.


Tks for sharing the tutorial.
But, I have a few questions:
1) how to backup and recover your gnupg key created with this process if you need to reinstall your system ?
2) if you have a desktop, a laptop and a netbook, should you install the same key you created on the first one on the two others ?
2.1) if yes, do I use same method as question 1, above, to recover the key on the new system ?
2.2) if not, I believe I will need to backup all new keys (of each system) if I need to reinstall the any one system. But this will became a mess for backups of common used shared/files on a the file-server from the different machines, if files are encrypted. How to avoid this ?
Best regards
why go over exporting and not cover importing?
exporting is intuitive from the man page. no one on the entire goddamn internet has accurate instructions for importing.
accurate solutions actually work instead of just issuing different errors
When I generate key for the 2nd time. Its failing, getting struck.
This is a very confusing tutorial. Several file names are used with no explanation of what they represent. Shaded text is clipped at the right margin. No reason is given why a private key is needed to decrypt a file. The decryption method is totally arcane. This site has no value whatever, IMO.