
This article describes the steps you can take to enable or disable secure DNS to specify how to look up the network address for websites.
Microsoft Edge is the default browser in Windows 11. However, users can switch to their preferred or favorite browser anytime. Edge is based on Chromium, similar to Google Chrome and other Chromium-based browsers today.
By default, Microsoft Edge uses your current DNS service provider, automatically assigned to your computer. However, if you want to use trusted secure DNS providers, Edge will let you choose custom DNS providers like NextDNS, OpenDNS, Google Public DNS, Cloudflare, and others.
It is excellent to use secure DNS. However, some DNS providers may cause some sites to be unreachable.
Choose secure DNS in the Microsoft Edge browser.
As described above, the Microsoft Edge browser will automatically use the default DNS assigned to your computer from your service provider.
If you wish to use custom secure DNS providers, Edge will let you choose from a list of providers.
Here’s how to do that.
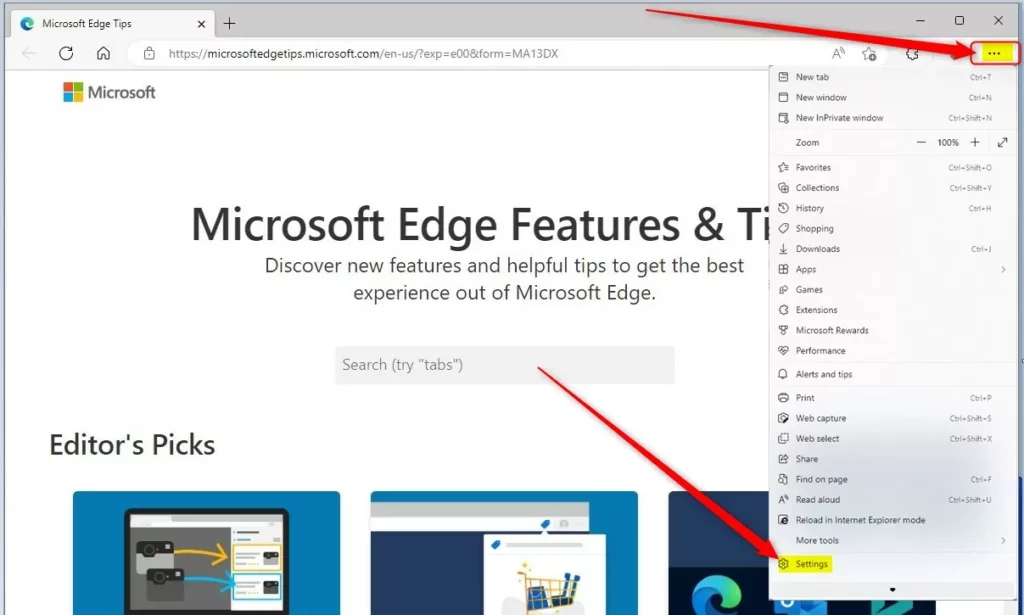
First, open the Microsoft Edge browser.
Then click on Setting and more (Alt+F) 3 horizontal dots button on the top right corner and select Settings.
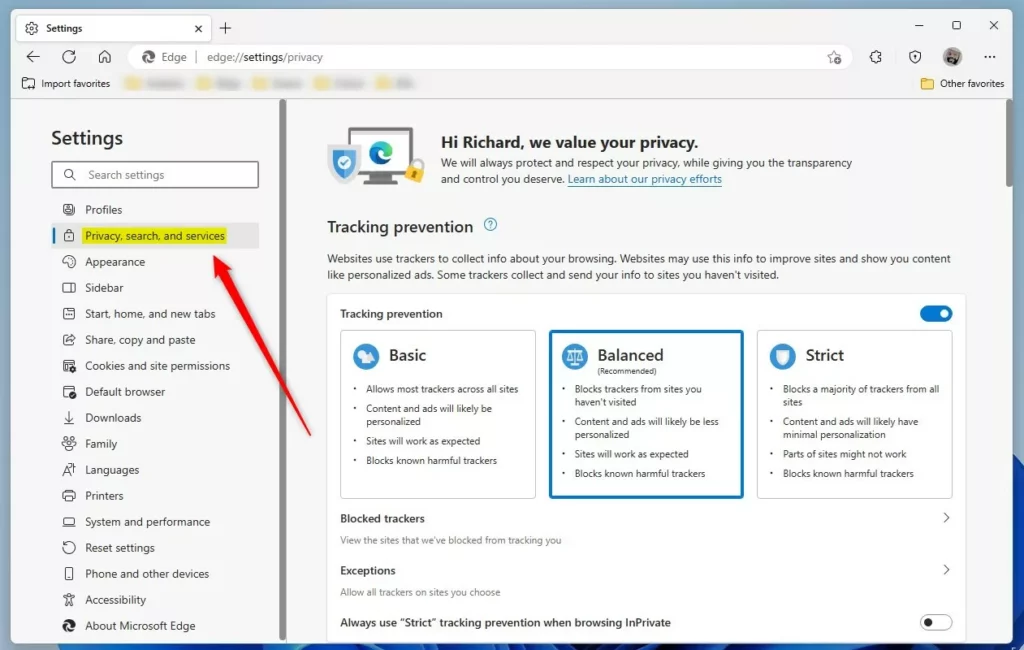
Next, click Privacy, search, and services on the left menu.
On the Settings -> Privacy, search, and services settings pane, under the Security section, toggle the button on the tile that says “Use secure DNS to specify how to lookup the network address for websites” to On or Off.
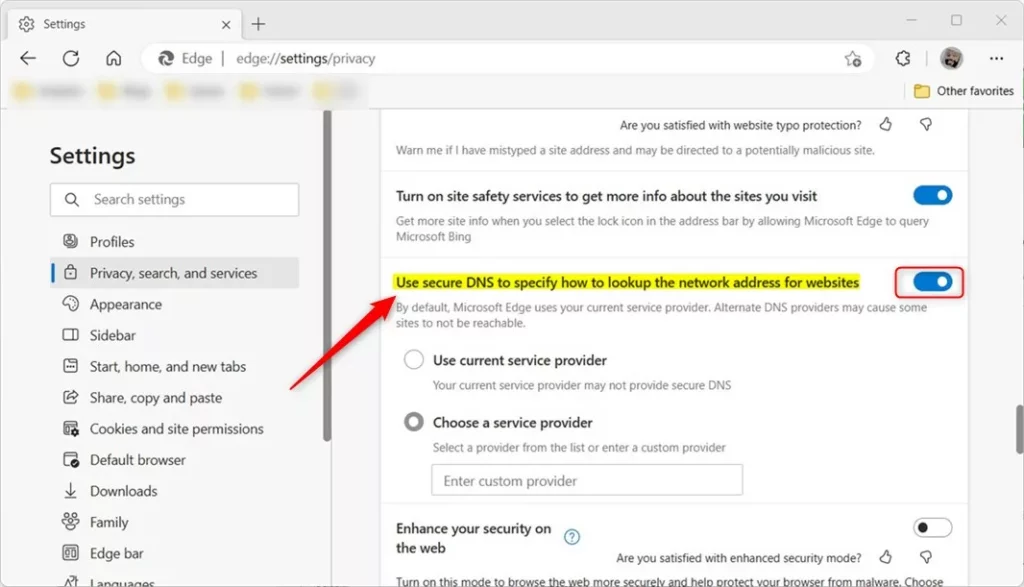
When you enable it, you will also need to choose which DNS provider to use:
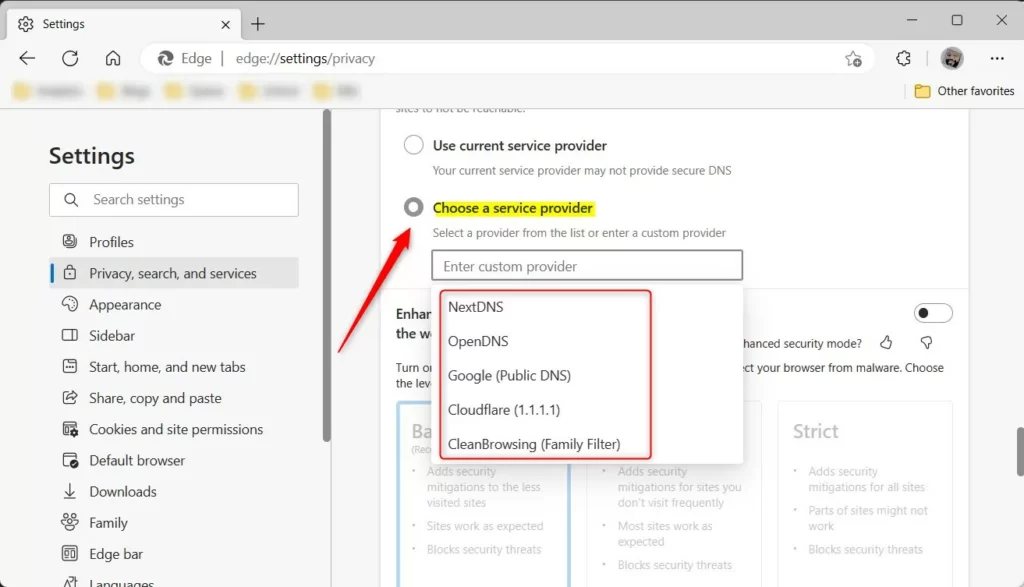
- Use the current service provider
- Choose a service provider:
- NextDNS
- OpenDNS
- Google (Public DNS)
- Cloudflare
- CleanBrowsing (Family Filter)
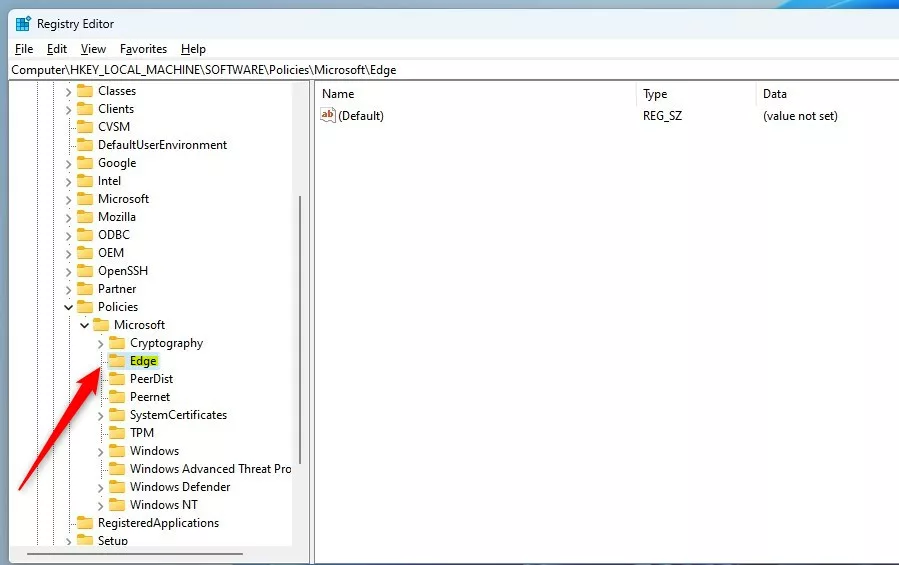
Enable or disable the use of secure DNS in Edge via the Windows Registry Editor
Alternatively, users can use the Windows registry to turn on or off the secure DNS in Microsoft Edge.
To do that, first, open the Windows Registry and navigate to the folder key path as listed below.
HKEY_LOCAL_MACHINE\SOFTWARE\Policies\Microsoft\Edge
If you don’t see the Edge folder key, right-click on the Microsoft parent key, then create the subkey (Edge) folder.
Right-click on the Edge folder key’s right pane and select New -> DWORD (32-bit) Value. Next, type an item named BuiltInDnsClientEnabled.
Double-click the new item name (BuiltInDnsClientEnabled) and enter the Value data of 1 to enable secure DNS with Microsoft Edge.
A Value data of 0 will disable the use or secure DNS in the Microsoft Edge browser.
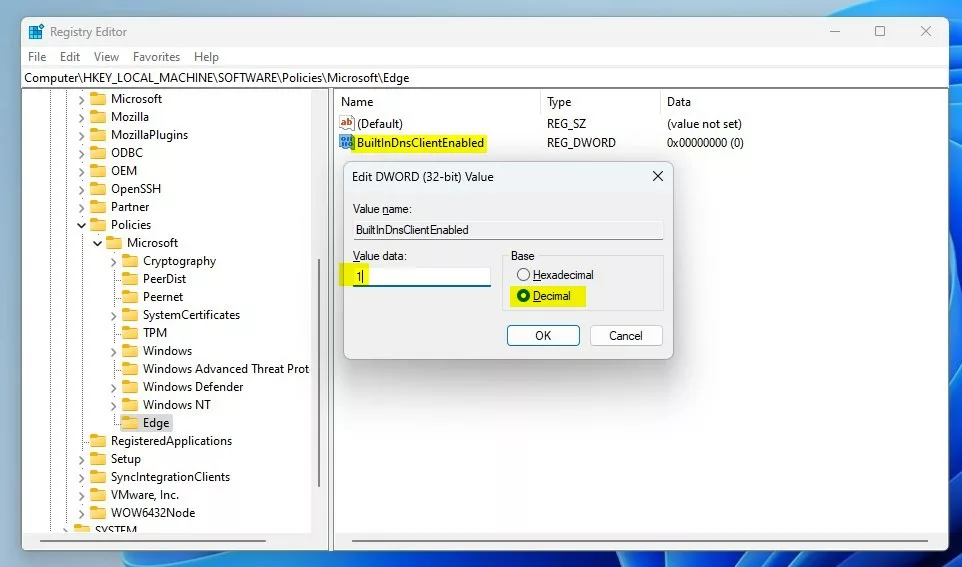
That should do it. Restart your computer to apply the changes.
If you enable and select the correct service provider, Edge will attempt to use secure DNS and fall back to no security if the service provider doesn’t support it.
If you enable and select a service provider from the list, your browser DNS traffic will be routed to the service provider infrastructure.
Alternatively, you can easily enable DNS over HTTPS (DoH) in Windows 11.
That should do it!
Conclusion:
- The article provides comprehensive guidance on enabling or disabling secure DNS in the Microsoft Edge browser.
- Users can choose from a list of trusted secure DNS providers, including NextDNS, OpenDNS, Google Public DNS, Cloudflare, and others, to enhance their browsing security.
- It also offers an alternative method, using the Windows Registry Editor, to turn on or off secure DNS in Microsoft Edge.
- Users are reminded to restart their computers for the changes to take effect.
- Additionally, it suggests enabling DNS over HTTPS (DoH) as an alternative option for enhancing browsing security in Windows 11.


Leave a Reply