How to Enable Task Scheduler History in Windows 11
You enable Task Scheduler history in Windows 11 to capture detailed logs of when your scheduled tasks start, run, and finish.
Task Scheduler is Windows’ powerful built-in utility for automating programs and scripts. Enabling its history feature provides comprehensive records, going beyond just the last run time.
This enhanced logging is crucial for troubleshooting, as it records every event, including specific success and failure codes like Event ID 106. You can then use these details to pinpoint exactly why a scheduled task might be failing.
Once activated, you’ll find these detailed logs conveniently located in the Event Viewer. Navigate to Applications and Services Logs > Microsoft > Windows > TaskScheduler > Operational to review them.
Open Task Scheduler, click Action, and select Enable All Tasks History. This provides detailed logs for troubleshooting, accessible later in Event Viewer under Applications and Services Logs > Microsoft > Windows > TaskScheduler > Operational.
How to enable or disable Task Scheduler history
Turning on Task Scheduler history in Windows 11 lets you see exactly when your scheduled tasks run and if they worked, which is really useful for troubleshooting any problems.
- Open the Start menu and search for Task Scheduler.
- Select the app from the results.
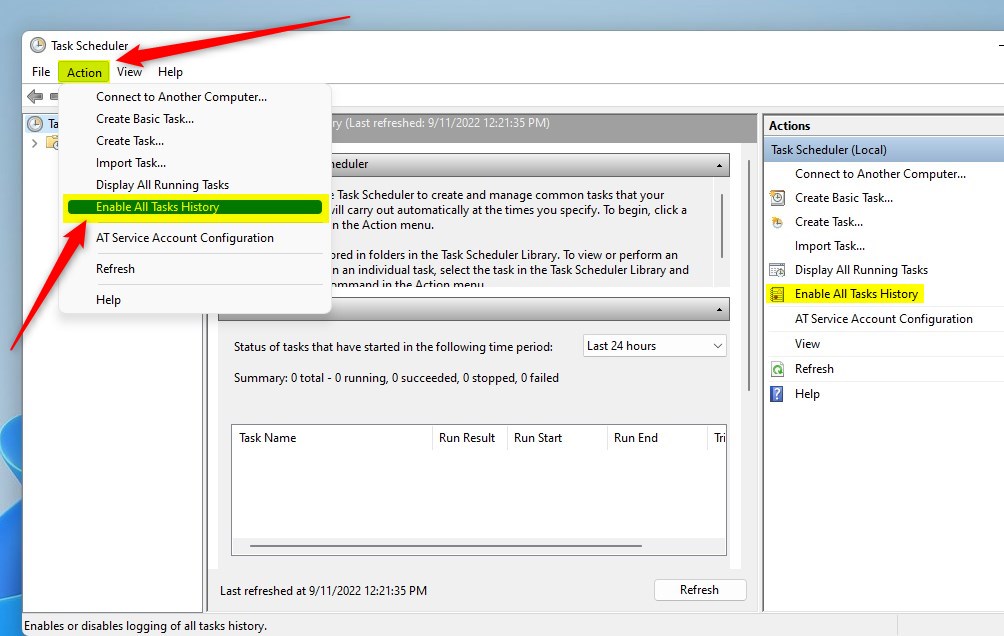
- Once the app is open, click the Action menu at the top.
- Select Enable All Tasks History.
- Alternatively, you can click Enable All Tasks History in the Actions panel on the right side of the window.
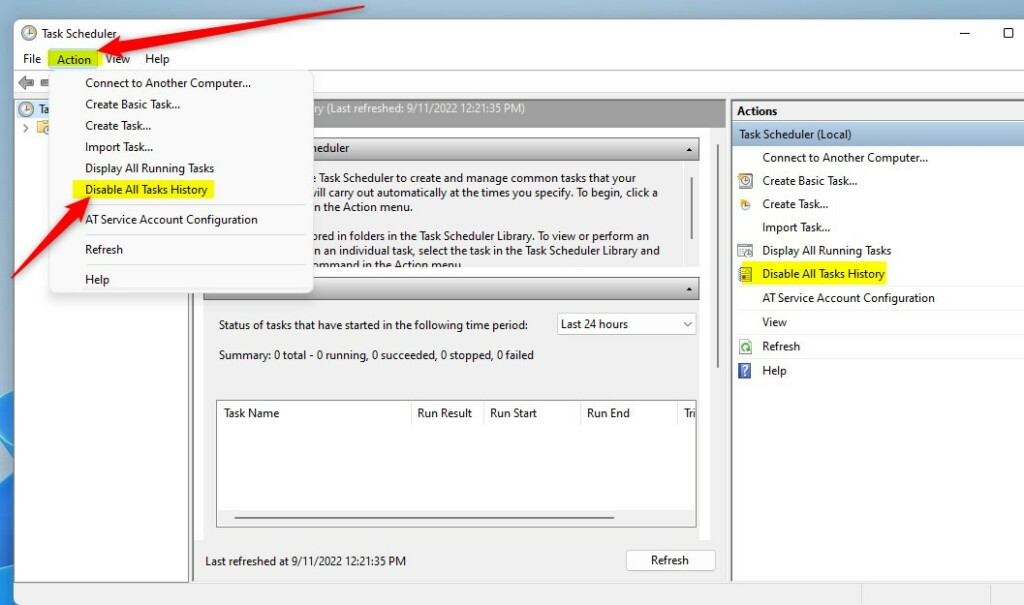
To turn it off later, follow these same steps and choose Disable All Tasks History instead.
Using PowerShell to Enable History
If you’re comfortable with command-line tools, you can use PowerShell to manage these settings quickly. Note: You must run PowerShell as an administrator.
To enable history, run this command:
wevtutil set-log Microsoft-Windows-TaskScheduler/Operational /enabled:true
To disable history, run this command:
wevtutil set-log Microsoft-Windows-TaskScheduler/Operational /enabled:false
Viewing Logs in Event Viewer
Once enabled, you can view the logs by opening Event Viewer. Navigate to Applications and Services Logs > Microsoft > Windows > TaskScheduler > Operational. You can filter these logs to find specific tasks or errors. Learn more about managing logs at the official Microsoft documentation.
Summary
Task Scheduler history in Windows 11 keeps a record of your tasks, making it easier to spot and fix issues with your automated jobs.
Does enabling Task Scheduler history slow down my PC?
Enabling Task Scheduler history has a negligible impact on system performance for most users. While it does write additional data to the system logs, the overhead is minimal. Unless you have thousands of tasks running every second, you will not notice any slowdown on your Windows 11 PC.
Where are Task Scheduler logs stored in 🪟 Windows 11?
Task Scheduler logs are stored within the Windows Event Log system. You can find them by navigating to the path 📁C:\Windows\System32\winevt\Logs\Microsoft-Windows-TaskScheduler%4Operational.evtx. It is best to view these files through the Event Viewer interface rather than opening the file directly.
How do I clear Task Scheduler history?
To clear your history, open Event Viewer, navigate to the TaskScheduler Operational log, and select ‘Clear Log’ from the Actions pane on the right. This will delete all existing entries, giving you a fresh start for tracking your tasks. This action requires administrative privileges to perform.
Was this guide helpful?

About the Author
Richard
Tech Writer, IT Professional
Richard, a writer for Geek Rewind, is a tech enthusiast who loves breaking down complex IT topics into simple, easy-to-understand ideas. With years of hands-on experience in system administration and enterprise IT operations, he’s developed a knack for offering practical tips and solutions. Richard aims to make technology more accessible and actionable. He's deeply committed to the Geek Rewind community, always ready to answer questions and engage in discussions.


No comments yet — be the first to share your thoughts!