How to Enable or Disable Inline AutoComplete in Windows 11
You can enable or disable inline autocomplete in Windows 11 to control how the File Explorer address bar suggests file paths as you type.
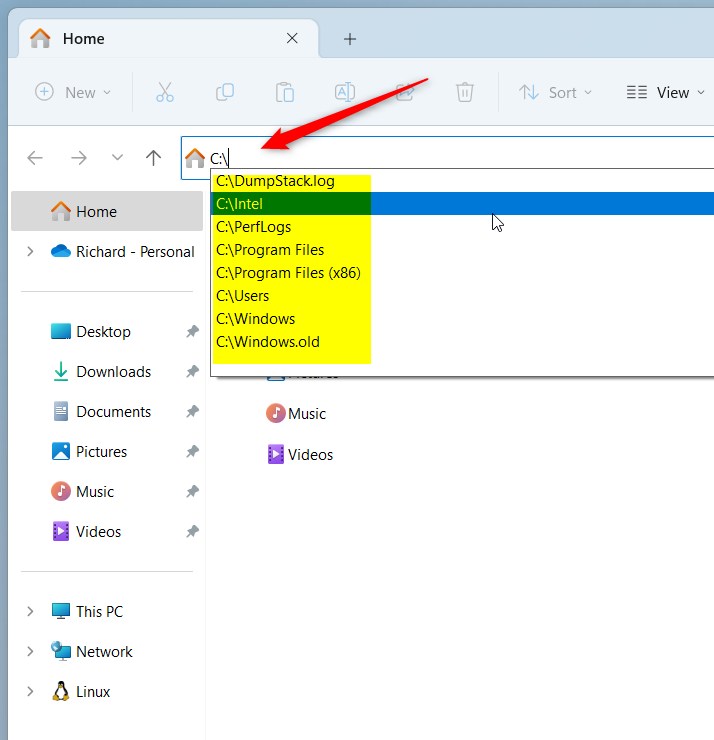
Inline autocomplete is a Windows 11 feature that predicts file and folder names directly in the address bar, speeding up navigation by anticipating your input.
This setting primarily impacts the File Explorer address bar. You might want to enable it for quicker file browsing or disable it if you prefer a less cluttered interface without predictive text.
Making this change affects how Windows 11 suggests destinations immediately, leveraging your typing and browsing habits for better efficiency.
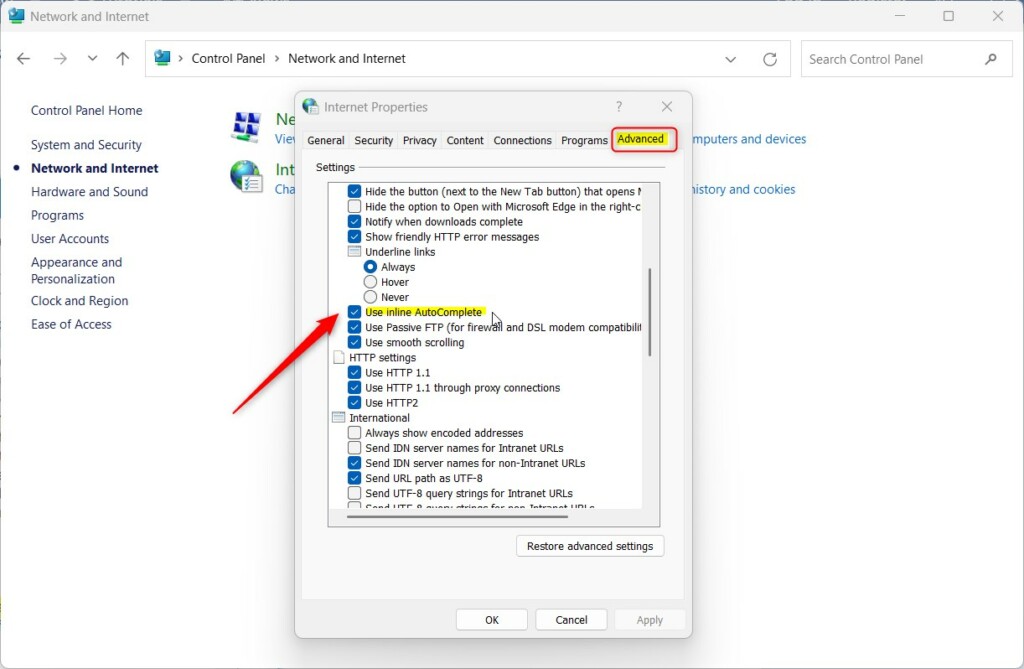
Open Internet Options from the Control Panel, go to the Advanced tab, and check or uncheck “Use inline AutoComplete” under Browsing. This setting immediately affects how file paths are suggested in File Explorer.
Prerequisites
Some methods require administrative access. Please ensure you are logged in with an account that has Administrator privileges before modifying the Registry or Group Policy.
Method 1Using Internet Options
This is a great way to toggle the feature for everyday users.
- Open the Control Panel.
- Navigate to Network and Internet > Internet Options.
- Click the Advanced tab.
- Locate Use inline AutoComplete under the Browsing section.
- Check or uncheck the box to enable or disable it .
- Click OK.
Method 2Using the Registry Editor (Advanced)
You can turn inline autocomplete on or off using the Registry Editor, but it’s best to be careful because changing the wrong things can mess up your computer.
- Press ⊞ Win+R, type
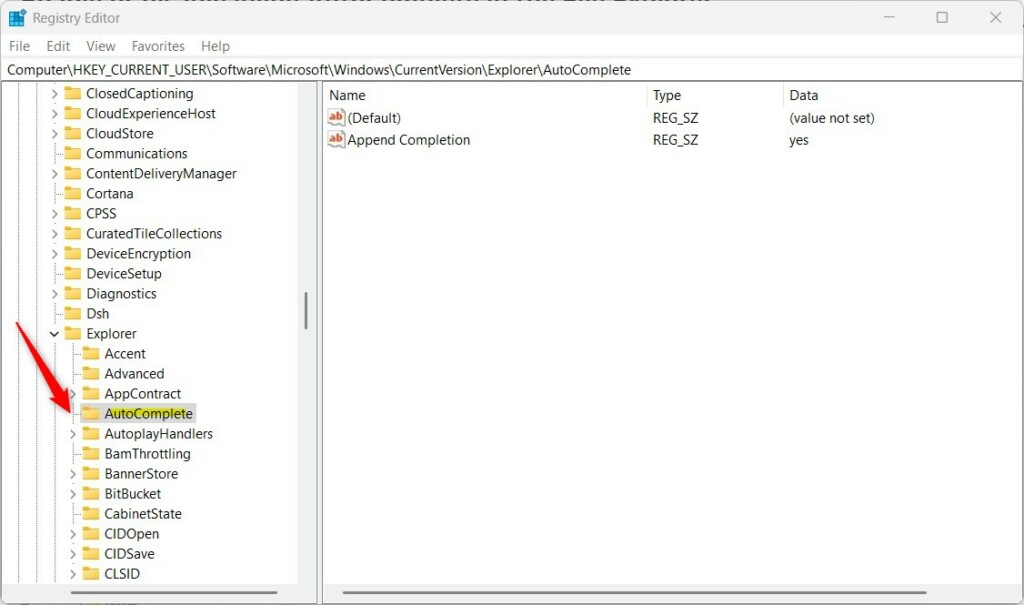
regedit, and hit Enter. - Navigate to:
HKEY_CURRENT_USER\Software\Microsoft\Windows\CurrentVersion\Explorer\AutoComplete - If the key is missing, right-click Explorer, select New > Key, and name it
AutoComplete. - Right-click in the right pane, select New > String Value, and name it
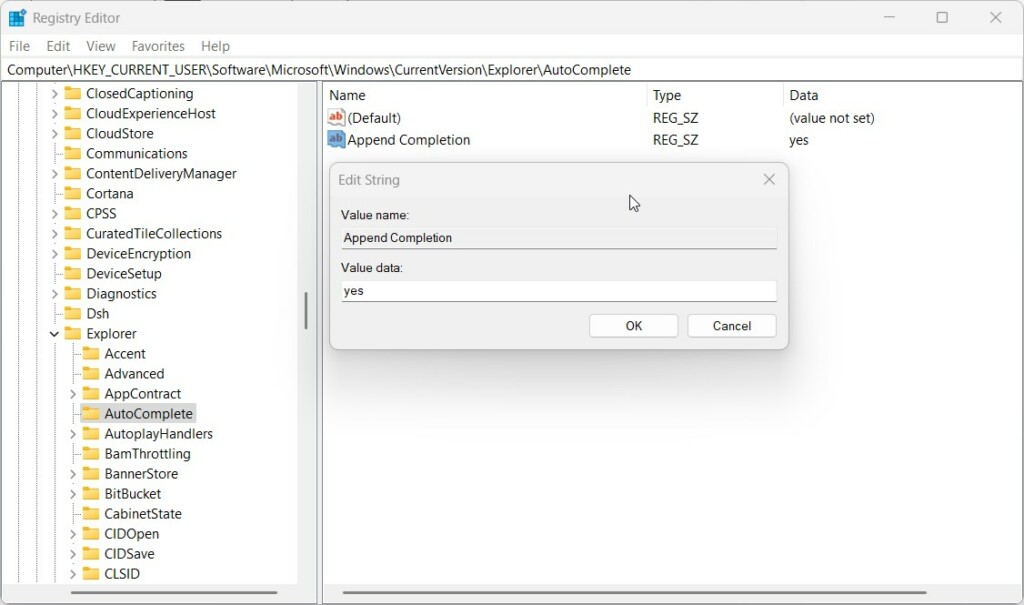
Append Completion. - Double-click it and set the value to
yesto enable ornoto disable.
Method 3Automation via PowerShell
For power users or IT administrators managing multiple machines, you can automate this setting using PowerShell.
Set-ItemProperty -Path 'HKCU:\Software\Microsoft\Windows\CurrentVersion\Explorer\AutoComplete' -Name 'Append Completion' -Value 'yes'
Method 4Enterprise Management via Group Policy
If you manage many computers, you can control the inline autocomplete setting using the Group Policy Editor, which is helpful for businesses.
- Press ⊞ Win+R, type
gpedit.msc, and hit Enter. - Go to User Configuration > Administrative Templates > Windows Components > File Explorer.
- Find Turn off display of recent search entries in the File Explorer search box.
- Configure the policy as needed.
Troubleshooting Common Issues
If the feature is not working, try clearing your File Explorer history. Open File Explorer Options, go to the General tab, and click Clear next to Clear File Explorer history. Make sure your user account has the necessary permissions to make changes in the Registry.
Summary
Inline autocomplete is a handy tool that can really speed up how you navigate Windows 11. Whether you use the simple Internet Options menu or advanced Registry and PowerShell methods, you can customize your experience. Remember to clear your history if suggestions become outdated or inaccurate.

Does disabling inline autocomplete delete my search history?
No, turning off inline autocomplete won’t delete your search history. It just stops those suggestions from showing up as you type in the address bar. Your history is still saved and can be cleared separately if you want.
Why is my inline autocomplete not working even after enabling it?
If inline autocomplete isn’t working after you’ve turned it on, your history might be a bit mixed up or a setting could be wrong. Try clearing your File Explorer history first, and then double-check the registry setting.
Was this guide helpful?

About the Author
Richard
Tech Writer, IT Professional
Richard, a writer for Geek Rewind, is a tech enthusiast who loves breaking down complex IT topics into simple, easy-to-understand ideas. With years of hands-on experience in system administration and enterprise IT operations, he’s developed a knack for offering practical tips and solutions. Richard aims to make technology more accessible and actionable. He's deeply committed to the Geek Rewind community, always ready to answer questions and engage in discussions.


No comments yet — be the first to share your thoughts!