AutoPlay is a handy feature on Windows 11 that helps your computer decide what to do when you plug in a USB drive, insert a CD/DVD, or connect a phone or camera. For example, it might automatically open your photos or play music.
Sometimes, you may want to turn AutoPlay on or off, or change what it does. This guide will show you simple steps to do that.
What is AutoPlay?
AutoPlay shows a small message (called a notification) when you connect a device or insert media like a USB stick, camera, or CD. You can then pick what you want your computer to do, like open a folder or play music.
If you want to learn more about AutoPlay, click here.
How to Turn AutoPlay On or Off in Windows 11 (Using Settings)
- Open the Settings app:
- Click the Start button (Windows icon) at the bottom-left of your screen, then click Settings.
- Or, press Windows key + I on your keyboard to open Settings quickly.
- In Settings, click Bluetooth & devices on the left side.
- On the right side, find and click AutoPlay.
- You will see an option called AutoPlay with a toggle switch. Click the switch to turn AutoPlay On or Off.
- Close the Settings app when done.
Here’s what it looks like:
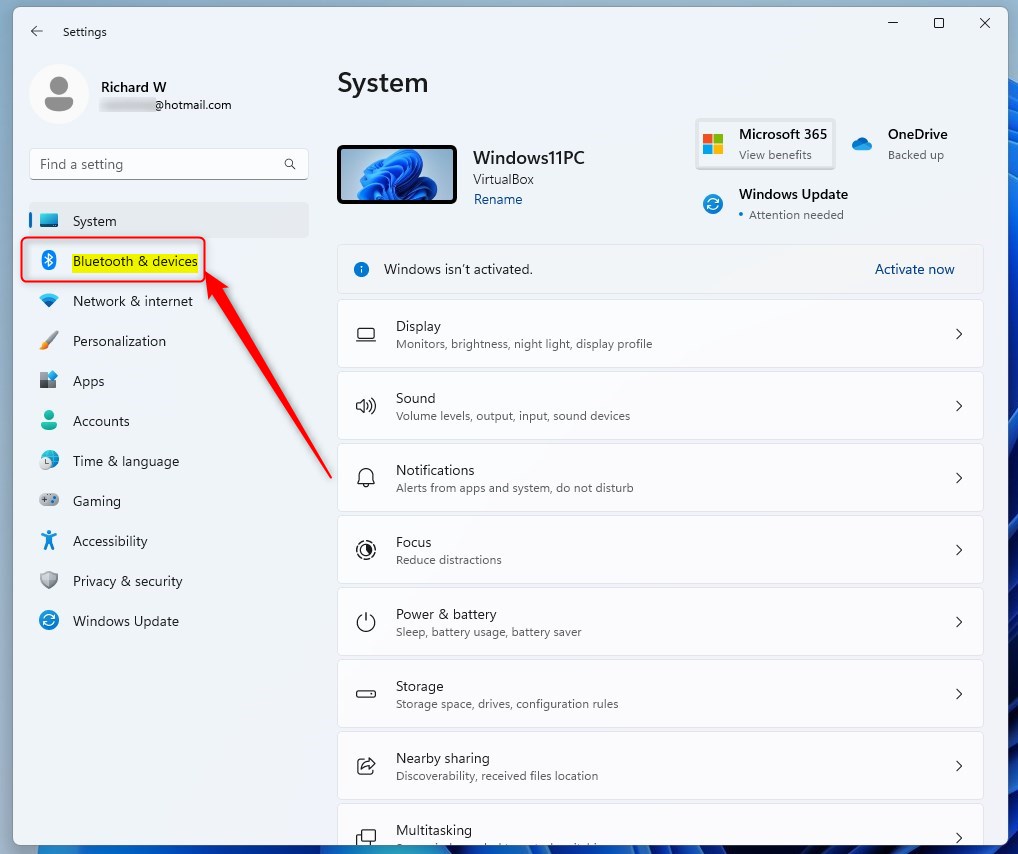
Windows 11 Bluetooth & Devices Settings
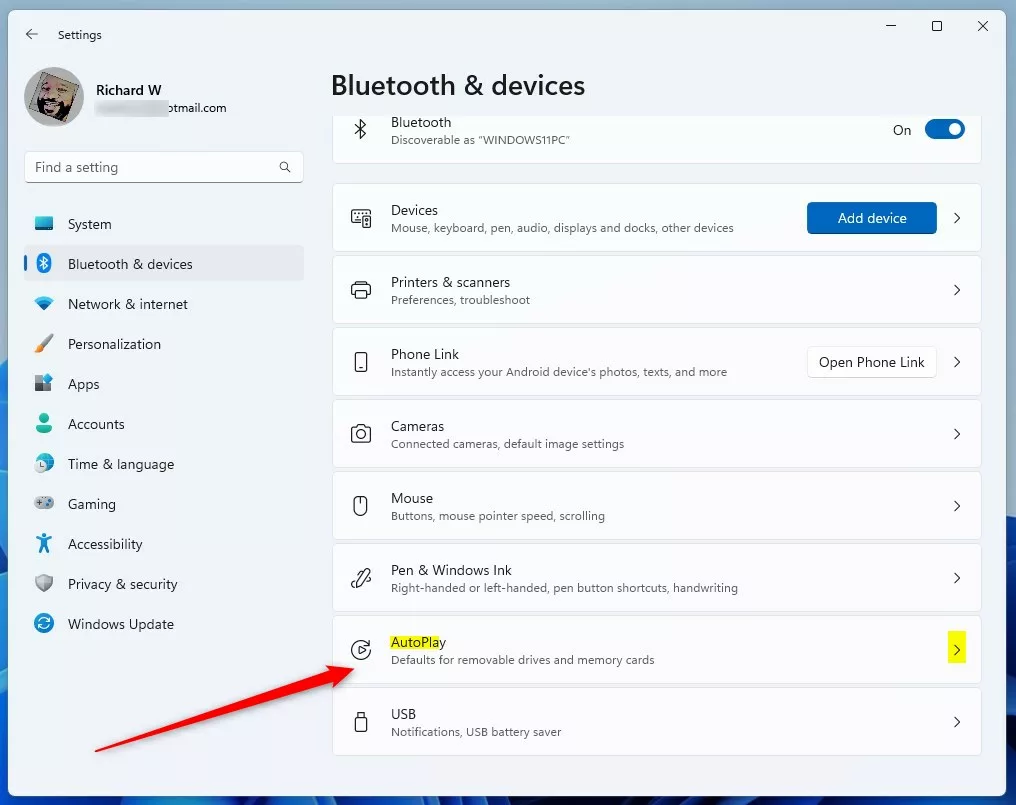
AutoPlay Settings Tile
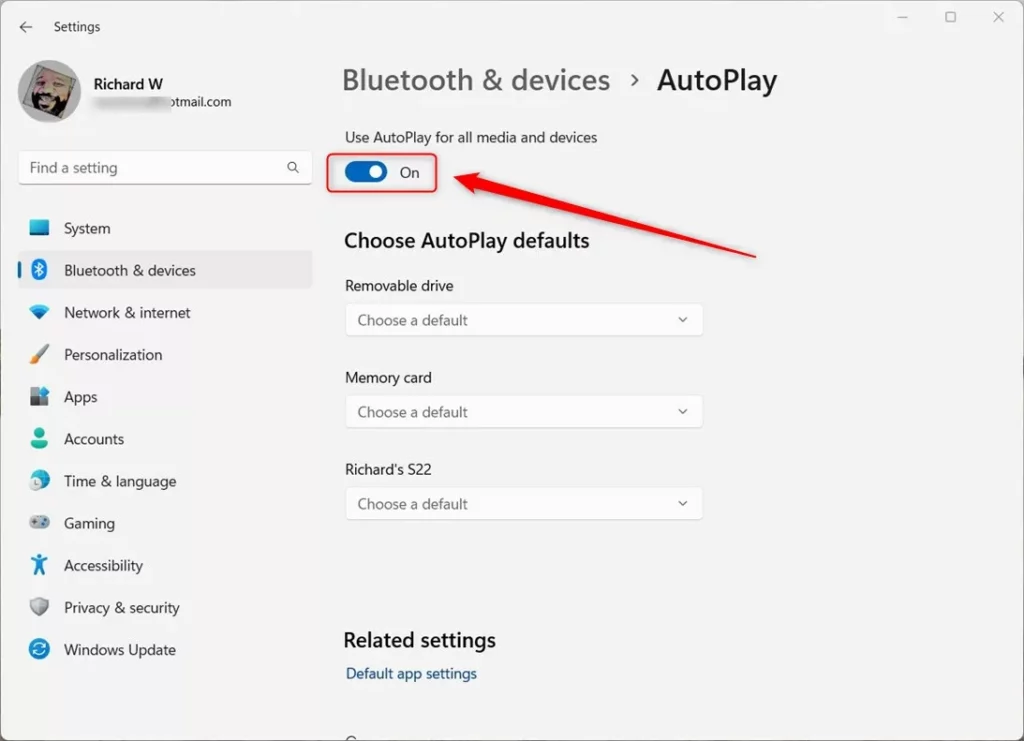
Toggle AutoPlay On or Off
How to Turn AutoPlay On or Off Using Control Panel
If you prefer, you can also use the classic Control Panel to manage AutoPlay:
- Open the Control Panel:
- Click the Start menu, type Control Panel, then open it.
- Or press Windows key + R, type
control, and press Enter.
- Inside Control Panel, click on Hardware and Sound.
- Click on AutoPlay.
- To enable AutoPlay, check the box next to Use AutoPlay for all media and devices. To disable it, uncheck this box.
- Click Save at the bottom to apply the changes.
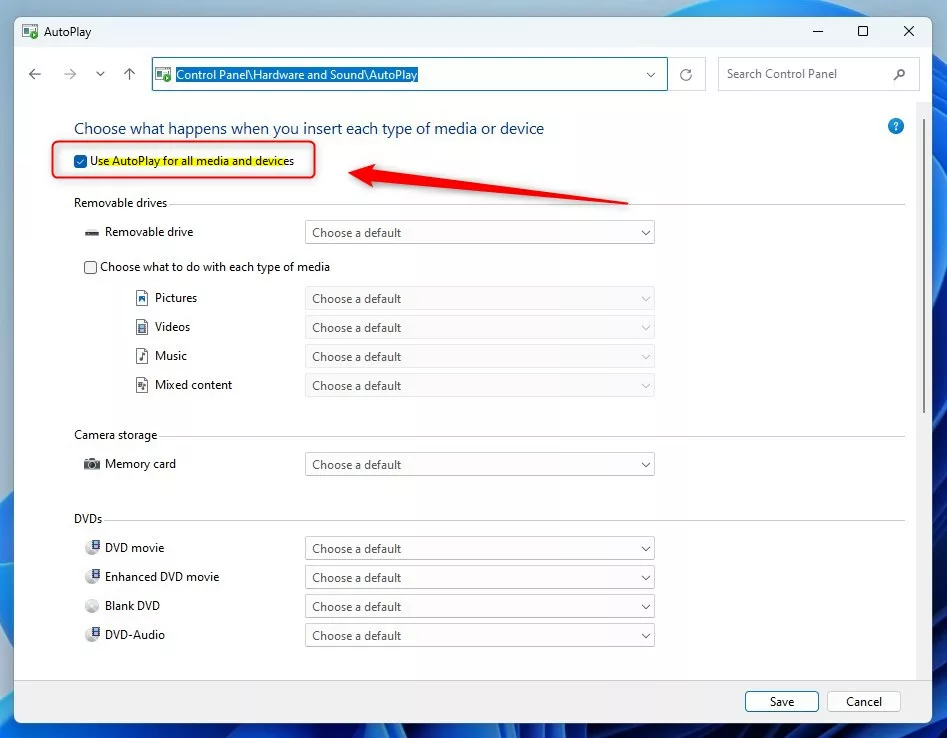
AutoPlay settings in Control Panel
How to Enable or Disable AutoPlay Using Windows Registry (Advanced)
Note: Editing the Windows Registry can be risky. Please follow these steps carefully or ask for help if you are unsure.
- Press Windows key + R to open the Run box.
- Type
regeditand press Enter. Click Yes if asked for permission. - In Registry Editor, navigate to this folder path:
HKEY_CURRENT_USER\Software\Microsoft\Windows\CurrentVersion\Explorer\AutoplayHandlers
- If you don’t see the AutoplayHandlers folder, right-click on Explorer and choose New > Key. Name it AutoplayHandlers.
- Right-click on the right side pane inside AutoplayHandlers, then select New > DWORD (32-bit) Value.
- Name this new entry DisableAutoplay.
- Double-click the DisableAutoplay entry you just created.
- In the window that appears, choose Decimal under Base, then enter:
- 0 – to turn AutoPlay On
- 1 – to turn AutoPlay Off
- Click OK, then close Registry Editor.
- Restart your computer to apply the changes.
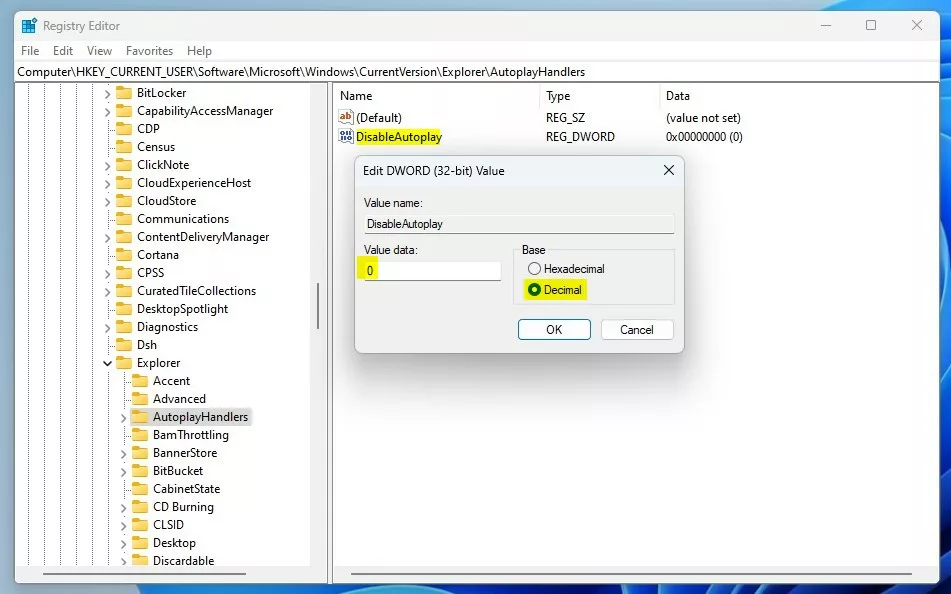
Editing DisableAutoplay value in Registry Editor
Quick Tip
If you want to temporarily bypass AutoPlay, hold down the SHIFT key while plugging in your device. This will show the AutoPlay notification even if it’s turned off.
Summary
- You can turn AutoPlay on or off in Windows 11 using the Settings app, Control Panel, or by editing the Registry.
- Turning AutoPlay off stops your computer from automatically opening files or apps when devices are plugged in.
- Remember to save your changes and restart your computer if using the Registry method.
- Controlling AutoPlay helps you manage how your Windows 11 PC behaves with USB drives, cameras, and other devices.
For more detailed guides, check out these helpful links:


Leave a Reply