How to Uninstall and Reinstall OneDrive on Windows 11

Uninstalling and reinstalling OneDrive on Windows 11 fixes syncing problems and resets the service. OneDrive is Microsoft’s cloud storage that comes built into Windows 11, letting you save files and keep them updated on all your devices.
Sometimes, OneDrive might have issues, like files not syncing or the app freezing. Reinstalling it is a good way to get it working smoothly again.
When you uninstall OneDrive from Windows 11, the app will stop working. It won’t open, won’t start when you turn on your PC, and won’t show up in your Start menu or File Explorer. Your files will stop syncing to the cloud, but they stay safe in their folder on your computer.
Uninstall OneDrive by going to Settings Apps Installed apps, finding OneDrive, clicking the three dots, and selecting Uninstall. Reinstall by downloading OneDriveSetup.exe from the official Microsoft website and running the installer. Sign in afterward to sync your files.
How to Uninstall OneDrive
- Open Settings . Press
Win + Ikeys together. - Click on Apps on the left side.
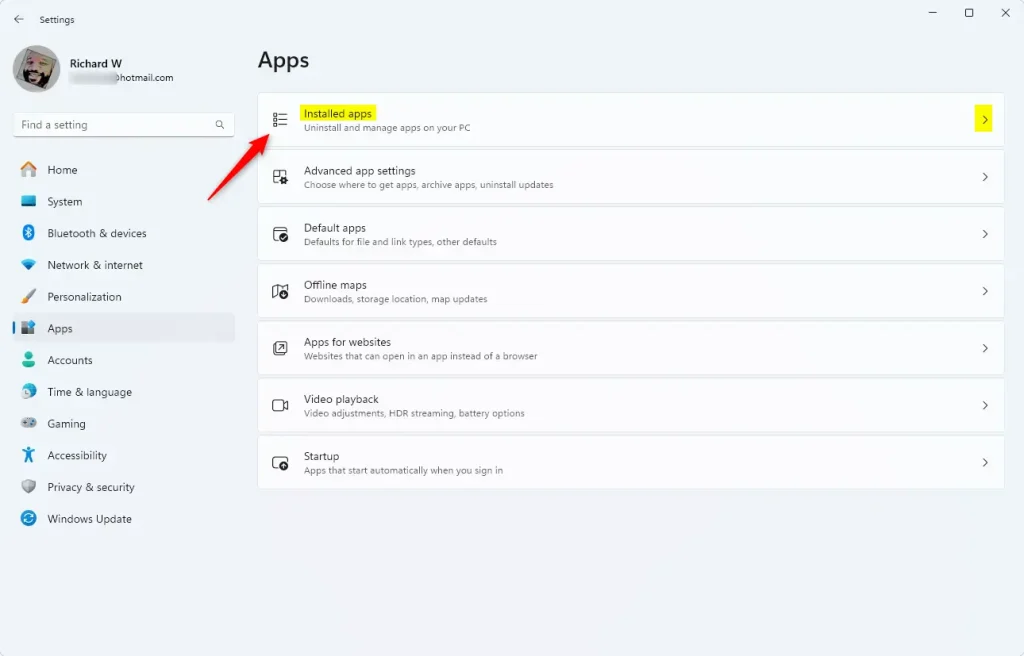
- Click on Installed apps (or Apps & features) on the right.
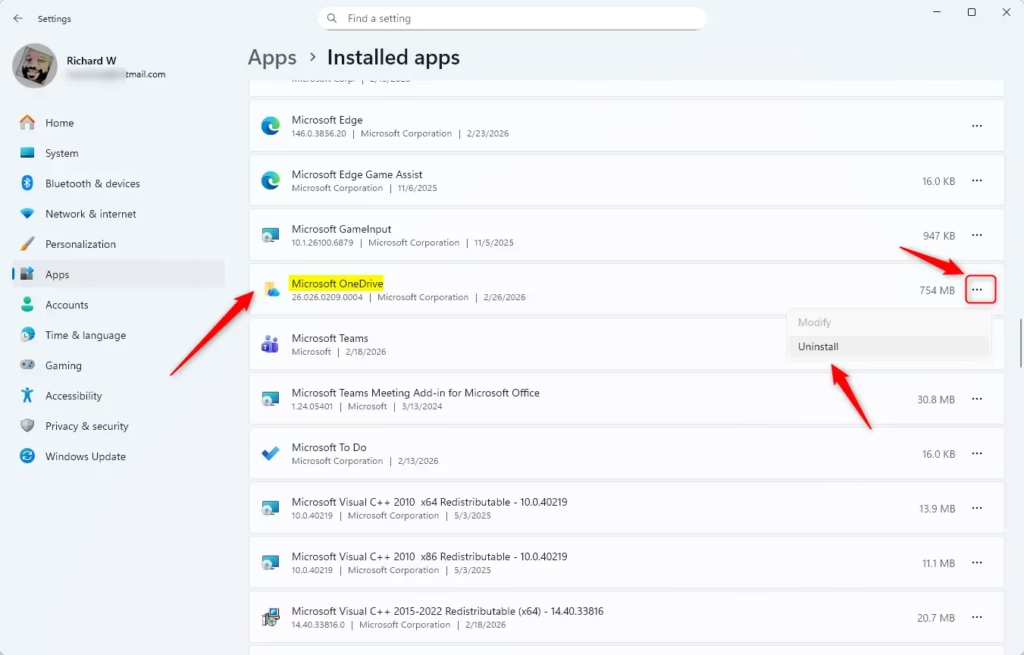
- Find Microsoft OneDrive in the list.
- Click the three dots next to it. Then click Uninstall. [ADMIN REQUIRED]
- When asked to confirm, click Uninstall again.
- Close Settings when done.
To uninstall OneDrive on Windows 11, start by opening the Settings app. You can do this by pressing the Windows key and the ‘I’ key at the same time. Then, go to the Apps section, click on ‘Installed apps’, find ‘Microsoft OneDrive’ in the list, and select the uninstall option. This process will remove the OneDrive application from your computer.
How to Reinstall OneDrive
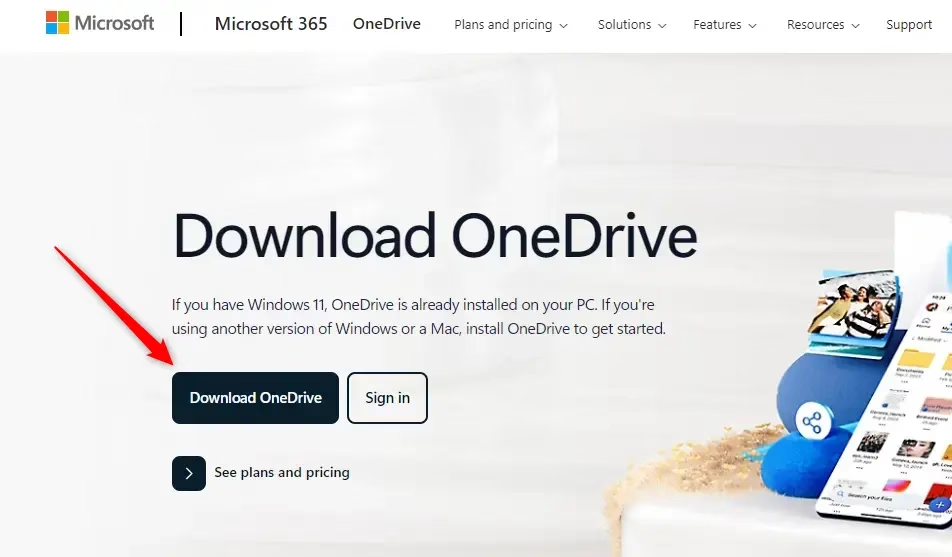
- Go to the official OneDrive download page. Download OneDrive for Windows
- Click the download button to get the
OneDriveSetup.exefile. - Save it to your Desktop or any folder you like.
- Double-click
OneDriveSetup.exeto start the installation. - You will see a small window saying "Microsoft OneDrive Setup" while it installs.
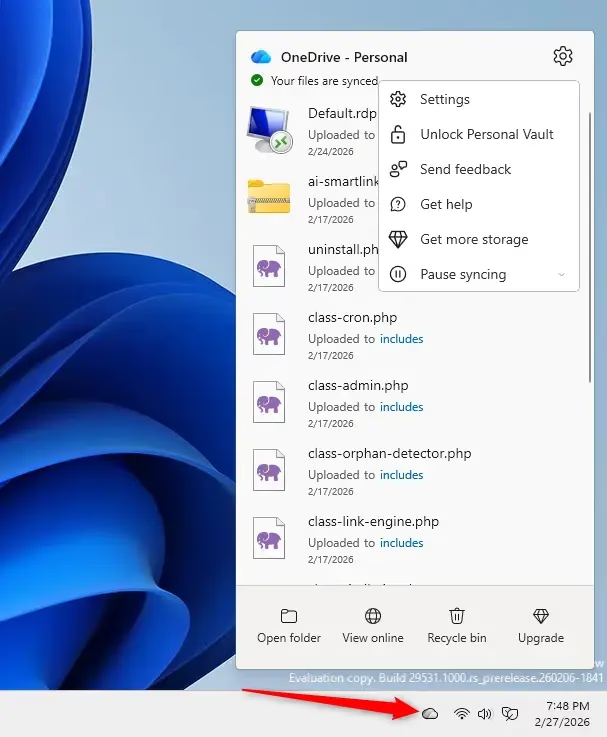
- When installation finishes, open OneDrive and sign in with your Microsoft account to set it up.
If you need to reinstall OneDrive on Windows 11, the easiest way is to get it directly from the official Microsoft website. Download the OneDrive setup file, which is usually named OneDriveSetup.exe. Once downloaded, run this file to start the installation process. Follow the on-screen prompts to complete the reinstallation and get OneDrive working again.
Summary
- Easy to do: You can uninstall or reinstall OneDrive quickly through Settings and a download link.
- Your files stay safe: Uninstalling OneDrive doesn't delete files on your PC or cloud.
- Cloud access remains: You can still get to your files anytime at onedrive.live.com.
- Backup first: Turn off backup and move files to local folders before uninstalling to keep them safe.
- Reinstall anytime: Download the latest OneDrive from Microsoft's website whenever you want.
Uninstalling and reinstalling OneDrive on Windows 11 is straightforward and doesn't risk your files. You can remove the OneDrive app using Windows Settings and get the OneDrive app back by downloading it from the official Microsoft site. Your OneDrive files are safe on your PC and in the cloud, but you should back up or move important files before uninstalling OneDrive to be extra sure.
More help from Microsoft: Turn off, disable, or uninstall OneDrive - Microsoft Support
What happens if I uninstall and reinstall OneDrive?
Reinstalling Microsoft OneDrive can sometimes resolve sync issues and resets all OneDrive settings. OneDrive will perform a full sync after the reinstallation. You won't lose any data by uninstalling OneDrive.
Was this guide helpful?

About the Author
Richard
Tech Writer, IT Professional
Richard, a writer for Geek Rewind, is a tech enthusiast who loves breaking down complex IT topics into simple, easy-to-understand ideas. With years of hands-on experience in system administration and enterprise IT operations, he’s developed a knack for offering practical tips and solutions. Richard aims to make technology more accessible and actionable. He's deeply committed to the Geek Rewind community, always ready to answer questions and engage in discussions.

No comments yet — be the first to share your thoughts!