How to Create a System Restore Point in Windows 11
Creating a system restore point in Windows 11 allows you to revert your PC to a previous stable state if software installations or updates cause issues.
A system restore point is essentially a snapshot of key system files, settings, and registry entries that Windows automatically or manually saves. If your computer starts behaving unexpectedly after a change, you can use this snapshot to undo those modifications without affecting your personal files.
For example, if a new driver update causes your graphics card to stop working, a restore point created before the update lets you easily roll back to a functional state. This process is crucial for troubleshooting and maintaining PC stability, especially when dealing with system-critical changes in Windows 11.
Why Make a Restore Point?
- It helps you fix problems caused by new apps or updates.
- You can undo changes that made your PC slow or unstable.
- It saves time because you don’t have to fix everything from scratch.
- It’s a good idea to make one before big changes, like installing new software.
How to Create a System Restore Point in 🪟 Windows 11
Follow these easy steps to create your restore point:
Step 1Open System Settings
- Click the Start button (Windows icon) in the bottom-left corner of your screen.
- Type System in the search box, then click on System from the results.
- On the right side, scroll down and click About. Then, click Advanced system settings under Related links. This opens the System Properties window.
Or, use this shortcut:
- Press Windows key + R on your keyboard to open the Run box.
- Type
sysdm.cpland press Enter.
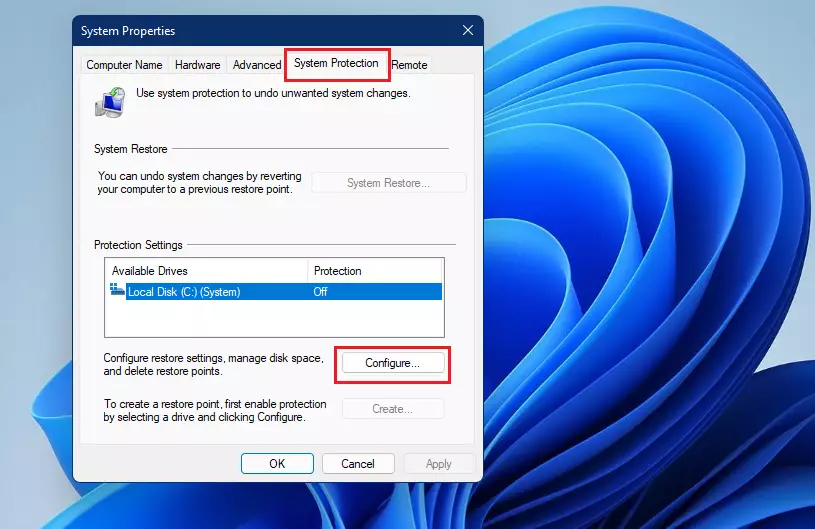
Step 2Turn On System Protection
In the System Properties window:
- Click the System Protection tab at the top.
- Look for your main drive, usually Local Disk (C:) (System).
- If it says Protection Off, click the Configure button.
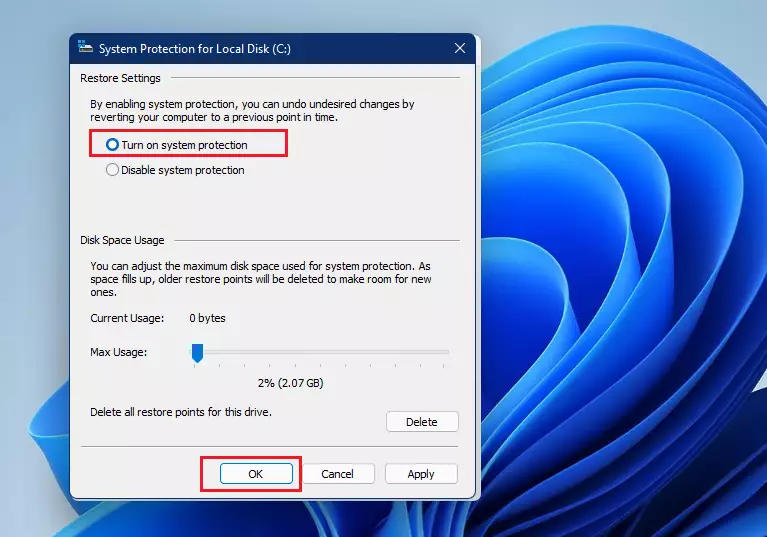
Now:
- Select Turn on system protection.
- You can also adjust how much disk space Windows can use for restore points, but the default is usually fine.
- Click OK to save.
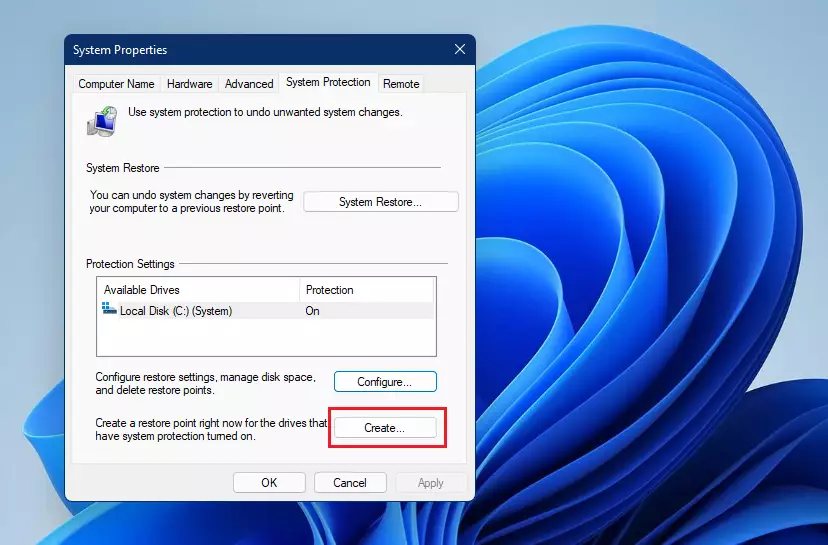
Step 3Create Your Restore Point
- Click the Create button.
- Type a name that helps you remember why you made this restore point (for example, “Before installing new app”).
- Click Create again and wait for Windows to finish.
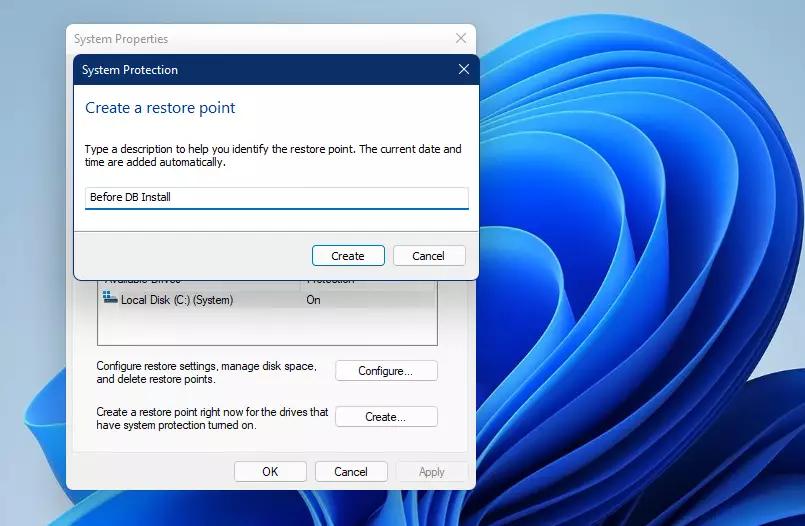
Windows will notify you when the restore point is ready.
How to Restore Your PC Using a Restore Point
If your PC starts acting strange after changes, you can go back to a restore point you made earlier. Here’s how:
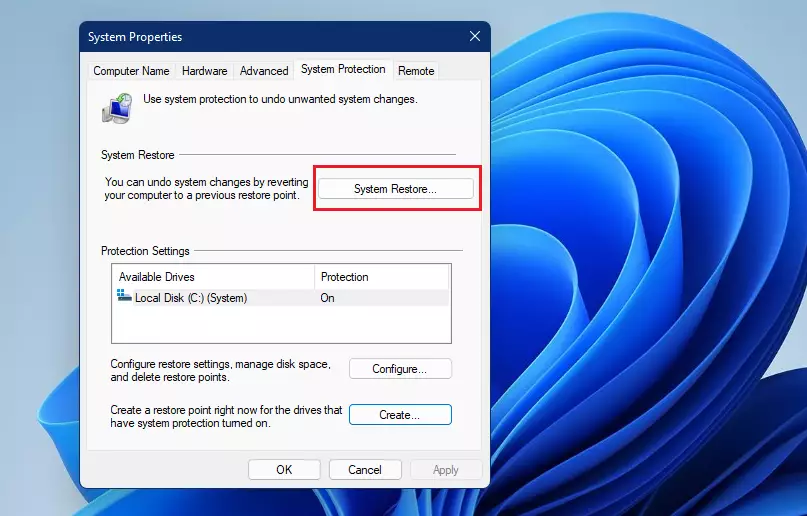
- Open the System Properties window again (follow the steps above).
- Click the System Protection tab.
- Click the System Restore button.
Then:
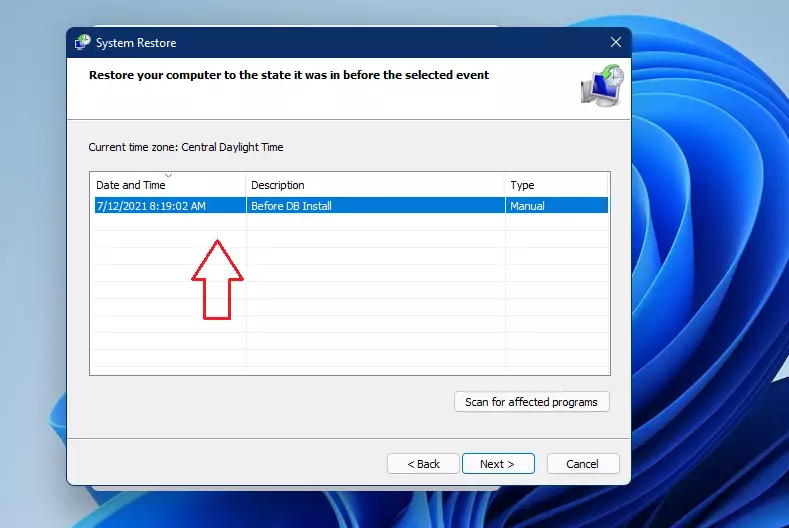
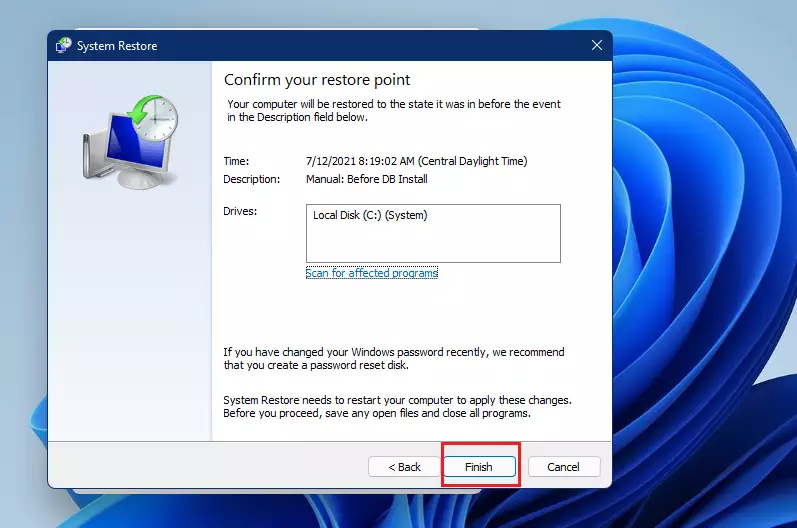
- Click Next.
- Choose the restore point you want to use.
- Click Next and then Finish to start restoring.
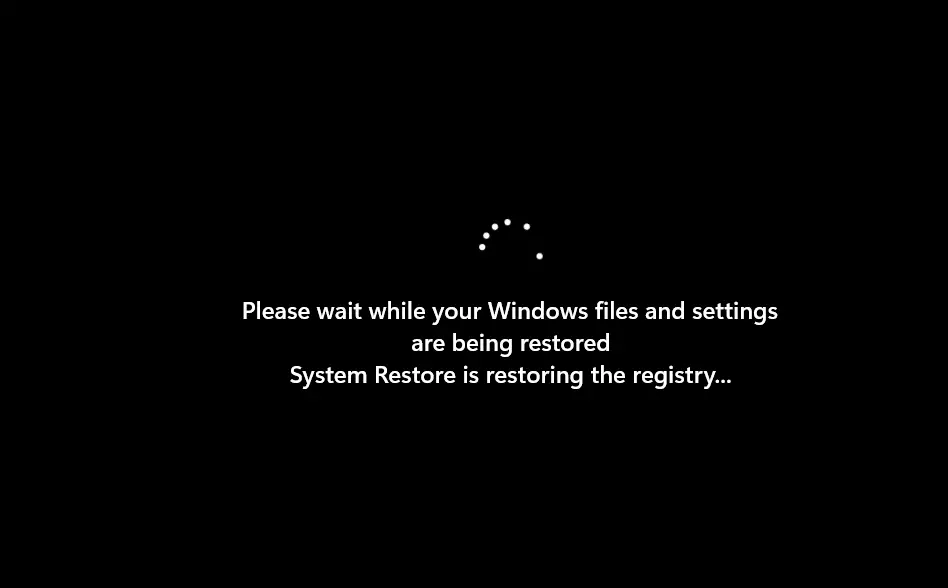
Your computer will restart and restore itself to the earlier state. This might take some time, so be patient.
Summary
- Making restore points in Windows 11 helps keep your computer safe.
- It lets you fix problems quickly by going back to a time when your PC worked well.
- Try to create restore points before big changes or updates.
- The process is simple and only takes a few minutes.
- Using restore points gives you peace of mind and can save you from headaches later.
For more easy Windows tips, visit Geek Rewind Windows 11 Guides.
Was this guide helpful?

About the Author
Richard
Tech Writer, IT Professional
Richard, a writer for Geek Rewind, is a tech enthusiast who loves breaking down complex IT topics into simple, easy-to-understand ideas. With years of hands-on experience in system administration and enterprise IT operations, he’s developed a knack for offering practical tips and solutions. Richard aims to make technology more accessible and actionable. He's deeply committed to the Geek Rewind community, always ready to answer questions and engage in discussions.


[…] How to Create a System Restore Point in Windows 11 […]