
This article explains how to choose or change where the Microsoft Store installs apps and games by default in Windows 11.
The Microsoft Store app is an app that comes pre-installed on Windows computers. It is a digital distribution platform that allows users to browse, download, and install various applications and games on their Windows devices.
Starting with the Microsoft Store app version 22310, you can choose which installation drive and folder to install apps and games by default. If the default local system (C:) drive is full, you can choose another drive and folder to install apps and games.
Choosing which installation drive and folder to install apps and games in the Microsoft Store app can have several advantages. For instance, if the default local system (C:) drive is low on disk space, you can choose another drive with more storage capacity to install new apps and games.
Additionally, if you prefer to keep your apps and games organized in a specific folder, you can choose a custom folder for installation. This can help you keep your computer tidy and make it easier to find your apps and games later on.
Choose which installation drive and folder to install Microsoft Store apps and games by default
As mentioned above, starting with the most recent Microsoft Store updates, users can choose the installation drive and folder to install games and apps by default.
Here’s how to choose or change the default location.
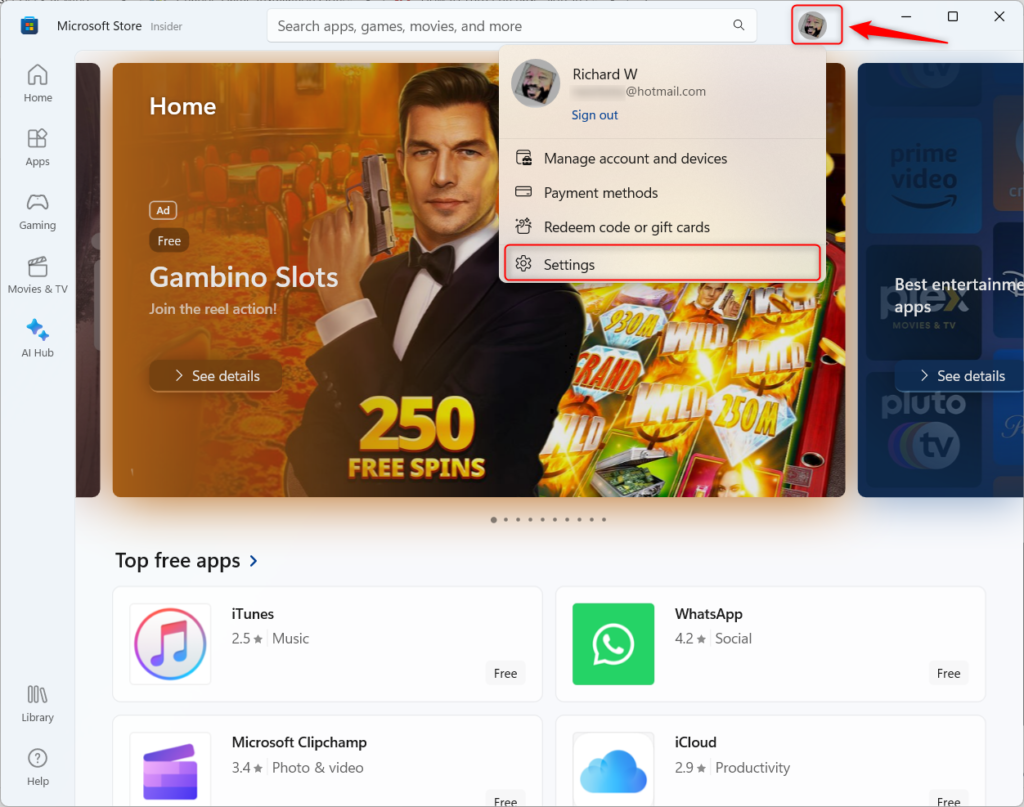
First, open the Microsoft Store and select your Profile image next to the search box.
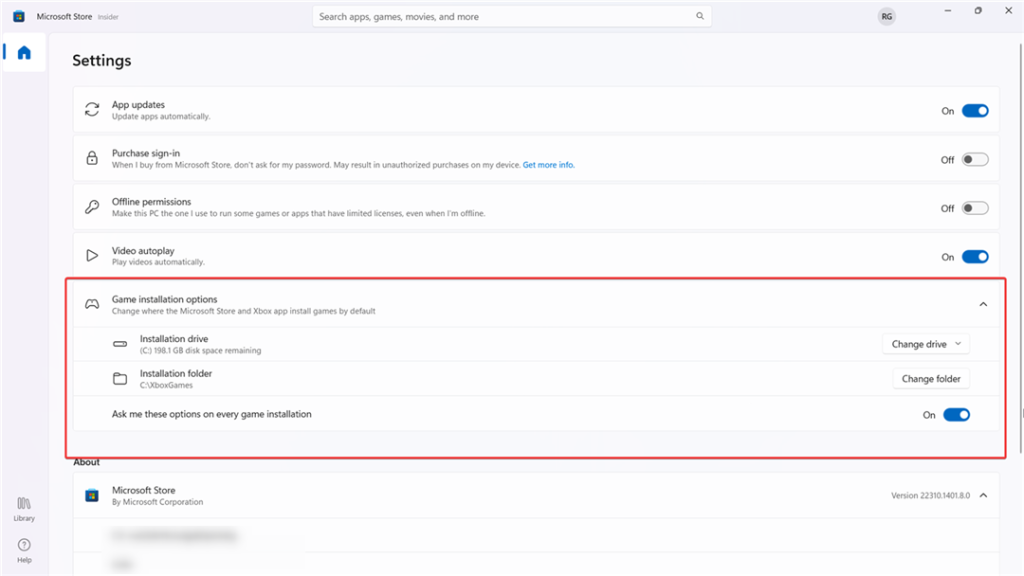
Select the Installation drive and Installation folder tiles under Game installation options on the Settings pane. Then, choose the default drive and folder to install games and apps.
Additionally, you can turn on “Ask me these options on every game installation” to choose the drive and folder in which you want to install games and apps.
That should do it!
Conclusion:
- Setting the default installation drive and folder for Microsoft Store apps and games provides flexibility and organization to Windows 11 users.
- Following the simple steps outlined in this article, users can maximize their storage space and keep their system tidy.
- The ability to choose a custom folder for installation can enhance the user experience by allowing for better organization and ease of access to apps and games.


Leave a Reply to Disable App Installations on Non-System Drives in Windows 11 | Geek Rewind Cancel reply