How to Check UEFI BIOS Version in Windows 11

This guide will show you simple steps to find out your computer’s UEFI BIOS version in Windows 11.
What is UEFI BIOS? It’s a modern software inside your computer that helps it start up and run. UEFI (Unified Extensible Firmware Interface) replaced the older BIOS system to make things work better and faster.
Knowing your UEFI BIOS version can help you check for updates or troubleshoot problems.
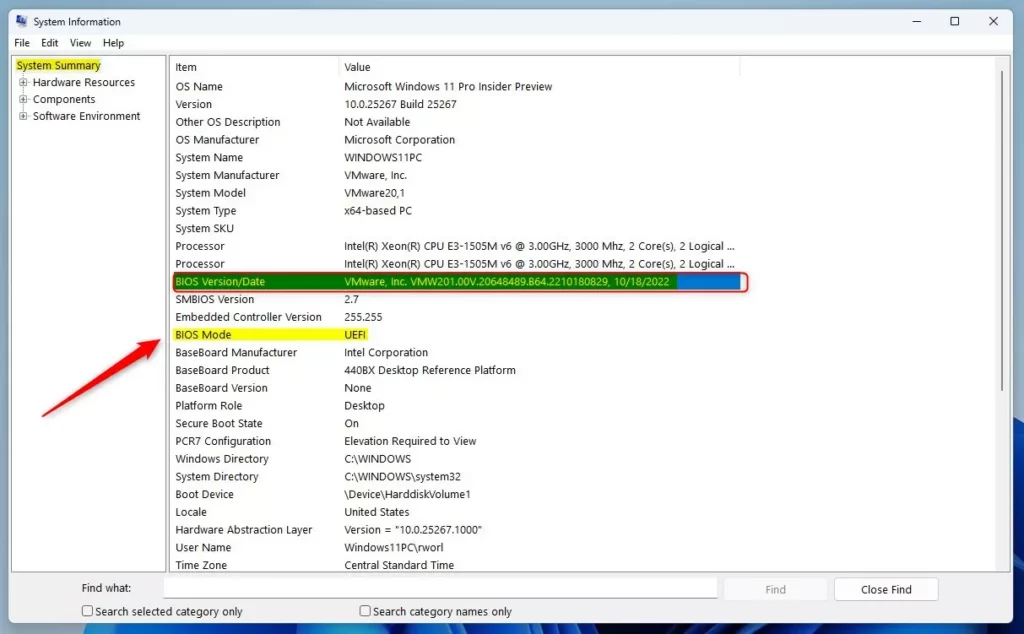
Open System Information by typing “System Information” in the Start menu search. In the System Summary, find the “BIOS Version/Date” entry to see your UEFI BIOS version.
1Using the System Information App
This is the easiest way. The System Information app is built into Windows and shows details about your computer.
- Click the Start button and type
System Informationormsinfo32and press Enter. - When the app opens, make sure System Summary is selected on the left.
- Look for these items on the right:
- BIOS Mode: It should say UEFI.
- BIOS Version/Date: This shows your BIOS version and its release date.
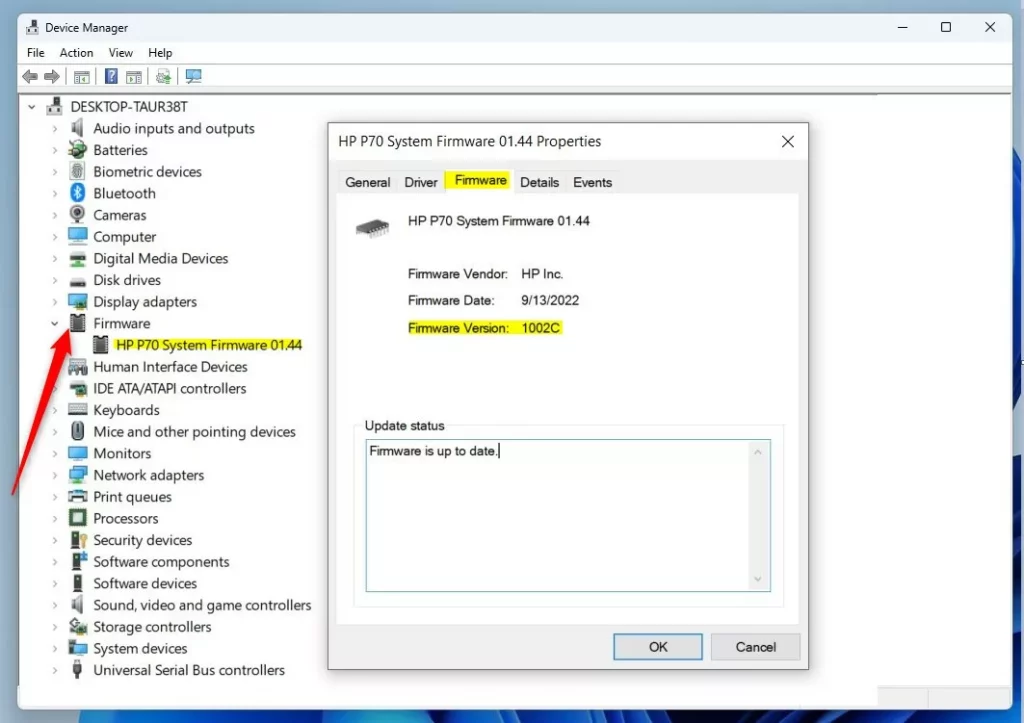
2Using Device Manager
You can also find your BIOS version using Device Manager.
- Right-click the Start button and select Device Manager.
- Scroll down and find Firmware. Click the arrow to expand it.
- Double-click System Firmware.
- In the window that opens, go to the Details tab or look for the Firmware Version.
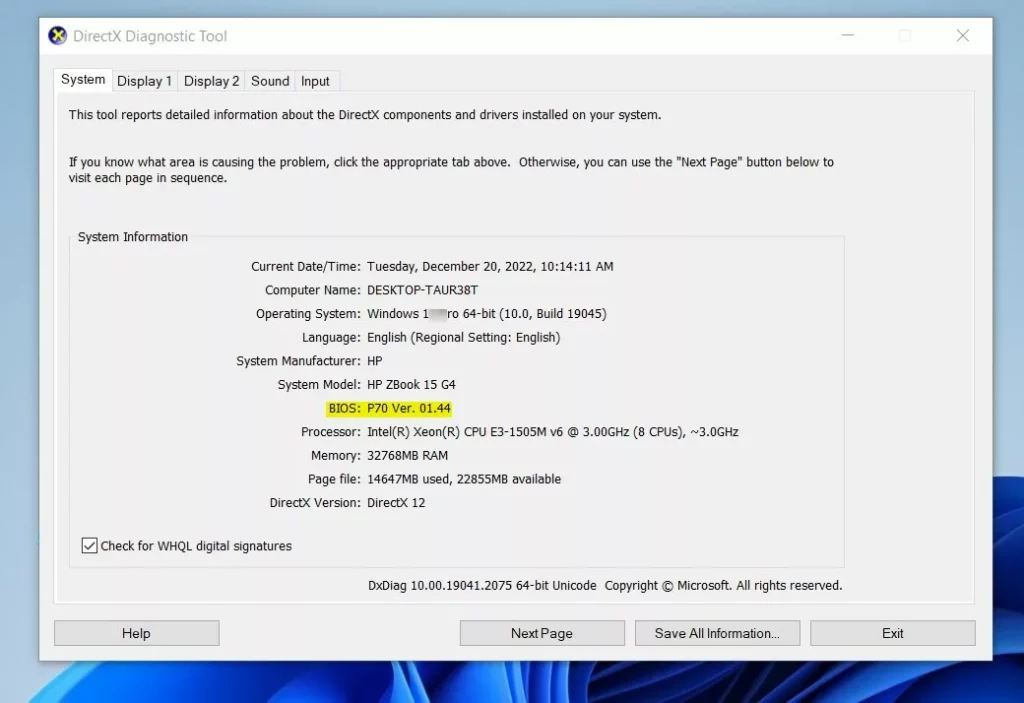
3Using DirectX Diagnostic Tool
The DirectX Diagnostic Tool can also show your BIOS version.
- Press ⊞ Win+R keys to open the Run box.
- Type
dxdiagand press Enter. - On the System tab, look under System Information for the BIOS line.
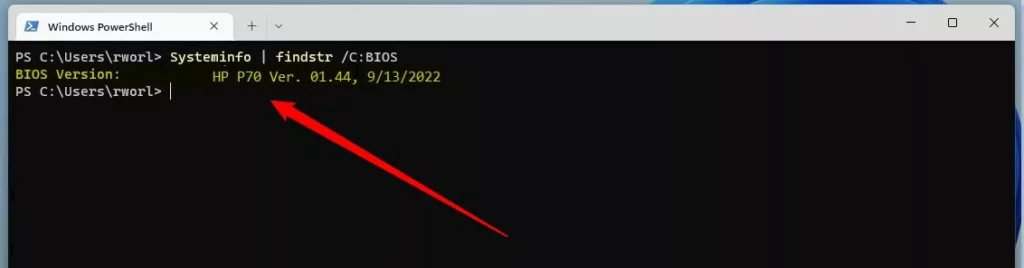
4Using Command Prompt or PowerShell
If you like using commands, here’s a quick way:
- Right-click the Start button and select Windows Terminal (or search for Command Prompt or PowerShell).
- If Windows Terminal opens, make sure you are in the Command Prompt or PowerShell tab.
- Type the following command and press Enter:
systeminfo | findstr /C:BIOS
This will show your BIOS version information.
Summary
- You can check your UEFI BIOS version in Windows 11 using several simple tools: System Information, Device Manager, DirectX Diagnostic Tool, or Command Prompt.
- Knowing your BIOS version can help you update your PC or fix issues.
- If you want to learn more about UEFI, you can visit the official Microsoft page: UEFI Information on Microsoft.com.
If you have questions or tips, feel free to leave a comment below!
Was this guide helpful?

About the Author
Richard
Tech Writer, IT Professional
Richard, a writer for Geek Rewind, is a tech enthusiast who loves breaking down complex IT topics into simple, easy-to-understand ideas. With years of hands-on experience in system administration and enterprise IT operations, he’s developed a knack for offering practical tips and solutions. Richard aims to make technology more accessible and actionable. He's deeply committed to the Geek Rewind community, always ready to answer questions and engage in discussions.


No comments yet — be the first to share your thoughts!