
Windows has a safety feature called User Account Control (UAC). It stops harmful programs from making changes to your computer without permission.
Why does this matter? When someone who isn’t an admin tries to run a program that needs admin powers, Windows asks for an admin password. This keeps your computer safe.
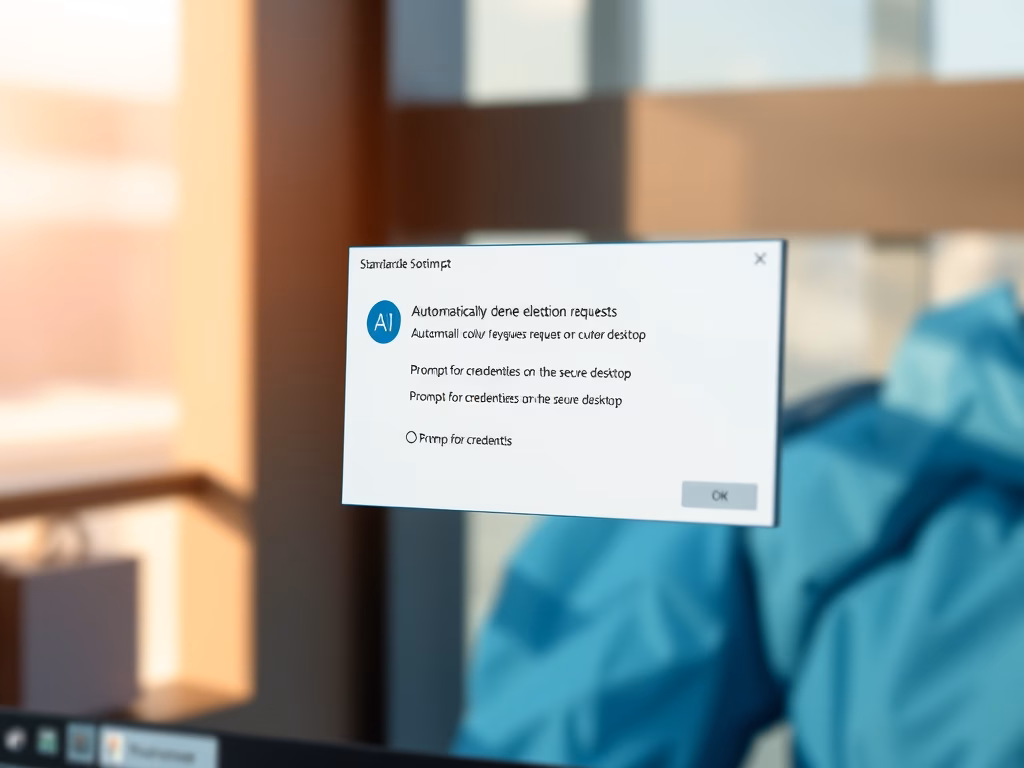
What happens? You can change how Windows handles these requests. Standard users can either be denied access, asked for a password, or asked for a password on a special secure screen.
Three Ways UAC Can Work
Option 1: Automatically Deny Access
When a standard user tries to do something that needs admin rights, they get an error message. Nothing happens. Most large companies use this setting to reduce help desk calls.
Option 2: Ask for Credentials on Secure Desktop
Windows shows a special secure screen. The user enters an admin username and password. If correct, the program runs with admin power.
Option 3: Ask for Credentials (Default)
A regular prompt appears asking for an admin username and password. This is the standard Windows setting.
Method 1: Use Local Security Policy Editor
Step 1: Open Local Security Policy
Press the Windows key and R together. Type secpol.msc and press Enter. Windows Registry Editor 🔐 Requires admin privileges
Step 2: Navigate to Security Options
In the left panel, click on the folders in this order:
- Local Policies
- Security Options
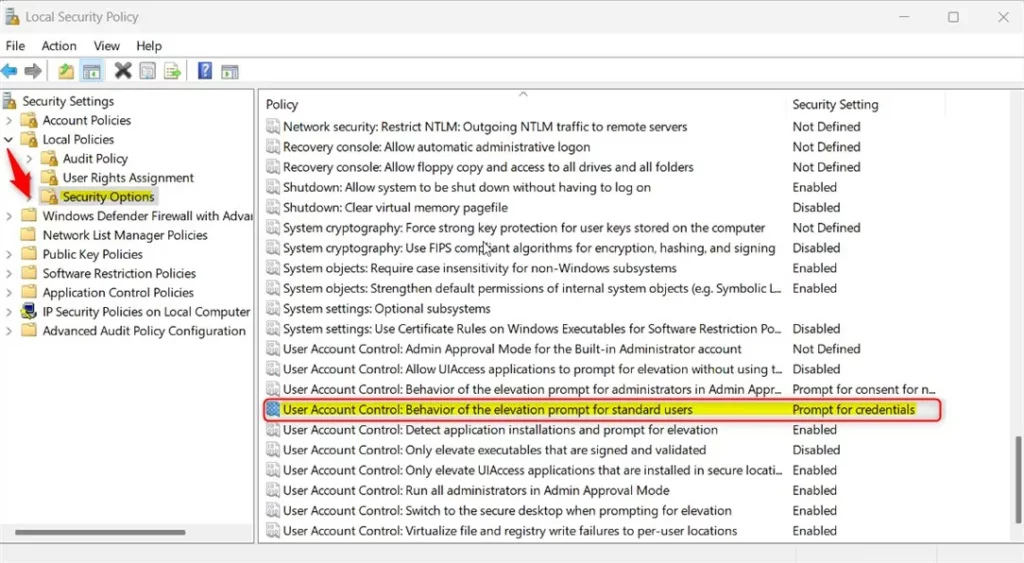
Step 3: Find the UAC Setting
In the right panel, look for the setting named “User Account Control: Behavior of the elevation prompt for standard users.” Double-click it to open.
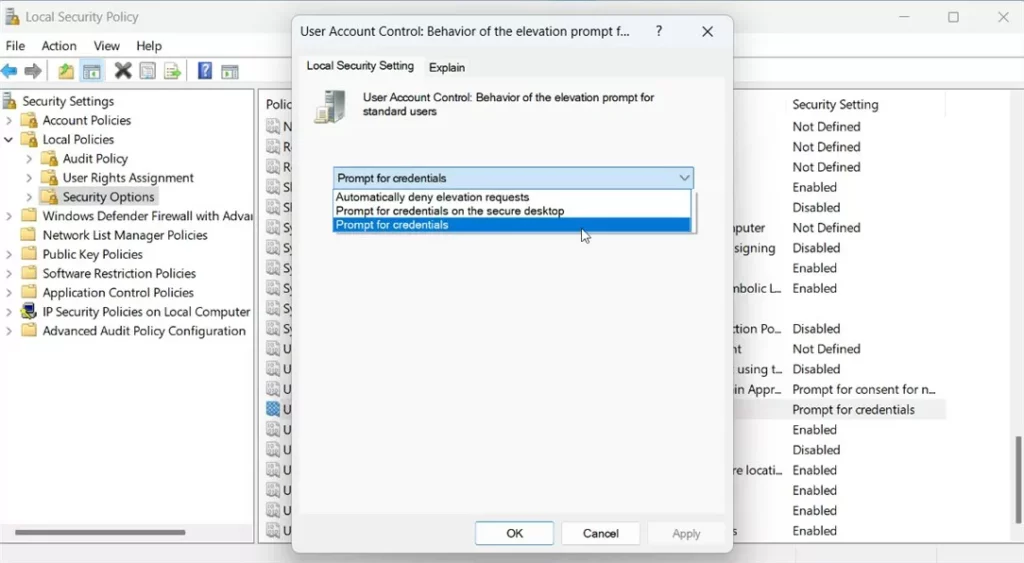
Step 4: Choose Your Option
Select one of these three choices:
- Automatically deny elevation requests
- Prompt for credentials on the secure desktop
- Prompt for credentials
Step 5: Save and Restart
Click OK to save. Restart your computer for changes to take effect.
Method 2: Use Windows Registry Editor
Why use this method? If Local Security Policy won’t open, the Registry Editor is another way to make the same changes.
Step 1: Open Registry Editor
Press the Windows key and R together. Type regedit and press Enter. Windows Registry 🔐 Requires admin privileges
Step 2: Navigate to the Correct Folder
In the left panel, navigate to this path:
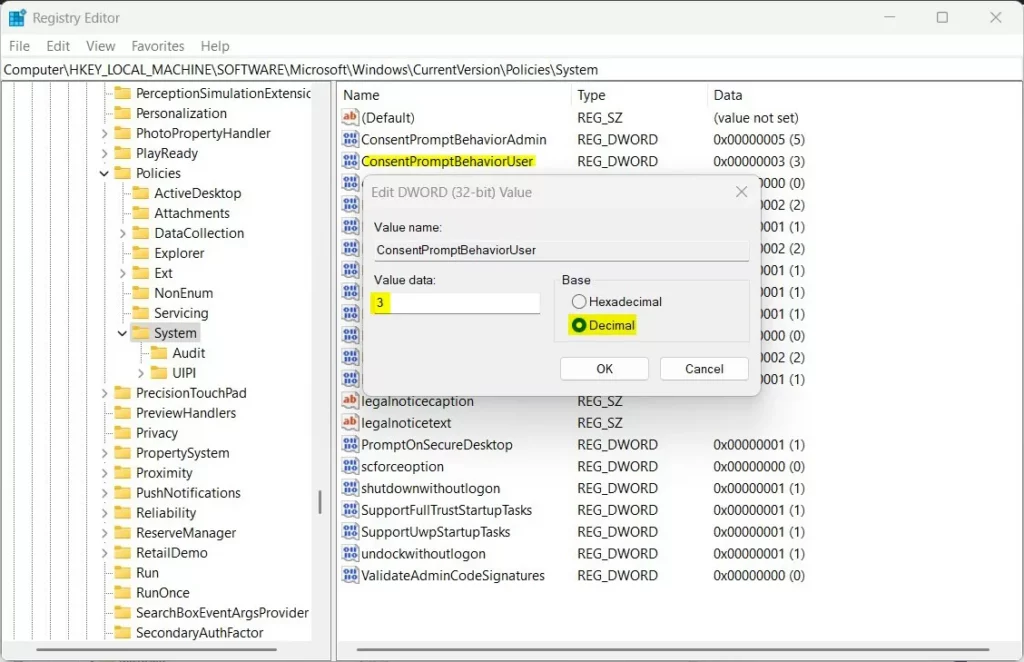
HKEY_LOCAL_MACHINE\SOFTWARE\Microsoft\Windows\CurrentVersion\Policies\SystemIf the System folder doesn’t exist, right-click the Policies folder and create a new subkey named System.
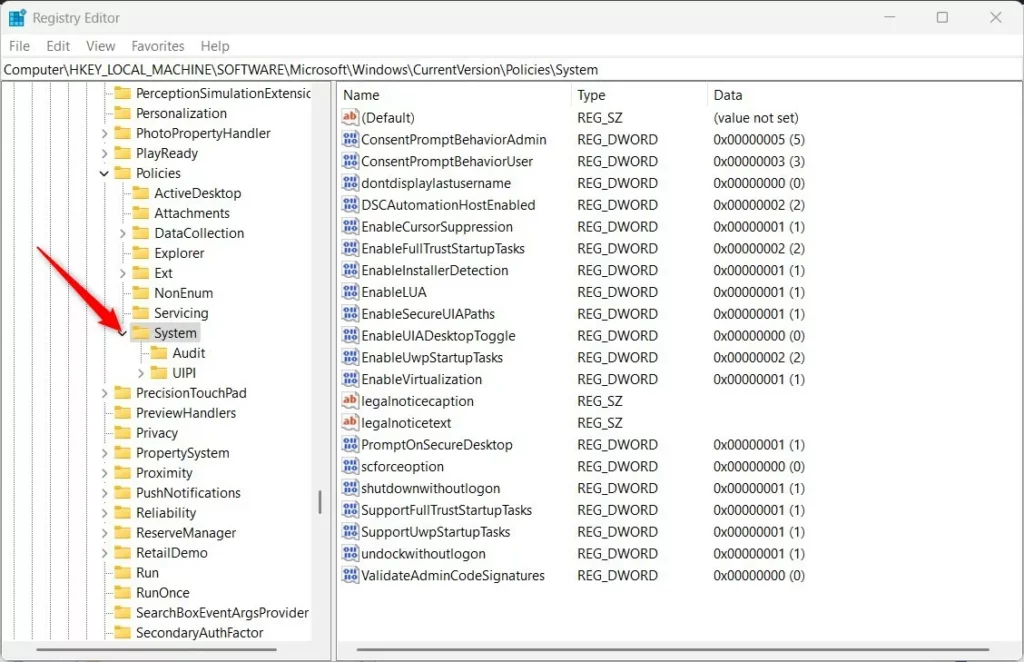
Step 3: Create a New Value
Right-click in the right panel. Select New -> DWORD (32-bit) Value. Name it ConsentPromptBehaviorUser.
Step 4: Set the Value
Double-click your new key. Make sure Base is set to Decimal. Enter one of these numbers based on what you want:
- Automatically deny elevated requests: Type
0 - Prompt for credentials on the secure desktop: Type
1 - Prompt for credentials: Type
3
Step 5: Save and Restart
Click OK to save. Restart your computer.
Summary
You now know how to control UAC prompts in Windows 11. Two methods work:
- Local Security Policy Editor: Easier for beginners. Uses a visual menu.
- Registry Editor: Works if the first method fails. Requires typing exact values.
Both methods do the same thing. Pick whichever works best for you. Remember to restart your computer after making changes. Choose the UAC setting that matches your security needs.


Leave a Reply