

This article explains how to change the Windows Automatic Maintenance (WAM) scheduled time in Windows 11.
Windows Automatic Maintenance (WAM) is a feature that combines various background tasks and performs them all at once at a scheduled time, usually 2 AM by default.
The WAM tasks include keeping the Windows operating system (OS) and applications up-to-date, checking security, and running scans for malware.
You can wake the computer up for the scheduled maintenance tasks if your computer is asleep or in hibernation mode during the default scheduled Time. You can also list and view all the maintenance tasks available on your device.
If the default 2 AM time isn’t suitable and you want to run Windows Automatic Maintenance tasks are a different time, you can change that. Instead of running at 2 AM, please change it to whenever your computer can run them without interruptions.
Change Windows Automatic Maintenance Time
As mentioned above, if your computer isn’t available to run the Windows Automatic Maintenance (WAM) tasks at the default time, you can change the scheduled Time to whenever your computer will be available without interruptions.
Here’s how to do that.
First, open the Control Panel app.
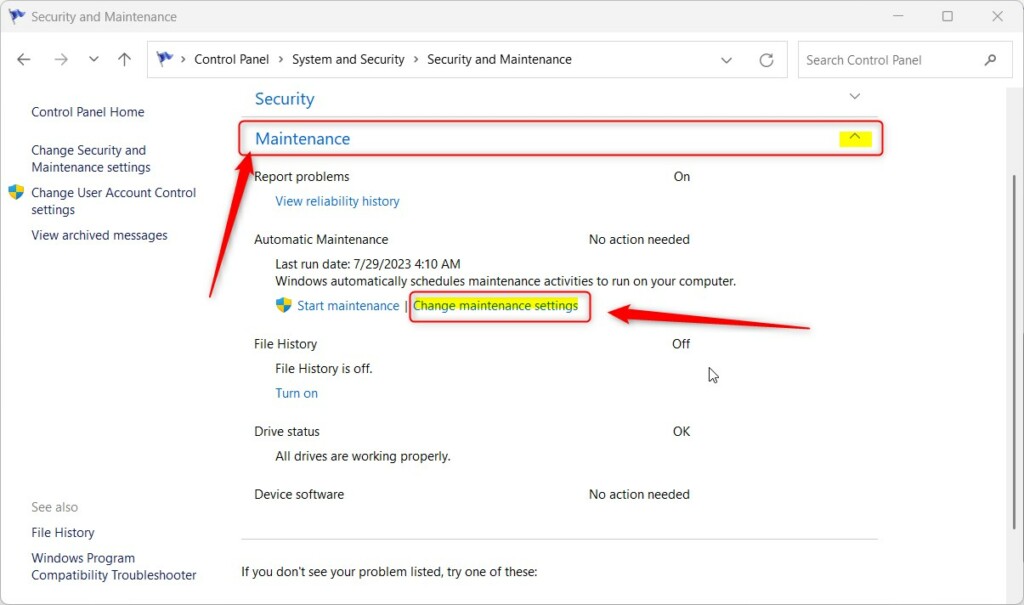
Then go to the Control Panel > System and Security > Security and Maintenance > Automatic Maintenance page.
On the Maintenance settings page, click the Change maintenance settings link.
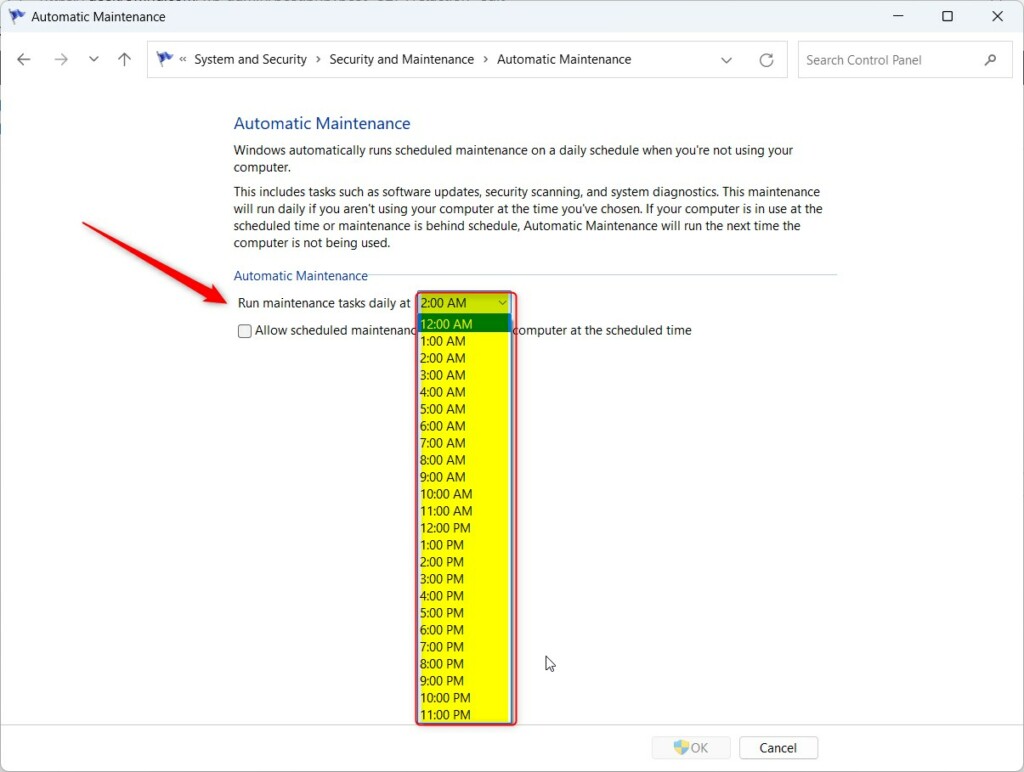
On the Settings page, choose the Time you want to run the WAM task daily.
When you are done, close the Control Panel app.
Define WAM tasks scheduled Time with the Local Group Policy Editor
Another way to change WAM scheduled Time is using the Local Group Policy Editor.
First, open the Local Group Policy Editor.
Then expand the following folders Computer Configuration -> Administrative Templates -> Windows Components -> Maintenance Scheduler.
Computer Configuration -> Administrative Templates -> Windows Components -> Maintenance Scheduler
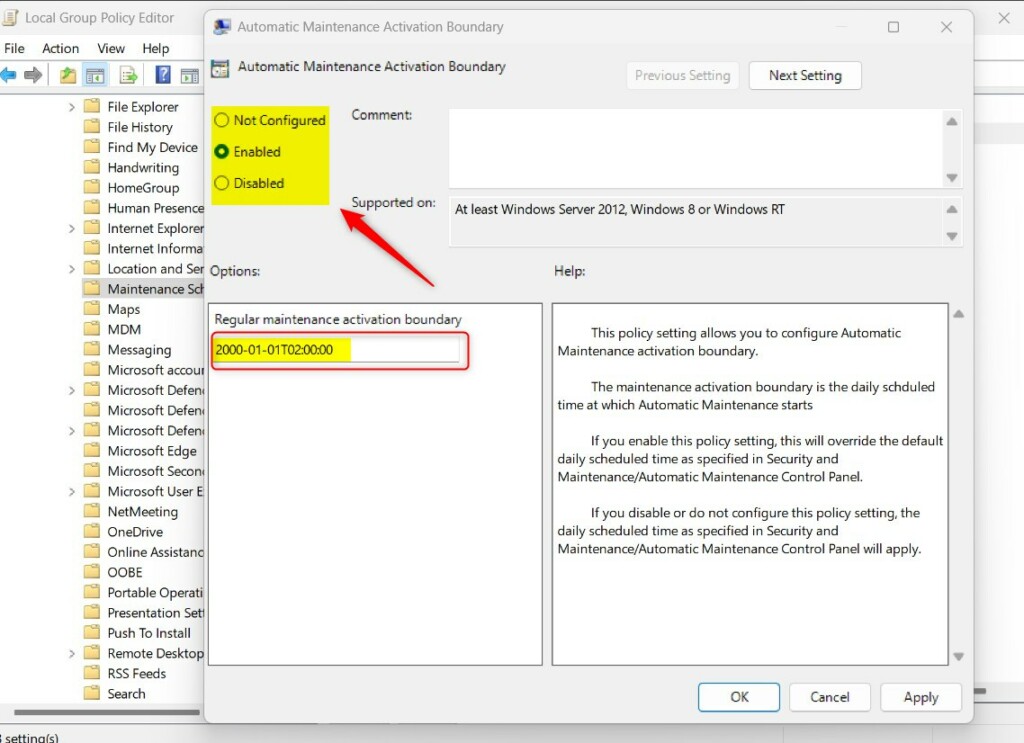
Next, click on the Maintenance Scheduler folder on the left panel, and double-click the setting on the right called “Automatic Maintenance Activation Boundary” to open.

When the setting window opens, select one of the options:
- Not Configured – Same as Disabled. The specified scheduled Time in the Control Panel applies.
- Enabled – Override default daily scheduled Time. Use the table below to select a new scheduled time.
- Disabled – The daily scheduled Time specified in the Control Panel will apply.
The table displays REG_SZ data values corresponding to the standard Time.
| standard Time | REG_SZ Data Value |
|---|---|
| 12:00 AM | 2001-01-01T00:00:00 |
| 1:00 AM | 2001-01-01T01:00:00 |
| 2:00 AM | 2001-01-01T02:00:00 |
| 3:00 AM | 2001-01-01T03:00:00 |
| 4:00 AM | 2001-01-01T04:00:00 |
| 5:00 AM | 2001-01-01T05:00:00 |
| 6:00 AM | 2001-01-01T06:00:00 |
| 7:00 AM | 2001-01-01T07:00:00 |
| 8:00 AM | 2001-01-01T08:00:00 |
| 9:00 AM | 2001-01-01T09:00:00 |
| 10:00 AM | 2001-01-01T10:00:00 |
| 11:00 AM | 2001-01-01T11:00:00 |
| 12:00 PM | 2001-01-01T12:00:00 |
| 1:00 PM | 2001-01-01T13:00:00 |
| 2:00 PM | 2001-01-01T14:00:00 |
| 3:00 PM | 2001-01-01T15:00:00 |
| 4:00 PM | 2001-01-01T16:00:00 |
| 5:00 PM | 2001-01-01T17:00:00 |
| 6:00 PM | 2001-01-01T18:00:00 |
| 7:00 PM | 2001-01-01T19:00:00 |
| 8:00 PM | 2001-01-01T20:00:00 |
| 9:00 PM | 2001-01-01T21:00:00 |
| 10:00 PM | 2001-01-01T22:00:00 |
| 11:00 PM | 2001-01-01T23:00:00 |
Save your settings and restart your computer for the changes to apply.
Change Windows Automatic Maintenance Time with Windows Registry Editor
Yet another way to change the Windows Automatic Maintenance scheduled Time in Windows is to use the Windows Registry Editor.
If you can’t open the Local Group Policy Editor, use the Windows Registry editor instead.
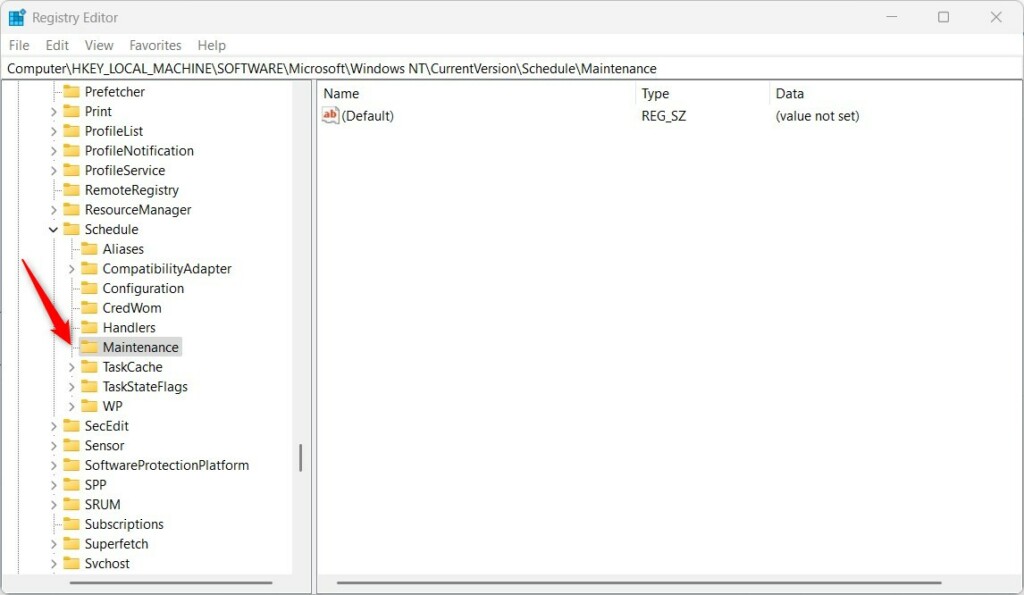
Open the Windows Registry, and navigate to the two folder keys below.
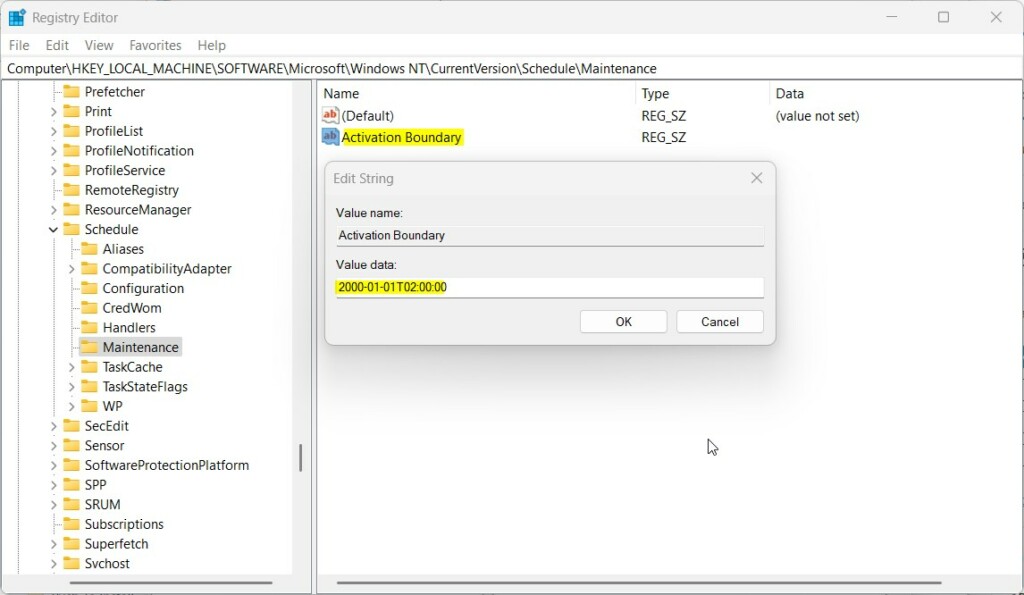
HKEY_LOCAL_MACHINE\SOFTWARE\Microsoft\Windows NT\CurrentVersion\Schedule\Maintenance
If you don’t see the Maintenance folder key, right-click on the Schedule key, then create the subkey (Maintenance) folders.
Right-click the Maintenance folder key’s right pane and select New -> String Value. Type a new key named Activation Boundary.
Double-click the new key item name (Activation Boundary) and enter your device’s scheduled Time using the table above.
- To disable the Registry Editor, type the above table value. The default value is
2000-01-01T02:00:00. - To use the default daily Time at 2 AM, delete the name Activation Boundary created above.
Save your changes and restart your computer.
Conclusion:
- Changing the scheduled time for Windows Automatic Maintenance (WAM) tasks in Windows 11 is essential for ensuring the tasks run without interruptions.
- Following the steps outlined in this article, you can easily modify the maintenance schedule to suit your computer usage patterns better.
- Whether through the Control Panel, Local Group Policy Editor, or Windows Registry Editor, multiple methods are available to adjust the WAM scheduled time to fit your preferences.
- After making these changes, it’s important to restart your computer to ensure that the new maintenance schedule takes effect.

Leave a Reply