

This post describes changing the Console Lock Display Off Timeout in Windows 11.
The lock screen is the screen or curtain you see when you turn on your computer before the sign-in screen. It is also displayed once your computer is locked after you step away or press the Windows key + L.
While your screen is locked, Console Lock Display Off Timeout is the minutes Windows will wait before timing out and automatically turning off the display when no activities are detected.
By default, Console Lock Display Off Timeout settings are set to 1 minute with all power plans.
Below is how to change the Console Lock Display Off Timeout settings in Windows 11.
How to change console lock display off timeout in Windows 11
As described above, Windows will wait before timing out and automatically turn off the display when no activities are detected on the lock screen.
Below is how to change those settings in Windows 11.
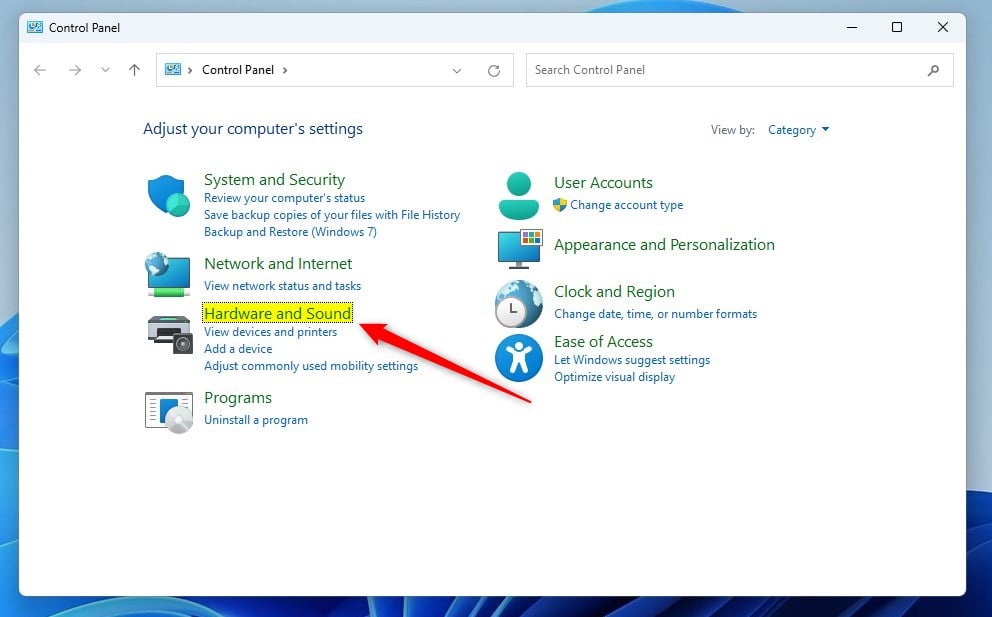
First, open the Control Panel in Windows 11.
Select Hardware and Sound, as highlighted below in the Control Panel app with the Category view.
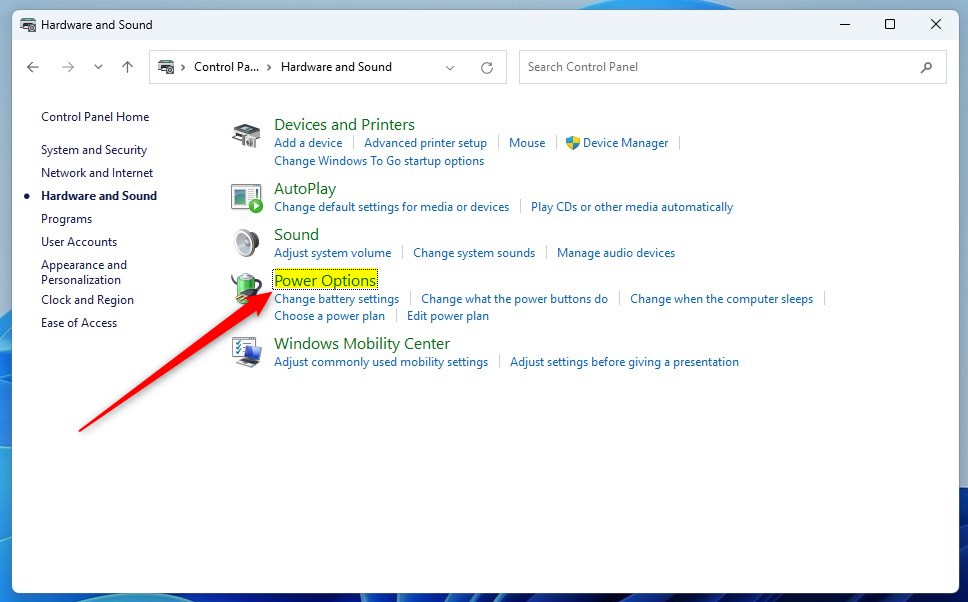
Next, select Power Options, as highlighted below.
In the Power Options window, select your active plan, then click the Change Plan settings link for the plan.
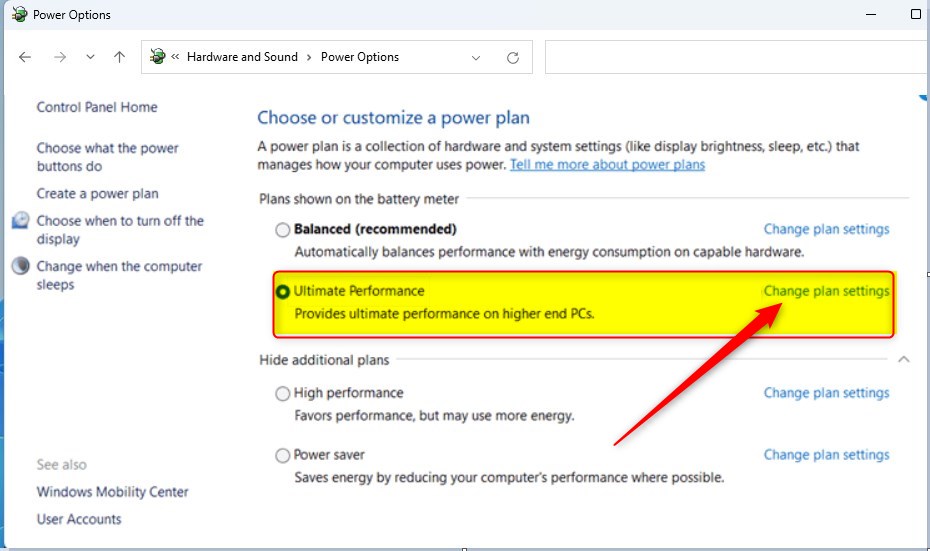
In the selected pan settings window, click Change advanced power settings link as highlighted below.

In the Power Options window, expand Display and Console lock display off timeout.
Change the wait time to minutes for:
- On battery:
- Plugged in:
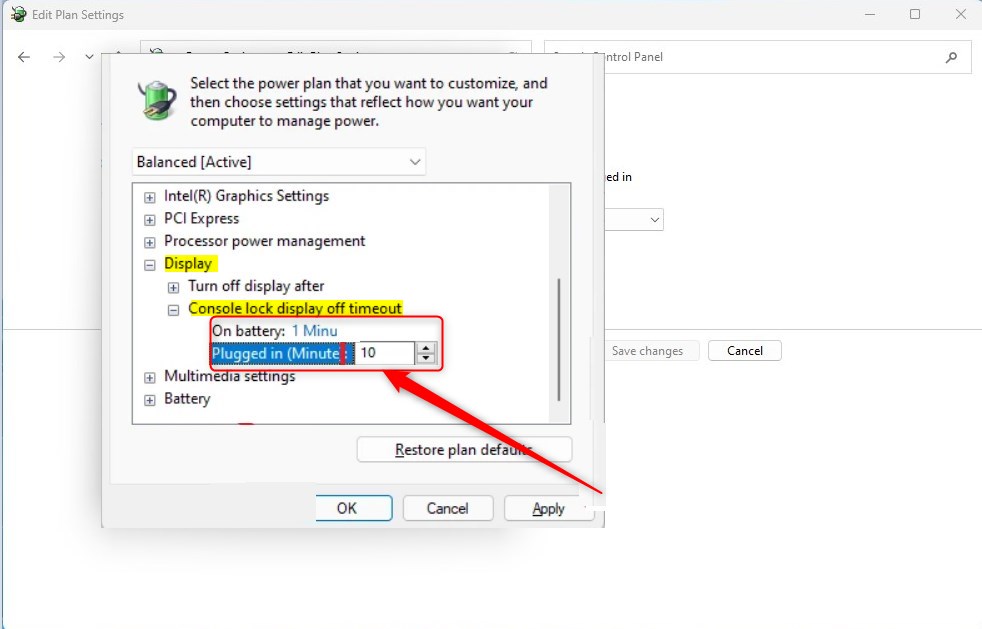
When you’re done, click OK to save your changes.
That should do it!
Conclusion:
- Changing the Console Lock Display Off Timeout in Windows 11 is a simple process that can help customize the user experience.
- By adjusting the timeout settings, users can effectively manage when the display turns off during lock screen periods.
- Following the outlined steps in the post enables users to modify these settings according to their preferences, enhancing their overall Windows 11 experience.

Leave a Reply