How to Change Live Captions Language in Windows 11
You change the Live Captions language in Windows 11 by downloading and selecting your preferred language pack from Settings.
Live Captions is a powerful Windows 11 feature that converts any audio playing on your PC into real-time, on-screen text. It’s a fantastic tool for accessibility and understanding content in different languages.
To get the most accurate transcriptions, you need to ensure the language processing matches the audio you’re listening to. For example, if you’re watching a French film, you’ll want to set Live Captions to French.
When you select a new language in Windows 11, the operating system automatically downloads the necessary language pack. Your PC then uses this specific language model to process the audio for incredibly accurate captions.
To change the Live Captions language, first install the desired language pack in Settings > Time & language > Language & region, ensuring Speech recognition is checked. Then, turn on Live Captions (⊞ Win+Ctrl+L), click the gear icon, and select Caption language from the menu.
How to Download and Install New Language Packs
Changing your Live Captions language in Windows 11 starts with installing the right language pack.
- Open Settings by pressing ⊞ Win+I.
- Go to Time & language and select Language & region.
- Click the Add a language button.
- Search for your desired language and click Next.
- Check the box for Speech recognition to ensure it works with Live Captions.
- Click Install.
How to Switch Your Language in Live Captions
Once you’ve installed a new language pack, switching your Live Captions language is simple.
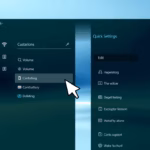
- Turn on Live Captions by pressing ⊞ Win+Ctrl+L.
- Click the Settings gear icon inside the Live Captions window.
- Select Caption language from the menu.
- Choose your preferred language from the list.
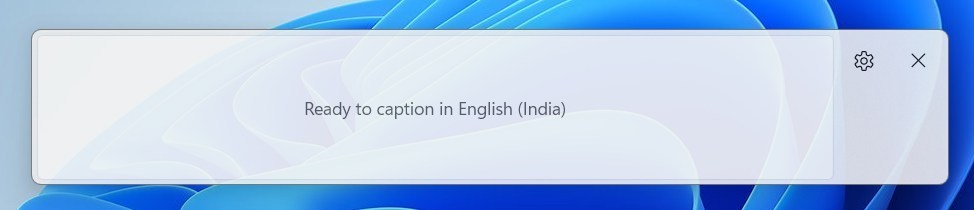
After you pick your language, a small message will appear on the caption bar. This confirms that the computer is ready to process audio in that language.
Language Support and Technical Limitations
Live Captions uses your computer’s processing power to work offline, but it requires specific language packs to be installed for different languages.
Summary
Changing the Live Captions language in Windows 11 is a straightforward process that greatly improves accessibility by letting you see captions in your preferred language.
What languages does live captions support for transcription?
Windows 11 Live Captions currently supports a wide range of major global languages including English, Spanish, French, German, Italian, Japanese, Chinese, and more. Microsoft frequently updates this list. You can view the full list of supported languages by checking the Language & region settings menu on your Windows 11 device.
Why is my preferred language not appearing in the settings menu?
Your preferred language might not appear in the Live Captions settings if the speech recognition component wasn’t installed with the language pack.
How to change FaceTime live caption language?
So that means the iPhone 15 Pro Max. Or later models. Start or accept a FaceTime call as you normally. Would this feature also works with regular phone calls.
What languages are supported by Apple live captions?
Currently, Live Captions is available only on iPhone 11 and later when the primary language set is English (US) or English (Canada).
Was this guide helpful?

About the Author
Richard
Tech Writer, IT Professional
Richard, a writer for Geek Rewind, is a tech enthusiast who loves breaking down complex IT topics into simple, easy-to-understand ideas. With years of hands-on experience in system administration and enterprise IT operations, he’s developed a knack for offering practical tips and solutions. Richard aims to make technology more accessible and actionable. He's deeply committed to the Geek Rewind community, always ready to answer questions and engage in discussions.

No comments yet — be the first to share your thoughts!