This article explains how to rename Windows 11 computers.
If you have purchased a Windows computer and wish to rename it to make it more personal, the following steps can guide you.
Changing your computer name in Windows 11 is useful for personalization and creating a unique identity for your device.
Rename your computer
There are multiple ways to rename your Windows computer, including through the System settings page.
First, open the Windows Settings app.
You can do that by clicking on the Start menu and selecting Settings. Or press the keyboard shortcut (Windows key + I) to launch the Settings app.
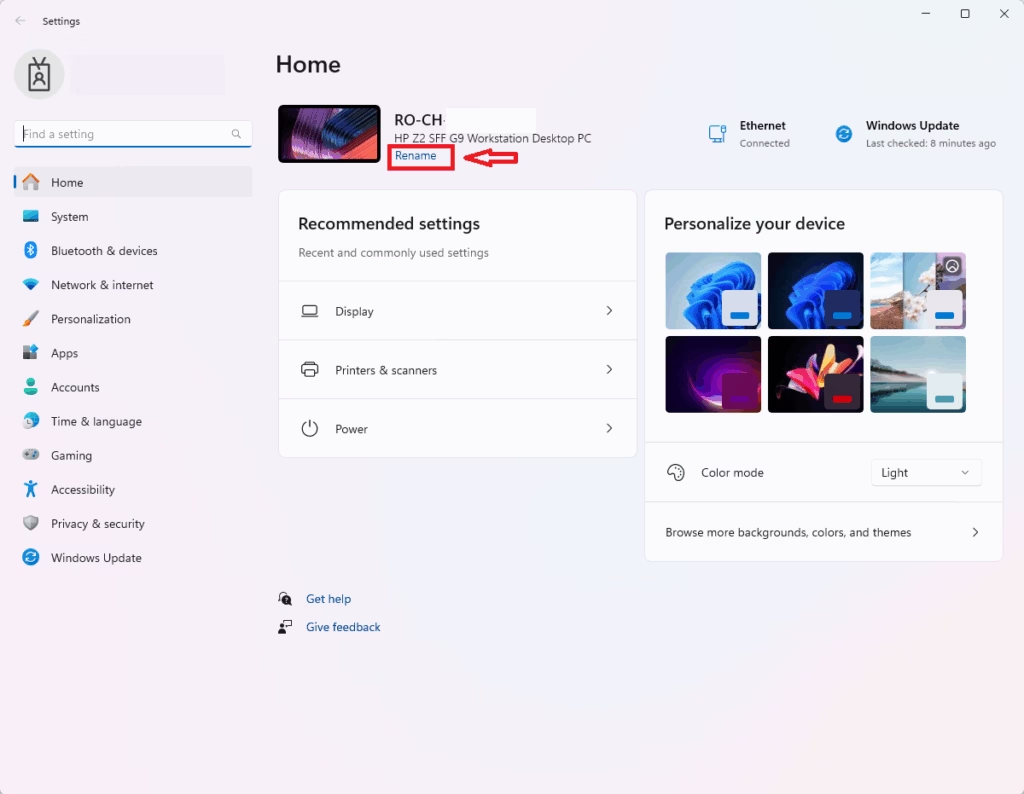
When the Settings app opens, look under the computer name in the Settings app under the ‘Home‘ section.
Then, click on the “Rename” link.
Enter the name you wish to use for your computer. You may include letters, hyphens, and numbers in the computer name.
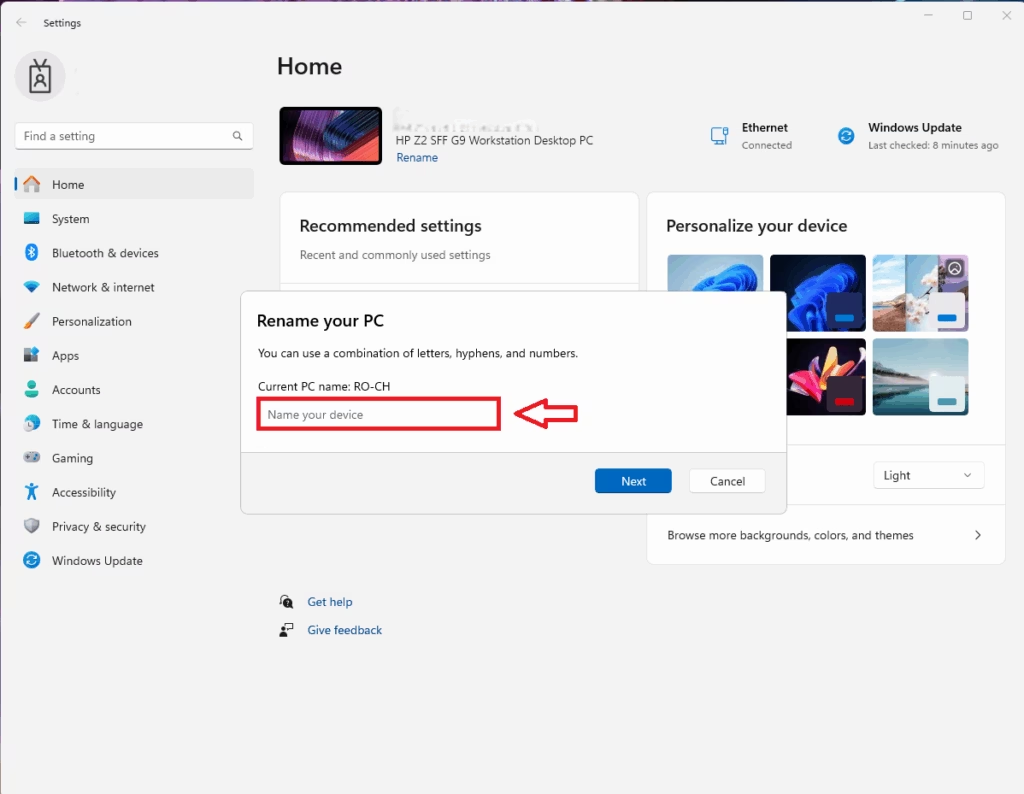
Click Next to apply your change. Restart to make change happen.
Change PC Name from System Properties
Another method to change and rename Windows computers is through System Properties. Access it by pressing the Windows key + R and entering the following commands:
sysdm.cpl
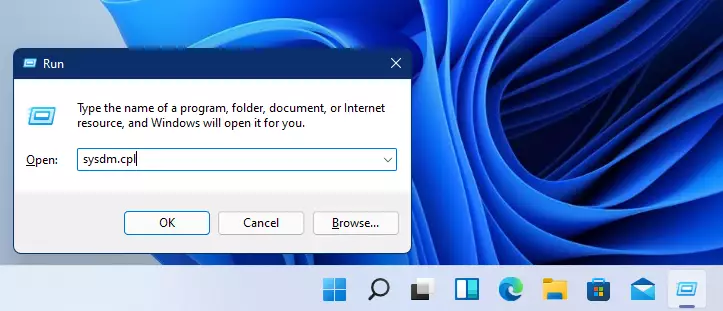
When you press Enter, the System Properties dialog box will appear.
In this dialog window, you can change your computer settings and perform other tasks, such as enabling a remote connection and creating a restore point.
To change your computer name, click the Change button below.
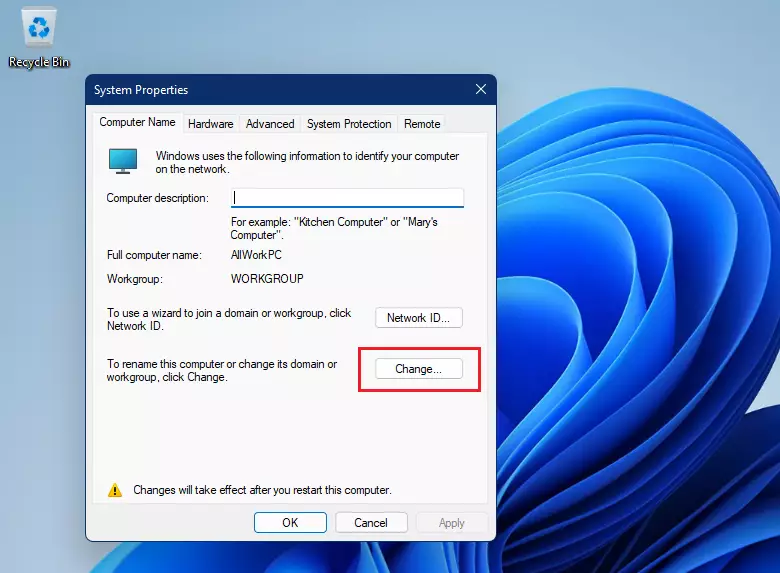
Another dialog box will appear, prompting you to enter the new computer name you wish to use.
Type in the name in the Computer name field and select OK. This will save the changes but prompt you to restart the computer to apply the changes.
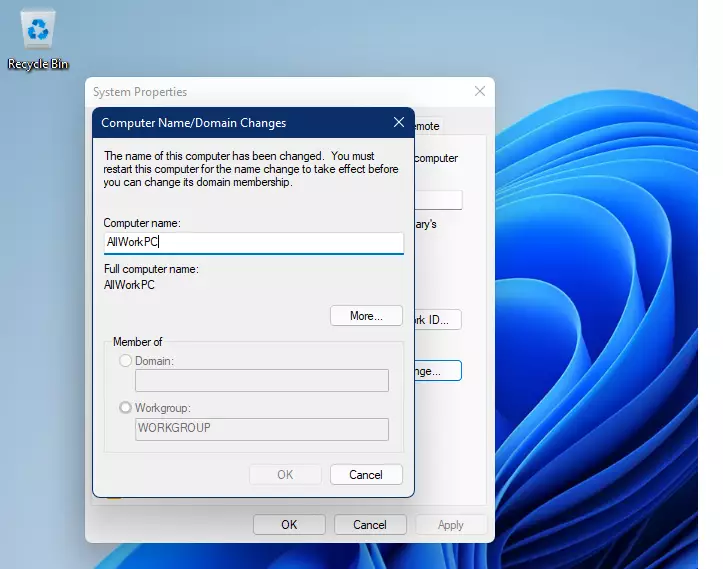
After restarting your computer, it will be named “new,” which explains how to change the name of a Windows PC.
Change Computer Name from Command Prompt
Another way to rename a Windows 11 computer is through the Command Prompt. To do this, use Windows search and type in “Command Prompt.”
Then right-click the Command Prompt and select Run as administrator.
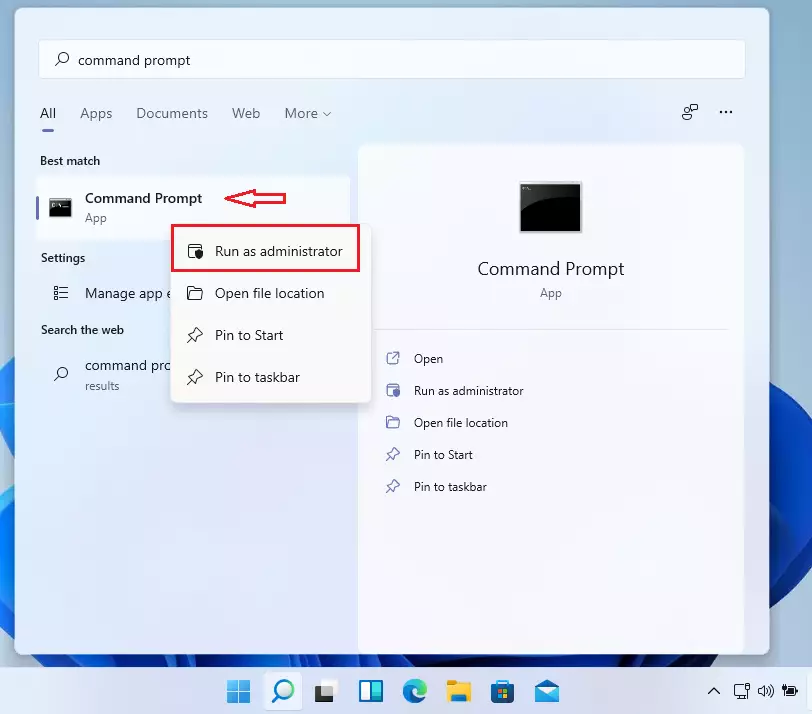
Type the commands below to rename your computer on the Command Prompt console.
wmic computersystem where name="Old_Name" call rename name="New_Name"
Replace Old_Name with the current computer name and replace New_Name with the new name you want to use.
A successful name change will display the output as shown below:
Executing (\\ALLWORKPC\ROOT\CIMV2:Win32_ComputerSystem.Name="ALLWORKPC")->rename()
Method execution successful.
Out Parameters:
instance of __PARAMETERS
{
        ReturnValue = 0;
};
Please restart your computer, and it should boot up using the name you provided.
Rename PC via PowerShell
Another way to rename Windows 11 computers is via PowerShell. Use the search feature to search for PowerShell. Then right-click PowerShell and select Run as administrator.
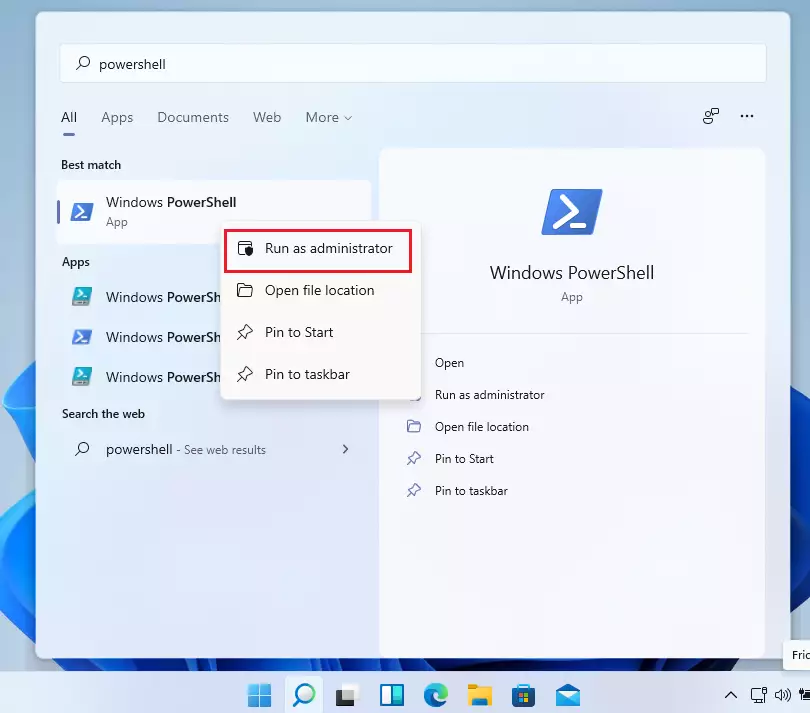
When PowerShell opens, run the commands below to rename your computer.
Rename-Computer -NewName "AllWorkPC"
Change the current name of your computer to the new name you want to use. Then, restart your computer to apply the name change.
That should do it!
Conclusion:
- Renaming your Windows 11 computer enhances personalization and makes your device unique.
- There are several methods to rename your PC: through Settings, System Properties, Command Prompt, and PowerShell.
- Each method is straightforward and allows you to choose a new computer name easily.
- Remember to restart your computer to ensure that the name change takes effect.
- Personalizing your device can improve your overall user experience.
Leave a Reply