How to Calibrate Your Display Color in Windows 11
Do your screen colors look a little odd? Windows 11 has a built-in tool that makes your colors look better and more natural. This tool is called display color calibration.
What does calibrating your display mean? It means adjusting the colors, brightness, and contrast of your screen. Why should you do this? If you edit photos, watch movies, or simply want your screen to look its best, calibration helps everything appear more realistic and clear.
How to Calibrate Your Display in 🪟 Windows 11
Follow these simple steps:
- Open Windows Settings
Click the Start menu button. It’s the Windows icon in the bottom-left corner of your screen. Then click Settings.
Or press the Windows key + I on your keyboard. This opens Settings faster.
Learn more about Windows Settings
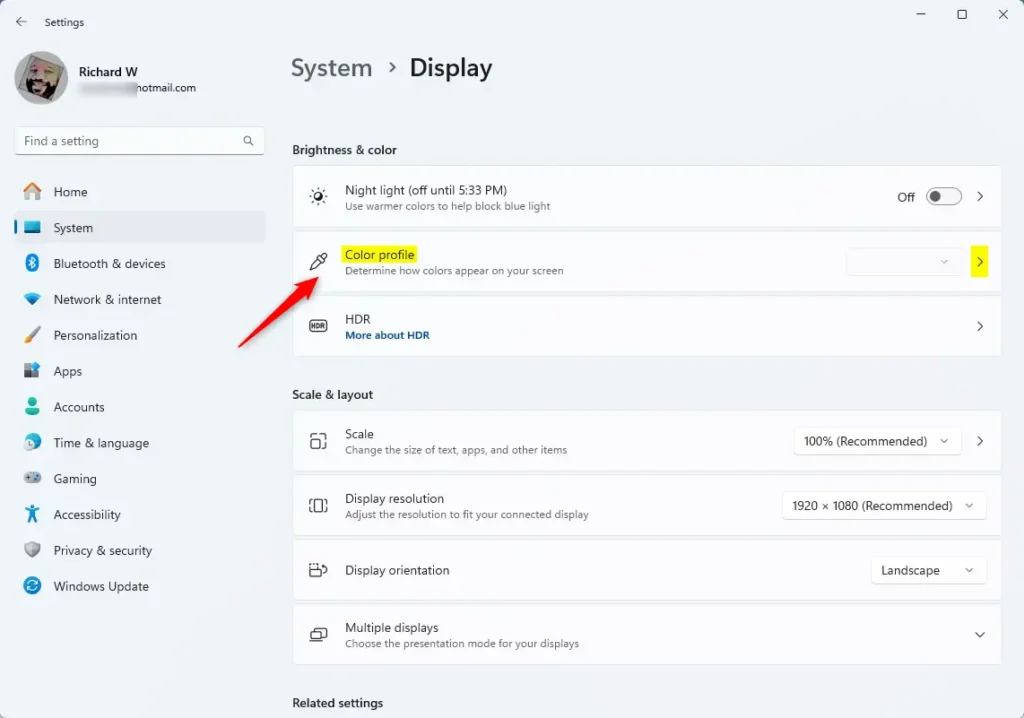
- Go to System settings
In the Settings window, click System on the left side.
- Select Display
On the right side, click on the Display option to open display settings.

- Open Color profile
Scroll down and find the Color profile option. Click it to open color choices.
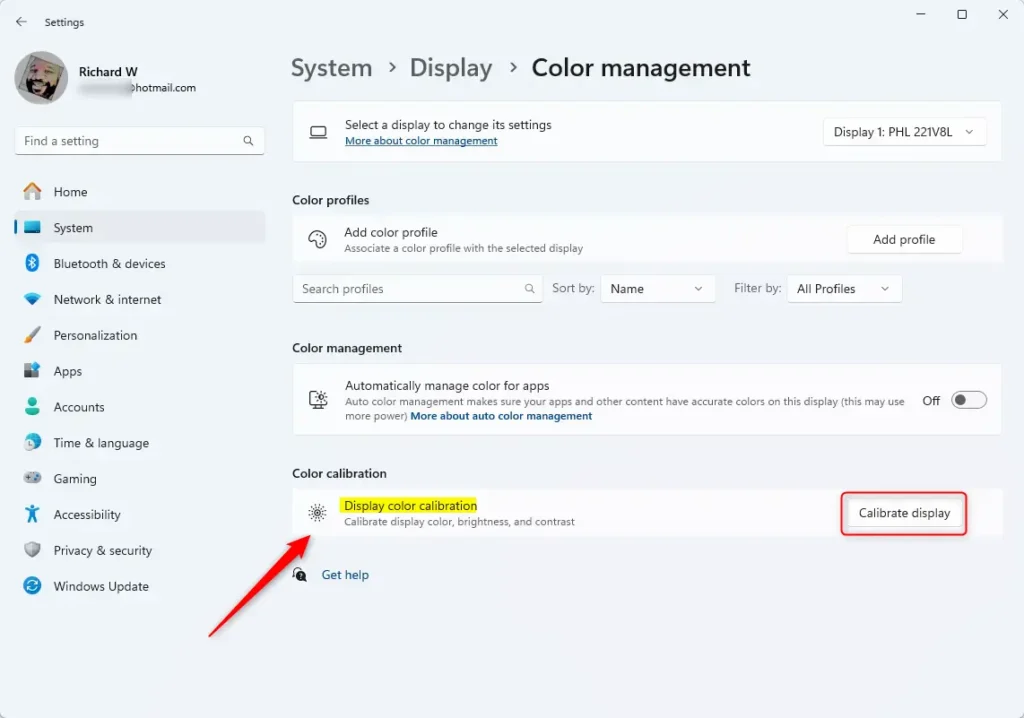
- Click Calibrate display
Find and click the Calibrate display button. This starts the calibration wizard.
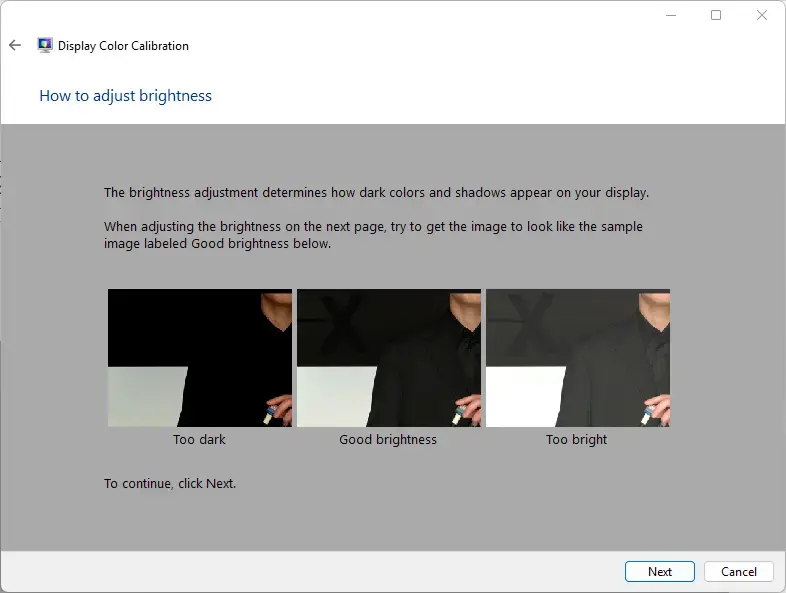
- Follow the on-screen instructions
A wizard window will appear. Click Next and follow each step carefully. The wizard helps you adjust your gamma, brightness, contrast, and color balance.
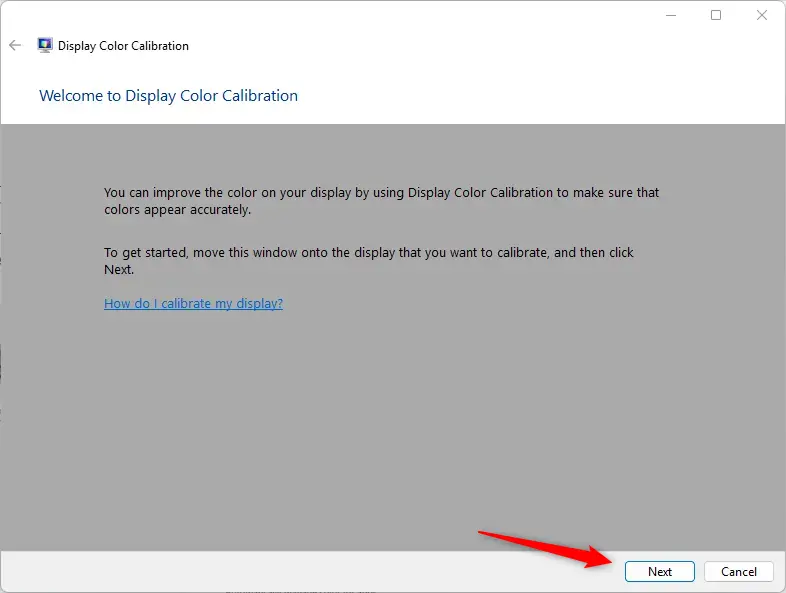
Keep clicking Next as you make adjustments.
- Finish the calibration
After completing all steps, click the Finish button.
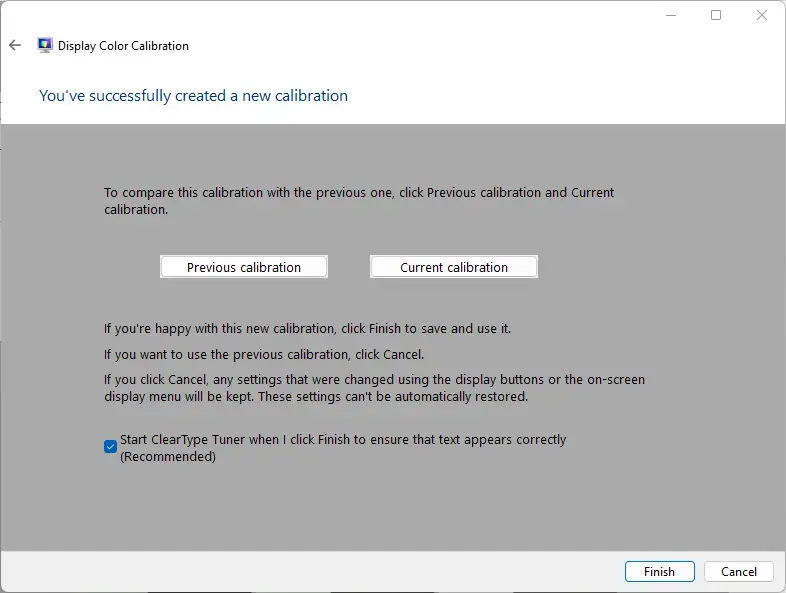
That’s it! Your display should now show better and more accurate colors.
Why Should You Calibrate Your Display?
- It makes colors look more natural and correct on your screen.
- Improves your movie watching, photo viewing, and gaming experience.
- Helps if you do photo editing or graphic design work. You’ll see true colors.
- It’s good to recalibrate if you get a new monitor or notice colors looking strange.
Give it a try and enjoy a nicer, clearer display!
Summary
Display color calibration is a simple Windows 11 feature that makes your screen colors look better and more natural. You access it through Settings > System > Display > Color profile > Calibrate display. The built-in wizard guides you through adjusting gamma, brightness, contrast, and color balance. Calibration helps if you edit photos, watch movies, play games, or do graphic design. It takes only a few minutes and greatly improves how colors appear on your screen.
Was this guide helpful?

About the Author
Richard
Tech Writer, IT Professional
Richard, a writer for Geek Rewind, is a tech enthusiast who loves breaking down complex IT topics into simple, easy-to-understand ideas. With years of hands-on experience in system administration and enterprise IT operations, he’s developed a knack for offering practical tips and solutions. Richard aims to make technology more accessible and actionable. He's deeply committed to the Geek Rewind community, always ready to answer questions and engage in discussions.


No comments yet — be the first to share your thoughts!