How to Change Geographic Location in Windows 11

You change your geographic location in Windows 11 by modifying the Location privacy settings. This allows your PC to accurately report a specific geographical point for services that require it.
Location services in Windows 11 are distinct from system region settings. While system region affects date, time, and currency formats, location services provide GPS-like data. This data is crucial for features like the Weather app, automatic time zone adjustments, and the Find My Device functionality.
You might need to change your location to access geo-restricted content or to protect your privacy on a shared computer. This guide will show you how to easily adjust these settings within Windows 11.
Change your country or region in Settings > Time & language > Language & region. To control app access or disable tracking, go to Settings > Privacy & security > Location. Advanced users can use gpedit.msc or regedit to disallow geographic location changes.
How to Change Your Region via Settings
You can change your geographic location in Windows 11 using the Settings app. This helps apps show you correct local information, like news or weather. To change your region, open Settings, go to Time & language, then Language & region, and pick your new country from the list.
- Open Settings by pressing ⊞ Win+I.
- Go to Time & language > Language & region.
- Under Region, select your new country from the Country or region dropdown menu.
Privacy and Location Services
You can control which apps have access to your location. Go to Settings > Privacy & security > Location. Here, you can toggle the Location services switch to Off to prevent all apps from tracking you. You can also manage permissions for individual apps in this menu.
Advanced Configuration (Admin Only)
Using the Local Group Policy Editor
- Open the Local Group Policy Editor by typing gpedit.msc in the search bar.
- Navigate to: Computer Configuration\Administrative Templates\System\Location Services.
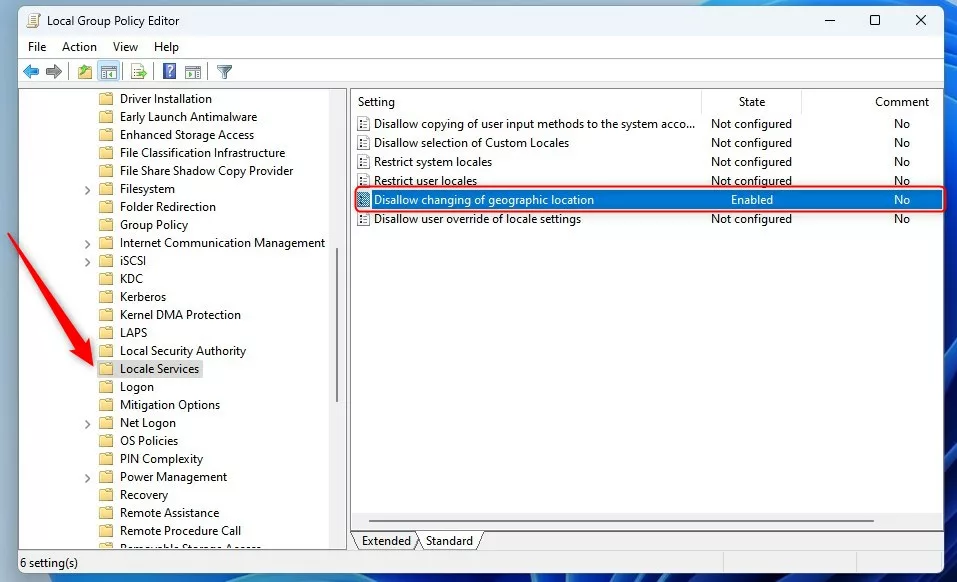
- Click on the Location Services folder.
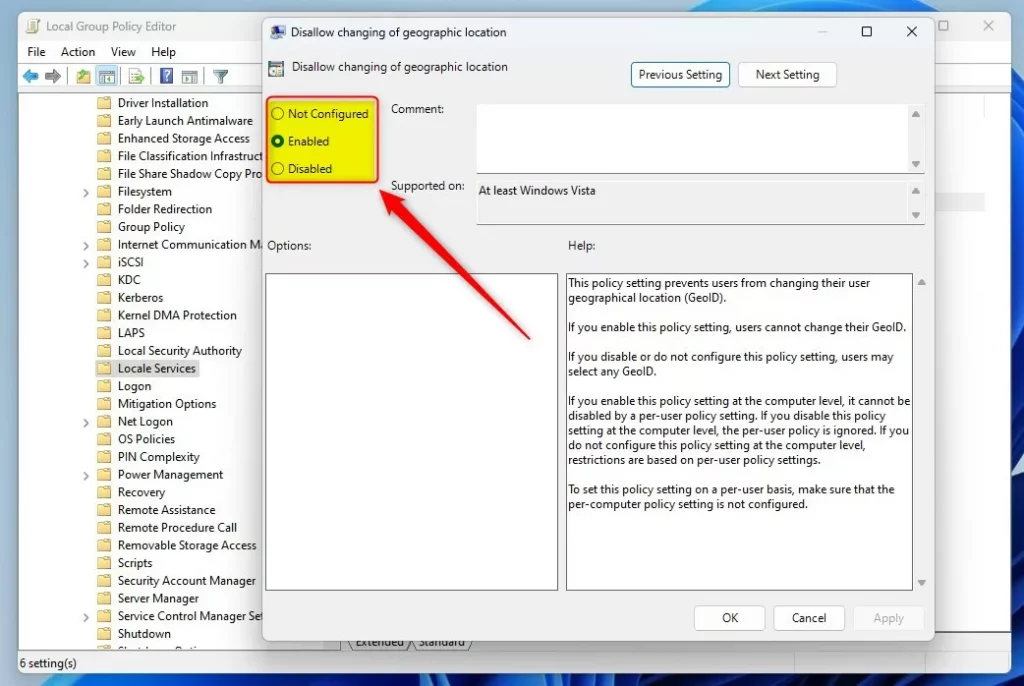
- Double-click Disallow changing of geographic location.
- Select Enabled to block users from changing the location, or Disabled to allow it.
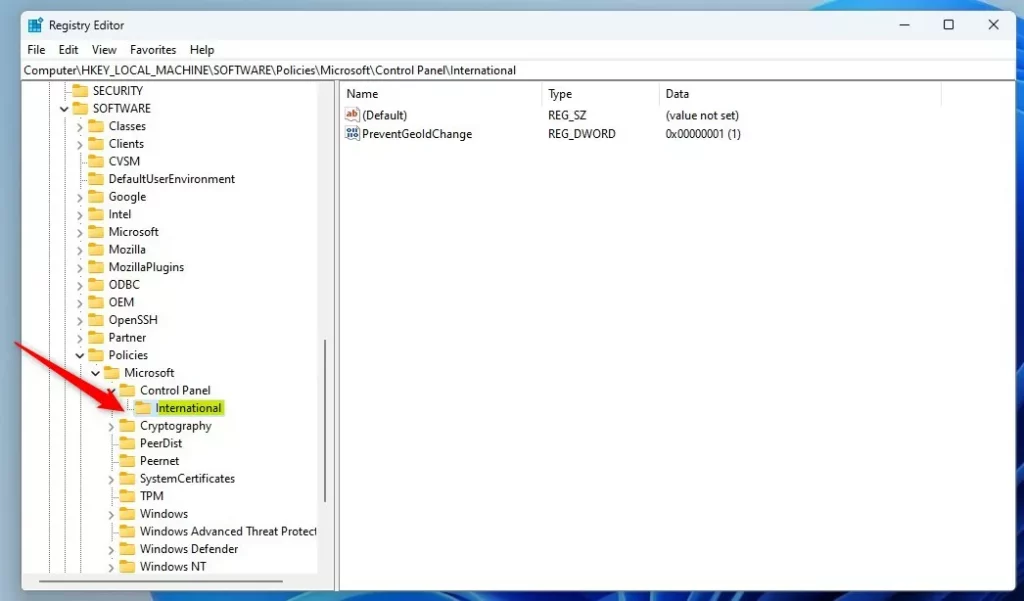
Using the Windows Registry Editor
If you cannot use the Group Policy Editor, use the Registry Editor.
HKEY_LOCAL_MACHINE\SOFTWARE\Policies\Microsoft\Control Panel\International
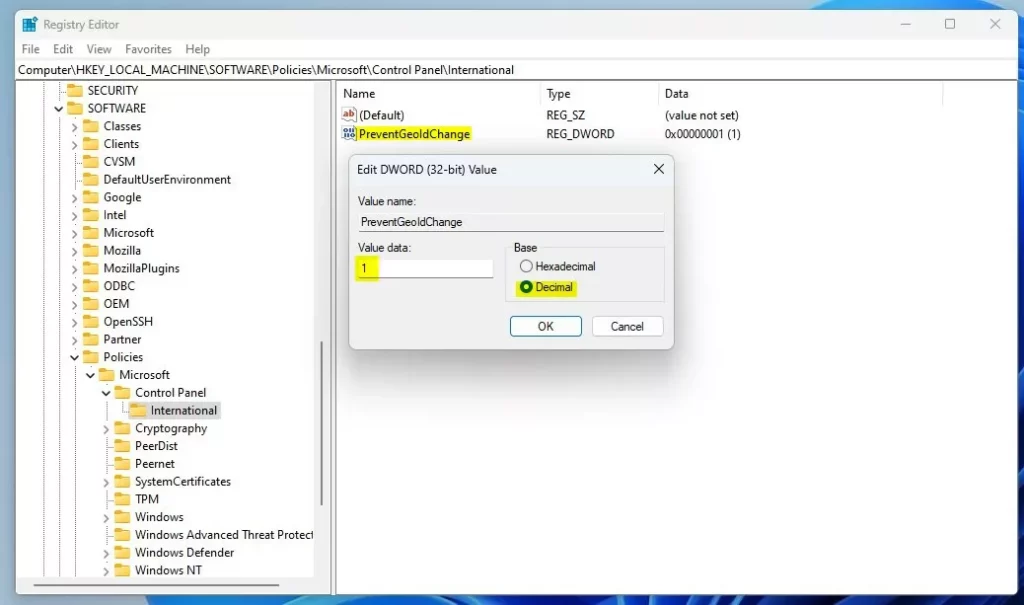
- Right-click in the empty space on the right side.
- Select New > DWORD (32-bit) Value.
- Name it
PreventGeoIdChange. - Set the Value data to
1to block changes.
Summary
Changing your geographic location in Windows 11 lets you adjust settings for things like date formats or control privacy with location services.
Does changing my region affect my Microsoft Store purchases?
Yes. The Microsoft Store is region-locked. Changing your Windows region settings does not automatically update your store region. You must update your billing address and payment method in your Microsoft account settings to match the new region to purchase content from that specific store.
What is the difference between Region and Location in 🪟 Windows 11?
Region settings control your system language, date formats, and currency symbols. Location services use GPS, Wi-Fi, and IP addresses to determine your physical coordinates. Region is a preference for how your computer displays data, while location is a privacy setting that tracks where you are physically located.
Was this guide helpful?

About the Author
Richard
Tech Writer, IT Professional
Richard, a writer for Geek Rewind, is a tech enthusiast who loves breaking down complex IT topics into simple, easy-to-understand ideas. With years of hands-on experience in system administration and enterprise IT operations, he’s developed a knack for offering practical tips and solutions. Richard aims to make technology more accessible and actionable. He's deeply committed to the Geek Rewind community, always ready to answer questions and engage in discussions.

No comments yet — be the first to share your thoughts!