
The text cursor is the blinking vertical line you see when typing text on your screen. Sometimes, it can be hard to see, especially on big or multiple monitors.
Luckily, Windows 11 lets you make this cursor thicker so it’s easier to spot. Here’s a simple guide to change your text cursor thickness and make typing easier.
How to Change Text Cursor Thickness in Windows 11 Using Settings
- Open Settings: Click the Start button and select Settings.
Or press Windows key + I on your keyboard to open Settings quickly. - In Settings, click on Accessibility from the left menu.
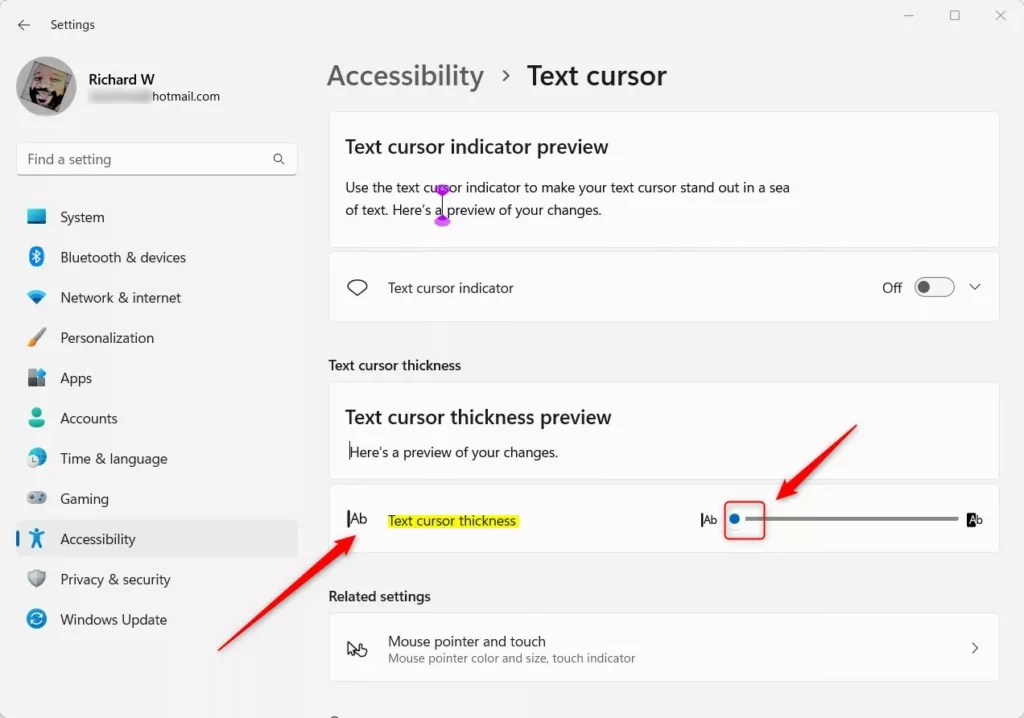
- On the right side, find and click Text cursor.
- Look for the Text cursor thickness option. Use the slider to make the cursor thicker or thinner.
- You’ll see a live preview showing how thick your cursor will look.
- When you’re happy with it, just close the Settings window.
How to Change Text Cursor Thickness Using Control Panel
If you like using the Control Panel, here’s how:
- Open Control Panel. You can search for it from the Start menu.
- Go to Ease of Access > Ease of Access Center.
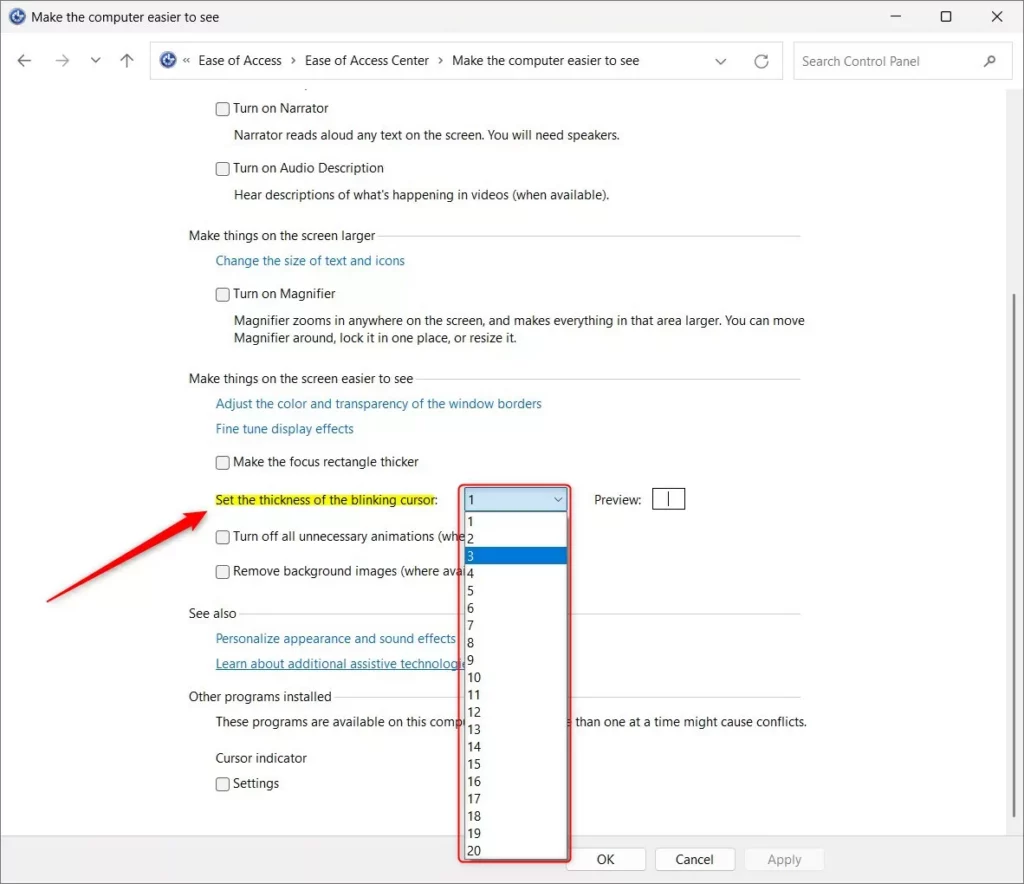
- Click on Make the computer easier to see.
- Find the dropdown for Set the thickness of the blinking cursor.
- Choose your preferred thickness number and click OK or close the window.
How to Change Text Cursor Thickness Using Windows Registry (Advanced)
This method is for advanced users. Be careful when editing the registry!
- Press Windows key + R, type
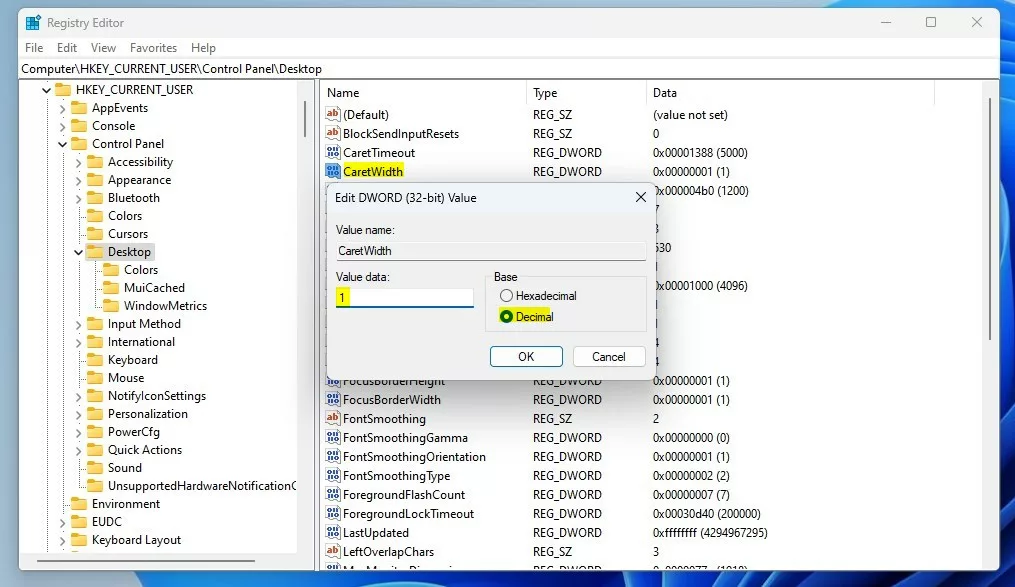
regedit, and press Enter to open the Registry Editor. - Navigate to this path:
HKEY_CURRENT_USER\Control Panel\Desktop - If you don’t see a Desktop folder, right-click on Control Panel, choose New > Key, and name it Desktop.
- Right-click in the right pane, select New > DWORD (32-bit) Value, and name it CaretWidth.
- Double-click on CaretWidth, choose Decimal as the base, and enter a number between 1 and 20 for the thickness.
- Click OK, close Registry Editor, and restart your computer to apply the changes.
Summary
- Making your text cursor thicker can help you see it better while typing.
- You can easily change cursor thickness in Windows 11 through Settings or Control Panel.
- Advanced users can also adjust the thickness in the Windows Registry.
- Try different settings to find what works best for you!
If you want to learn more about other cursor options like blink rate or cursor indicators, check out these helpful guides:
- Change Cursor Blink Rate in Windows 11
- Turn On or Off Text Cursor Indicator

Leave a Reply