
This article explains enabling or disabling “App diagnostics access” in Windows 11.
App diagnostics access collects and sends diagnostic data about apps’ performance and behavior. This feature can help developers identify issues, improve software, and enhance user experiences.
Apps in Windows are carefully isolated so they don’t interfere with each other. However, there are scenarios where it’s useful for one app to see certain information about other running apps (for example, it’s useful for diagnostic tools to get a list of running apps).
If you are worried about privacy and performance, you can disable Windows’s “App diagnostics access” feature. Users who prefer not to share data with developers might disable diagnostics to maintain control over their information.
The steps below walk you through disabling and enabling the “App diagnostics access” feature.
Enable or disable app diagnostics access using the Settings app
As mentioned above, users can enable or disable the “App diagnostics access” feature in Windows 11.
Here’s how to do it.
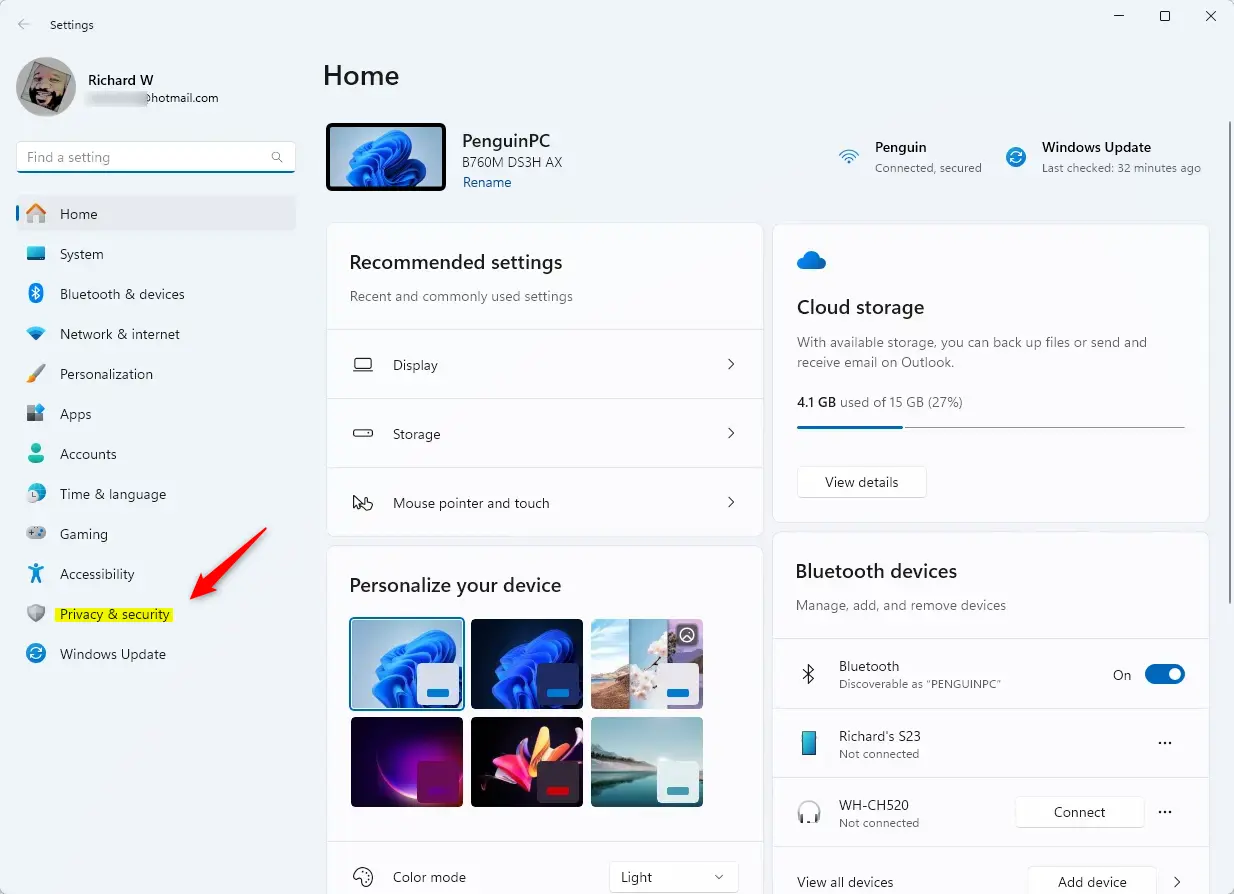
First, open the Windows Settings app.
You can do that by clicking on the Start menu and selecting Settings. Or press the keyboard shortcut (Windows key + I) to launch the Settings app.
When the Setting app opens, click the Privacy & security button on the left.
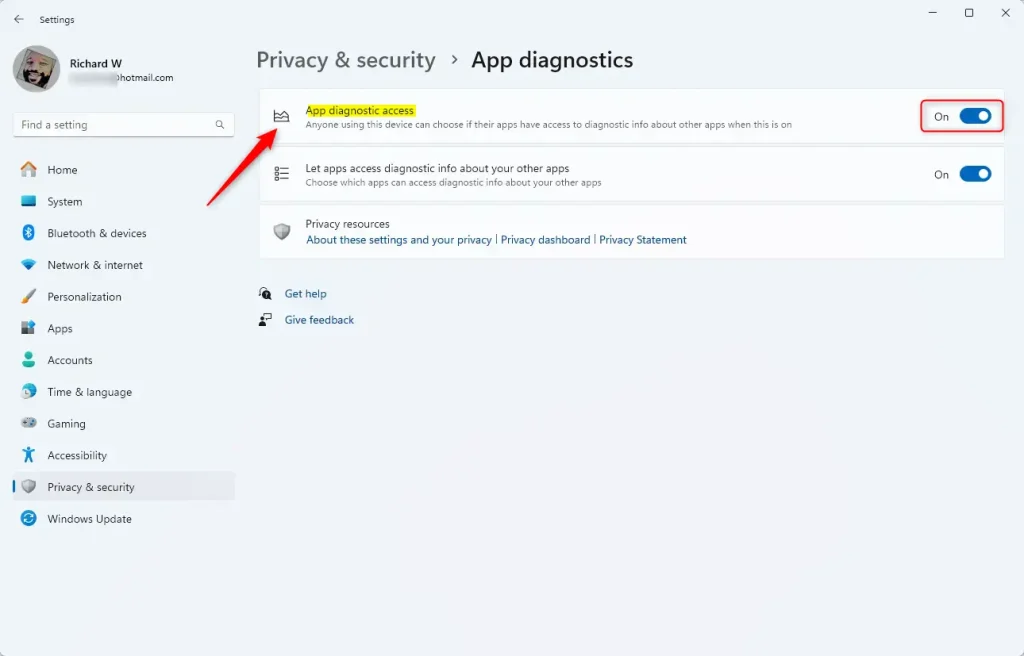
On the right, scroll down and select the App diagnostics tile to expand it.

On the App diagnostics settings pane, toggle the button for “App diagnostics access” to the On or Off position to enable or disable it.
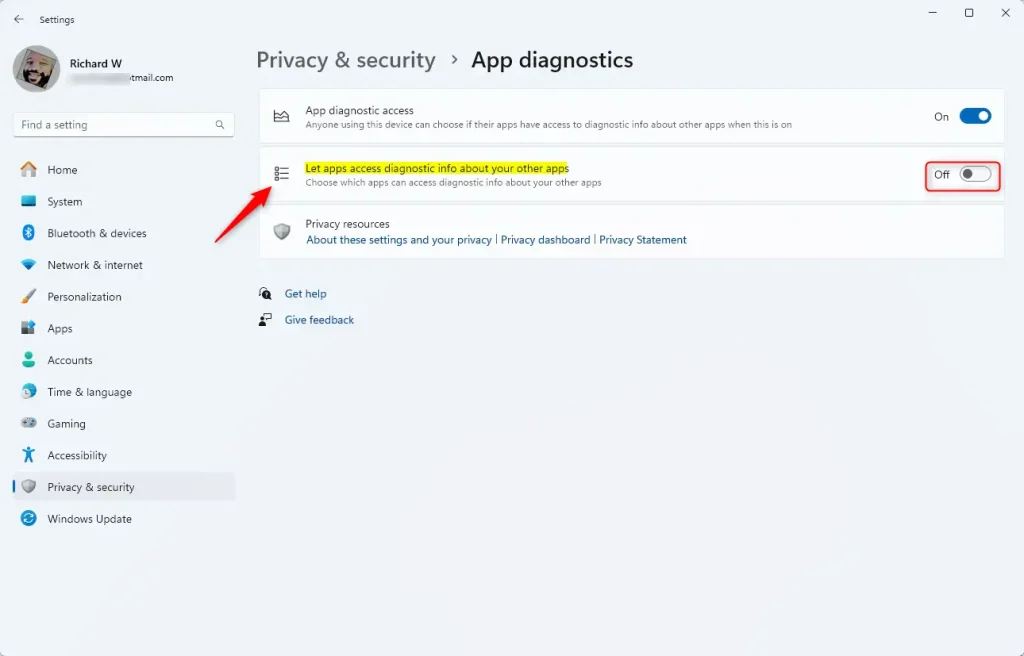
Turning off App diagnostic access will gray out and turn off Let apps access diagnostic info about your apps for all users.
If you want to turn off or on app diagnostics access for the current user only, then turn on or off “Off Let apps access diagnostic info about your apps” but keep “App diagnostics access” on.
Close the Settings app when you are finished.
Enable or disable App diagnostics access using the local group policy editor
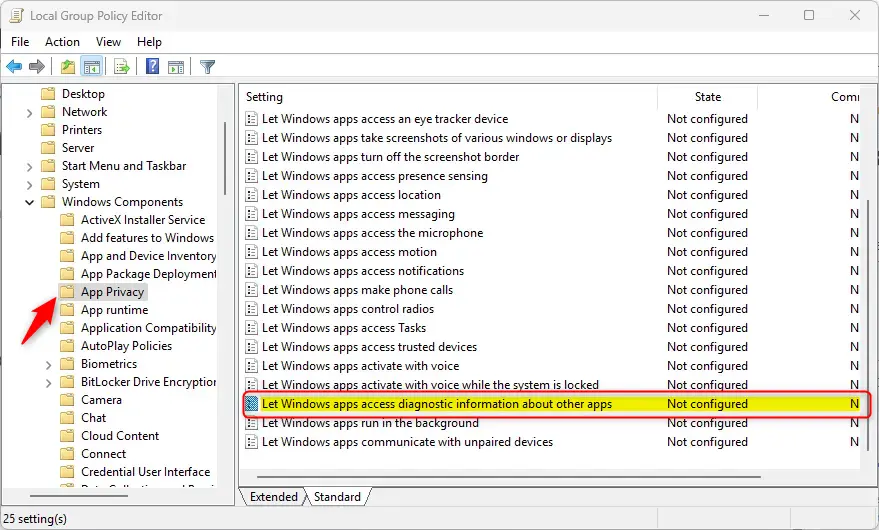
Another way to enable or disable “App diagnostics access” is to use the local group policy editor in Windows.
Here’s how to do that.
First, open the Local Group Policy Editor (gpedit.msc). (Search for “Edit group policy”) on the Start menu.
Then, navigate the folders below:
Computer Configuration > Administrative Templates > Windows Components > App Privacy
In the App Privacy details pane on the right, locate and double-click the “Let Windows apps access diagnostic information about other apps” settings.
On the “Let Windows apps access diagnostic information about other apps” window, set the option to Not Configure, Enabled, or Disabled.
- Not Configured (default) – Allow default user choice.
- Enabled:
- Under Option: select “Force Allow” to enable app diagnostics access for all users.
- User Options: select “Force Deny” to disable app diagnostics access for all users.
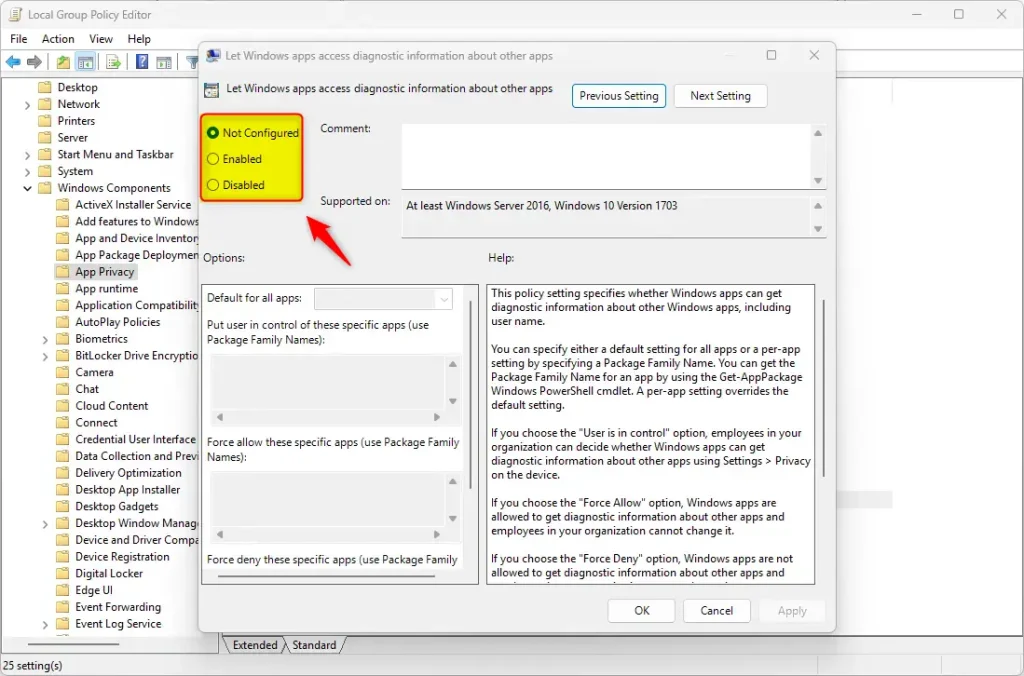
Click OK to save your changes.
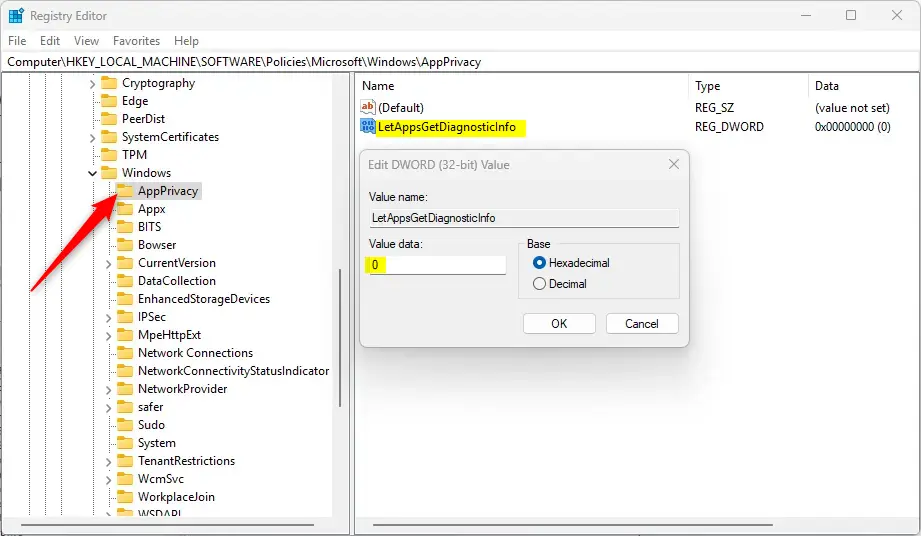
Enable or disable app diagnostics access using the Registry
Yet another way to enable or disable “App diagnostics access” is to use the Windows Registry Editor.
Remember to back up your registry before making any changes or create a System Restore point as a precaution.
First, open the Windows Registry and navigate to the folder key path below.
ComputerHKEY_LOCAL_MACHINESOFTWAREPoliciesMicrosoftWindowsAppPrivacy
Right-click AppPrivacy > New > DWORD (32-bit) Value and name the new DWORD LetAppsGetDiagnosticInfo.
Double-click LetAppsGetDiagnosticInfo and type 1 to enable “App diagnostics access” for all users.
Type 0 to disable “App diagnostics access” for all users.
To restore the default behavior and allow user choice for “App diagnostics access,” delete the name created above and all listed below.
LetAppsGetDiagnosticInfo
LetAppsGetDiagnosticInfo_UserInControlOfTheseApps
LetAppsGetDiagnosticInfo_ForceAllowTheseApps
LetAppsGetDiagnosticInfo_ForceDenyTheseApps
You may have to reboot your computer to apply the changes.
That should do it!
Reference:
Conclusion:
In summary, managing App diagnostics access in Windows 11 is crucial for users who wish to control their app data sharing. Here are the key points to remember:
- App diagnostics access aids developers in improving app performance and user experience.
- Users can enable or disable this feature through the Settings app, Local Group Policy Editor, or Windows Registry.
- Disabling the feature can help maintain privacy and control over personal data.
- Following careful steps ensures that users do not unintentionally compromise their settings.
- Consider backing up data and creating a System Restore point before making system changes.
By understanding these aspects, you can make informed decisions regarding app diagnostics access in Windows 11.

Leave a Reply