How to Create a Full System Backup in Windows 11


You create a full system backup in Windows 11 using the built-in System Image Backup tool, which makes an exact copy of your entire hard drive.
Unlike the newer Windows Backup app focused on cloud file syncing, a system image is your ultimate safety net for disaster recovery, capturing your operating system, all installed programs, and your personal data.
This ensures you can restore your PC to its previous state, even after a critical hard drive failure or severe malware infection, avoiding the tedious process of reinstalling everything.
Performing this backup, a process that typically takes several hours depending on your drive size and speed, gives you complete peace of mind.
The 3-2-1 Backup Strategy
To keep your data safe, follow the 3-2-1 rule. Keep 3 copies of your data. Store them on 2 different types of media (like an internal drive and an external SSD). Keep 1 copy off-site or in the cloud for data redundancy. This protects you against local disasters like fire or theft.
How to Create a System Image in 🪟 Windows 11
Follow these steps to create your backup. Note: This process requires administrator privileges.
To get to System Settings, you can use the Windows key + I shortcut or click on Start ==> Settings, as shown in the image below:

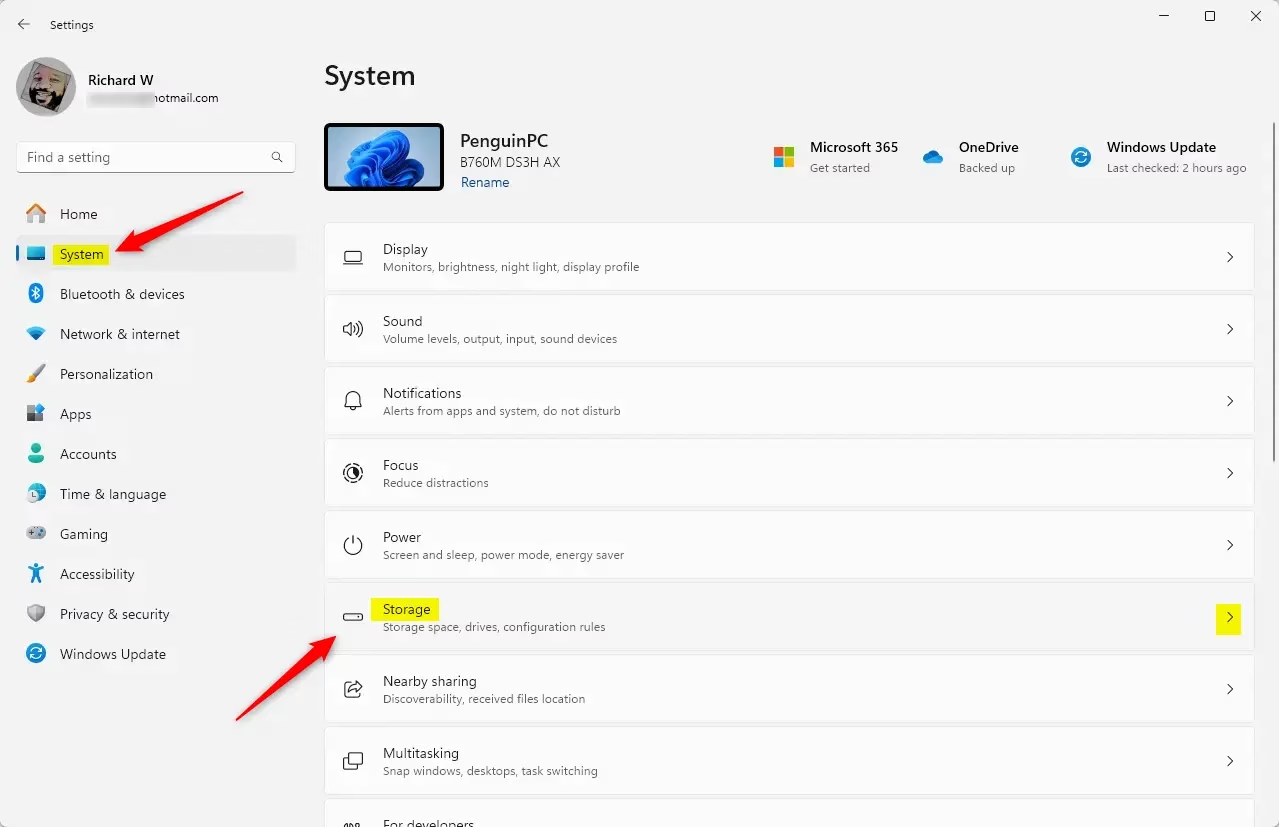
In Windows Settings, navigate to System and select Storage from the right pane of your screen as shown in the image below.
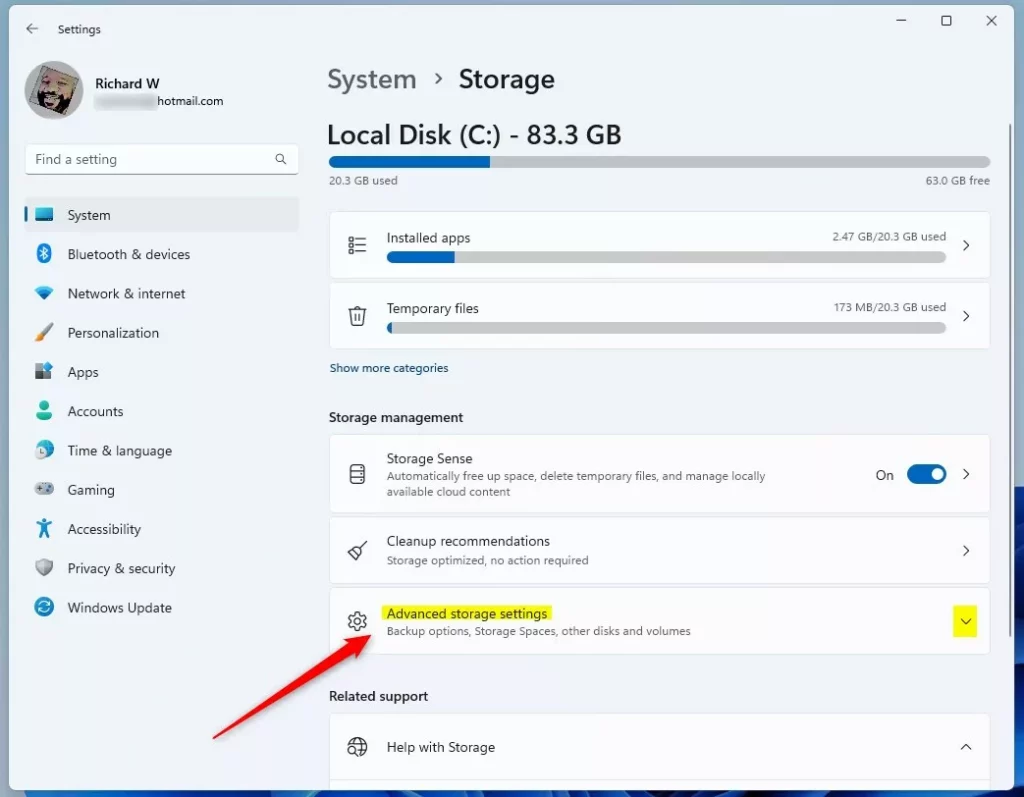
Select Advanced storage settings under Storage Management on the Storage settings pane to expand more storage options.
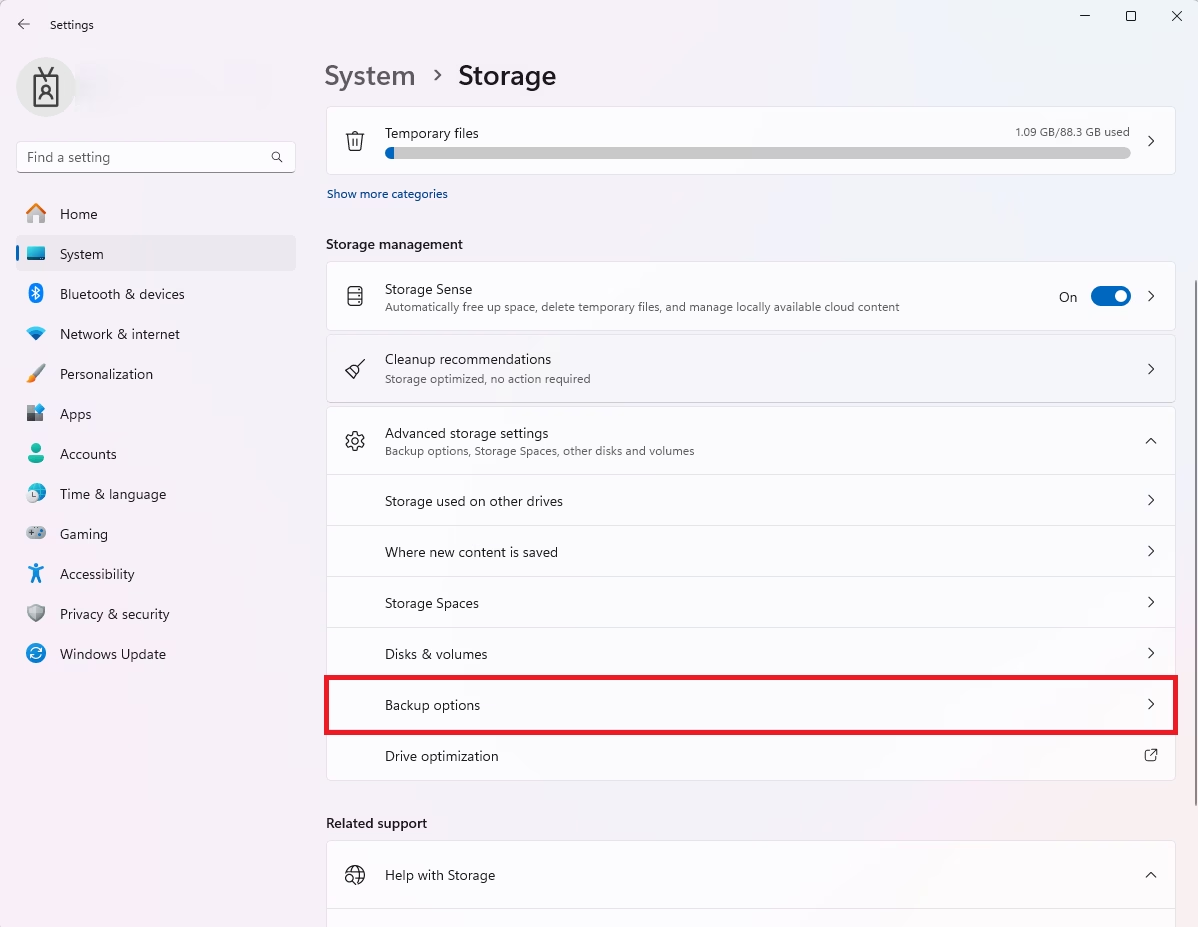
Next, select the Backup options
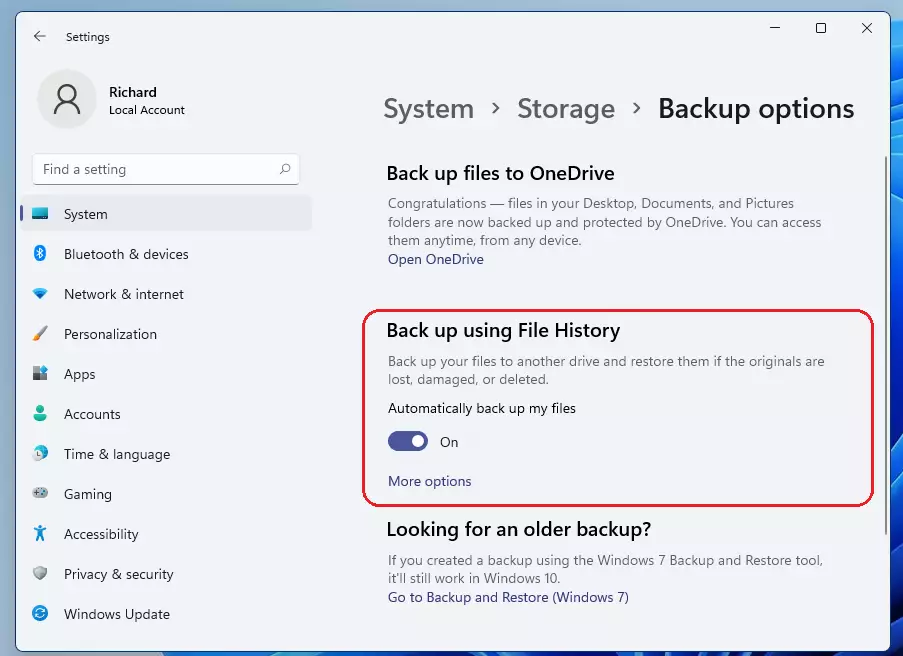
Click the link for Backup and Restore (Windows 7). This opens a classic Control Panel window.
Click Add a Drive. You must save your system image to an external hard drive, a DVD, or a network location. Note: Admin privileges are required to configure these system-level storage settings.
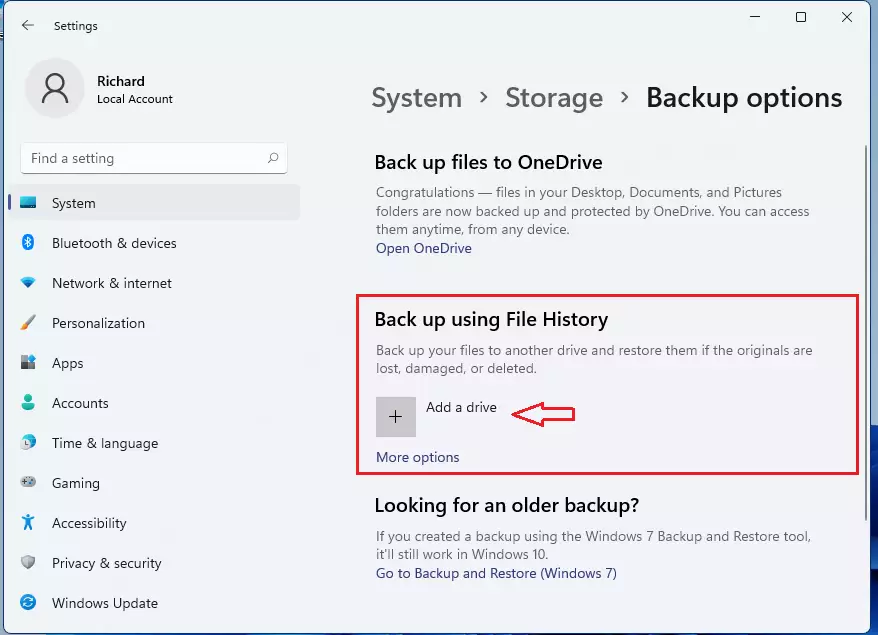
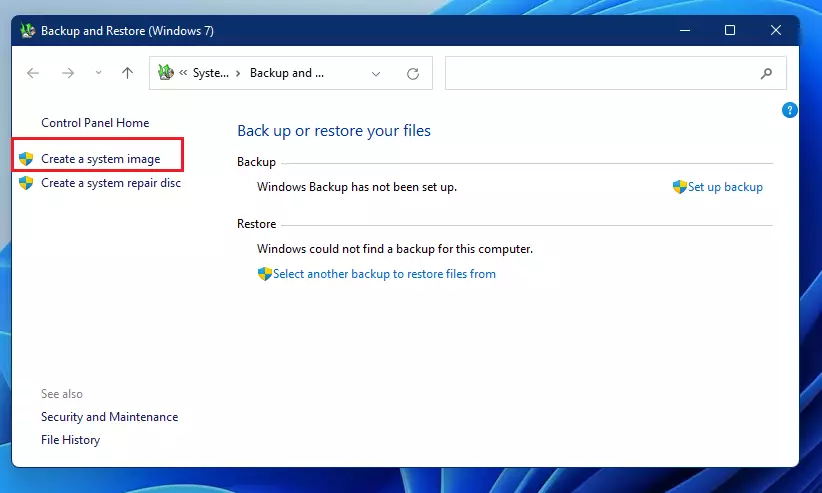
Click Create a system image on the left side of the window.
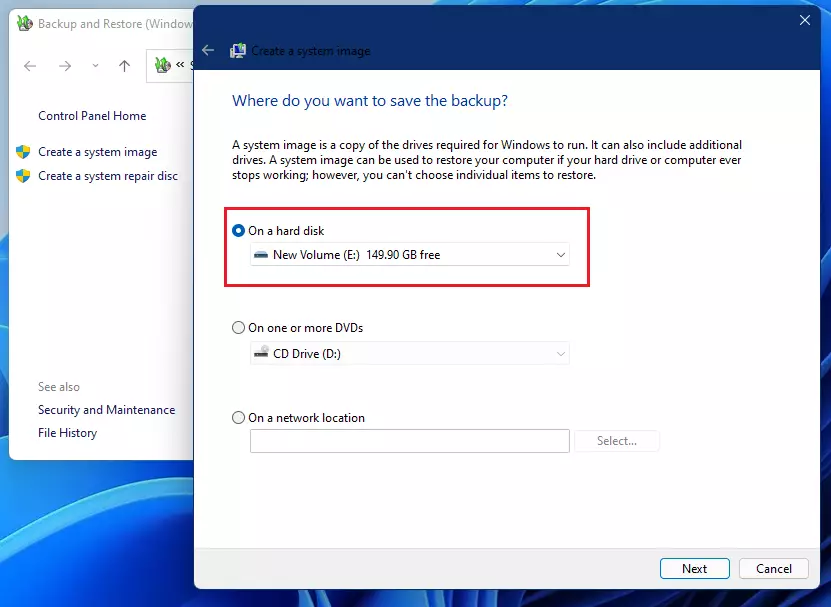
Choose where you want to save your backup. In this example, we are using an external hard disk.
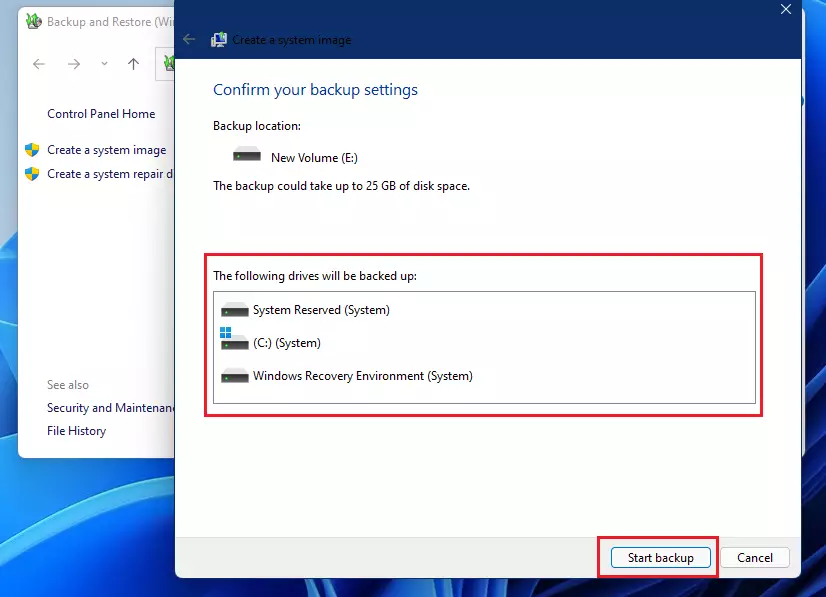
Click Start Backup to begin. Note: This process requires admin privileges to access system files.
Wait for the progress bar to finish. This can take a few hours depending on how much data is on your computer.
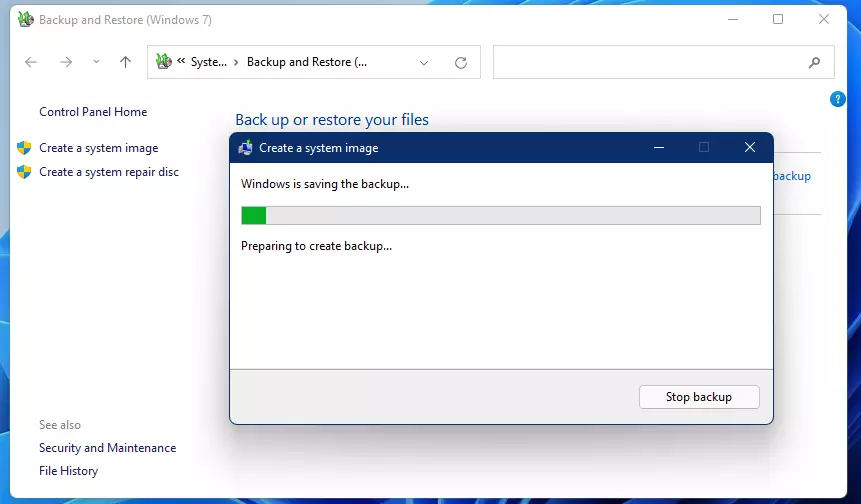
Once it finishes, unplug your external drive and keep it in a safe place.
Click the link to Backup and Restore (Windows 7). This opens the legacy tool.
Summary
A full system backup is the best way to protect your PC. While the new Windows Backup app is great for files, use the legacy System Image tool for complete drive protection. Always store your backups on an external drive, keep a bootable USB recovery drive handy, and follow the 3-2-1 rule to ensure your data is never lost. Check out our other guide on How to Backup and Restore in Windows 11 for more tips.
Does 🪟 Windows 11 have a built-in full system image tool?
Yes, Windows 11 includes a legacy tool called Backup and Restore (Windows 7). While Microsoft focuses on cloud-based solutions, this tool remains available in the Control Panel. It allows you to create a full system image, which is essential for recovering your entire PC if the operating system becomes corrupted or the drive fails.
Was this guide helpful?

About the Author
Richard
Tech Writer, IT Professional
Richard, a writer for Geek Rewind, is a tech enthusiast who loves breaking down complex IT topics into simple, easy-to-understand ideas. With years of hands-on experience in system administration and enterprise IT operations, he’s developed a knack for offering practical tips and solutions. Richard aims to make technology more accessible and actionable. He's deeply committed to the Geek Rewind community, always ready to answer questions and engage in discussions.




After the image showing file history, it is not clear where the link/tab is, to trigger the system image screen
[…] You can create a system image: How to create a system image […]
[…] You can read that post here. […]