This article outlines the steps to enable or disable the “Activate on hover” mouse feature in Windows 11.
In Windows, one needs to click on a window to bring it into focus and make it active. Windows in the background are inactive by default.
While windows in the background are inactive, users can scroll inactive windows by hovering over them in Windows.
The steps below show you how to activate a window by hovering over it with the mouse in Windows 11.
Enable Activate on hover using the Settings app
Users can enable an accessibility feature in Windows to activate or bring a window to the front by hovering their mouse over it.
Here’s how to do it
First, open the Windows Settings app.
You can do that by clicking on the Start menu and selecting Settings. Or press the keyboard shortcut (Windows key + I) to launch the Settings app.
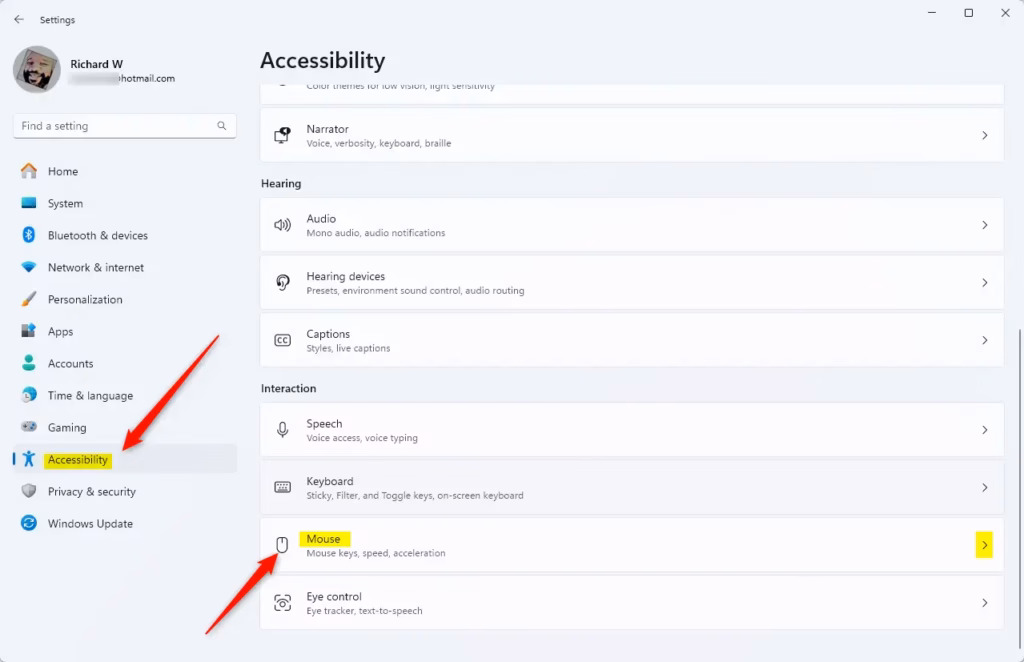
When the Settings app opens, click the Accessibility button on the left. Then, select the Mouse tile on the right to expand it.
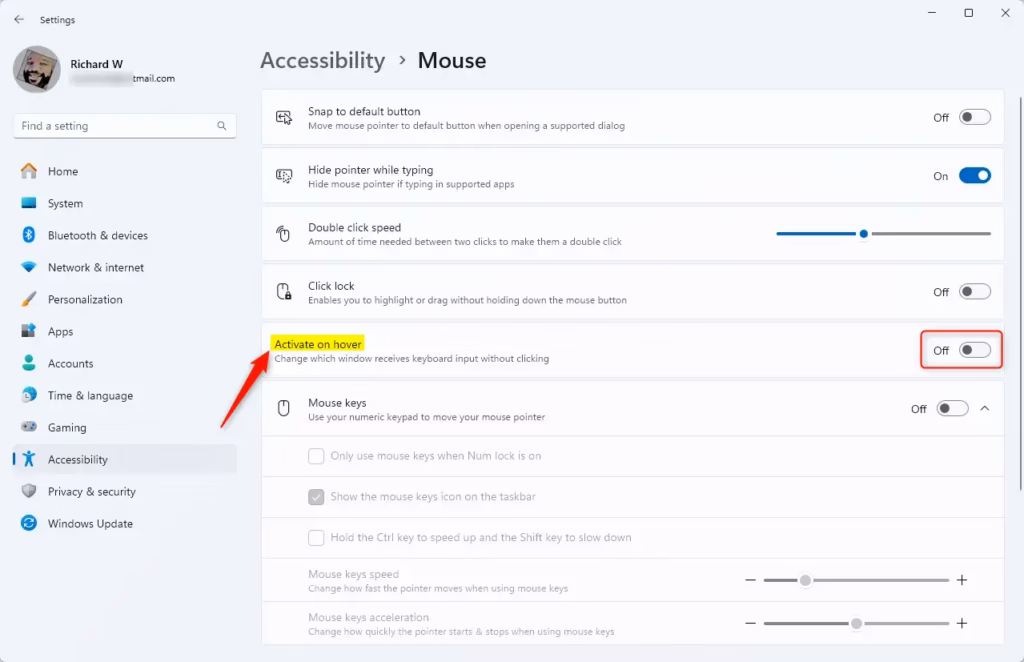
On the Accessibility > Mouse settings page, toggle the button on the “Activate on hover” tile to enable or disable it.
Close the Settings app when finished.
Active window by hovering over it with the mouse using the Control Panel app
As described above, users can enable or disable “Activate a window by hovering over it with the mouse” in Windows 11.
Here’s how to do that.
First, open the Control Panel app.
When the Control Panel app opens, go to the Control Panel -> Ease of Access -> Ease of Access Center settings page.
Control Panel -> Ease of Access -> Ease of Access Center
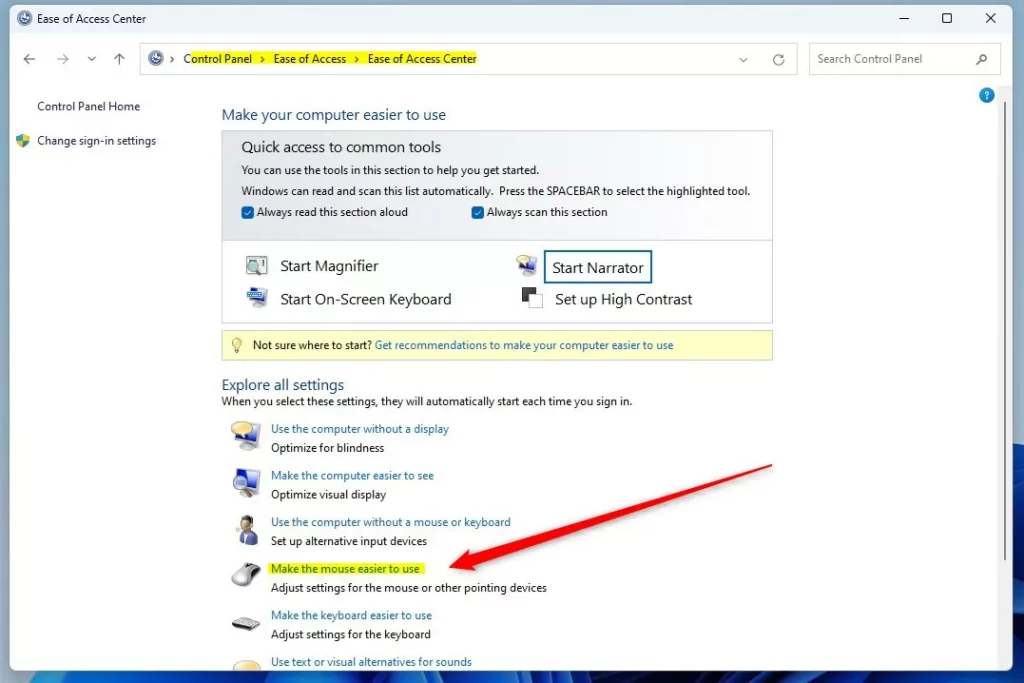
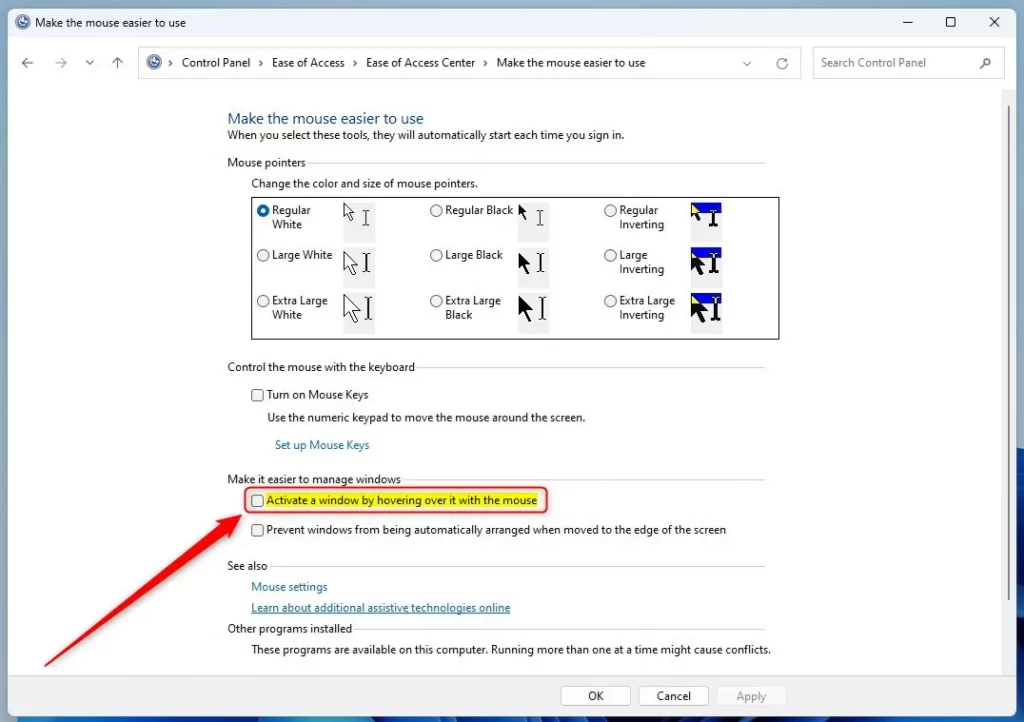
On the Control Panel -> Ease of Access -> Ease of Access Center, under Explore all settings, click on the link that says “Make the mouse easier to use.”
On the Control Panel -> Ease of Access -> Ease of Access Center -> Make the mouse easier to use the settings pane, select the box next to “Activate a window by hovering over it with the mouse” to enable.
To disable it, uncheck the box.
That should do it!
Conclusion:
- Enabling or disabling the “Activate a window by hovering over it with the mouse” feature in Windows 11 can enhance user experience based on individual preferences.
- Accessing the Control Panel app provides a straightforward method to toggle this setting, offering users greater control over window activation behavior.
- Users can effortlessly manage window focus through simple checkbox selection, optimizing their interaction with multiple windows in the Windows 11 operating system.
Leave a Reply