How to Turn Mouse Pointer Trails on or off in Windows 11
You turn mouse pointer trails on or off in Windows 11 through the Accessibility settings.
Pointer trails are a visual aid that creates a shadow or trail behind your mouse cursor as you move it across the screen. This feature helps you track the pointer’s location, especially on busy displays or for users with visual impairments.
In Windows 11, you can enable or disable this setting by navigating to Settings > Accessibility > Mouse pointer and touch.
Once you find the ‘Mouse pointer trails’ option, you can toggle it on or off with a simple click.
Why Use Mouse Pointer Trails?
What happens when you turn on mouse pointer trails? You’ll see a faint line or shadow that follows your mouse pointer as you move it around the screen. This makes it much easier to track the pointer’s location, especially if you move your mouse quickly or work on a busy screen.
How to Turn On Mouse Pointer Trails
Step 1Open Windows Settings
First, you need to open the Windows Settings app. Here are two ways to do it:
- Using the Keyboard: Press the Windows key + I on your keyboard at the same time. This is a quick shortcut to open Settings.
- Using the Start Menu: Click the Start button (the Windows logo) on your taskbar. Then, click the Settings gear icon. If you don’t see it, type “Settings” in the search bar and click on the result.
Step 2Go to Mouse Settings
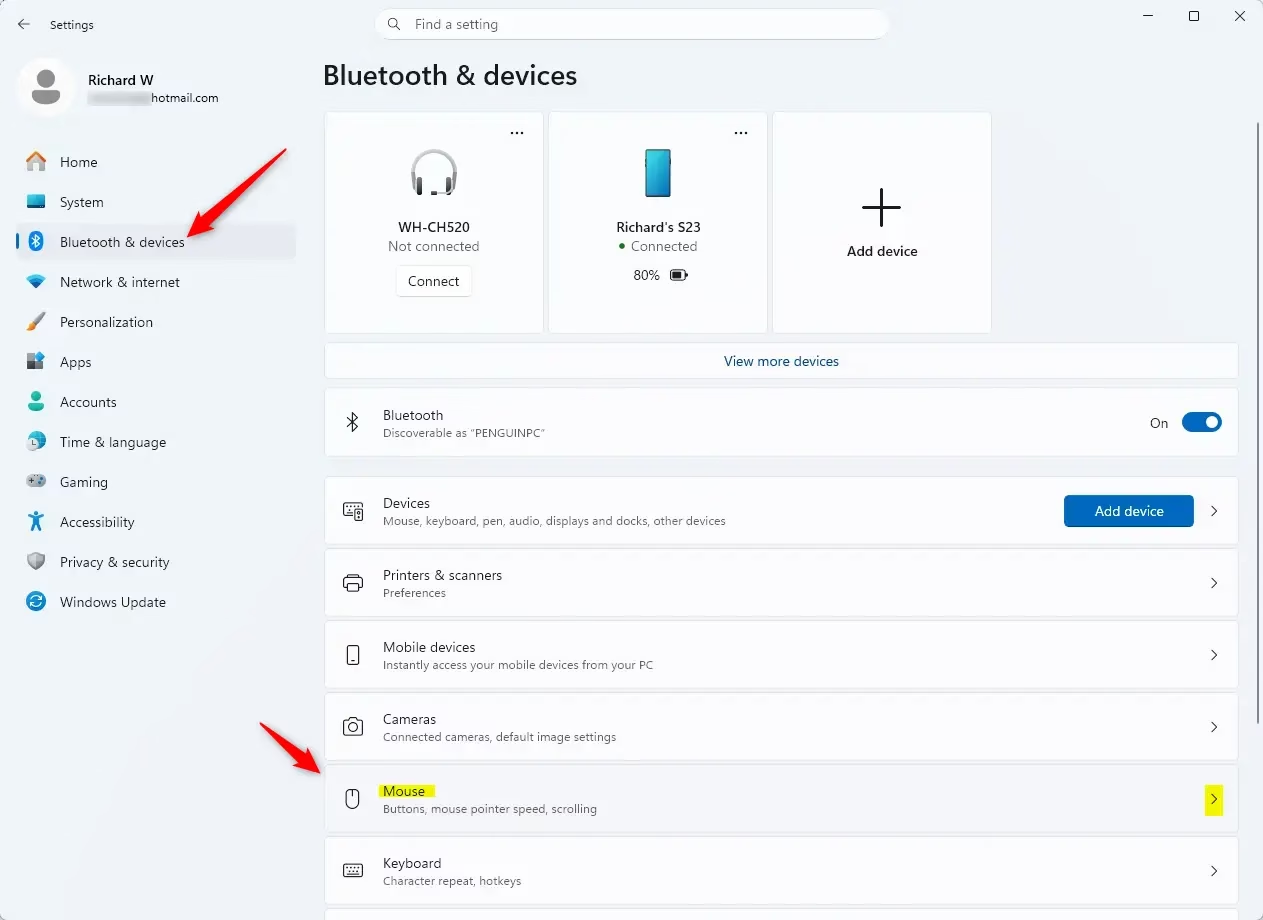
Once the Settings app is open, look at the list on the left side. Click on ‘ Bluetooth & devices’.
In the “ Bluetooth & devices” section, scroll down until you find and click on Mouse.
Step 3Find More Mouse Options
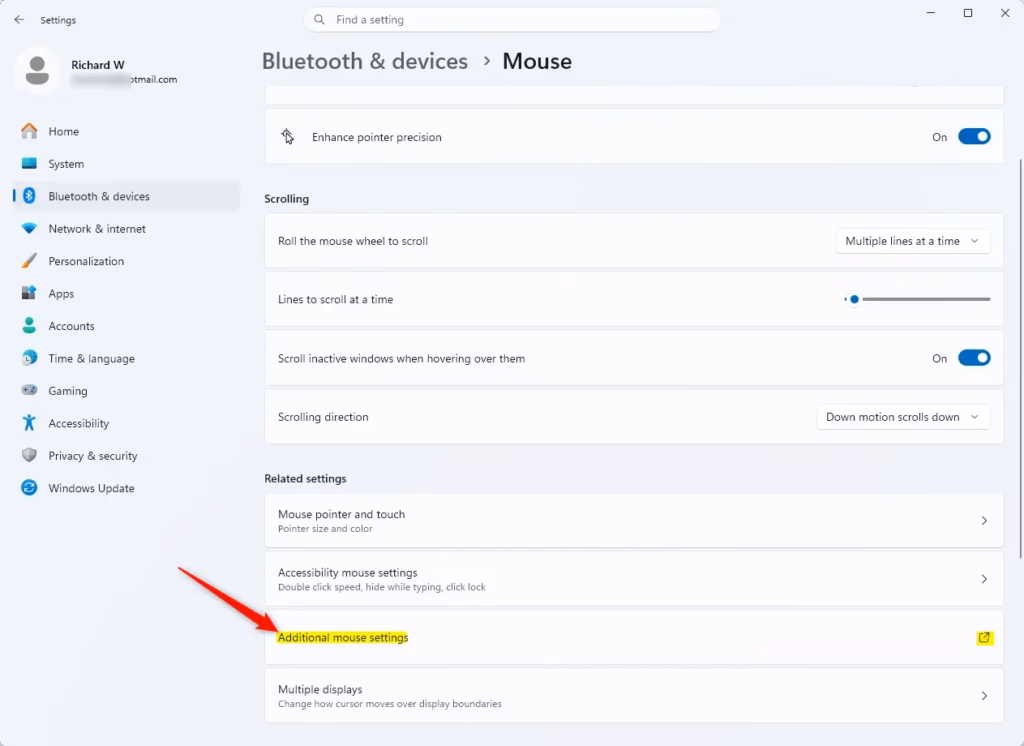
You are now in the main Mouse settings. Here you can change things like which mouse button is your main one or how fast the scrolling is. To find pointer trails, you need to click one more option.
Look for a link that says Additional mouse settings. It’s usually near the bottom. Click on it.
This will open a small window with a different look, called “Mouse Properties.” Don’t worry if it looks older; it has important settings.
Step 4Turn On Pointer Trails
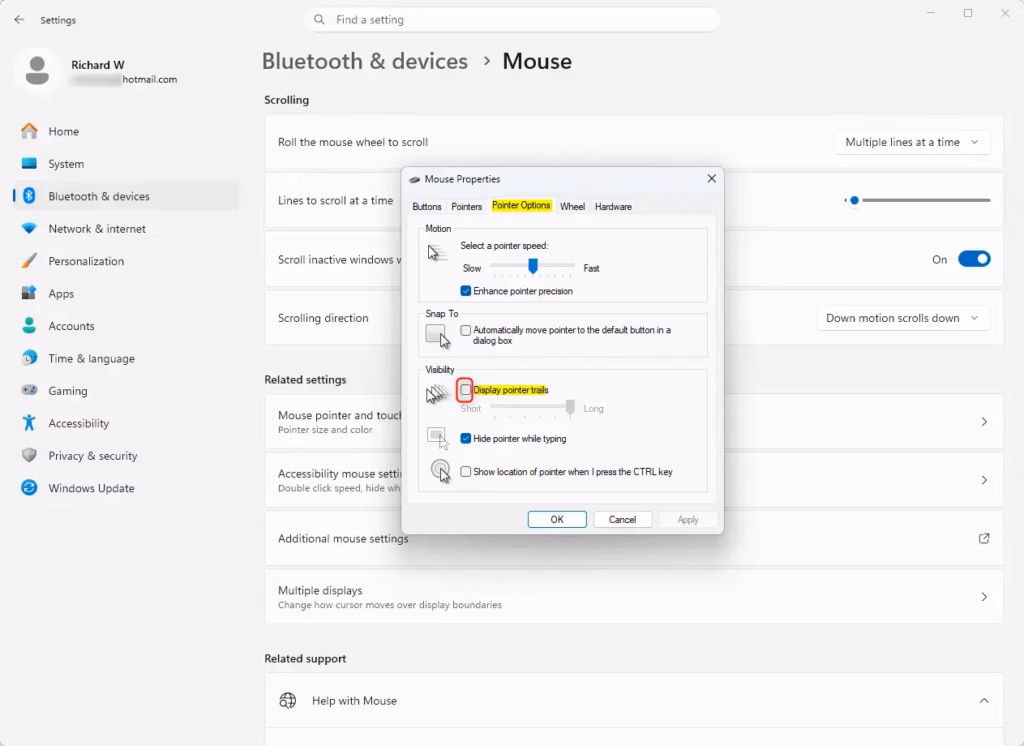
In the “Mouse Properties” window, you will see tabs at the top. Click on the Pointer Options tab.
Now, look for a checkbox labeled Display pointer trails. Click this box to put a checkmark in it.
Note: You’ll also see a checkbox for ‘Enhance pointer precision’ (this setting can make your mouse cursor move faster when you move the mouse faster). Some people like this for games, but others feel it makes the mouse less direct. You can try it later, but focus on the pointer trails for now.
Step 5Save Your Changes
Almost done! After checking the “Display pointer trails” box, you need to save your choice. Click the Apply button at the bottom right of the “Mouse Properties” window. Then, click OK to close the window.
Now, try moving your mouse around your desktop. You should see a trail following your pointer! This can really help you keep track of it.
Reference:
Summary
Turning on mouse pointer trails in Windows 11 is a great way to make your cursor easier to see. By going to Settings > Bluetooth & devices > Mouse > Additional mouse settings and checking the “Display pointer trails” box, you can add a visual trail to your mouse pointer. This helps improve visibility and makes navigating your computer smoother, especially during fast movements or on busy screens.
Was this guide helpful?

About the Author
Richard
Tech Writer, IT Professional
Richard, a writer for Geek Rewind, is a tech enthusiast who loves breaking down complex IT topics into simple, easy-to-understand ideas. With years of hands-on experience in system administration and enterprise IT operations, he’s developed a knack for offering practical tips and solutions. Richard aims to make technology more accessible and actionable. He's deeply committed to the Geek Rewind community, always ready to answer questions and engage in discussions.


No comments yet — be the first to share your thoughts!