How to Add More Storage Space to Your Windows 11 Storage Pool
Want to combine multiple hard drives into one big virtual drive on your Windows 11 PC? You can use a feature called Storage Spaces. This guide will show you how to add more storage space to your existing storage pool. It’s easier than you might think.
What is Storage Spaces?
Storage Spaces lets you group multiple physical drives (like hard drives or SSDs) into one virtual drive. Why do this? It makes it easier to manage your storage and can help protect your data if a drive fails.
With Storage Spaces, you can:
- Create a storage pool
- Rename your storage pool
- Add new drives to your storage pool
- Add more storage space to an existing pool
Adding more storage space means you get more room to save files without juggling multiple drives.
Why Add Storage Space to Your Storage Pool?
- More space: Easily increase how much storage your computer has.
- Save space physically: Use fewer drives while having more storage.
- Protect your data: Some storage options keep copies of your files in case a drive fails.
- Simpler file management: One big drive is easier to manage than many small ones.
How to Add Storage Space to a Storage Pool on 🪟 Windows 11
Follow these simple steps to add storage space:
Open Windows Settings: Click the Start button and select Settings. You can also press Windows key + I on your keyboard.
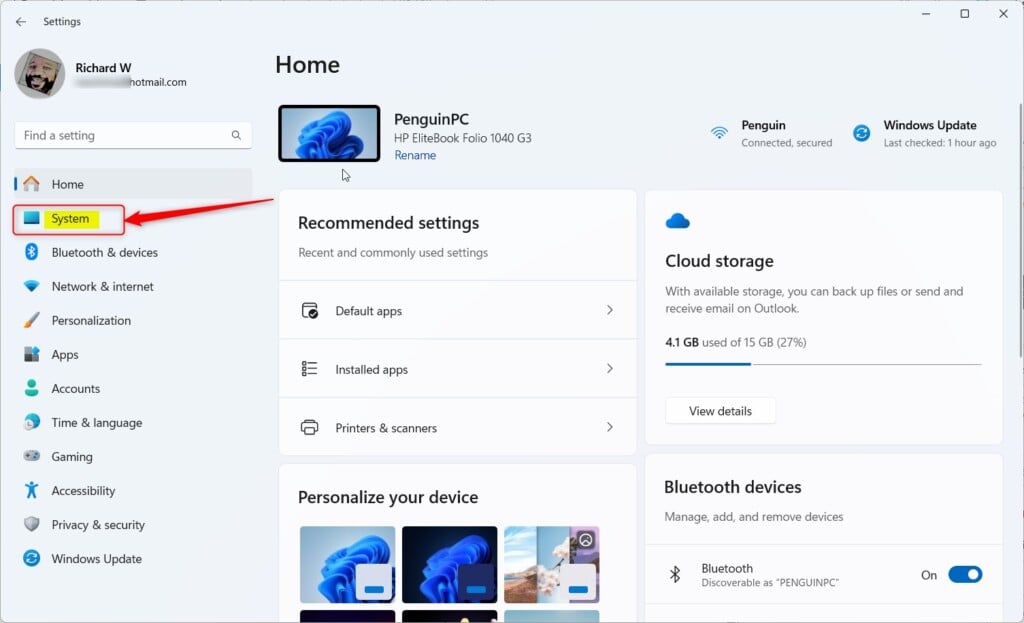
In Settings, click System on the left side.
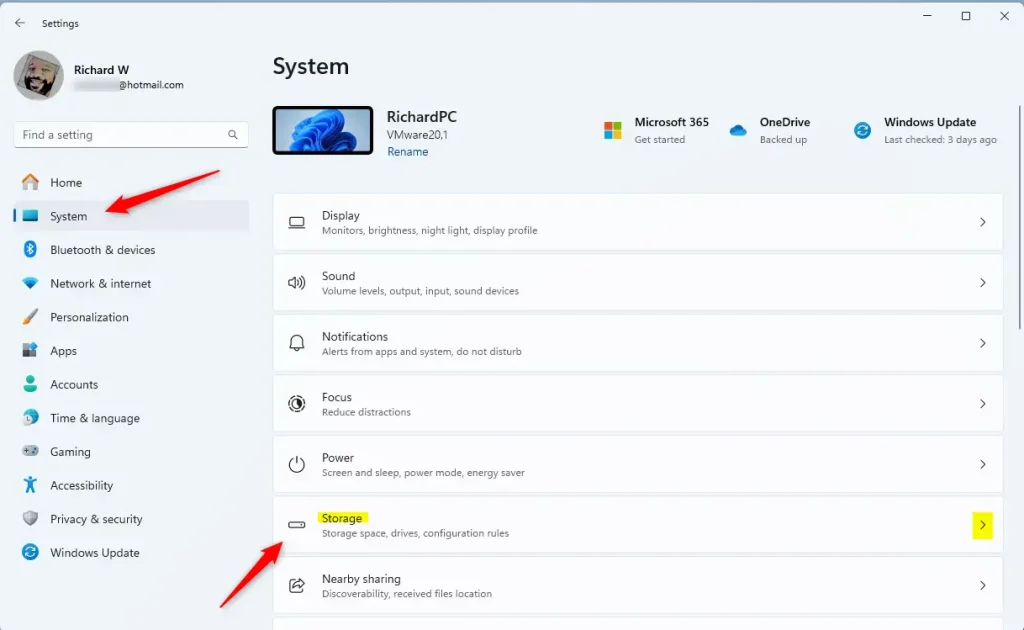
On the right, find and click Storage to open your storage settings.
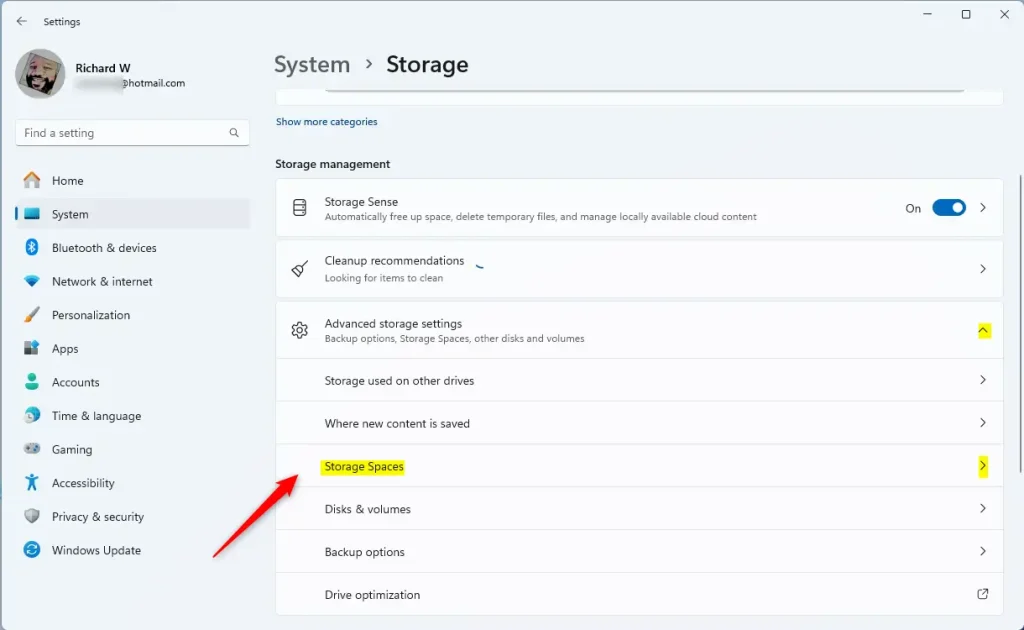
Scroll down and click Advanced storage settings to expand it. Then click Storage Spaces.
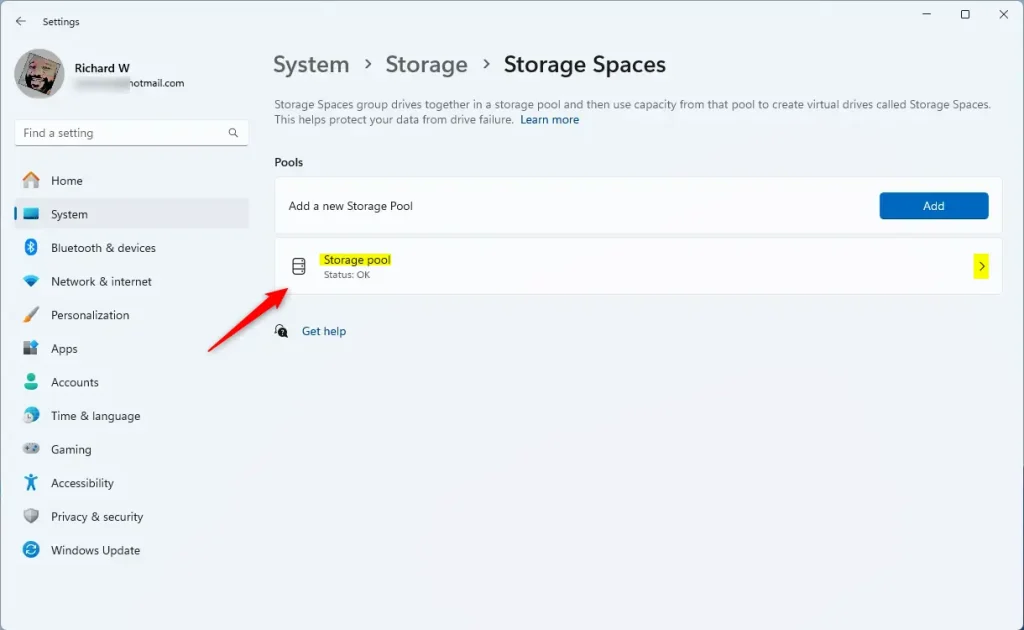
Click on your existing storage pool to open it.
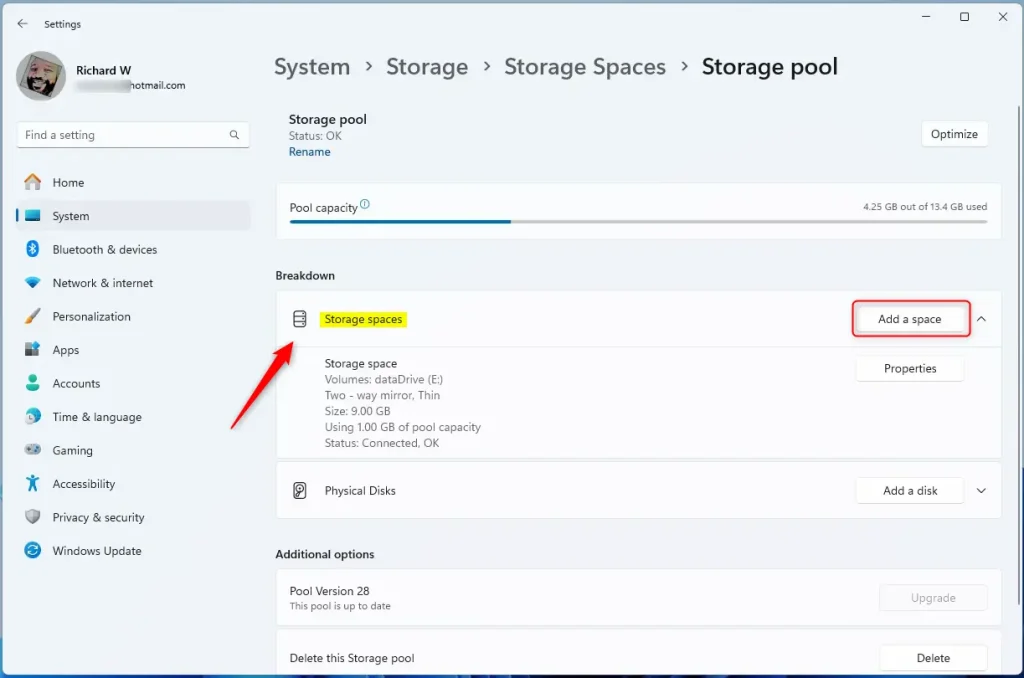
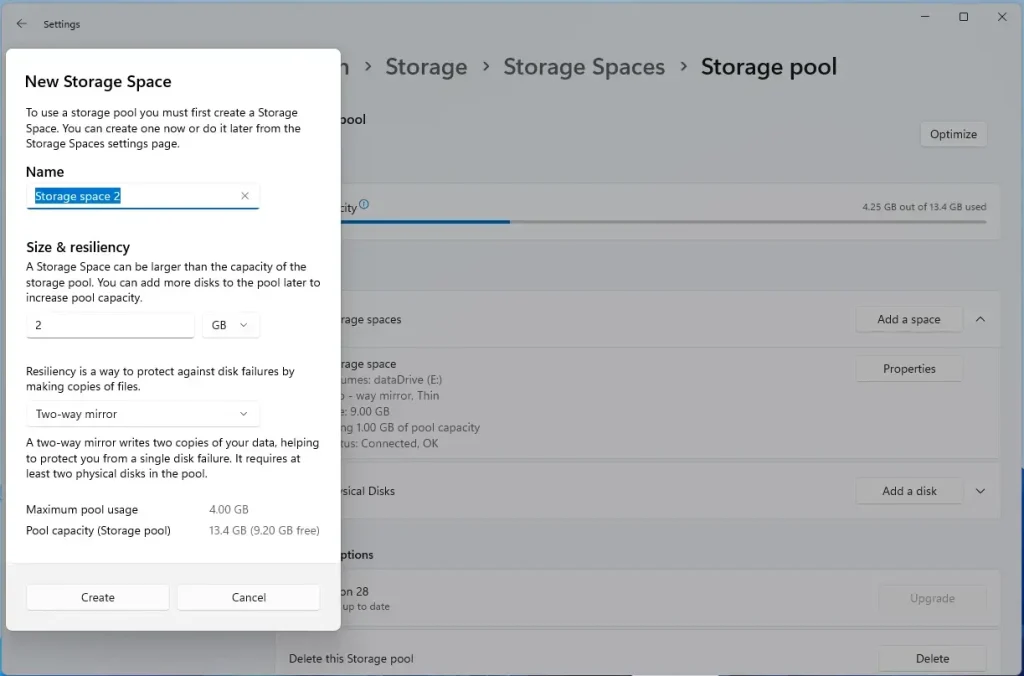
Click on Storage space, then press the Add a space button.
Enter a name for your new storage space. Choose a size (how much space you want to add) and a Resiliency option (how your data is protected):
- Simple: Uses at least two drives, but no data protection.
- Two-way mirror: Requires two drives. Keeps a copy of your data to protect against one drive failing.
- Three-way mirror: Needs five drives. Protects against two drive failures.
- Parity: Uses three drives. Balances protection and performance.
- Dual parity: Needs seven drives. Protects against two drive failures and keeps good performance.
Click Create to make the new storage space.
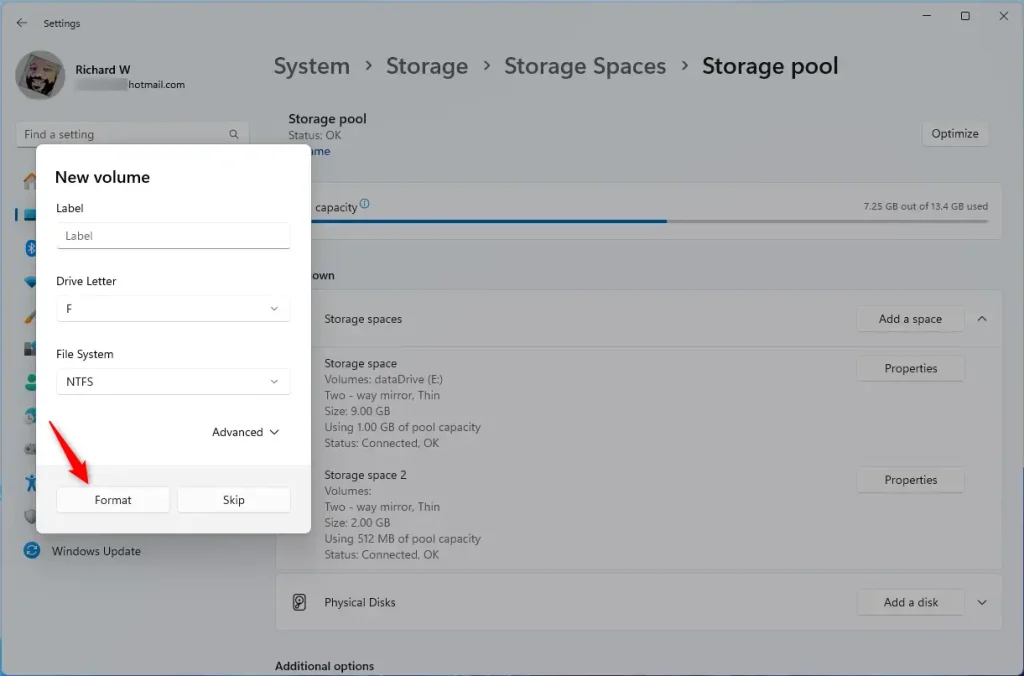
Next, assign a drive letter (like D: or E:) and give the new space a label (a name you’ll see in File Explorer). Choose the file system type: NTFS (recommended for most users) or FAT32. Click Format to finish.
Once complete, the new storage space will show up as a new drive in File Explorer.
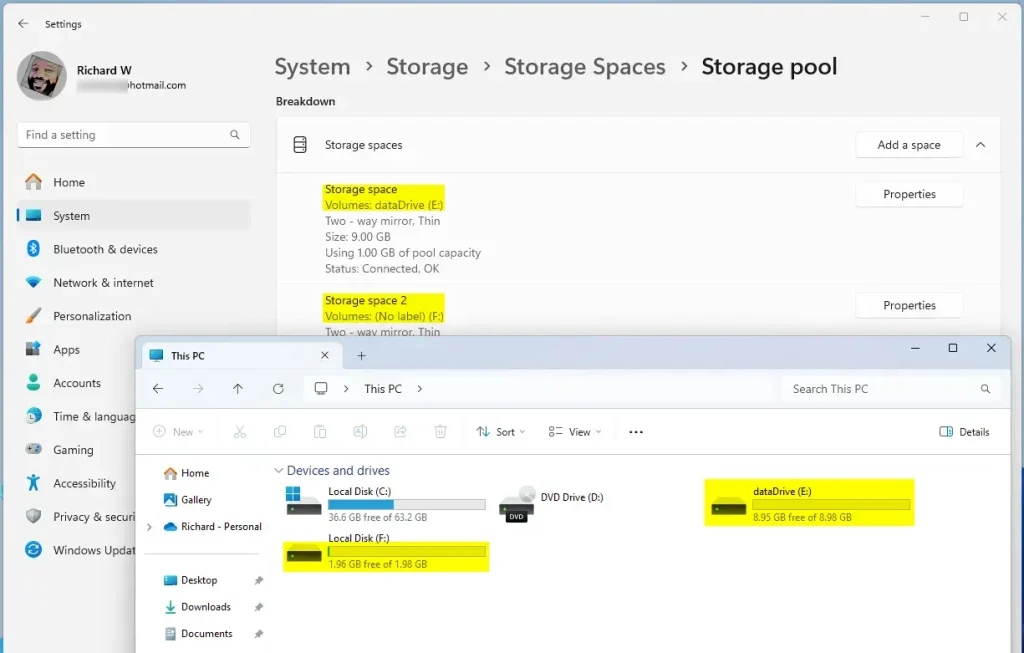
That’s it! You’ve successfully added more storage space to your Windows 11 storage pool.
Summary
- More Storage: Easily increase your computer’s storage space.
- Data Safety: Choose options that keep your data safe if a drive fails.
- Simple Management: Manage your files on one big virtual drive instead of multiple small drives.
- Easy Access: Your new storage space is ready to use right away in File Explorer.
Want to learn more about Storage Spaces? Check out this full guide on creating storage pools on Windows 11.
Was this guide helpful?

About the Author
Richard
Tech Writer, IT Professional
Richard, a writer for Geek Rewind, is a tech enthusiast who loves breaking down complex IT topics into simple, easy-to-understand ideas. With years of hands-on experience in system administration and enterprise IT operations, he’s developed a knack for offering practical tips and solutions. Richard aims to make technology more accessible and actionable. He's deeply committed to the Geek Rewind community, always ready to answer questions and engage in discussions.


No comments yet — be the first to share your thoughts!