Should you enable Device Encryption if your PC has a TPM chip
Device encryption is a built-in Windows security feature that locks your files so no one else can read them without your password or key. It scrambles everything on your drive using BitLocker technology, which is built into Windows 10 and Windows 11.
Advertisement
Windows can set this up automatically during the initial installation or first sign-in if your PC has a compatible TPM (Trusted Platform Module) chip and modern hardware. To see whether it is available on your system, open Settings and go to Privacy & security. If you see a Device encryption entry there, your hardware supports it. If the entry is missing, the PC does not meet the requirements, which later sections cover. The steps below are written for current Windows 11.
⚡ Quick Answer
Yes. If your PC has a compatible TPM 2.0 chip, UEFI firmware, and Secure Boot enabled, enable Device Encryption to protect your files if your laptop is stolen or lost. The performance impact is negligible on modern hardware. Back up your recovery key first and store it outside the encrypted PC.
Advertisement
The Role of the TPM Chip in Data Security
A Trusted Platform Module is a dedicated security chip on your motherboard. It acts as a secure vault for your encryption keys. Windows does not store the key on your hard drive, where a thief could find it. It keeps the key inside the chip, so unauthorized software cannot read it.
When you boot, the TPM releases the key only if it verifies that the system boot files have not been tampered with. Suppose someone steals your computer and puts the drive into a different machine. The TPM on the new motherboard will not release the key, so the data stays locked.
System Requirements for Device Encryption
Windows will not let you turn on Device Encryption until your computer has certain hardware and firmware features. Your PC needs a compatible TPM version 2.0 or later, Unified Extensible Firmware Interface (UEFI) enabled, and Secure Boot active. UEFI is the modern replacement for traditional BIOS firmware, and it initializes your hardware at startup.
A compatible Trusted Platform Module (version 2.0 or later).
Unified Extensible Firmware Interface (the modern replacement for traditional BIOS firmware that initializes hardware) enabled on your motherboard.
Secure Boot (a security standard that ensures your device boots using only software trusted by the manufacturer) enabled in your firmware settings.
Modern Standby or HSTI-compliant hardware capabilities.
The TPM and Secure Boot options are switched on or off in your firmware setup screen. Many PCs ship with the TPM disabled, and Windows treats a disabled TPM as a missing one. Firmware menus differ by manufacturer, so check your PC’s manual or support page for the exact location. Older PCs that run in legacy BIOS mode usually cannot use Device Encryption at all.
Advertisement
Pros of Enabling Device Encryption
Device Encryption protects your personal files if your laptop is lost or stolen. A thief cannot bypass your login screen by pulling the drive and plugging it into another computer. Without the key, every file on the drive stays scrambled and unreadable.
On modern processors the performance impact is virtually nonexistent. They include dedicated hardware instruction sets, such as AES-NI, built to handle encryption and decryption in the background. You should not notice a difference in your apps or games.
Cons and Potential Risks
⚠️WarningThe main risk is permanent data lockout.
It can happen after a major hardware failure, or if you lose your recovery key. If the TPM detects an unexpected change to your hardware or boot configuration, it locks the drive as a safety precaution. You then have to type a long recovery key to get back in. Motherboard replacements and some firmware updates are common triggers.
Performance overhead is negligible on modern hardware. Older systems without hardware-accelerated encryption might see a minor dip in file transfer speeds. For most users the security benefits outweigh the performance concerns.
Advertisement
So, should you turn it on if your PC has a TPM? In most cases, yes. Just back up your recovery key first and store it somewhere other than the encrypted PC. The later sections cover how.
How to Check if Your PC Supports Device Encryption
You can check whether your computer supports Device Encryption with the built-in System Information tool. The check takes under a minute and shows whether your hardware meets the requirements before you try to turn protection on.
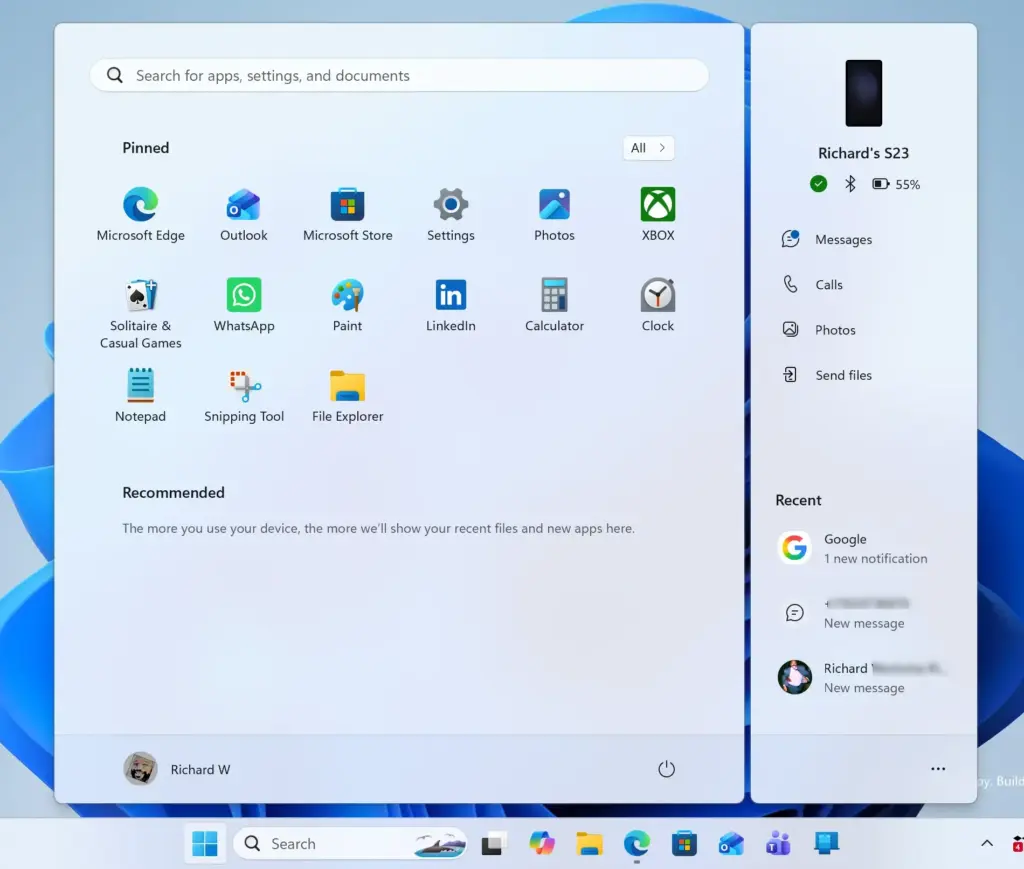
Open the Start menu, type msinfo32, and press Enter. The System Information window opens. Start Menu
In the left pane, make sure System Summary is selected. Then scroll the main list to the Device Encryption Support item.
Read the value. If it says "Reasons for failed automatic device encryption: ..." followed by technical warnings, your system does not meet the requirements out of the box. Each warning names a missing item, such as the TPM or Secure Boot, so you know what to fix.
If the value reports that prerequisites are met (typically "Meets prerequisites"), your system supports the feature.
Next, check the status of your TPM chip:
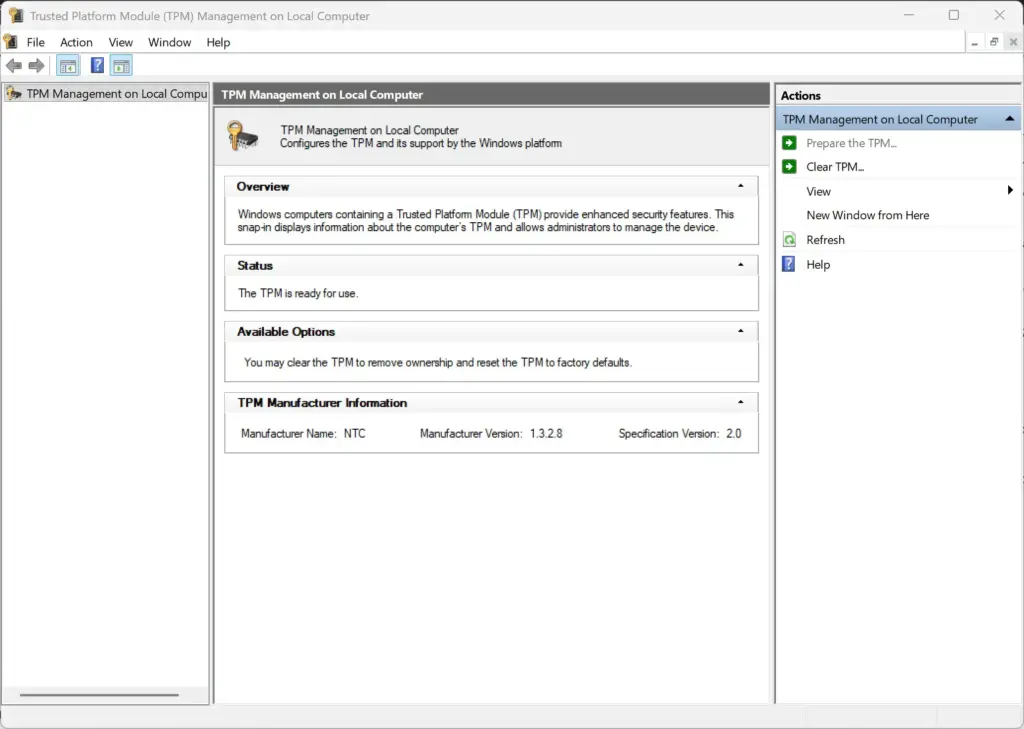
Open the Start menu, type tpm.msc, and press Enter. The Trusted Platform Module Management window opens. If it reports that no compatible TPM can be found, the chip is either missing or disabled in your firmware settings.
Look at the Status section. It should state that the TPM is ready for use.
Look at the Specification Version in the lower right and confirm it reads 2.0.
How to Enable Device Encryption in Windows
You can turn on Device Encryption from the Settings app if your hardware supports it and it is not already running. You need administrator rights on the PC. The process takes only a few clicks.
Advertisement
Open Settings by pressing Windows Key + I.
Click Privacy & security in the left sidebar.
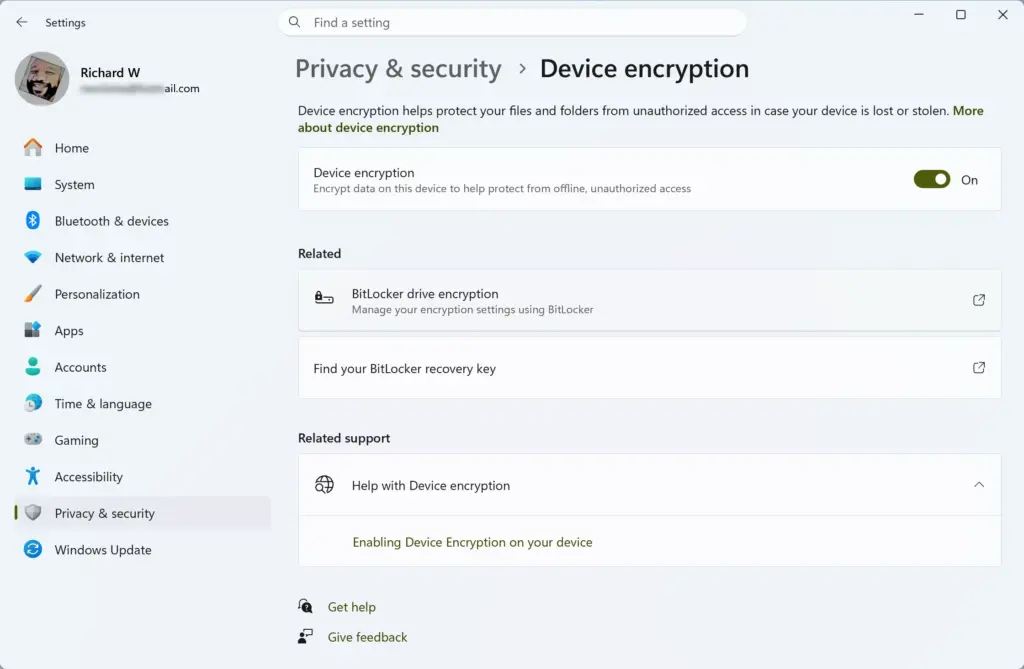
Click Device encryption. If you do not see this entry, the hardware does not support it (see the System Information check above). Pro editions may show BitLocker options instead.
Set the Device encryption switch to On. If the switch is greyed out, sign in with an administrator account. Windows then encrypts the drive in the background, and you can keep working while it runs.
To undo this, return to the same page and set the switch to Off. Windows will decrypt the drive, which can take a while on a large disk.
How to Backup Your Recovery Key
⚠️WarningBack up your recovery key right after you turn on Device Encryption, so you do not get locked out of your files.
If you lose access to this key during a system repair or hardware change, your encrypted data is gone for good.
Open Settings and go to Privacy & security›Device encryption.
Click the option to back up your recovery key.
Choose a backup method. You can save it to your Microsoft account, save it as a file on a USB drive, or print a physical copy.
If you sign in with a Microsoft account, Windows normally saves a copy of the key to that account automatically. Check that it is really there rather than assuming. Whichever method you use, keep the copy away from the encrypted PC. A key file saved on the same drive is no help when you cannot get into that drive.
Enterprise vs Home Editions: BitLocker Differences
Windows Home editions use a simplified version called Device Encryption for everyday users. Windows Pro and Enterprise editions include full BitLocker Drive Encryption. BitLocker adds advanced security controls such as startup PINs, pre-boot authentication, and centralized management tools for IT administrators.
Device Encryption is essentially an automated subset of BitLocker. On Pro, you can fine-tune cipher strengths and policy enforcement through the Local Group Policy Editor. Home users get a simpler, set-it-and-forget-it experience, with no extra options to tune.
Was this guide helpful?
📬 Get new Windows tips in your inbox
One email when we publish something worth your time. No spam, unsubscribe anytime.
Richard is a writer at Geek Rewind who turns complex IT tasks into clear, step-by-step guides. He draws on years of hands-on experience in system administration and enterprise IT operations, focusing on Windows, Linux and WordPress: the problems people actually run into, and the fixes that work.
His server and WordPress guides come from systems he runs himself. Richard builds and maintains the platform behind Geek Rewind, from its Ubuntu servers and Nginx configuration to its custom WordPress plugins.
Many new tutorials start with readers' questions, and he's always glad to answer them in the comments.
One email when we publish a guide worth your time — new Windows features, the fixes that actually
work, and a heads-up when Microsoft breaks something. Unsubscribe in one click.
📬 Get new Windows tips in your inbox
One email when we publish something worth your time. No spam, unsubscribe anytime.




No comments yet — be the first to share your thoughts!